


Hazelcast的使用还不是特别广泛,很多时候我们还是习惯使用redis。
目前项目中有使用到Hazelcast作为缓存框架,网上相关文档不多,这里记录下简单使用方法。
日后有进一步了解后,再补充。
一,新建一个Springboot工程。
这里补充一个知识点,在Springboot中使用swagger2,方便接口说明和测试。
引入jar包如下:
<!-- swagger2使用 -->
	<dependency>
            <groupId>io.springfox</groupId>
            <artifactId>springfox-swagger2</artifactId>
            <version>2.7.0</version>
        </dependency>
        <dependency>
            <groupId>io.springfox</groupId>
            <artifactId>springfox-swagger-ui</artifactId>
            <version>2.7.0</version>
        </dependency>

        <!-- hazelcast使用 -->
        <dependency>
            <groupId>com.hazelcast</groupId>
            <artifactId>hazelcast</artifactId>
        </dependency>
先说明swagger的使用:
1,如上,引入相关依赖包
2,配置类SwaggerConfigurer
package com.example.config;
import io.swagger.annotations.Api;
import io.swagger.annotations.ApiOperation;
import org.springframework.context.annotation.Bean;
import org.springframework.context.annotation.Configuration;
import org.springframework.web.bind.annotation.CookieValue;
import org.springframework.web.context.request.async.DeferredResult;
import springfox.documentation.builders.ApiInfoBuilder;
import springfox.documentation.service.ApiInfo;
import springfox.documentation.spi.DocumentationType;
import springfox.documentation.spring.web.plugins.Docket;
import springfox.documentation.swagger2.annotations.EnableSwagger2;
import static com.google.common.base.Predicates.or;
import static springfox.documentation.builders.RequestHandlerSelectors.withClassAnnotation;
import static springfox.documentation.builders.RequestHandlerSelectors.withMethodAnnotation;
@Configuration
@EnableSwagger2
public class SwaggerConfigurer {
@Bean
public Docket mideaApis() {
return new Docket(DocumentationType.SWAGGER_2)
.groupName("example-project")
.genericModelSubstitutes(DeferredResult.class)
.useDefaultResponseMessages(false)
.forCodeGeneration(true)
.select()
.apis(or(withClassAnnotation(Api.class), withMethodAnnotation(ApiOperation.class)))//这里配置swagger监控的接口,也可以写包名
.build()
.ignoredParameterTypes(CookieValue.class)
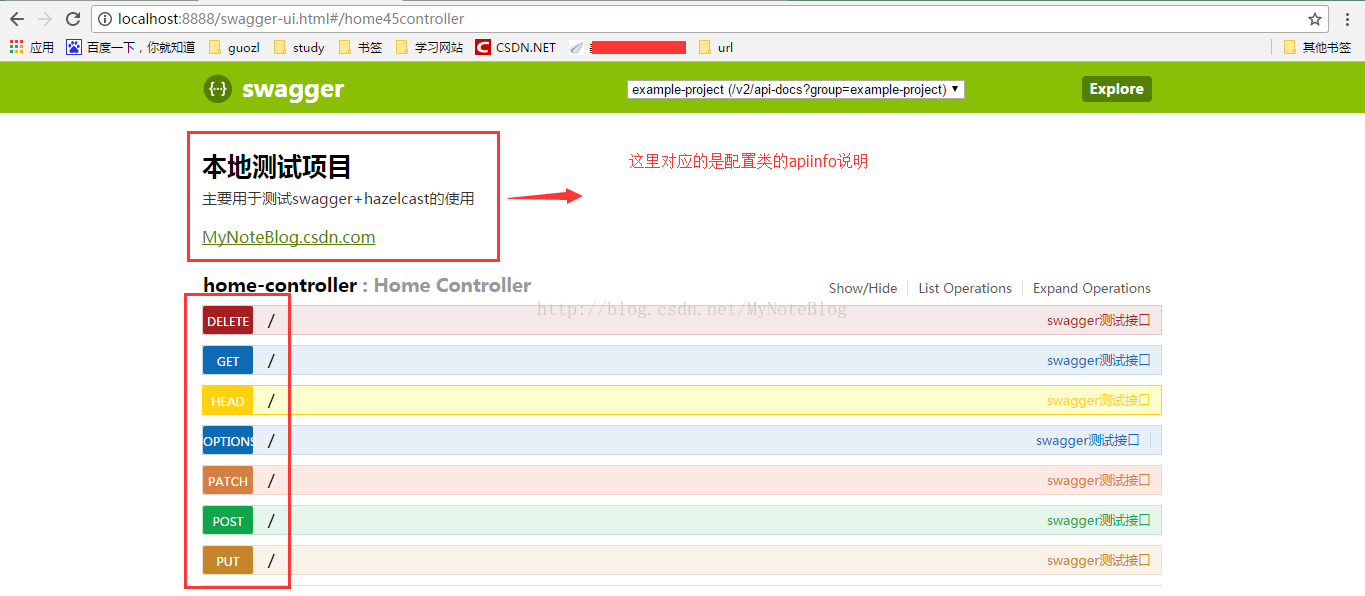
.apiInfo(apiInfo());//在页面显示的说明
}
private ApiInfo apiInfo() {
return new ApiInfoBuilder().title("本地测试项目")
.description(
"主要用于测试swagger+hazelcast的使用")
.termsOfServiceUrl("http://write.blog.csdn.net/postlist").license("MyNoteBlog.csdn.com")
.licenseUrl("http://write.blog.csdn.net/postlist").version("1.0").build();
}
}
package com.example.controller;
import org.springframework.web.bind.annotation.RequestMapping;
import org.springframework.web.bind.annotation.RequestMethod;
import org.springframework.web.bind.annotation.RestController;
import io.swagger.annotations.Api;
import io.swagger.annotations.ApiImplicitParam;
import io.swagger.annotations.ApiOperation;
@RestController
@Api(value = "swagger测试接口")
public class HomeController {
@RequestMapping("/")
@ApiOperation(value = "swagger测试接口", notes = "根据用户名返回欢迎语句")
@ApiImplicitParam(
required = true,//必须传参
name = "uname", //参数名
value = "用户名", //参数说明
paramType = "query", //参数传递方法
dataType = "String"//参数类型
)
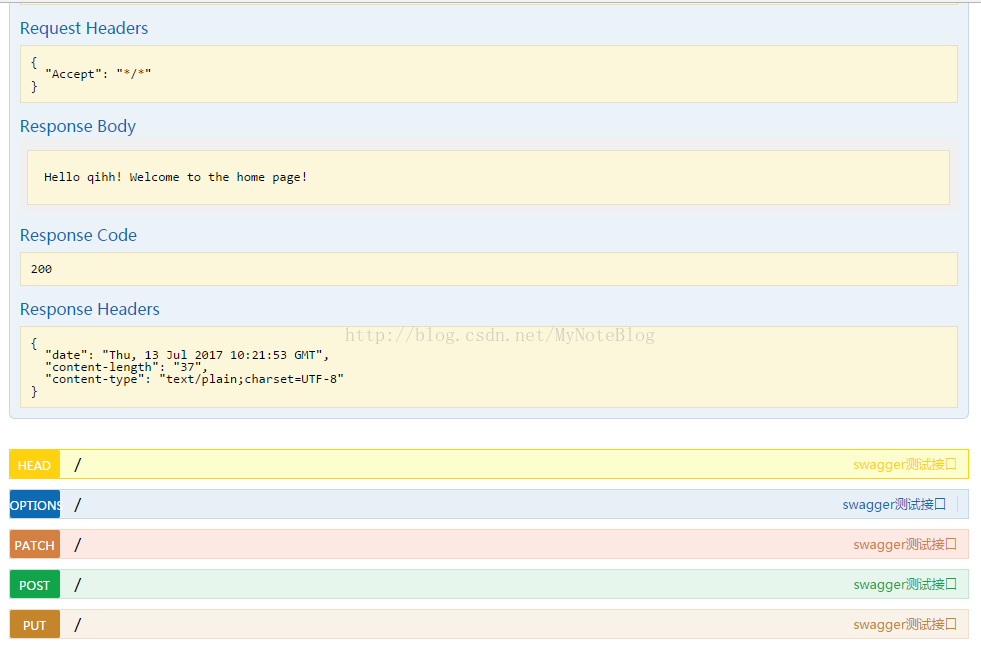
public String index(String uname) {
return "Hello "+uname+"! Welcome to the home page!";
}
}
=========================================================================================
由于接口中没有指定请求方法,故各种请求都可以访问。
下面测试,这里使用get方法做演示:

在项目中使用swagger管理接口,不需要额外编写接口文档就可以很方便的测试了。
下面我们再来介绍今天的主题,hazelcast。
1,引入依赖包,上面已经贴出了。
2,配置文件,如果没有给定配置,将会使用hazelcast.jar包的hazelcast-default.xml文件。
这里我们在application.properties中添加简单的配置:
server.port=8888

spring.hazelcast.members=localhost:5701
spring.hazelcast.instanceName=example-project
spring.hazelcast.group.name=example-project
spring.hazelcast.group.password=dev-passpackage com.example.config;
import com.hazelcast.config.*;
import com.hazelcast.core.Hazelcast;
import com.hazelcast.core.HazelcastInstance;
import com.hazelcast.core.IMap;
import com.hazelcast.nio.ObjectDataInput;
import com.hazelcast.nio.ObjectDataOutput;
import com.hazelcast.nio.serialization.StreamSerializer;
import org.slf4j.Logger;
import org.slf4j.LoggerFactory;
import org.springframework.beans.factory.annotation.Value;
import org.springframework.context.annotation.Bean;
import org.springframework.context.annotation.Configuration;
import java.io.*;
import java.util.Arrays;
@Configuration
public class HazelCastConfigurer {
private final static Logger logger = LoggerFactory.getLogger(HazelCastConfigurer.class);
@Bean(destroyMethod = "shutdown")
public HazelcastInstance hazelcastInstance(@Value("${spring.hazelcast.members}") String members,
@Value("${spring.hazelcast.instanceName}") String instanceName,
@Value("${spring.hazelcast.group.name}") String groupName,
@Value("${spring.hazelcast.group.password}") String groupPassword) {
Config cfg = new Config();
cfg.setInstanceName(instanceName);
// For Network Setting
cfg.getNetworkConfig().setJoin(new JoinConfig()
.setTcpIpConfig(
new TcpIpConfig().setEnabled(true).setMembers(Arrays.asList(members.split(","))))
.setMulticastConfig(new MulticastConfig().setEnabled(false)));
// For Serialization Setting
cfg.getSerializationConfig().addSerializerConfig(
new SerializerConfig().setTypeClass(Object.class).setImplementation(new ObjectStreamSerializer()));
// For Group Setting
cfg.getGroupConfig().setName(groupName).setPassword(groupPassword);
return Hazelcast.getOrCreateHazelcastInstance(cfg);
}
@Bean("userNameMap")
public IMap<String, String> accessTokenMap(HazelcastInstance hazelcastInstance) {
return hazelcastInstance.getMap("userNameMap");
}
class ObjectStreamSerializer implements StreamSerializer<Object> {
@Override
public int getTypeId() {
return 2;
}
@Override
public void write(ObjectDataOutput objectDataOutput, Object object) throws IOException {
ObjectOutputStream out = new ObjectOutputStream((OutputStream) objectDataOutput);
out.writeObject(object);
out.flush();
}
@Override
public Object read(ObjectDataInput objectDataInput) throws IOException {
ObjectInputStream in = new ObjectInputStream((InputStream) objectDataInput);
try {
return in.readObject();
} catch (ClassNotFoundException e) {
throw new IOException(e);
}
}
@Override
public void destroy() {
logger.info("StreamSerializer is destroy......");
}
}
}
package com.example.controller;
import javax.annotation.Resource;
import org.springframework.web.bind.annotation.RequestMapping;
import org.springframework.web.bind.annotation.RequestMethod;
import org.springframework.web.bind.annotation.RestController;
import com.hazelcast.core.IMap;
import io.swagger.annotations.Api;
import io.swagger.annotations.ApiOperation;
@RestController
@RequestMapping("/user")
@Api(value = "hazelcast测试接口")
public class UserController {
@Resource(name="userNameMap")
private IMap<String, String> userNameMap;
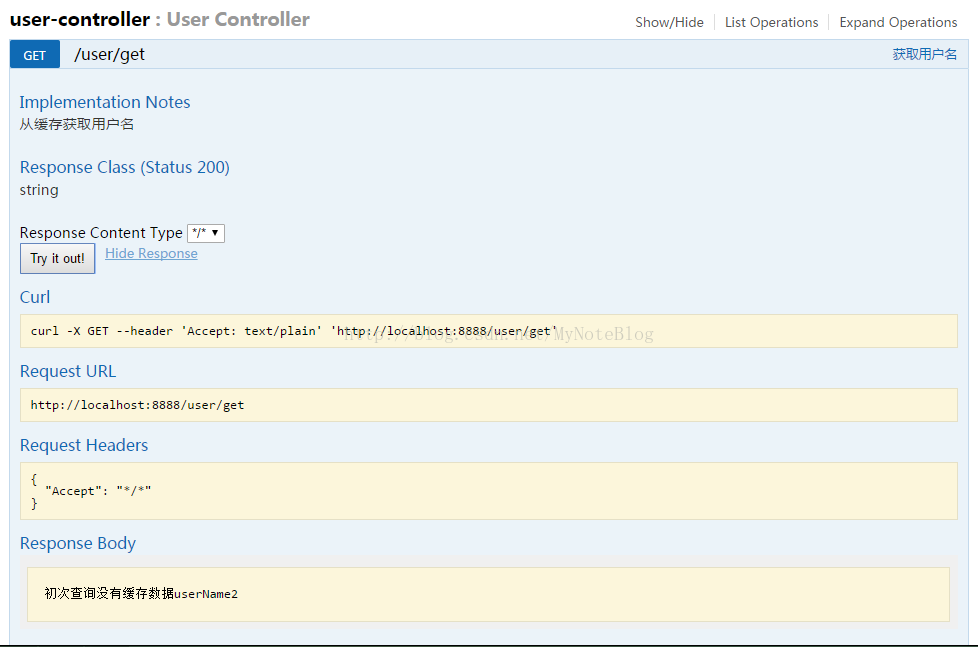
@RequestMapping(value="/get",method=RequestMethod.GET)
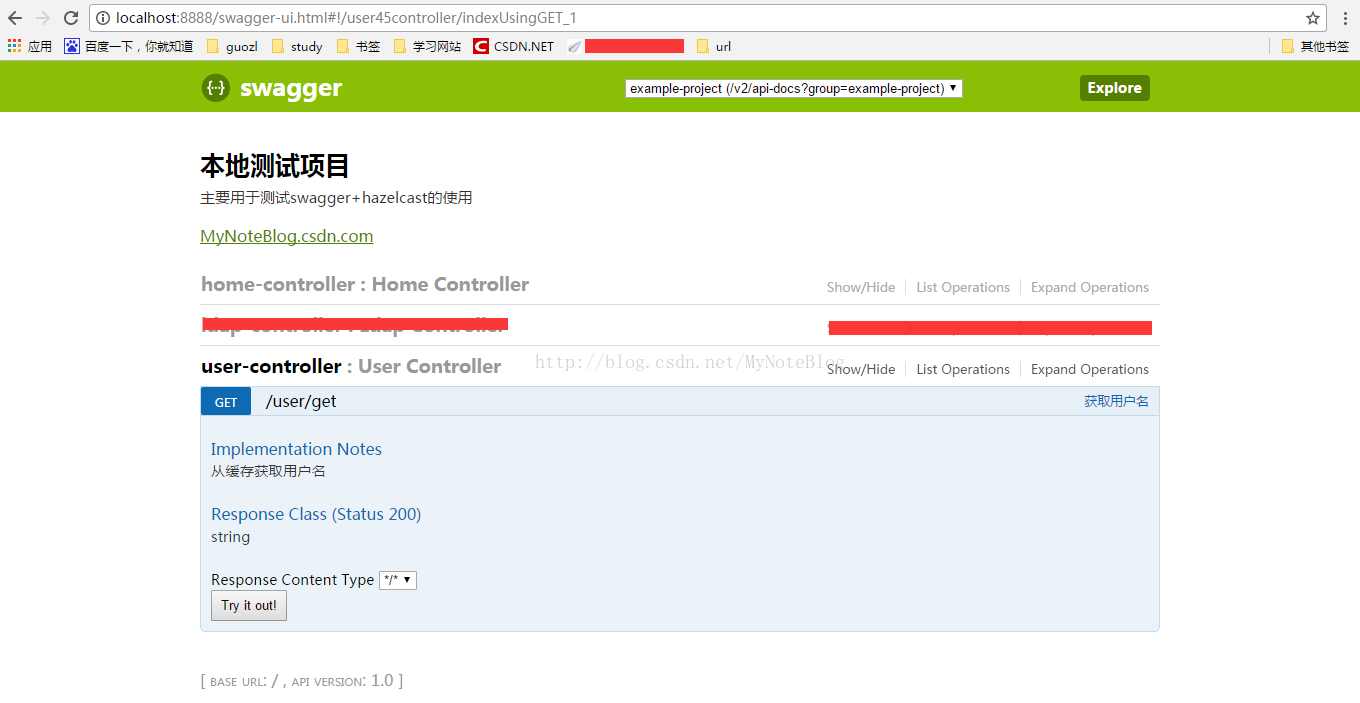
@ApiOperation(value = "获取用户名", notes = "从缓存获取用户名")
public String index() {
String userName1 = userNameMap.get("userName1");
String userName2 = userNameMap.get("userName2");
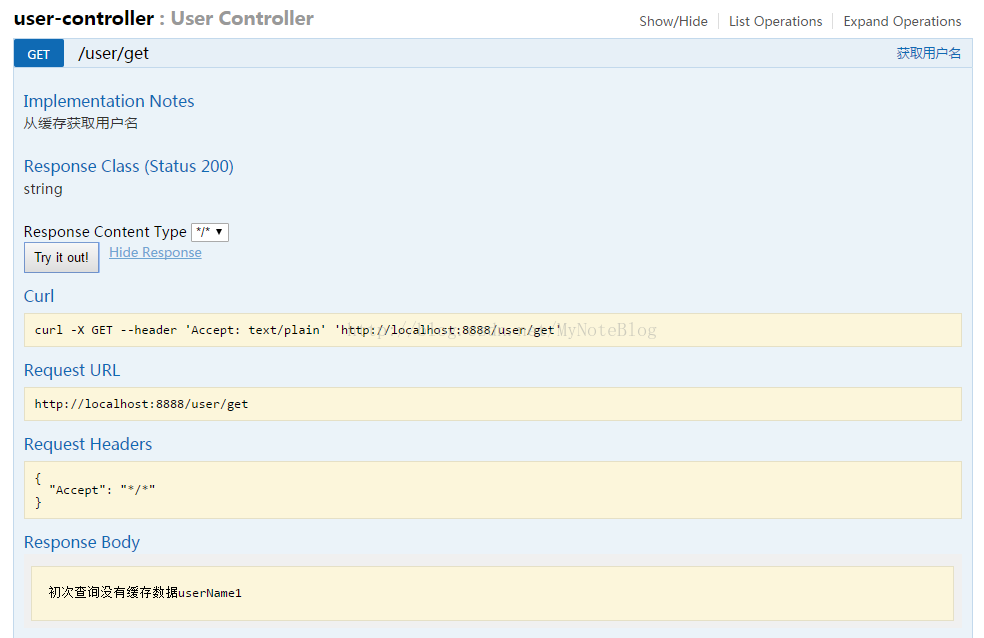
if (userName1 == null) {
userNameMap.put("userName1", "wendy");
return "初次查询没有缓存数据userName1";
}
if (userName2 == null) {
userNameMap.put("userName2", "qihh");
return "初次查询没有缓存数据userName2";
}
return "从缓存获取用户名1="+userName1+",用户名2="+userName2;
}
}
启动测试,可以看到多了一个UserController
第一次try out
第二次try out
第三次try out
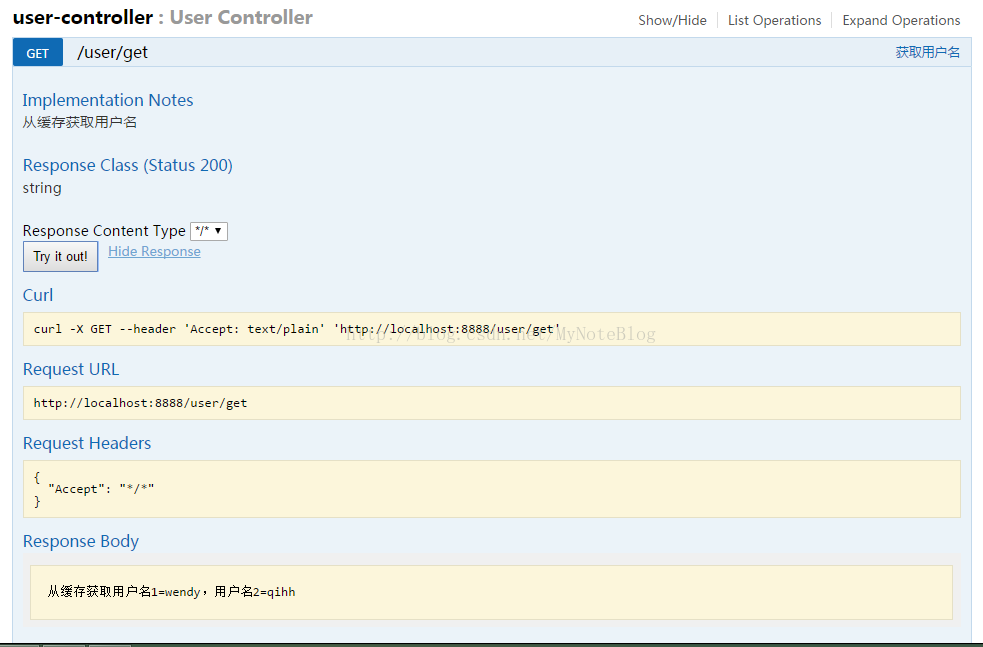
第三次访问获取到数据,成功启用缓存。
只需要引入一个jar包,简单配置,就可以使用hazelcast作为缓存框架使用了,是不是很便利呢。
相关学习资料,可以点击这里深入学习:https://my.oschina.net/chkui/blog/729698


 339
339

 被折叠的 条评论
为什么被折叠?
被折叠的 条评论
为什么被折叠?
 到【灌水乐园】发言


