


实验名称:Zabbix实验
实验目的:搭建Zabbix实验,检测到信息即可
实验环境:Linux CentOS 7
实验步骤:
Zabbix的官方网站 :http://www.zabbix.com/
下载:http://www.zabbix.com/download.php
一、配置如下:
1、Zabbix主机的初始配置
配置IP地址、主机名、关闭kdump与SELinux
(1)配置IP地址
[root@localhost ~]# vim /etc/sysconfig/network-scripts/ifcfg-ens33

(2)更改主机名
[root@localhost ~]# vim /etc/hostname
添加映射
[root@localhost ~]# vim /etc/hosts

(3)关闭kdump与SELinux
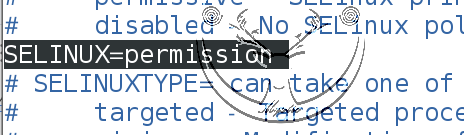
[root@localhost ~]# vim /etc/selinux/config
SELINUX=permission(许可的)
[root@localhost ~]# systemctl stop kdump
(4)重新启动虚拟机
[root@localhost ~]# reboot
2、部署LAMP
(1)用yum安装Apache
[root@zabbix ~]# yum -y install httpd

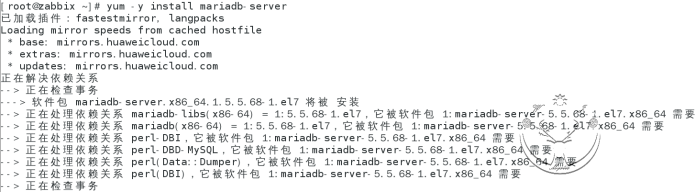
(2)安装Mariadb
[root@zabbix ~]# yum -y install mariadb-server
(3)启动apache和mariadb
[root@zabbix ~]# systemctl start httpd.service
[root@zabbix ~]# systemctl enable httpd.service

[root@zabbix ~]# systemctl start mariadb.service
[root@zabbix ~]# systemctl enable mariadb.service

(4)安装php包(用yum安装)
[root@zabbix ~]# yum -y install php

(5)安装PHP组件,使PHP支持MariaDB
[root@zabbix ~]# yum -y install php-mysql php-gd libjpeg* php-ldap php-odbc php-pear php-xml php-xmlrpc php-mbstring php-bcmath php-mhash

(6)重启MariaDB、Apache
[root@zabbix ~]# systemctl restart mariadb.service
[root@zabbix ~]# systemctl restart httpd.service
三、部署Zabbix。
(1)安装“Zabbix安装包”资源存储库(必须要在网站查找,因为每一次的版本都不同)Zabbix的官方网站 :http://www.zabbix.com/
[root@zabbix ~]# rpm -Uvh https://repo.zabbix.com/zabbix/4.0/rhel/7/x86_64/zabbix-release-4.0-2.el7.noarch.rpm

(2)清除yum源
[root@zabbix ~]# yum clean all

(3)清除完毕后,直接安装Zabbix
[root@zabbix ~]# yum install zabbix-server-mysql zabbix-web-mysql zabbix-agent -y

[root@zabbix ~]# yum -y install centos-release-scl

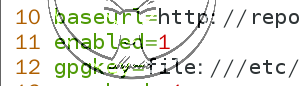
(4)安装完毕后,编辑 /etc/yum.repos.d/zabbix.repo 开启 zabbix-frontend 库
[root@zabbix ~]# vim /etc/yum.repos.d/zabbix.repo
enabled=1(改为1)
(5)再清除一下yum,每次修改都有清除一下
[root@zabbix ~]# yum -y clean all

(6)安装 Zabbix frontend 包
[root@zabbix ~]# yum -y install zabbix-web-mysql-scl zabbix-apache-conf-scl

(7)对数据库进行初始化并创建Zabbix数据库
给数据库管理员root设置密码
见到MariaDB成功
[root@zabbix ~]# mysqladmin -u root password 123
[root@zabbix ~]# mysql -uroot -p
create database zabbix character set utf8 collate utf8_bin;
grant all privileges on zabbix.* to zabbix@localhost identified by ‘Z9865321’;
flush privileges;

查看库中有多少文件


(8)编辑Zabbix数据库配置文件并启动Zabbix服务
[root@zabbix ~]# vim /etc/zabbix/zabbix_server.conf


(9)开启服务
[root@zabbix ~]# systemctl enable zabbix-server

启动服务
[root@zabbix ~]# systemctl start zabbix-server
查看服务(绿色为启动状态)
[root@zabbix ~]# systemctl status zabbix-server

(10)修改 /etc/opt/rh/rh-php72/php-fpm.d/zabbix.conf
[root@zabbix ~]# vim /etc/httpd/conf.d/zabbix.conf
修改第20行去掉注释,更改时区是chongqing或者shanghai,其实就是北京时间
php_value date.timezone Asia/Chongqing

(11)配置防火墙
[root@zabbix ~]# firewall-cmd --permanent --zone=public --add-port=10051/tcp
[root@zabbix ~]# firewall-cmd --zone=public --add-port=10051/tcp
[root@zabbix ~]# firewall-cmd --permanent --zone=public --add-port=80/tcp
[root@zabbix ~]# firewall-cmd --zone=public --add-port=80/tcp

(12)启动 Zabbix server and agent
[root@zabbix ~]# systemctl restart zabbix-server zabbix-agent httpd
[root@zabbix ~]# systemctl enable zabbix-server zabbix-agent httpd
(13)访问
在WebUI中继续安装
[root@zabbix ~]# firefox http://127.0.0.1/zabbix
欢迎使用Zabbix

检查先决条件

配置数据库连接

配置服务器详细信息

预安装总结

安装完成

在WebUI中登录
第一次登录,用户名:Admin,密码:zabbix

@修改WebUI界面语言为中文
点击右上角“个人配置

选择Language为Chinese(zh_CN),再点击“Update”

四、在客户机上进行操作
(1)安装“Zabbix安装包”资源存储库
在Zabbix的官方网站中下载 :http://www.zabbix.com/
[root@localhost ~]# rpm -Uvh https://repo.zabbix.com/zabbix/4.0/rhel/7/x86_64/zabbix-release-4.0-2.el7.noarch.rpm

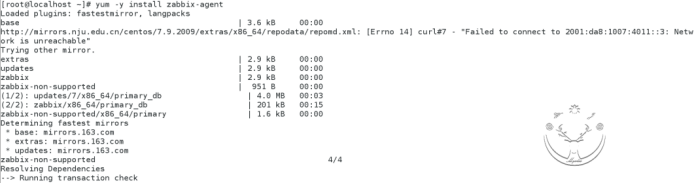
[root@localhost ~]# yum -y install zabbix-agent
(2)编辑配置文件,添加主机IP
[root@localhost ~]# vim /etc/zabbix/zabbix_agentd.conf


(3)直接启动,如果启动不了就关闭沙盒
[root@localhost ~]# setenforce 0
开启服务
[root@localhost ~]# systemctl enable zabbix-agent.service

重启服务
[root@localhost ~]# systemctl restart zabbix-agent.service
查看服务
[root@localhost ~]# systemctl status zabbix-agent.service

(4)配置防火墙
[root@localhost ~]# firewall-cmd --permanent --zone=public --add-port=10050/tcp
[root@localhost ~]# firewall-cmd --zone=public --add-port=10050/tcp
[root@localhost ~]# firewall-cmd --permanent --zone=public --add-port=80/tcp
[root@localhost ~]# firewall-cmd --zone=public --add-port=80/tcp

返回服务器
创建(右上角创建主机)

添加主机名

选择这个

点击小模板添加以下两项

选择以下两项


直接添加上了

检测信息:

至此,Zabbix实验成功!


 464
464


 被折叠的 条评论
为什么被折叠?
被折叠的 条评论
为什么被折叠?
 到【灌水乐园】发言


