


redhat 7.9 安装oracle 11g-11.2.0.4
- 0、本实验涉及的操作系统镜像文件、数据库安装包、SQL Developer安装包做如下分享
- 1、数据库安装文档
- 2、安装前准备
- 2.0、修改主机名-重要
- 2.1、硬件要求
- 2.2、软件要求
- 2.3、Installation Fixup Scripts
- 2.4、端口范围-Verifying UDP and TCP Kernel Parameters
- 2.5、Installing the cvuqdisk Package for Linux
- 2.6、配置/etc/hosts文件
- 2.7、Disabling Transparent HugePages
- 2.8、创建用户和组
- 2.9、创建安装目录
- 2.10、Checking Resource Limits for the Oracle Software Installation Users
- 2.11、Configuring Kernel Parameters for Linux
- 2.12、Setting the shell profile
- 2.13、 Configuring Oracle Software Owner Environment
- 3、安装
- 4、安装后查看数据库状态
- 5、使用oracle数据库
- 6、SQL Developer 安装
- 7、windows客户端安装
- 8、为什么不能永远停留在11g
0、本实验涉及的操作系统镜像文件、数据库安装包、SQL Developer安装包做如下分享
0.1、操作系统镜像文件
redhat 7.9 iso:
https://pan.baidu.com/s/17o21CF0XKeK-JfseqKtO5w
27n9
rhel HASH校验信息:
https://www.aliyundrive.com/s/wzwaitD5j1r
52eu
0.2、数据库安装包
数据库安装包:
https://pan.baidu.com/s/15o2dNaUtQboLgYwn2hgw9g
l2xu
0.3、SQL Developer安装包
SQL Developer安装包:
https://pan.baidu.com/s/1aTzmOxK4qs7vzLWCzlGW3w?pwd=1bpl
1bpl
1、数据库安装文档
1.1、查看oracle 11g 适合安装的linux版本
RHEL 7
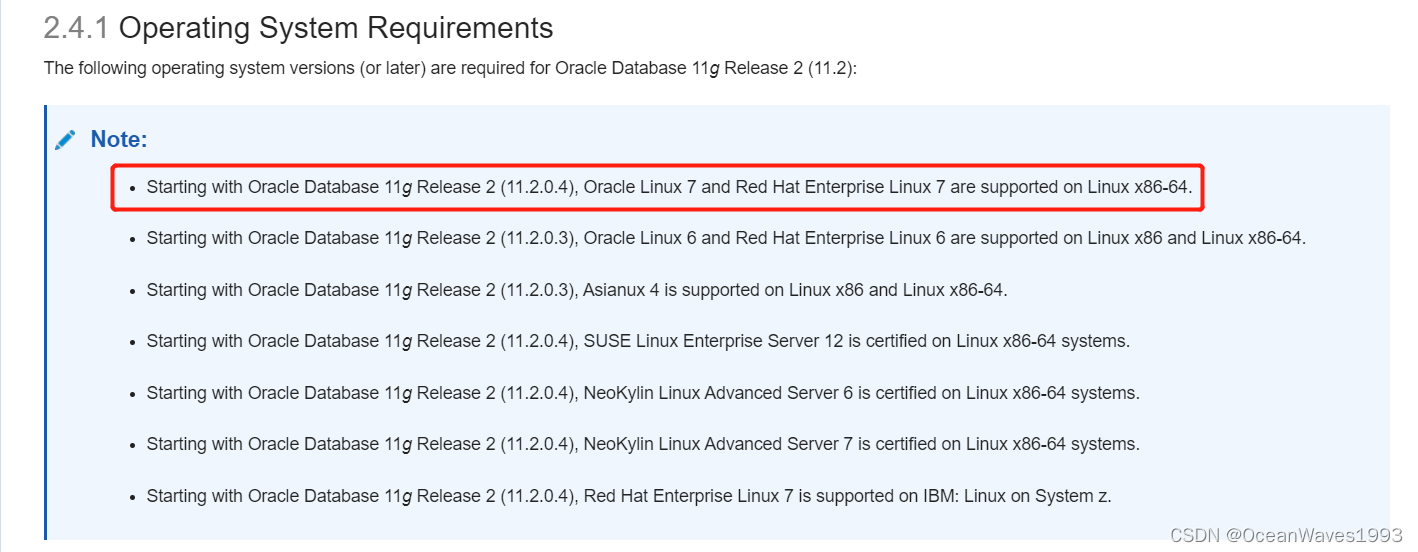
参考:https://docs.oracle.com/cd/E11882_01/install.112/e47689/pre_install.htm#LADBI1106
以下是官网文档的坑,忽略即可。
参考这个的话会认为RHEL8也可以安装,实际上RHEL8安装失败了,属实是毁人不倦。
RHEL8和Oracle 11g-11.2.0.4 不兼容,因为在先决条件检查时,是按照RHEL7的rpm包进行检查的,
输出的不满足项也是让安装RHEL7的rpm包。
看来oracle的官网手册可能也不靠谱。
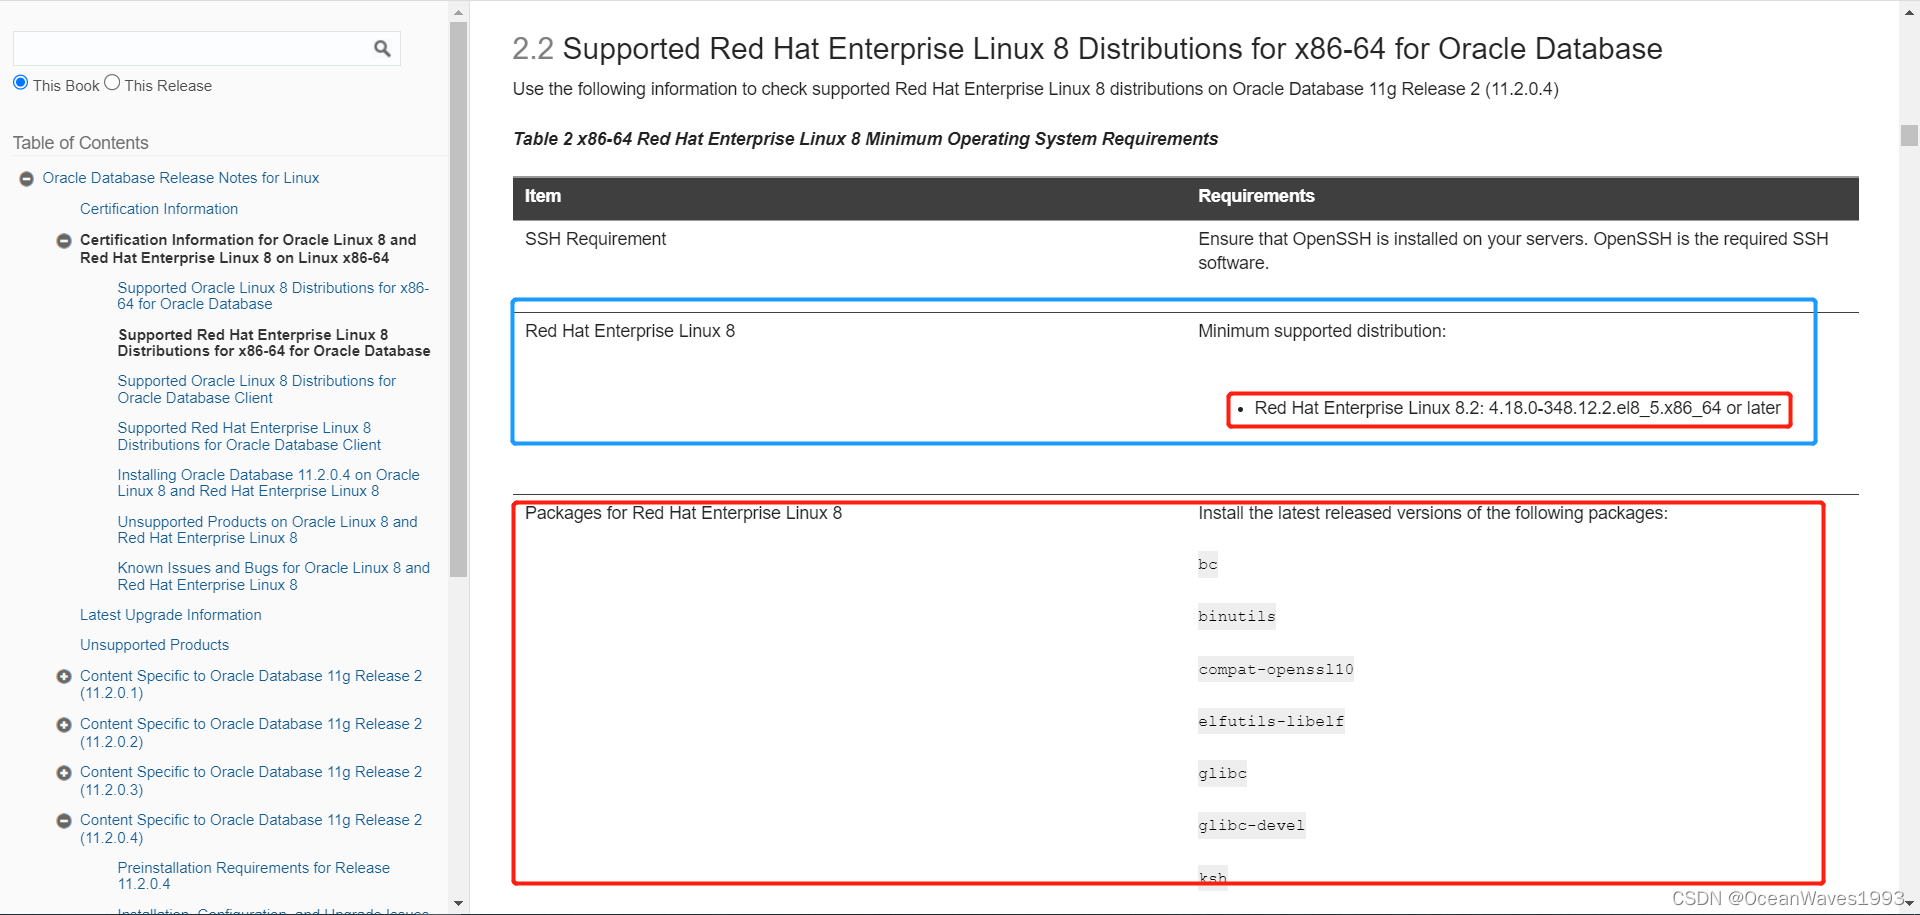
参考:https://docs.oracle.com/cd/E11882_01/relnotes.112/e23558/toc.htm#CHDHIFDE
Red Hat Enterprise Linux 8 可以安装
redhat 8版本要求:Red Hat Enterprise Linux 8.2: 4.18.0-348.12.2.el8_5.x86_64 or later
1.2、安装文档
参考: https://docs.oracle.com/cd/E11882_01/install.112/e47689/toc.htm
1.3、license种类解释( XE版 标准本 个人版 企业版)
各种不同的oracle版本 XE版 标准本 个人版等
参考: https://docs.oracle.com/cd/E11882_01/license.112/e47877/toc.htm
1.4、在安装完oracle后再创建数据库
查看 Oracle Database 2 Day DBA
参考: https://docs.oracle.com/cd/E11882_01/server.112/e10897/install.htm#ADMQS023
完整文档:https://docs.oracle.com/cd/E11882_01/server.112/e10897/toc.htm
1.5、DBA的文档
参考链接: https://docs.oracle.com/cd/E11882_01/server.112/e25494/toc.htm
1.6、Automatic Storage Management Administrator’s Guide
参考链接: https://docs.oracle.com/cd/E11882_01/server.112/e18951/toc.htm
See also Managing Oracle ASM Users with Oracle Enterprise Manager in
Oracle Automatic Storage Management Administrator’s Guide for information about the ASMSNMP user
1.7、数据库备份恢复手册
数据库备份恢复手册: https://docs.oracle.com/cd/E11882_01/backup.112/e10642/toc.htm
1.8、Overview of Oracle Database Installation
安装过程中的各个选项释义:https://docs.oracle.com/cd/E11882_01/install.112/e47689/install_overview.htm#LADBI1042
1.9、升级手册(升级到11.2)
https://docs.oracle.com/cd/E11882_01/server.112/e23633/upgrade.htm#UPGRD003
2、安装前准备
2.0、修改主机名-重要
2.0.1、永久修改-重启也能生效
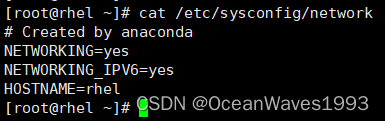
查看/etc/sysconfig/network
cat /etc/sysconfig/network
默认没有内容

编辑/etc/sysconfig/network
vi /etc/sysconfig/network
添加以下内容
NETWORKING=yes
NETWORKING_IPV6=yes
HOSTNAME=rhel
修改后展示
参考链接:https://www.jb51.net/article/99897.htm
2.1、硬件要求
2.1.1、/dev/shm 大小要求
配置要求:一般大于1G即可。
这个值默认是机器内存的一半,意思是分配给oracle使用的内存。
查看大小
df -lh /dev/shm/

/dev/shm > MEMORY_MAX_TARGET and MEMORY_TARGET parameters for each Oracle instance on the computer.
2.1.2、文件描述符大小要求
配置要求:每个进程需要至少512个。
后续篇幅会在/etc/security/limits.conf 中设置。
The number of file descriptors for each Oracle instance must be at least 512*PROCESSES. The limit of descriptors for each process must be at least 512.
每个进程需要至少512个。
2.1.3、内存大小
配置要求:内存>2G
查看内存大小
grep MemTotal /proc/meminfo

2.1.4、SWAP大小
配置要求:按照此规则分配SWAP大小

查看SWAP大小
grep SwapTotal /proc/meminfo

2.1.5、/tmp大小
配置要求:/tmp > 1G
查看/tmp大小
df -lh /tmp/

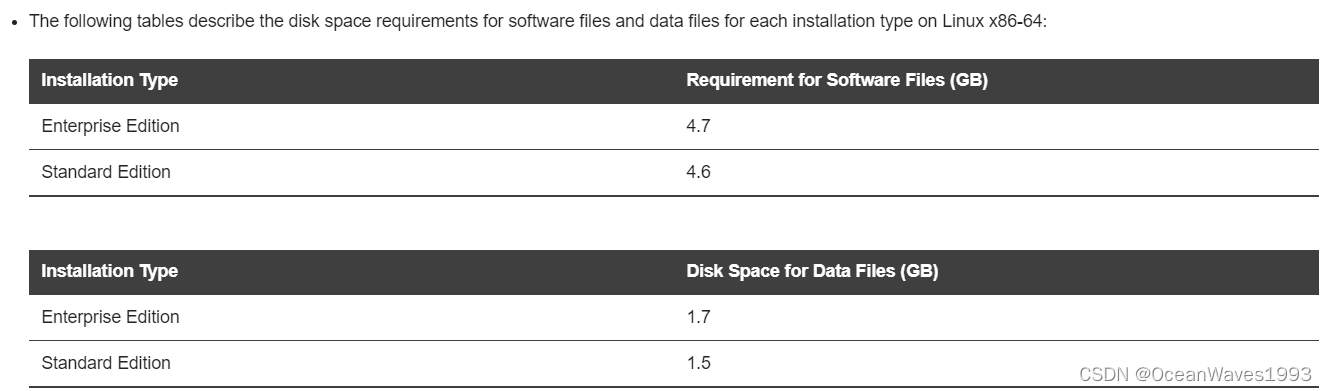
2.1.6、磁盘大小
配置要求:可用磁盘空间>10G
2.1.7、显示器分辨率大小
配置要求:显示器分辨率 > 1024 x 768
这是为了oracle安装程序图形界面使用

2.2、软件要求
2.2.1、操作系统要求
RHEL 7
参考:https://docs.oracle.com/cd/E11882_01/install.112/e47689/pre_install.htm#LADBI1106
2.2.2、内核版本要求
不用管 ,操作系统满足一般这个可以满足。
参考:https://docs.oracle.com/cd/E11882_01/install.112/e47689/pre_install.htm#LADBI1110
2.2.3、依赖包安装
yum -y install bc binutils elfutils-libelf gcc gcc-c++ glibc glibc.i686 glibc-devel glibc-devel.i686 ksh libaio libaio-devel libaio-devel.i686 libcap libXrender libX11 libXau libXi libXi.i686 libXtst libXtst.i686 libgcc libgcc.i686 libstdc++ libstdc++.i686 libstdc++-devel libstdc++-devel.i686 libxcb libibverbs make policycoreutils smartmontools sysstat xdpyinfo elfutils-libelf-devel
参考:https://docs.oracle.com/cd/E11882_01/install.112/e47689/pre_install.htm#LADBI1111
--------------------------------
!!!!!!!!!!重要的事情!!!!!!!!
!!!!!!!!!!重要的事情!!!!!!!!
!!!!!!!!!!重要的事情!!!!!!!!
--------------------------------
注意这些包的版本需满足下面所述,不能高于下面版本。如果在link binaries过程安装出现问题,
先确认是不是安装的这些包的版本不是下述这些版本。
binutils-2.23.52.0.1-12.el7.x86_64
compat-libcap1-1.10-3.el7.x86_64
compat-libstdc++-33-3.2.3-71.el7.i686
compat-libstdc++-33-3.2.3-71.el7.x86_64
gcc-4.8.2-3.el7.x86_64
gcc-c++-4.8.2-3.el7.x86_64
glibc-2.17-36.el7.i686
glibc-2.17-36.el7.x86_64
glibc-devel-2.17-36.el7.i686
glibc-devel-2.17-36.el7.x86_64
ksh
libaio-0.3.109-9.el7.i686
libaio-0.3.109-9.el7.x86_64
libaio-devel-0.3.109-9.el7.i686
libaio-devel-0.3.109-9.el7.x86_64
libgcc-4.8.2-3.el7.i686
libgcc-4.8.2-3.el7.x86_64
libstdc++-4.8.2-3.el7.i686
libstdc++-4.8.2-3.el7.x86_64
libstdc++-devel-4.8.2-3.el7.i686
libstdc++-devel-4.8.2-3.el7.x86_64
libXi-1.7.2-1.el7.i686
libXi-1.7.2-1.el7.x86_64
libXtst-1.2.2-1.el7.i686
libXtst-1.2.2-1.el7.x86_64
make-3.82-19.el7.x86_64
sysstat-10.1.5-1.el7.x86_64
2.3、Installation Fixup Scripts
如果安装过程出现错误,会用到这个功能去自动修复,但是修复完后还是需要手动去确认确实满足了。
参考:https://docs.oracle.com/cd/E11882_01/install.112/e47689/pre_install.htm#LADBI1146
During installation, for certain prerequisite verification failures, click Fix & Check Again to generate a fixup script (runfixup.sh). You can run this script as the root user to complete the required preinstallation steps.
The fixup script:
Checks for and sets kernel parameters to values required for successful installation, including:
Shared memory parameters
Open file descriptor and UDP send/receive parameters
Oracle recommends that you do not modify the contents of the generated fixup script.
Note:

Using fixup scripts does not ensure that all the prerequisites for installing Oracle Database are met. You must still verify that all the preinstallation requirements are met to ensure a successful installation.
2.4、端口范围-Verifying UDP and TCP Kernel Parameters
编辑/etc/sysctl.conf
vi /etc/sysctl.conf
修改这行为: net.ipv4.ip_local_port_range = 9000 65500
如没有这行就添加一行
net.ipv4.ip_local_port_range = 9000 65500
使得修改生效
sysctl -p /etc/sysctl.conf

端口最小值大于9000 是为了防止熟知端口被使用到
最大值尽量大
检查当前端口范围
cat /proc/sys/net/ipv4/ip_local_port_range
参考:https://docs.oracle.com/cd/E11882_01/install.112/e47689/pre_install.htm#LADBI1149
2.5、Installing the cvuqdisk Package for Linux
cluster安装才会使用到,单数据库安装忽略。
这个包在 Oracle Grid Infrastructure安装后的目录oracle_home1/cv/rpm中。
参考:https://docs.oracle.com/cd/E11882_01/install.112/e47689/pre_install.htm#LADBI1151
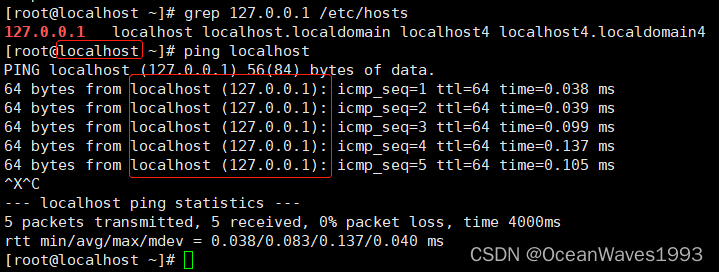
2.6、配置/etc/hosts文件
确保/etc/hosts 文件中含有这一行
127.0.0.1 localhost localhost.localdomain localhost4 localhost4.localdomain4
使用如下命令查看是否含有
grep 127.0.0.1 /etc/hosts

没有的话就编辑/etc/hosts文件加入这一行
127.0.0.1 localhost localhost.localdomain localhost4 localhost4.localdomain4
这是为了主机名可以解析到地址
参考:https://docs.oracle.com/cd/E11882_01/install.112/e47689/pre_install.htm#LADBI1152
2.7、Disabling Transparent HugePages
To check if Transparent HugePages are enabled run one of the following commands as the root user:
cat /sys/kernel/mm/redhat_transparent_hugepage/enabled
或者
cat /sys/kernel/mm/transparent_hugepage/enabled

博主系统是rhel 7.9 不支持设置为never 就不设置了
参考链接:https://docs.oracle.com/cd/E11882_01/install.112/e47689/pre_install.htm#LADBI1519
2.8、创建用户和组
groupadd --system oinstall
groupadd --system dba
adduser -m --system -g oinstall -G dba --shell /bin/bash oracle
参考链接:https://docs.oracle.com/cd/E11882_01/install.112/e47689/pre_install.htm#LADBI1161
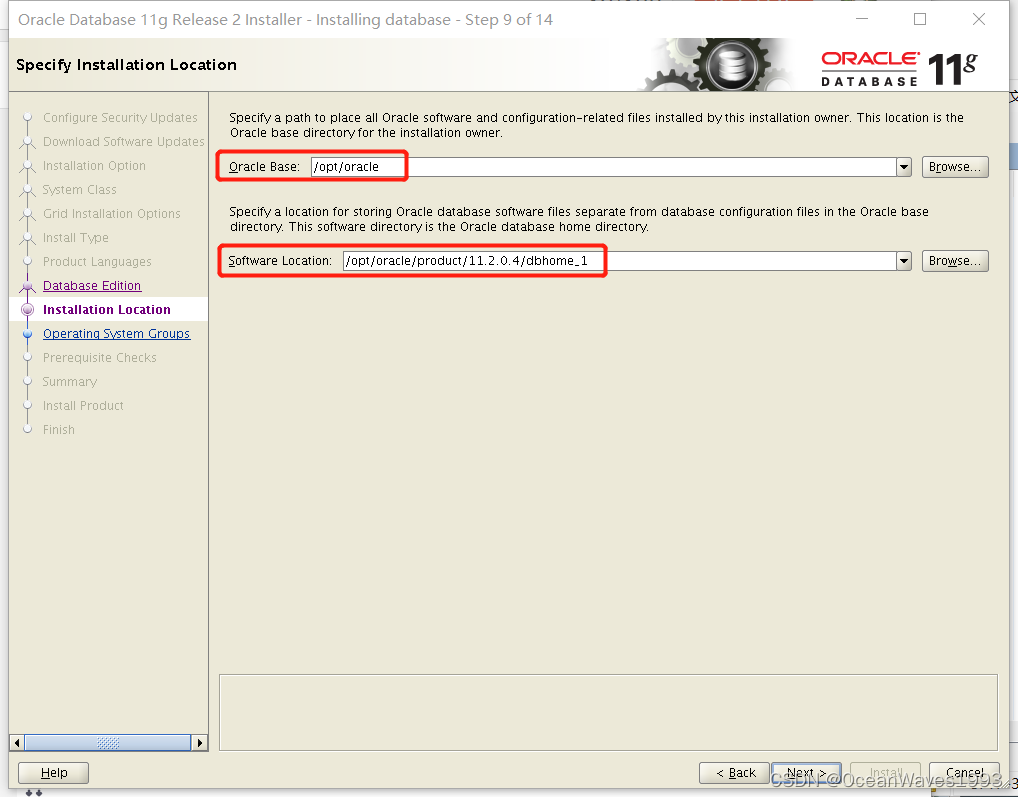
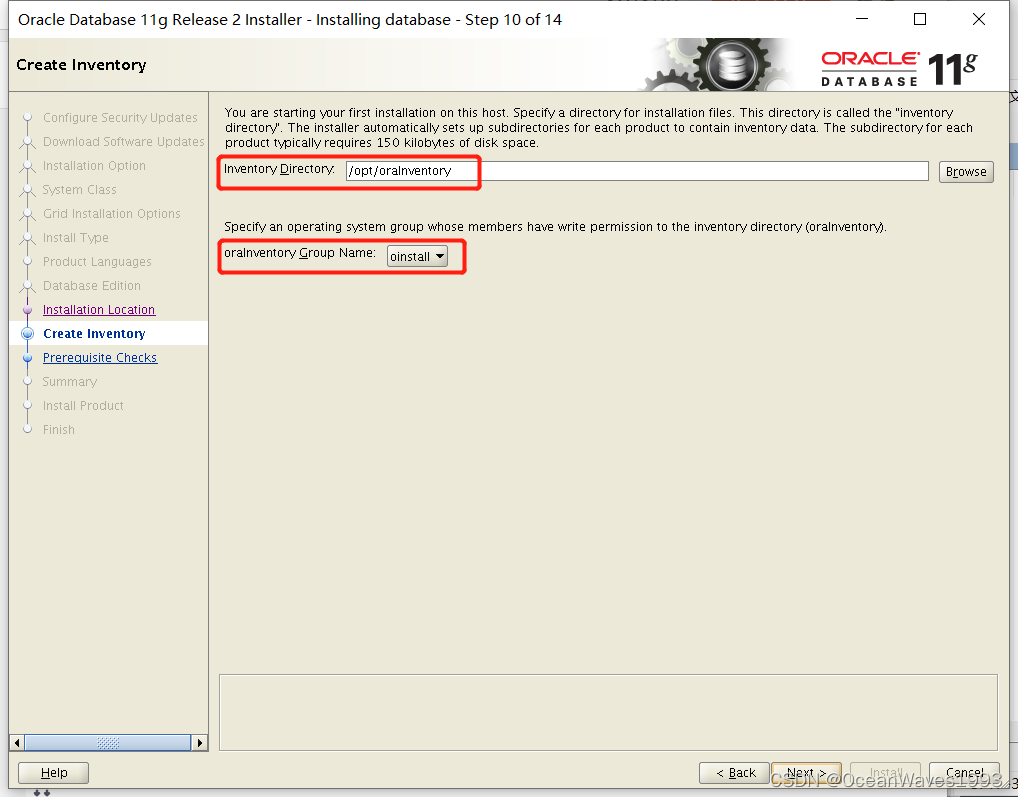
2.9、创建安装目录
mkdir -p /opt/oracle/product/11.2.0.4/dbhome_1
mkdir -p /opt/oraInventory
chown -R oracle:dba /opt/oracle/
chown -R oracle:dba /opt/oraInventory
2.10、Checking Resource Limits for the Oracle Software Installation Users
vi /etc/security/limits.conf
添加以下内容
oracle          soft    nproc           2047
oracle          hard    nproc           16384
oracle          soft    nofile          1024
oracle          hard    nofile          65536
oracle          soft    stack           10240
oracle          hard    stack           32768
重启系统让配置生效
2.11、Configuring Kernel Parameters for Linux
vi /etc/sysctl.conf
插入如下内容
# ============================

# Oracle 11g

# ============================

# semaphores: semmsl, semmns, semopm, semmni

kernel.sem = 250 32000 100 128

kernel.shmall = 2097152

kernel.shmmni = 4096

# Replace kernel.shmmax with the half of your memory size in bytes

# if lower than 4 GB minus 1

# 6442450944 is 6 GigaBytes (12 GB of RAM / 2)

kernel.shmmax=6442450944

#

# Max number of network connections. Use sysctl -a | grep ip_local_port_range to check.

net.ipv4.ip_local_port_range = 9000  65500

#

net.core.rmem_default = 262144

net.core.rmem_max = 4194304

net.core.wmem_default = 262144

net.core.wmem_max = 1048576

#

# The maximum allowed value, set to avoid overhead and input/output errors

fs.aio-max-nr = 1048576

# 512 * Processes

fs.file-max = 6815744

fs.suid_dumpable = 1
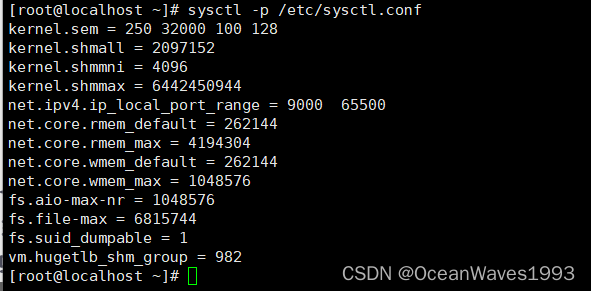
使配置生效
sysctl -p /etc/sysctl.conf
2.12、Setting the shell profile
编辑 /etc/profile
vi /etc/profile
添加以下
if [ $USER = "oracle" ]; then
    if [ $SHELL = "/bin/ksh" ]; then
        ulimit -p 16384
        ulimit -n 65536
    else
        ulimit -u 16384 -n 65536
    fi
fi
使生效
source /etc/profile
2.13、 Configuring Oracle Software Owner Environment
指的是oracle用户
su - oracle
vi  ~/.bashrc
插入以下内容
# Oracle Settings

TMP=/tmp; export TMP

TMPDIR=$TMP; export TMPDIR

# Enter your hostname

ORACLE_HOSTNAME=rhel; export ORACLE_HOSTNAME

ORACLE_UNQNAME=ORADB11G; export ORACLE_UNQNAME

ORACLE_BASE=/opt/oracle; export ORACLE_BASE

ORACLE_HOME=$ORACLE_BASE/product/11.2.0.4/dbhome_1; export ORACLE_HOME

ORACLE_SID=ORCL; export ORACLE_SID

PATH=/usr/sbin:$PATH; export PATH

PATH=$ORACLE_HOME/bin:$PATH; export PATH

LD_LIBRARY_PATH=$ORACLE_HOME/lib:/lib:/usr/lib:/usr/lib64; export LD_LIBRARY_PATH

CLASSPATH=$ORACLE_HOME/jlib:$ORACLE_HOME/rdbms/jlib; export CLASSPATH

umask 022
使生效
source ~/.bashrc
注意!!!
ORACLE_HOSTNAME变量一定需要设置成系统的主机名,否则安装会报错: [INS-20802] Oracle Net Configuration Assistant failed. 出现这个错误耳朵根本原因是ORACLE_HOSTNAME变量和真实的主机名不同。
这个错误虽然可以忽略,待安装完成再配置监听文件中的主机名,但是比较繁琐。
主机名查看命令
grep HOSTNAME /etc/sysconfig/network

3、安装
3.1、直接使用oracle用户进行ssh登录
shsell中把ssh连接属性配置成 enable X11Forwarding
vi /etc/ssh/sshd_config
确定有下面这行
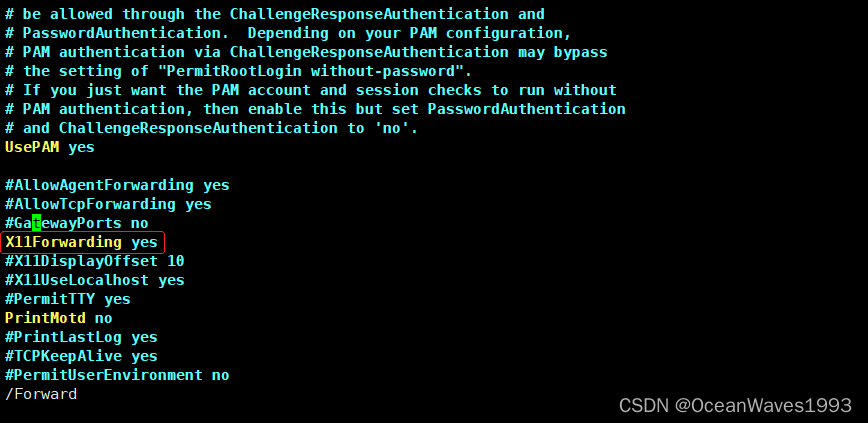
grep X11Forwarding /etc/ssh/sshd_config

3.2、执行安装程序
3.2.1、runInstaller
cd /path/to/oracle/database/
./runInstaller


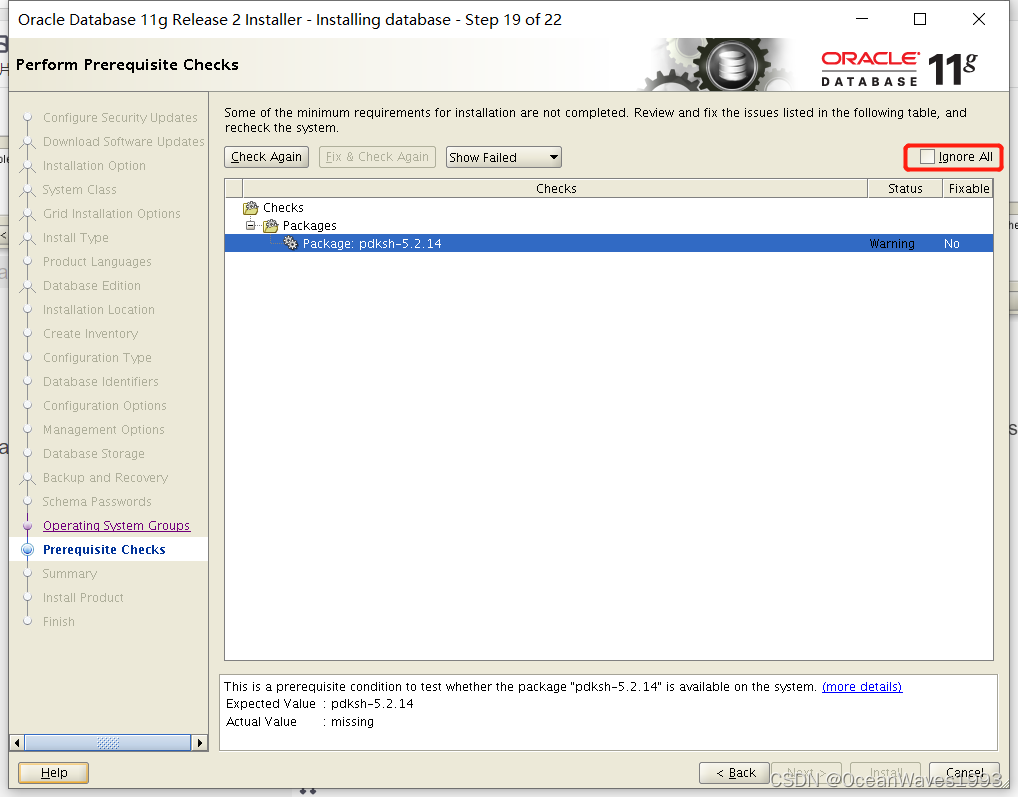
3.2.2、先决条件检查报错
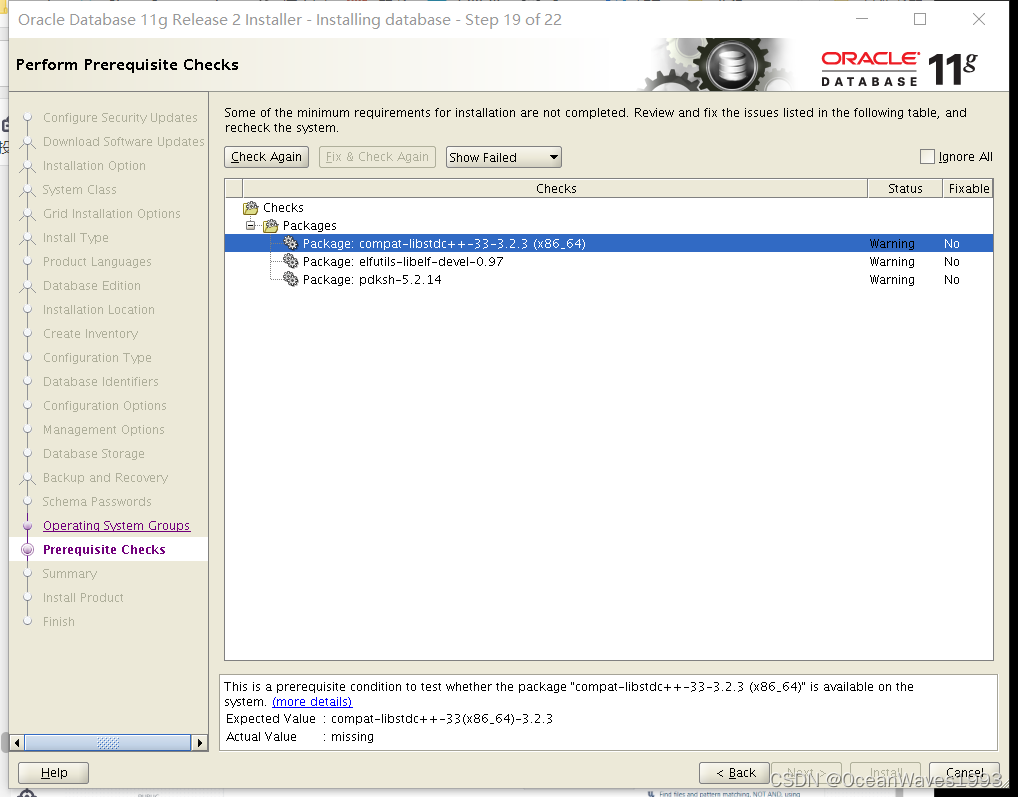
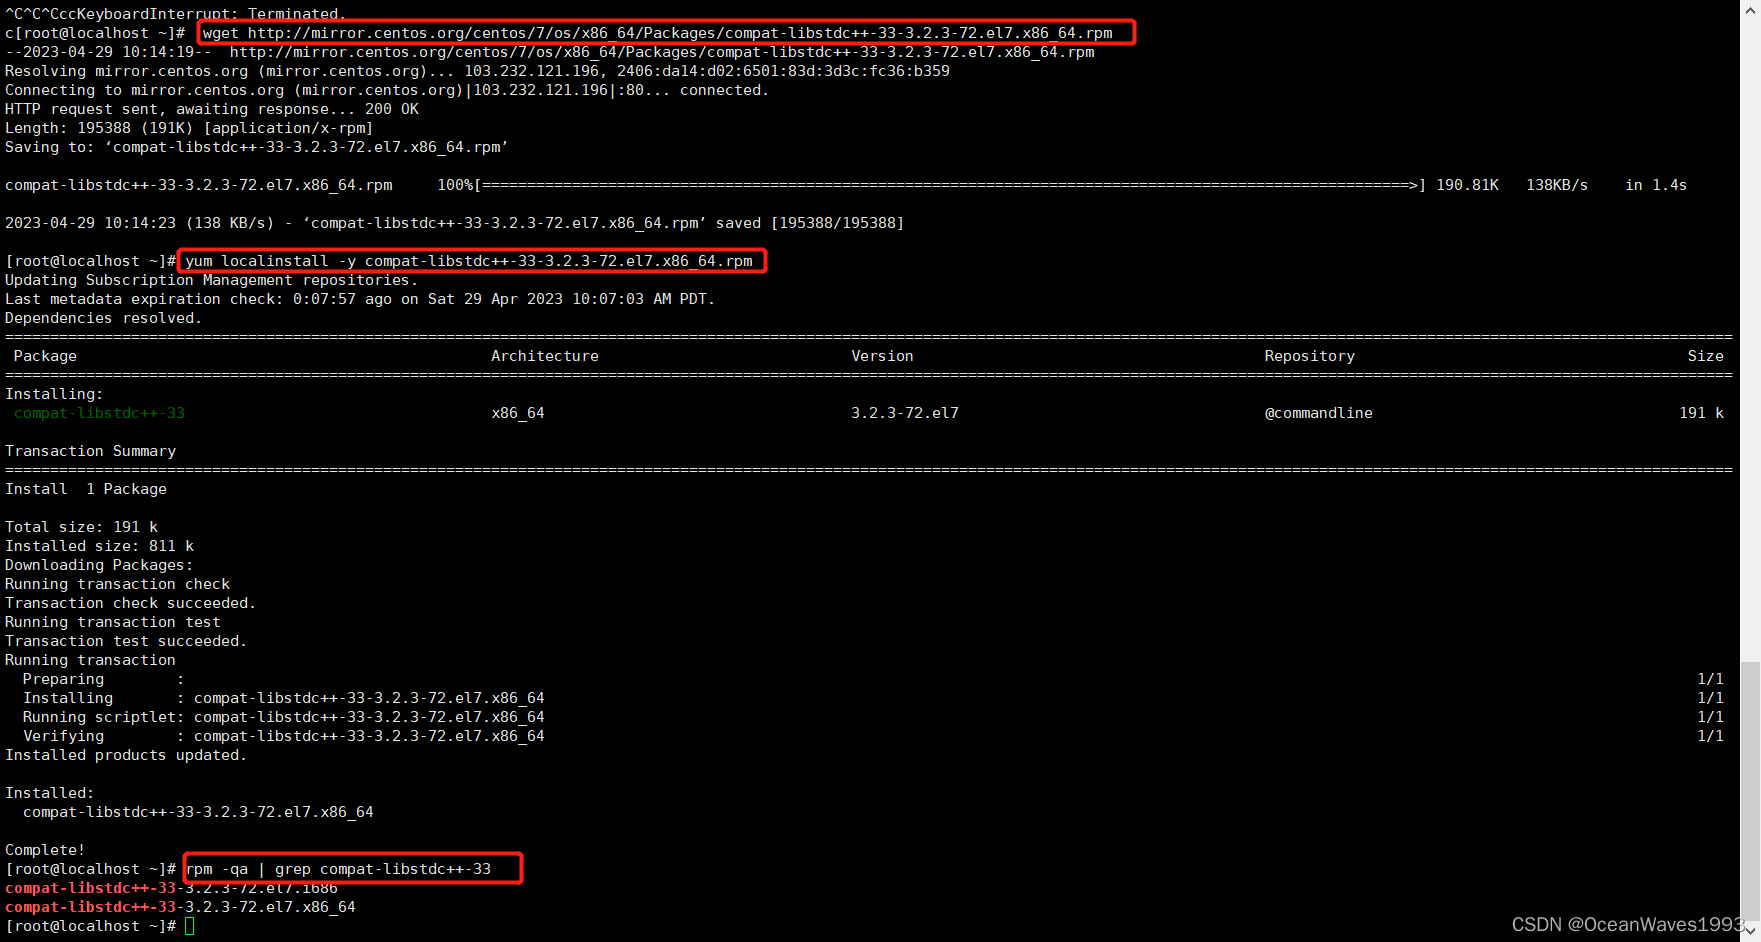
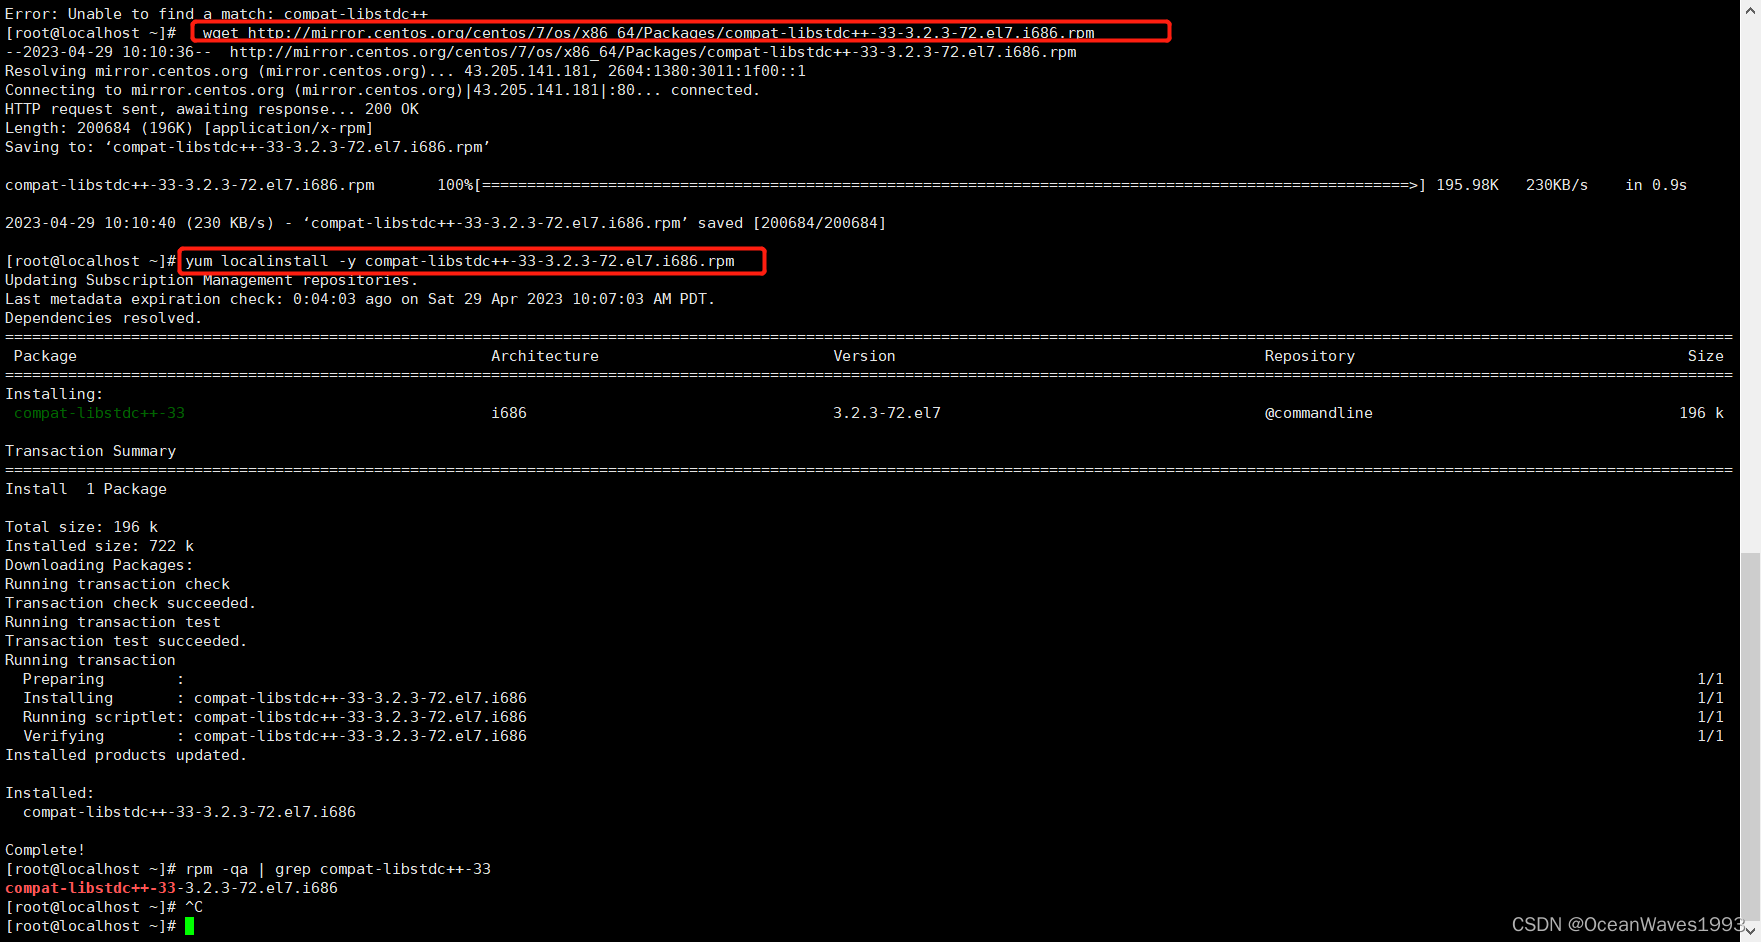
3.2.2.1、安装compat-libstdc+±33-3.2.3
wget http://mirror.centos.org/centos/7/os/x86_64/Packages/compat-libstdc++-33-3.2.3-72.el7.x86_64.rpm
yum localinstall -y compat-libstdc++-33-3.2.3-72.el7.x86_64.rpm
rpm -qa | grep compat-libstdc++-33
参考:https://www.ibm.com/support/pages/ibm-watson-explorer-how-install-red-hat-enterprise-linux%C2%AE-8
3.2.2.2、安装 elfutils-libelf-devel
yum -y install elfutils-libelf-devel
再次检查
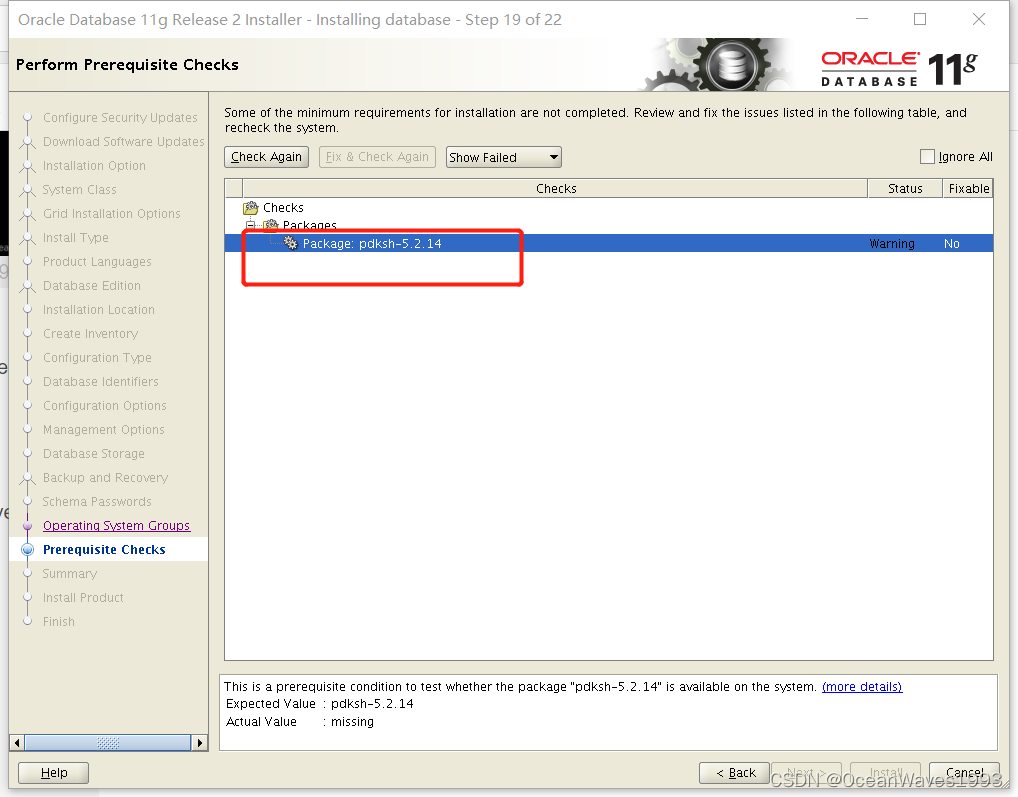
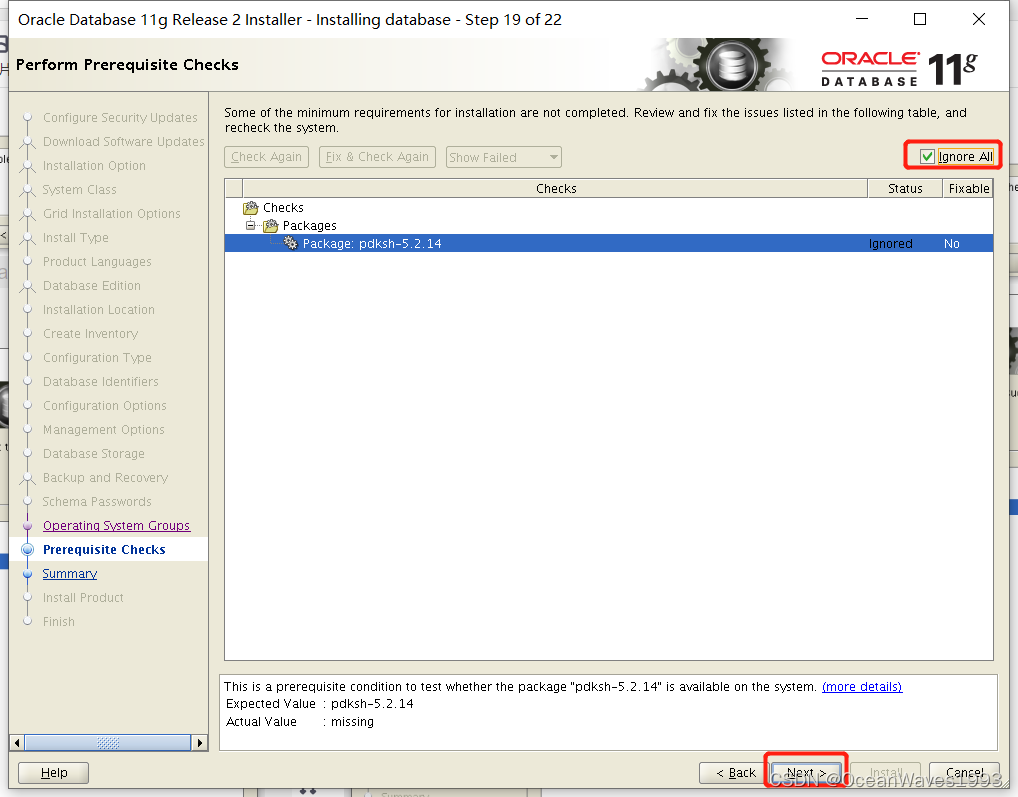
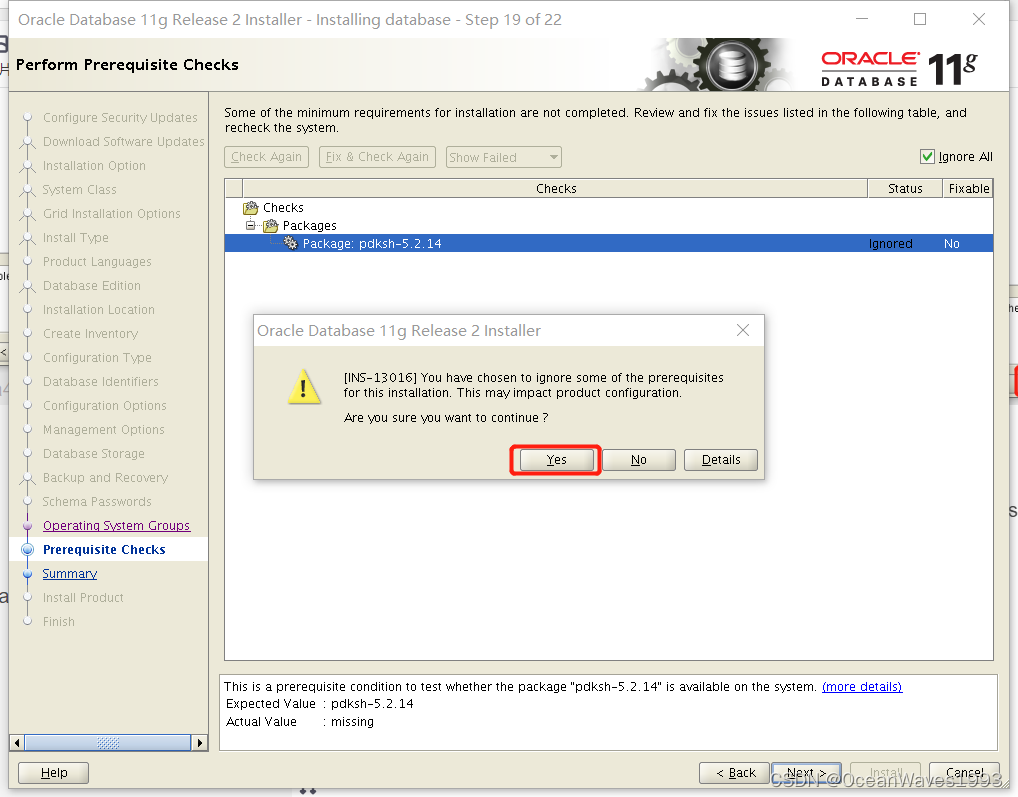
3.2.2.3、pkksh可以忽略
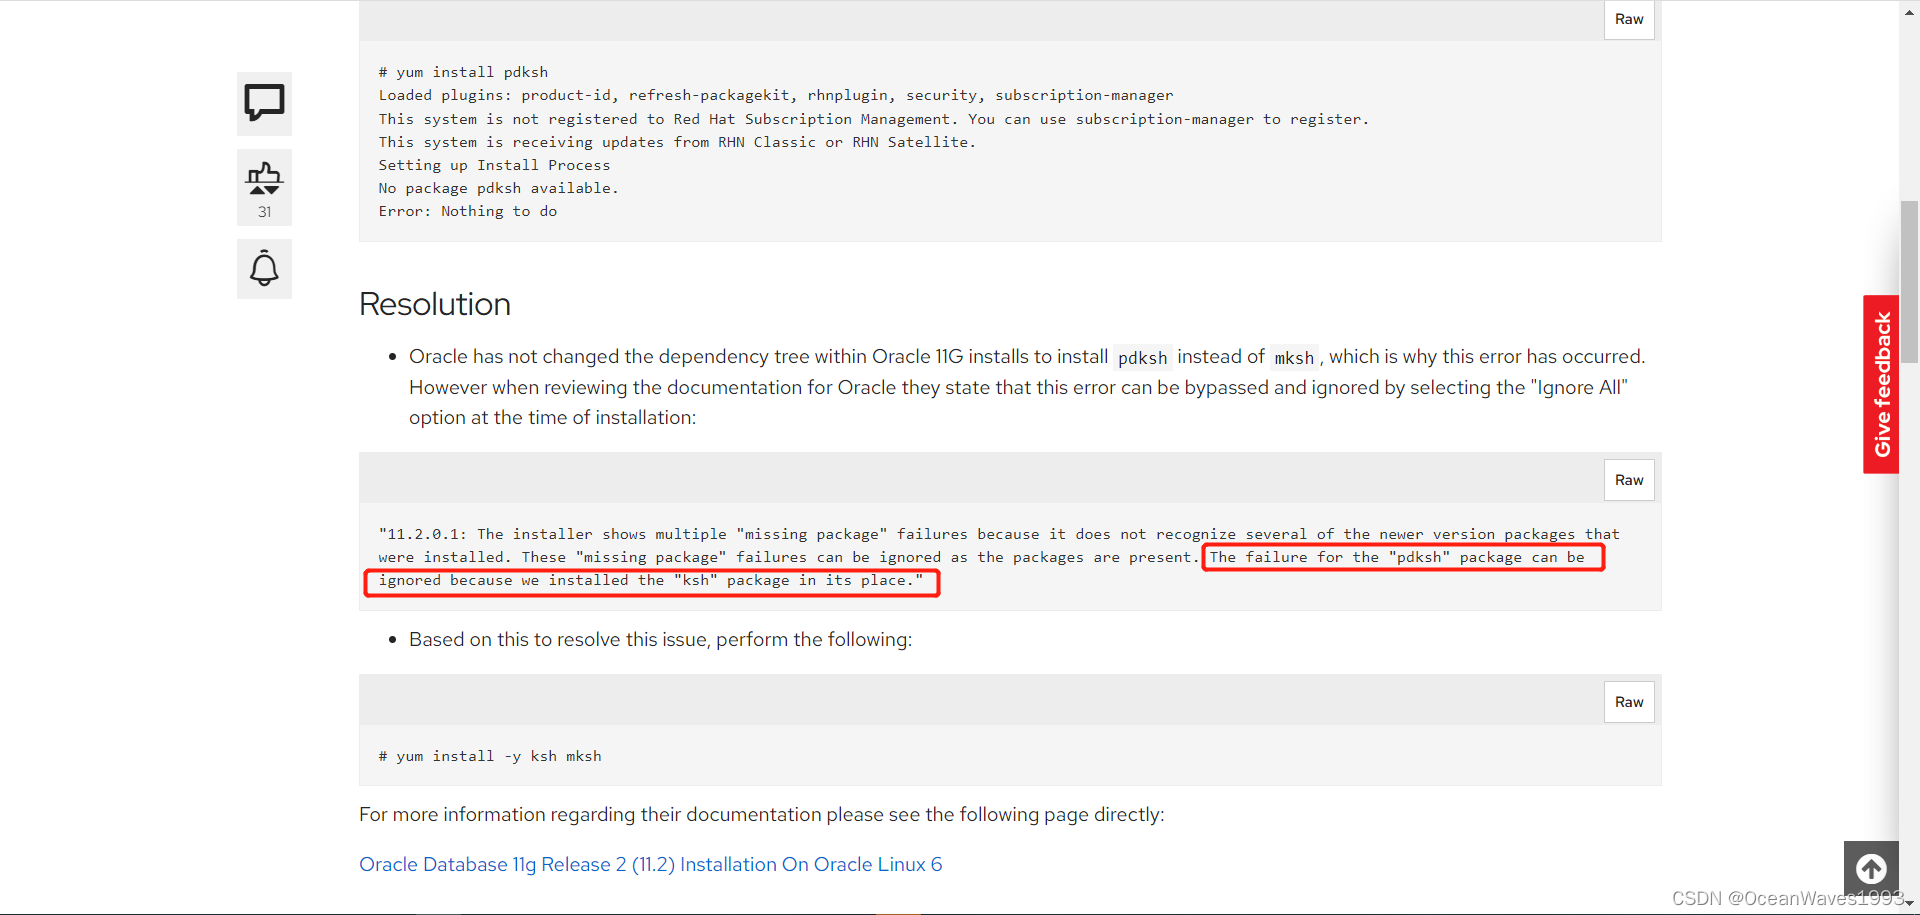
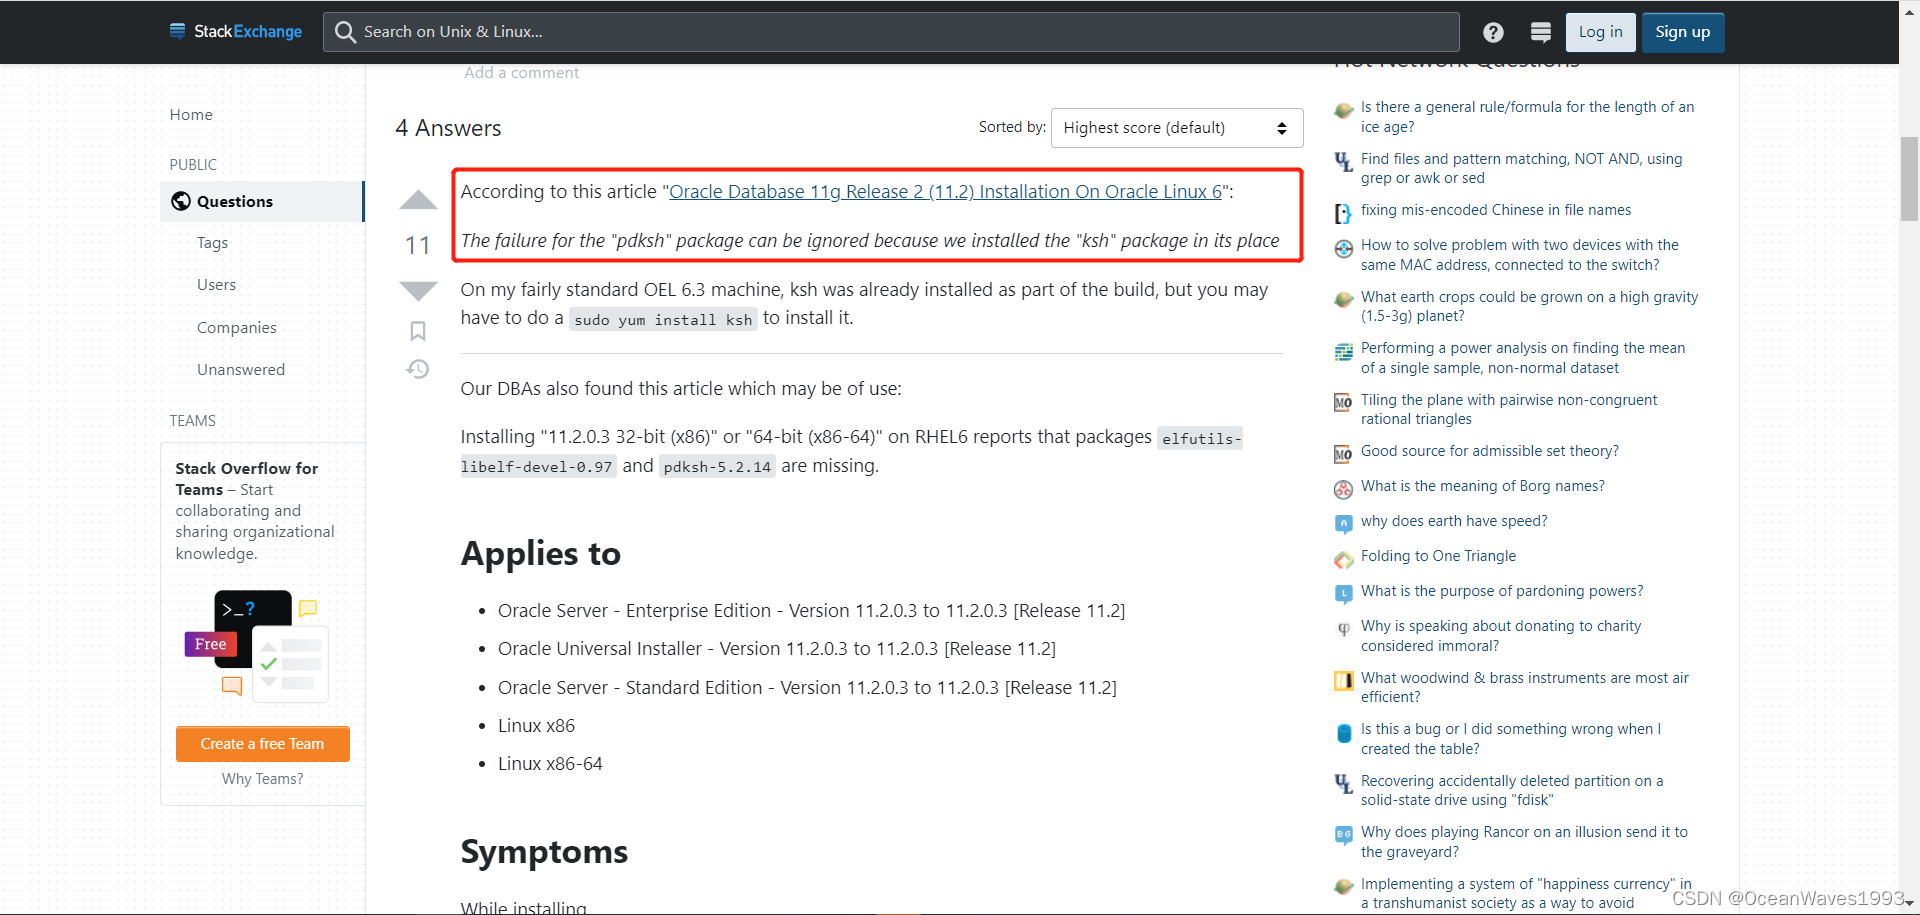
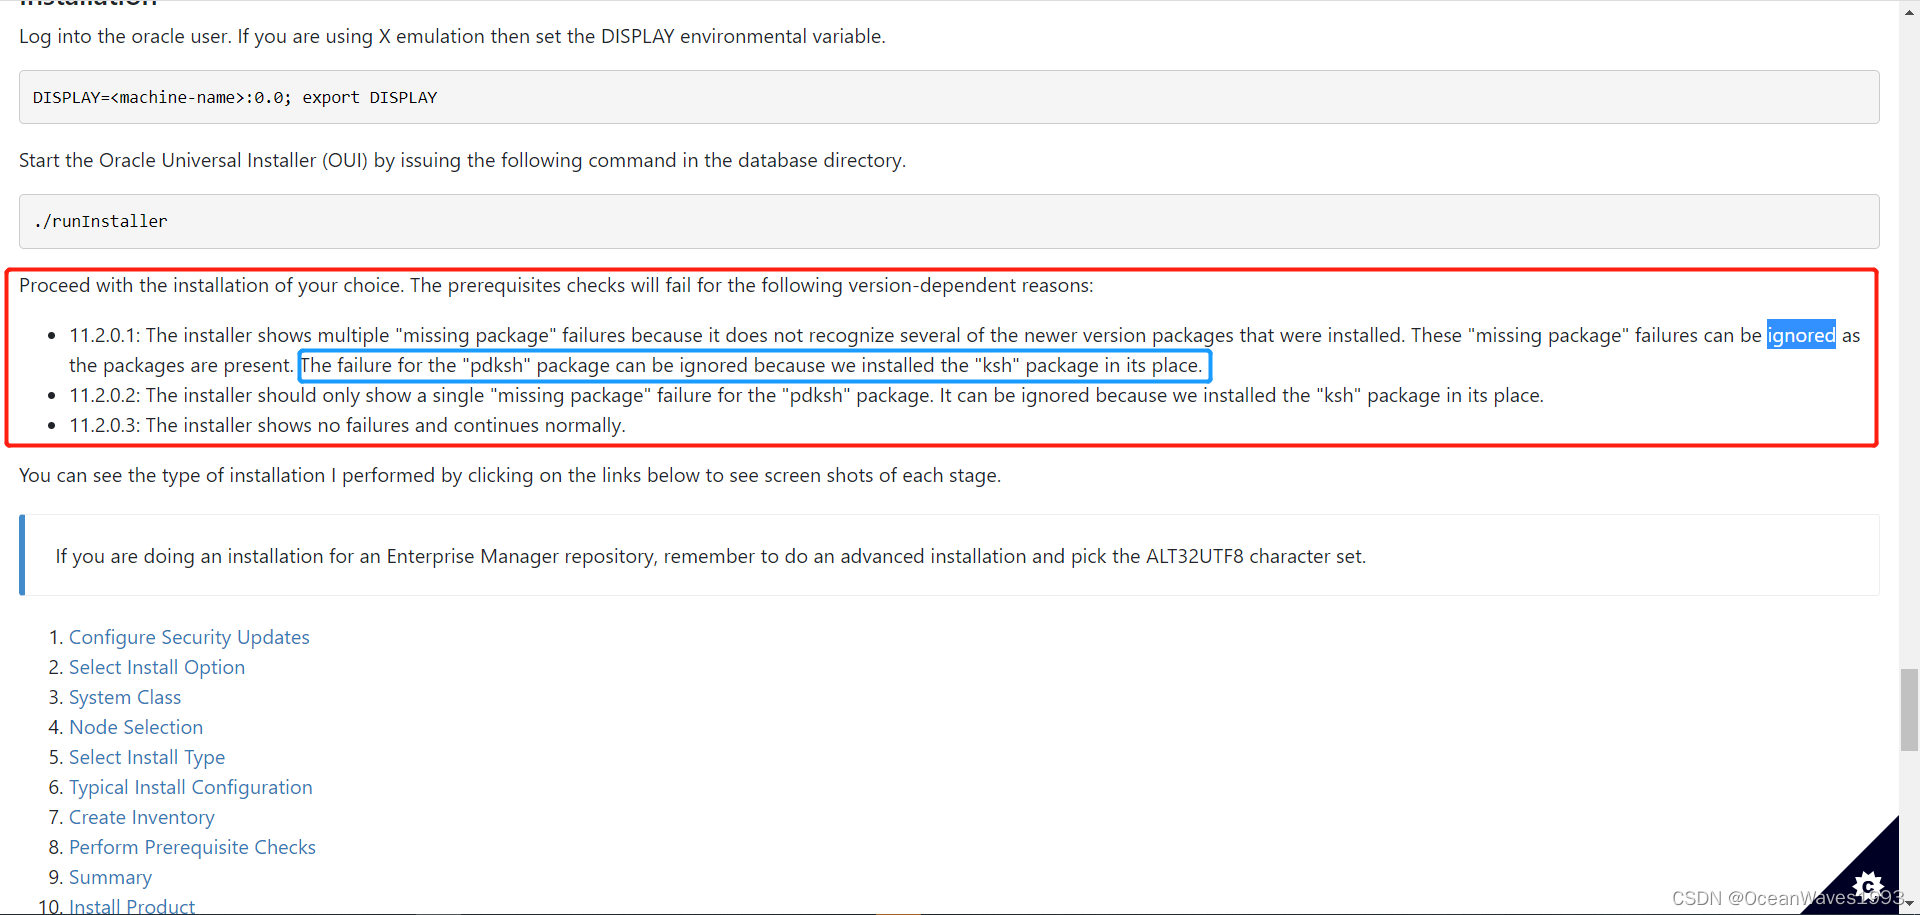
参考链接: https://unix.stackexchange.com/questions/29554/pdksh-missing-from-rhel-6-and-centos-6
参考链接:https://oracle-base.com/articles/11g/oracle-db-11gr2-installation-on-oracle-linux-6
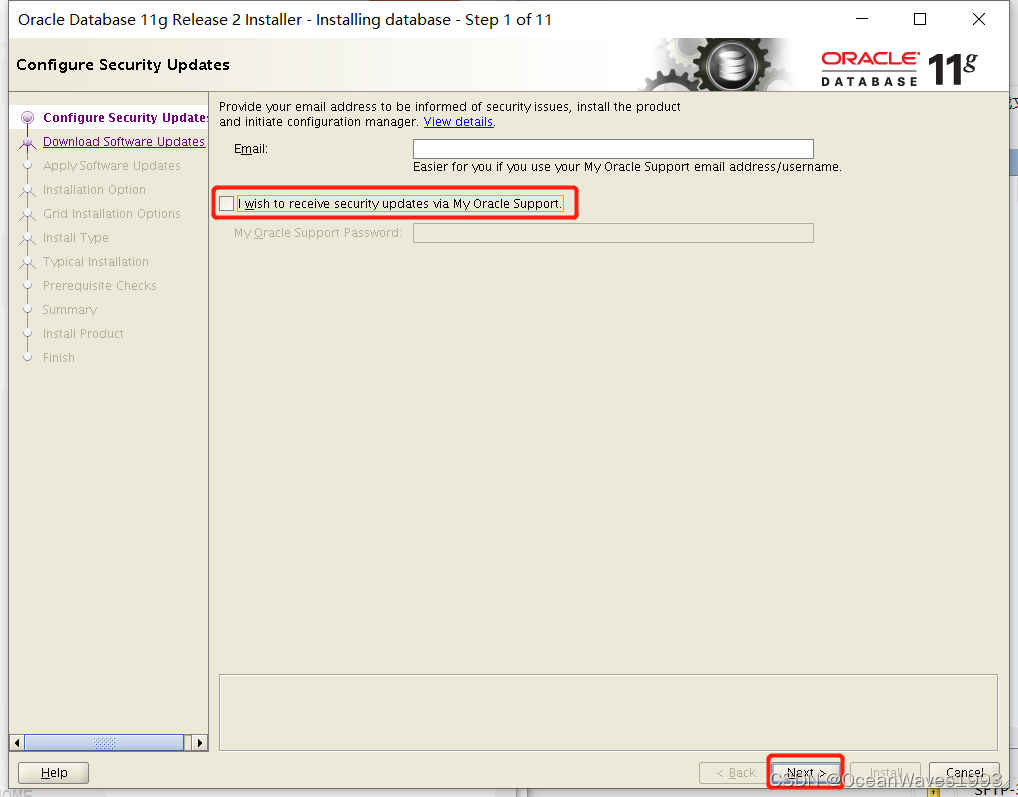
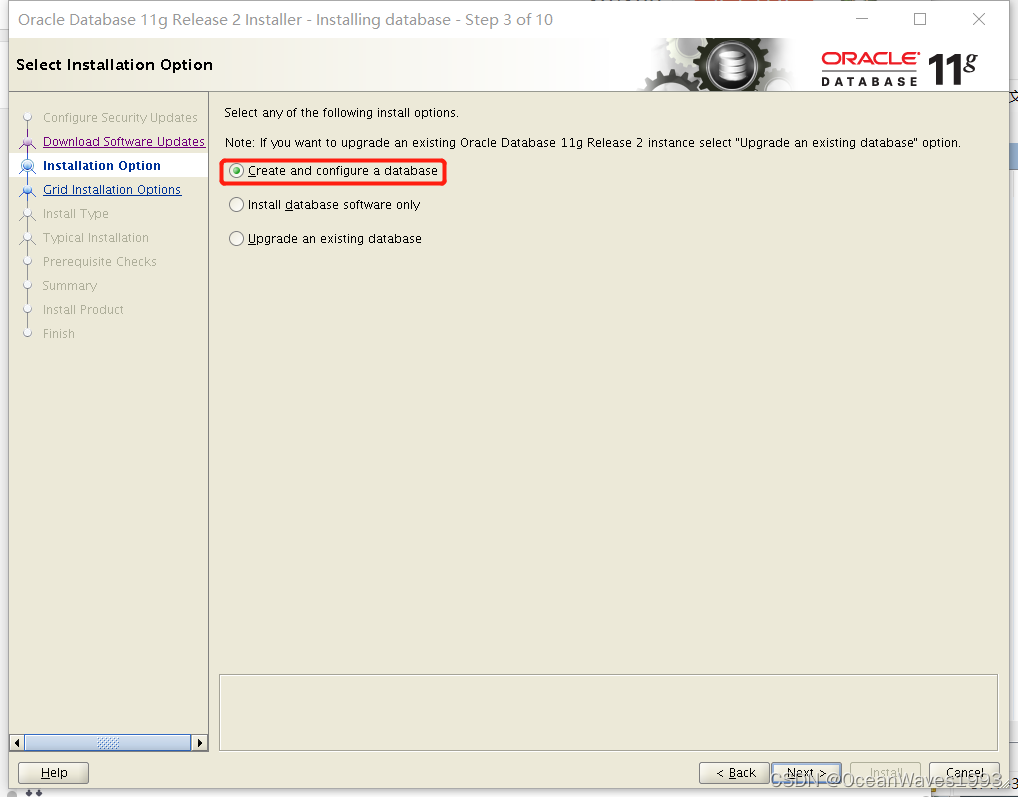
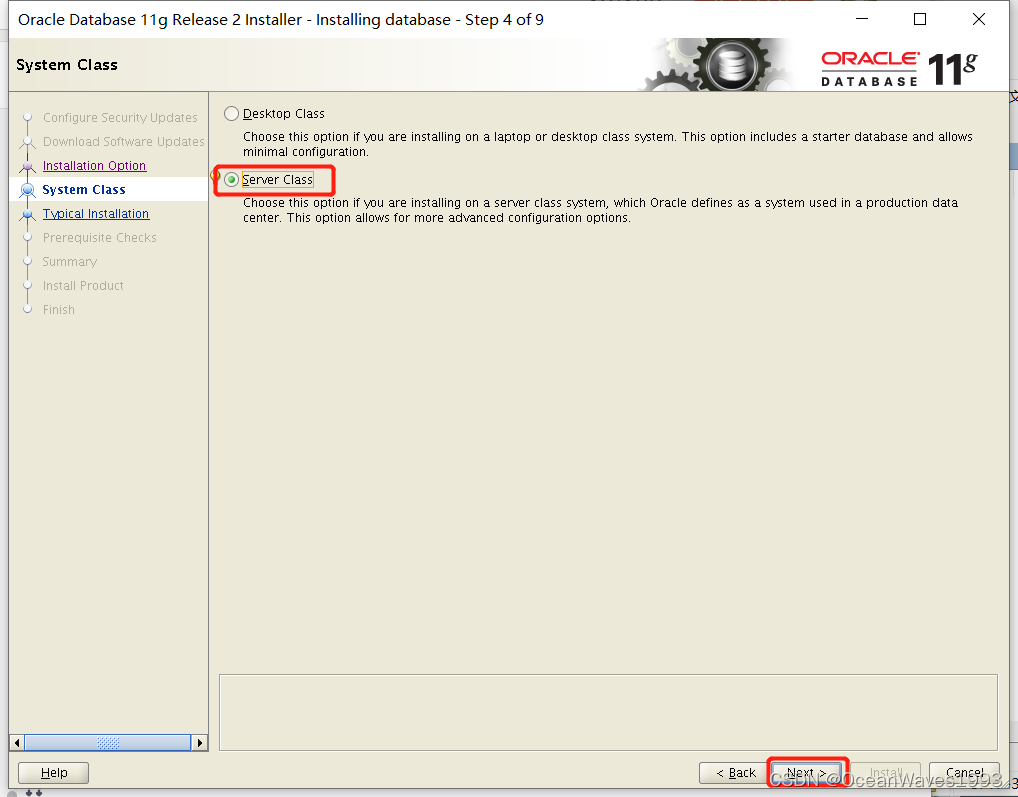
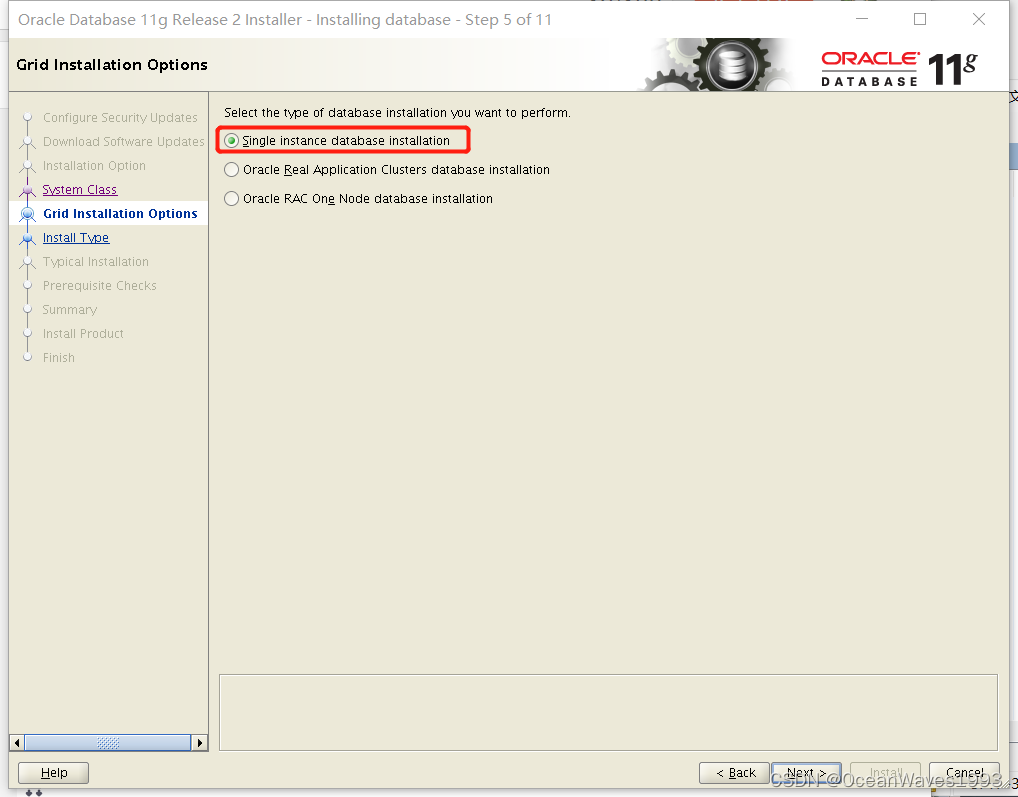
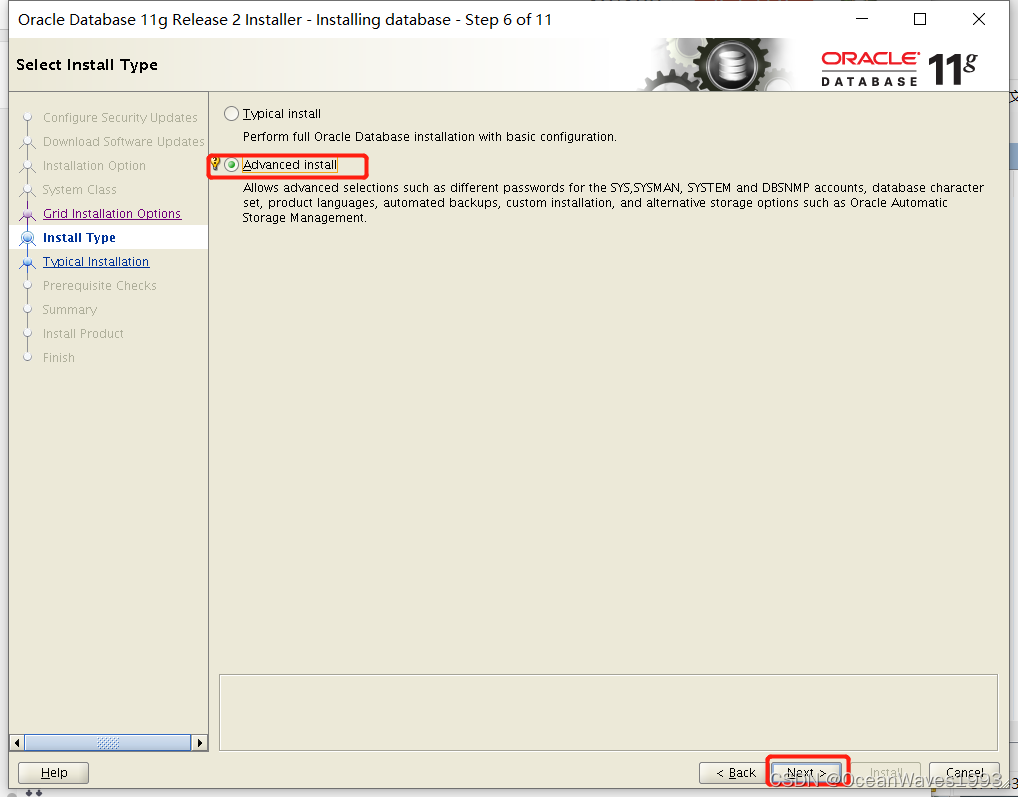
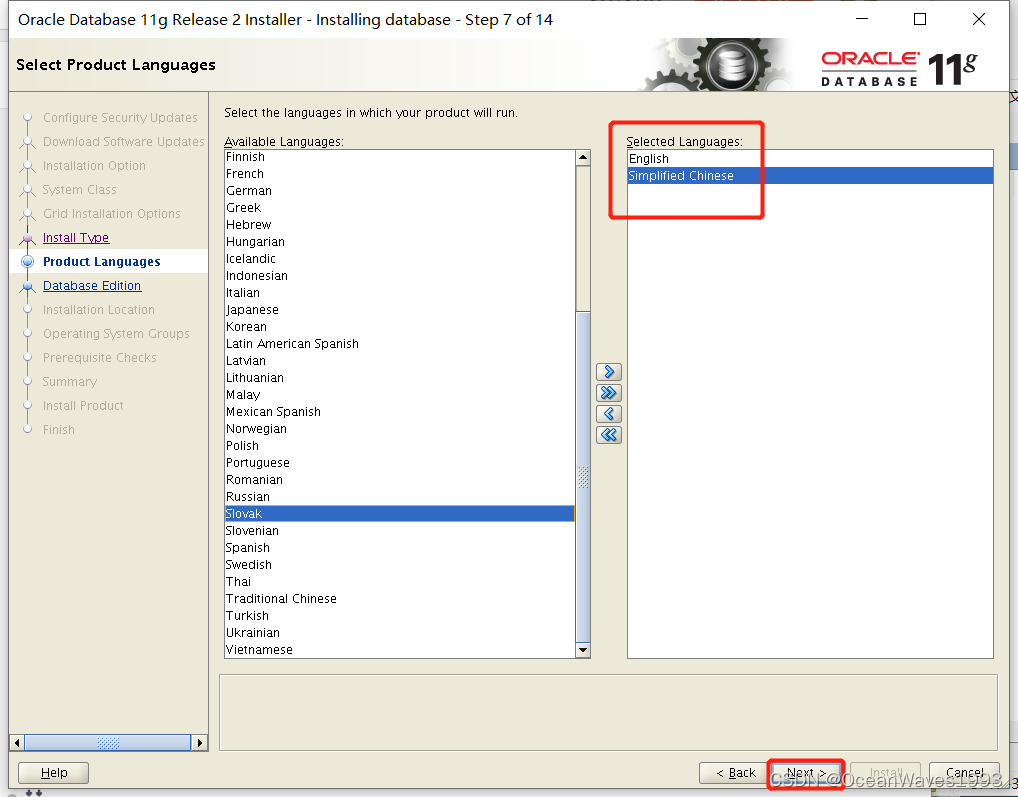
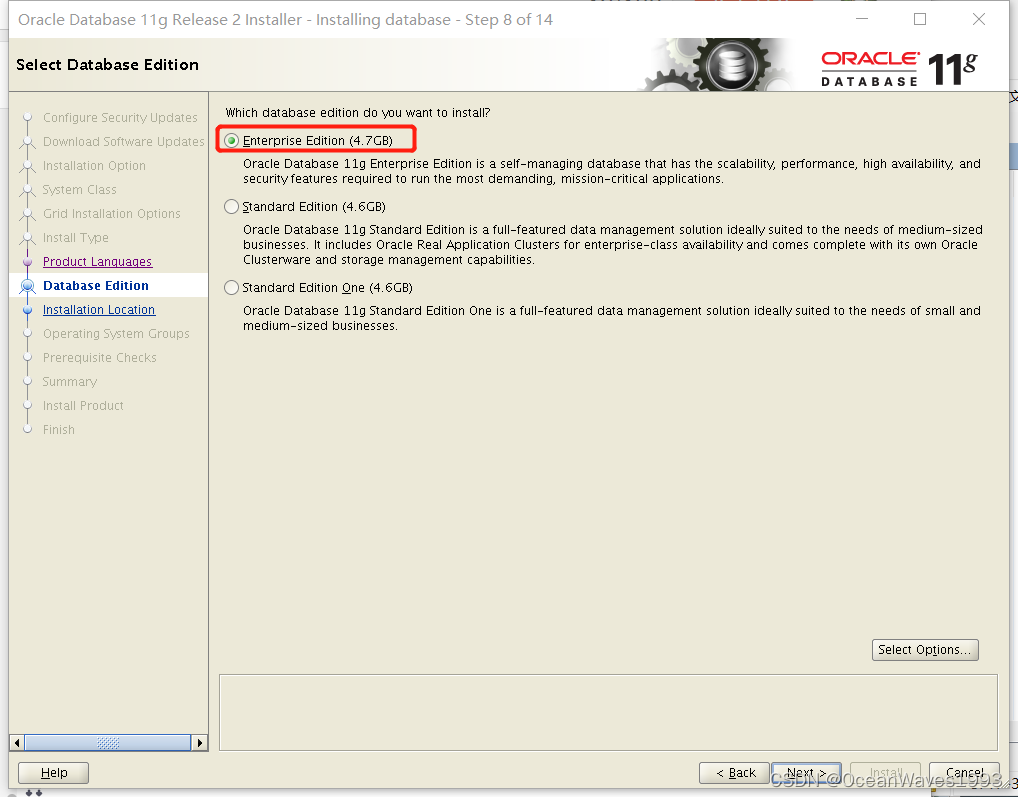
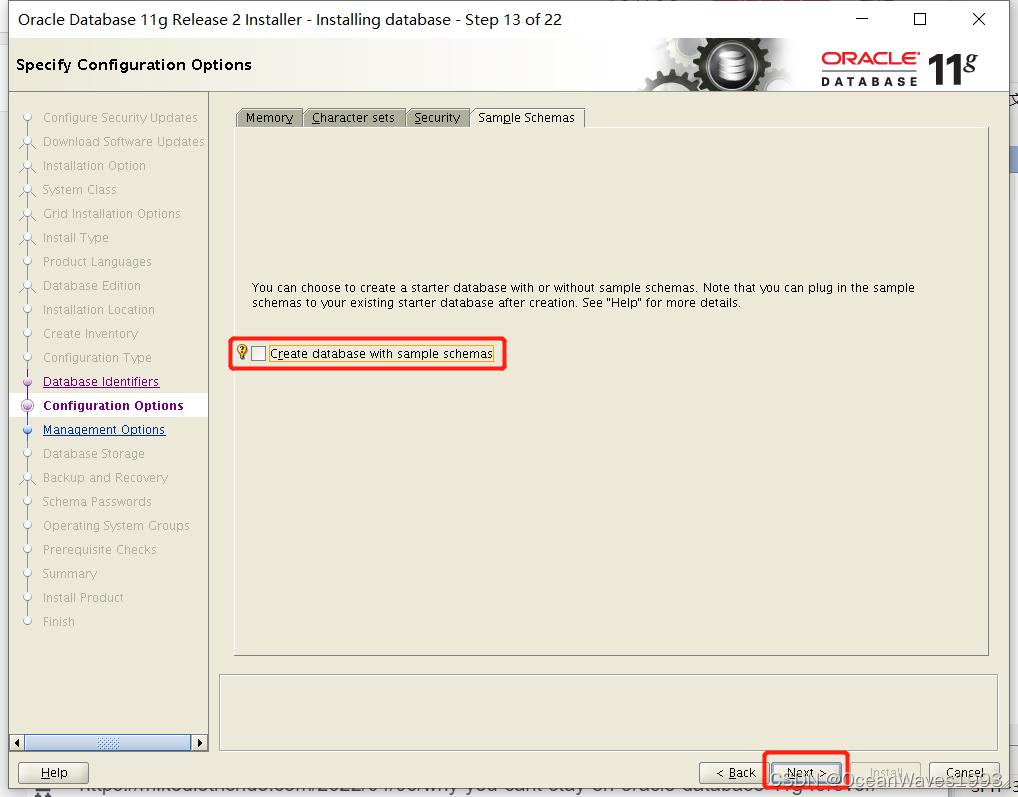
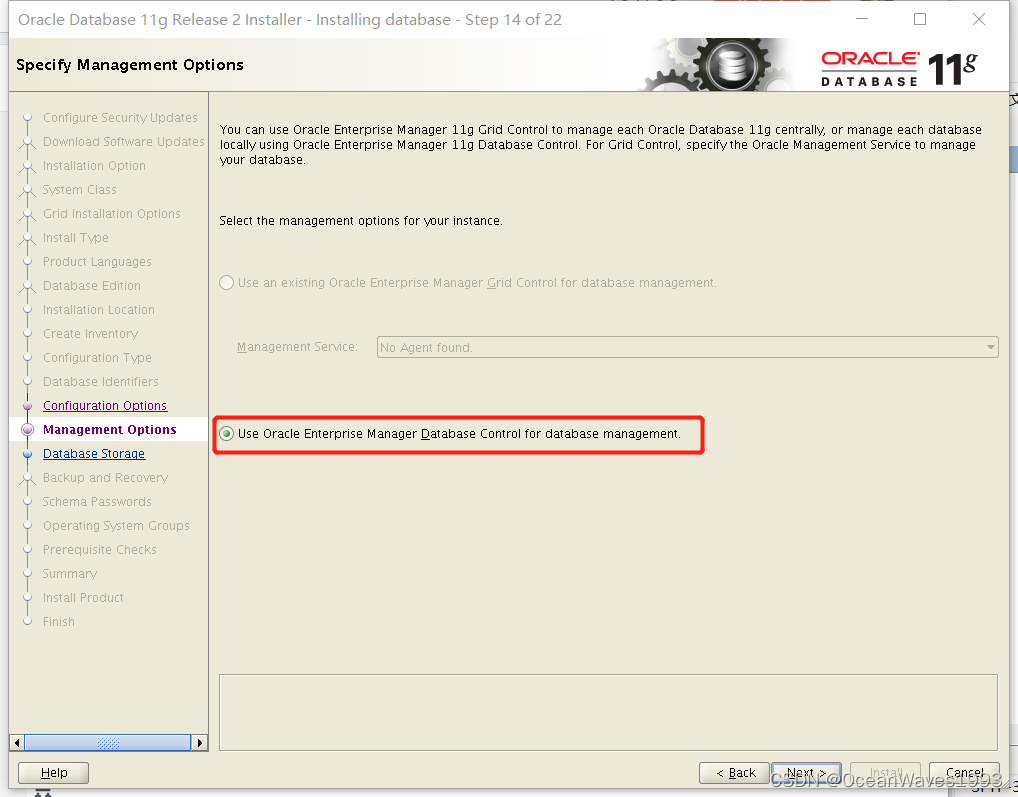
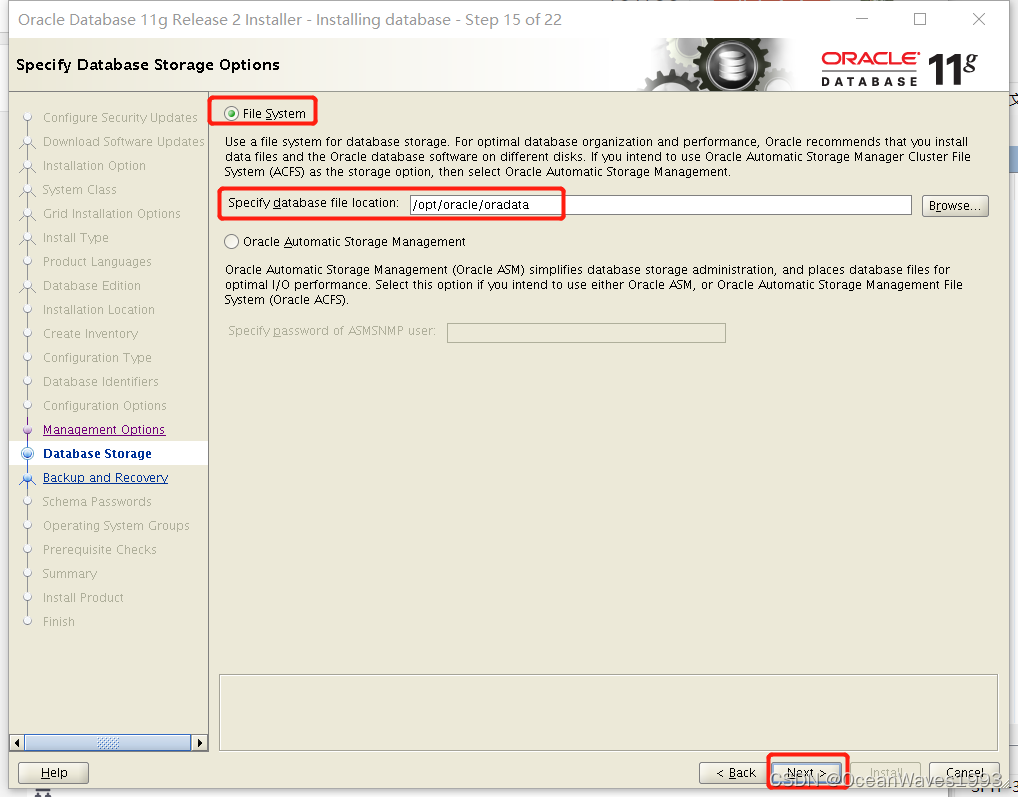
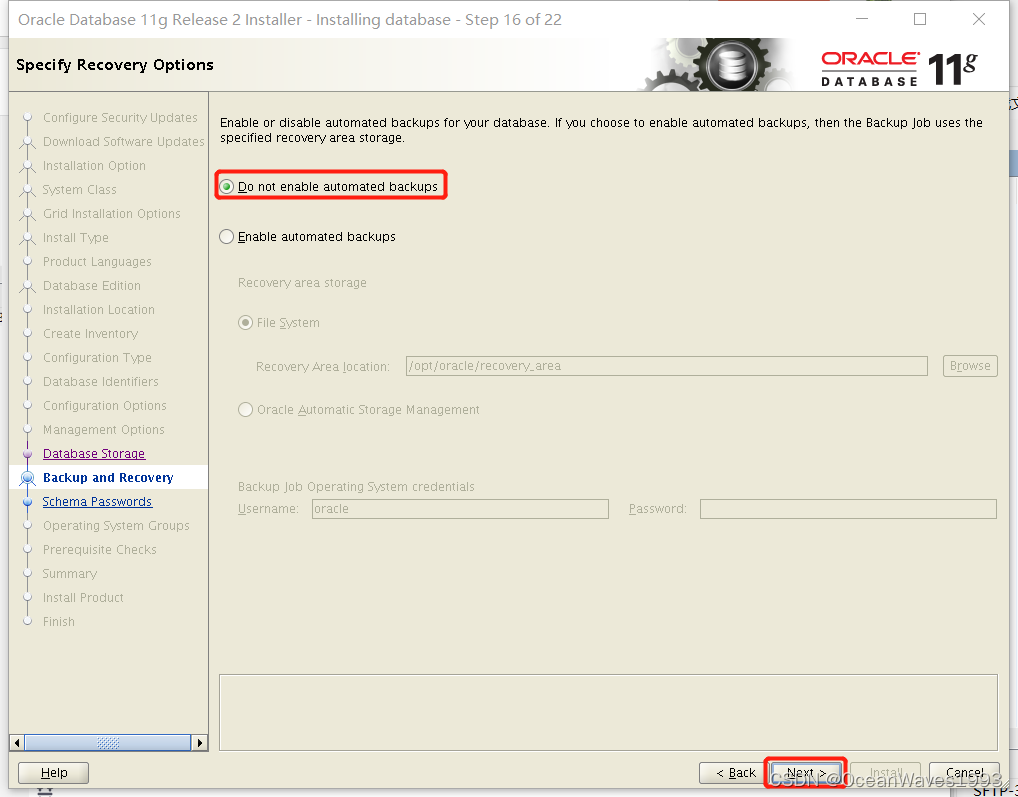
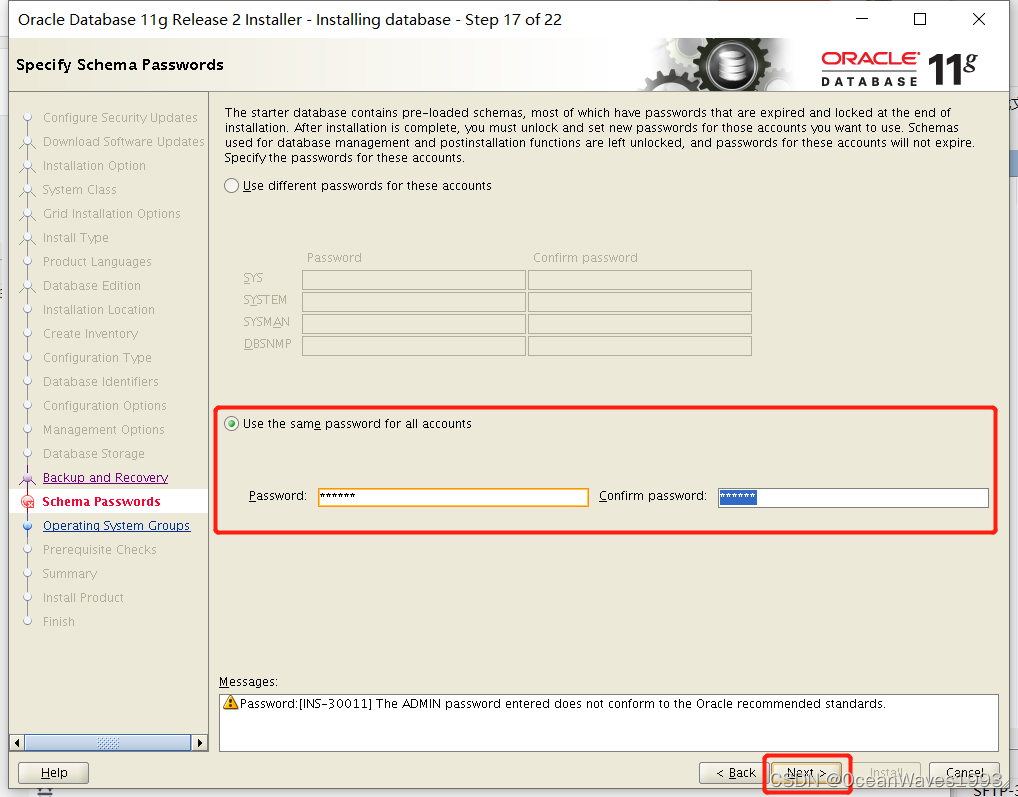
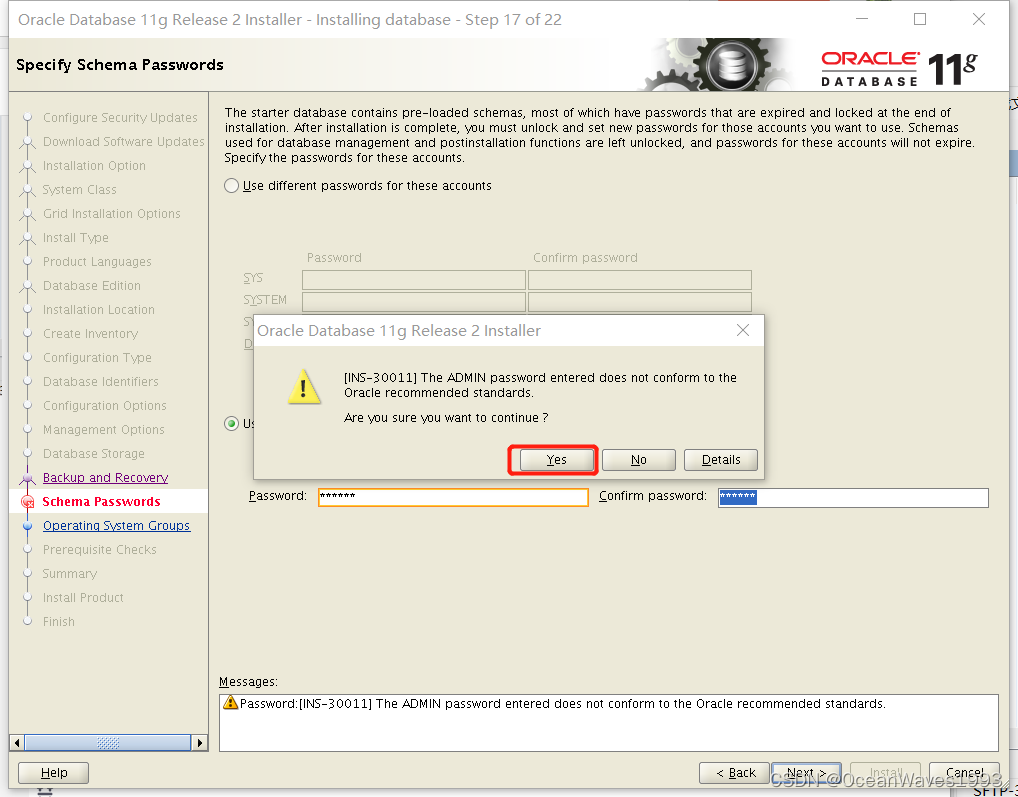
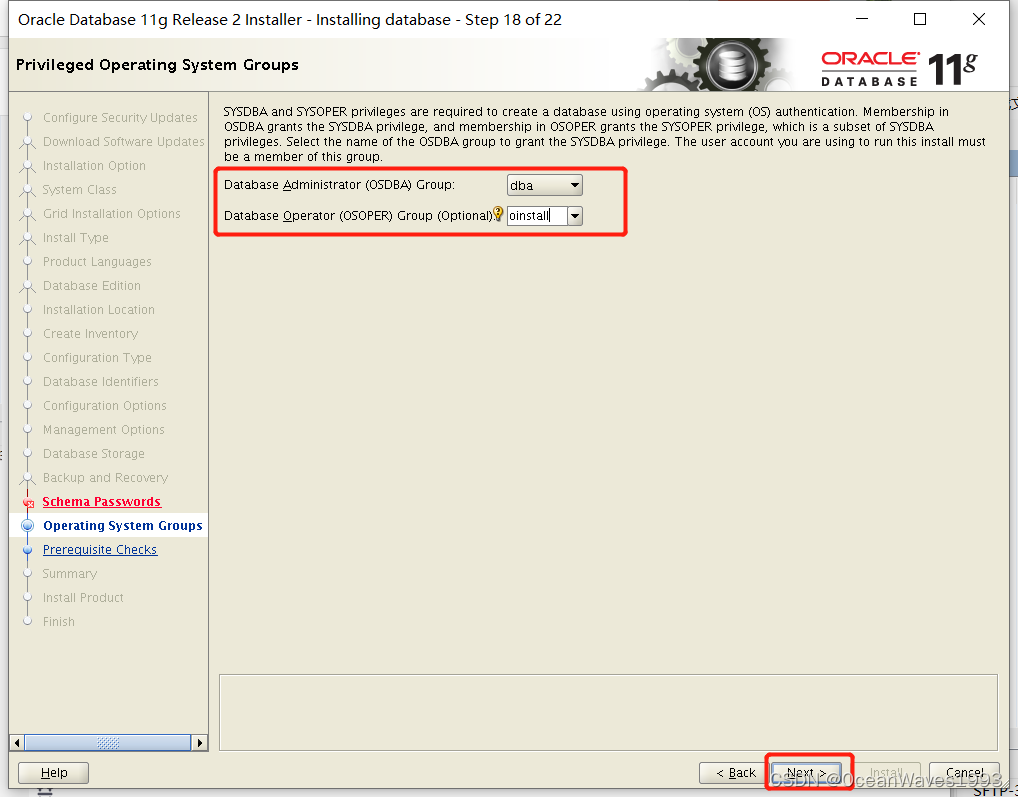
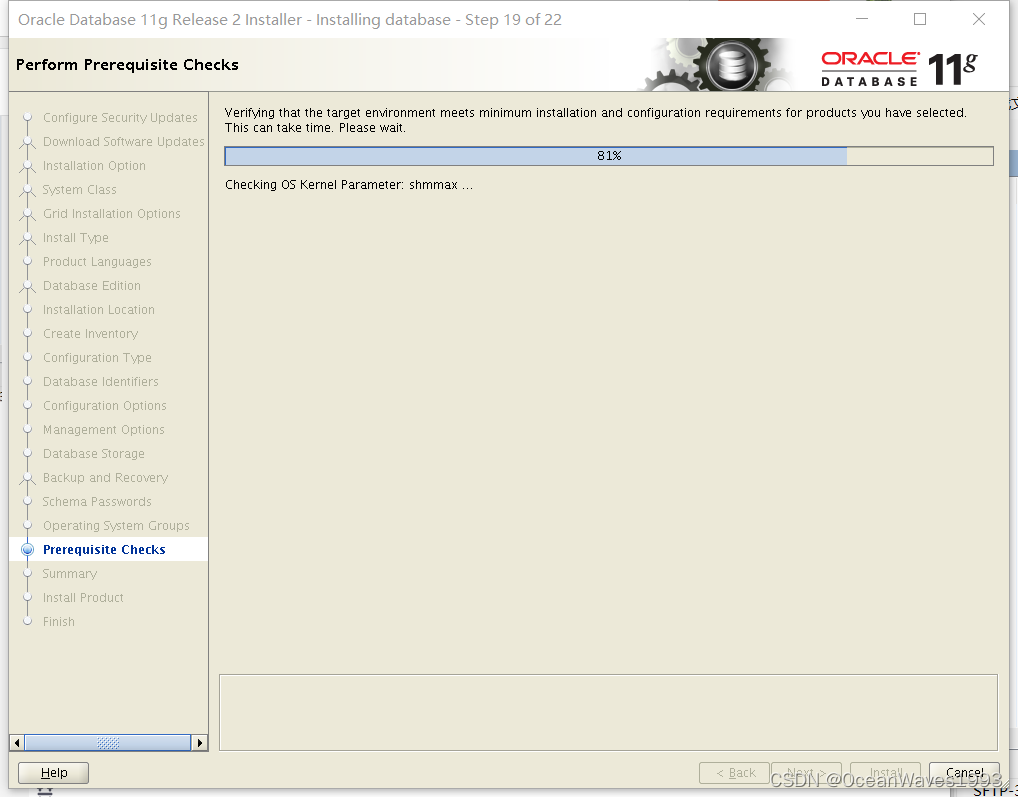
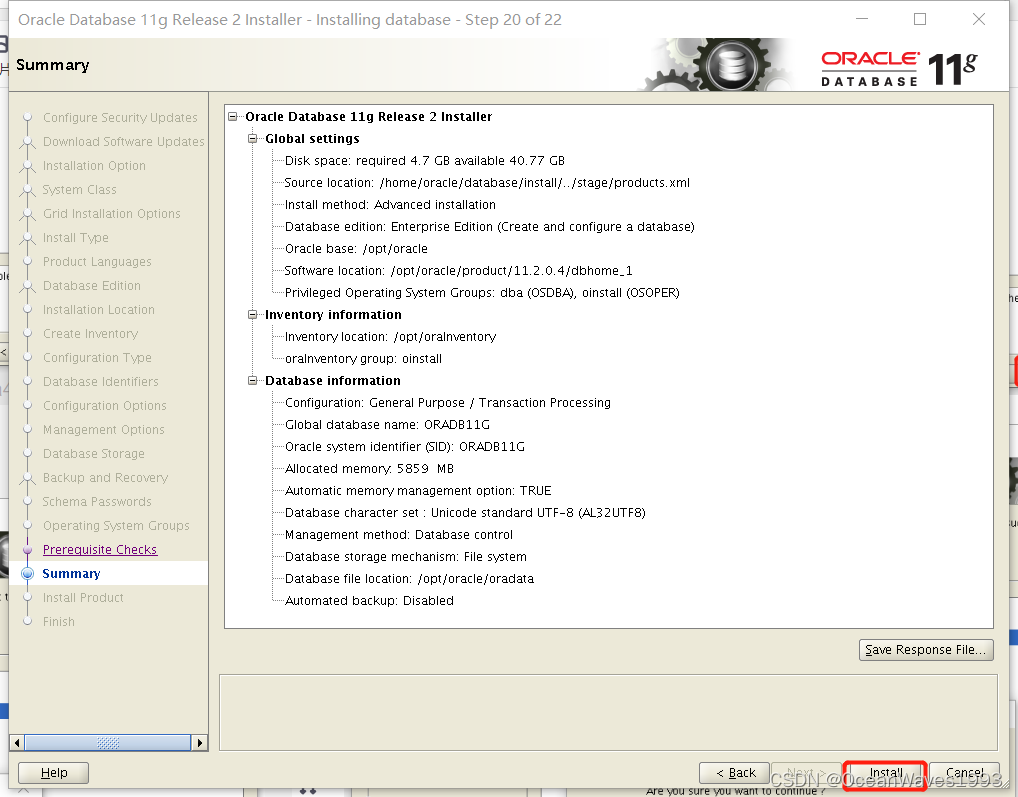
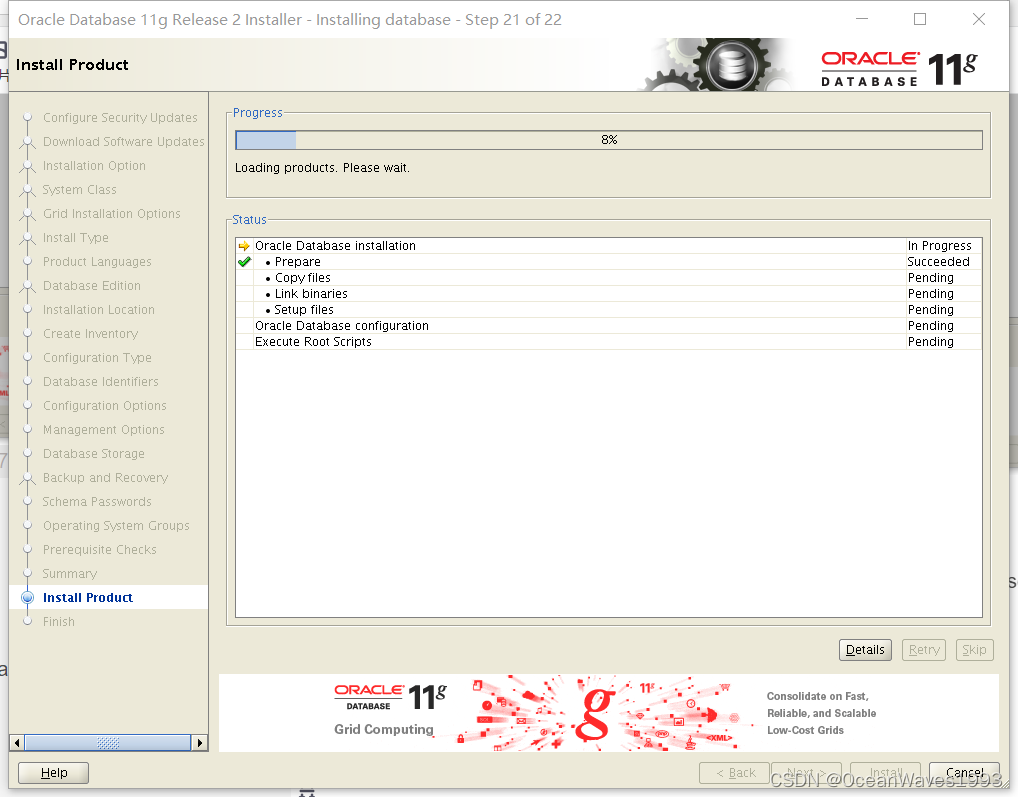
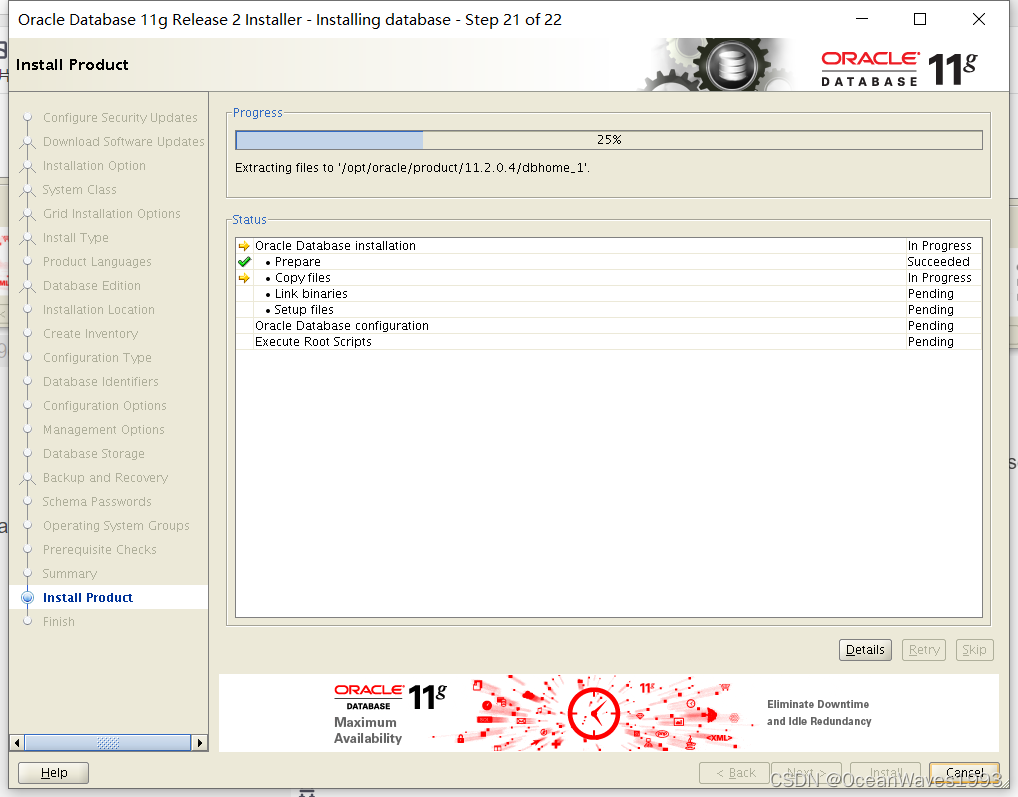
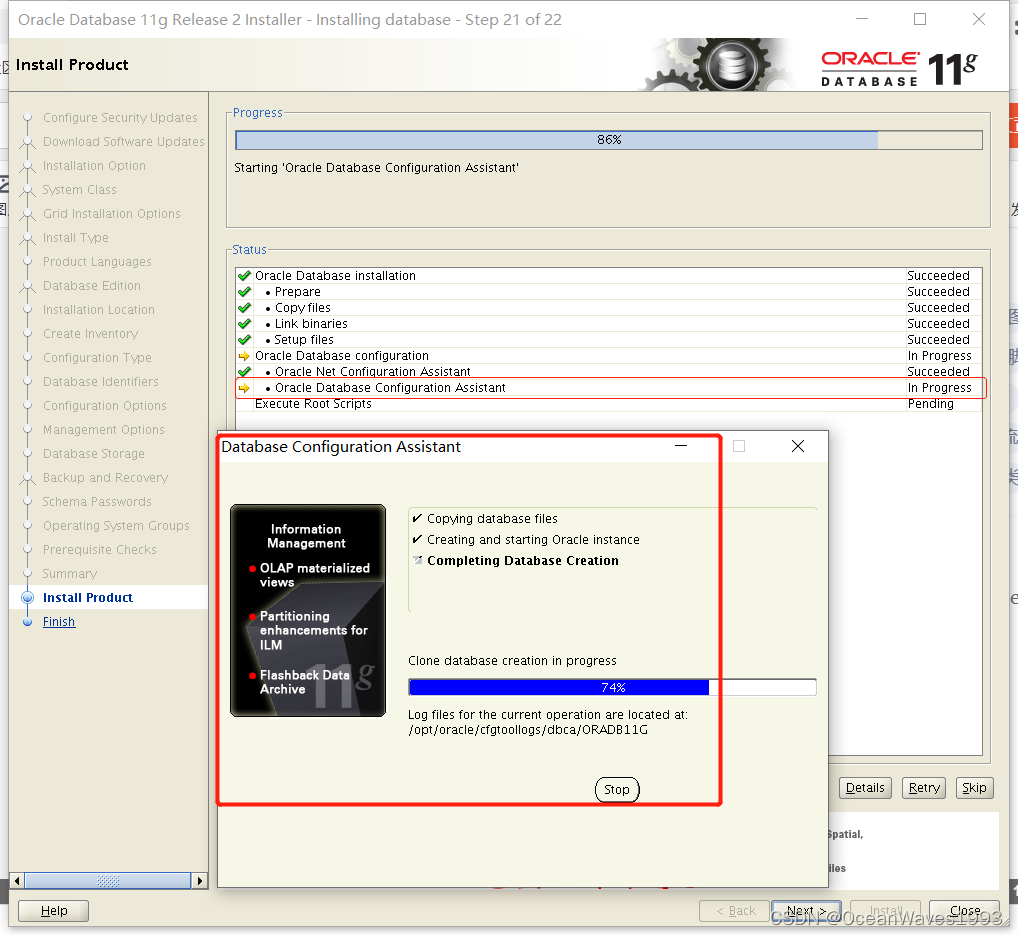
3.2.3、开始安装
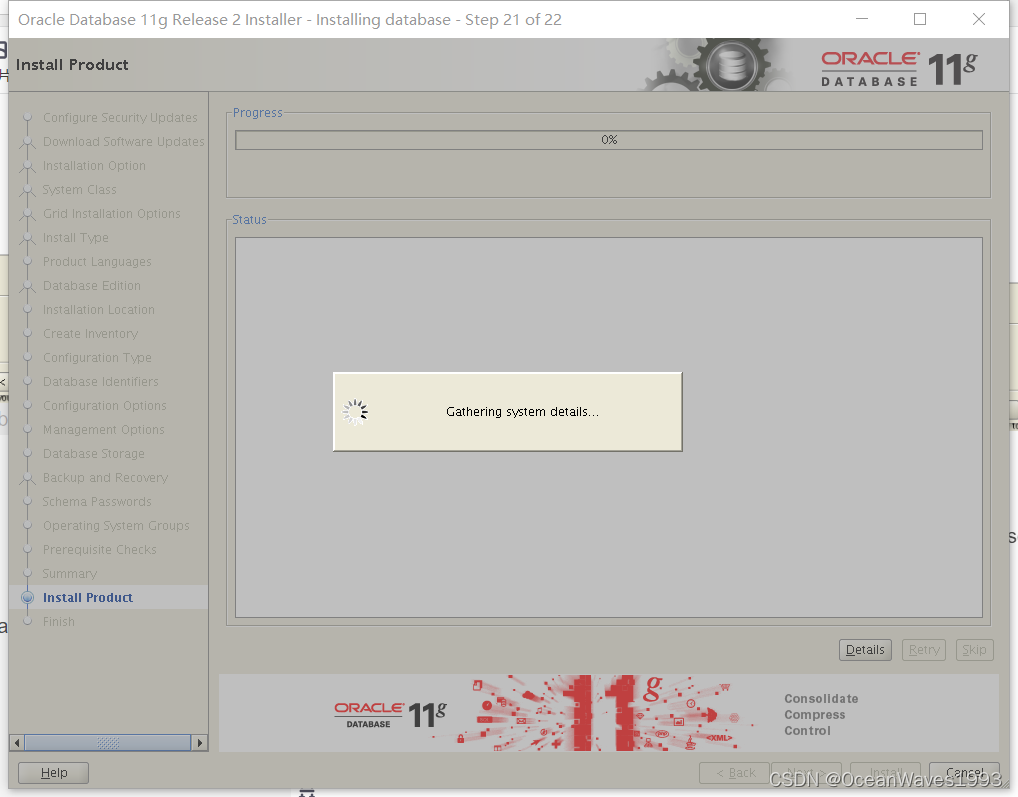
3.2.4、等待安装完成
3.2.4.1、报错 Error in invoking target ‘agent nmhs’ of makefile
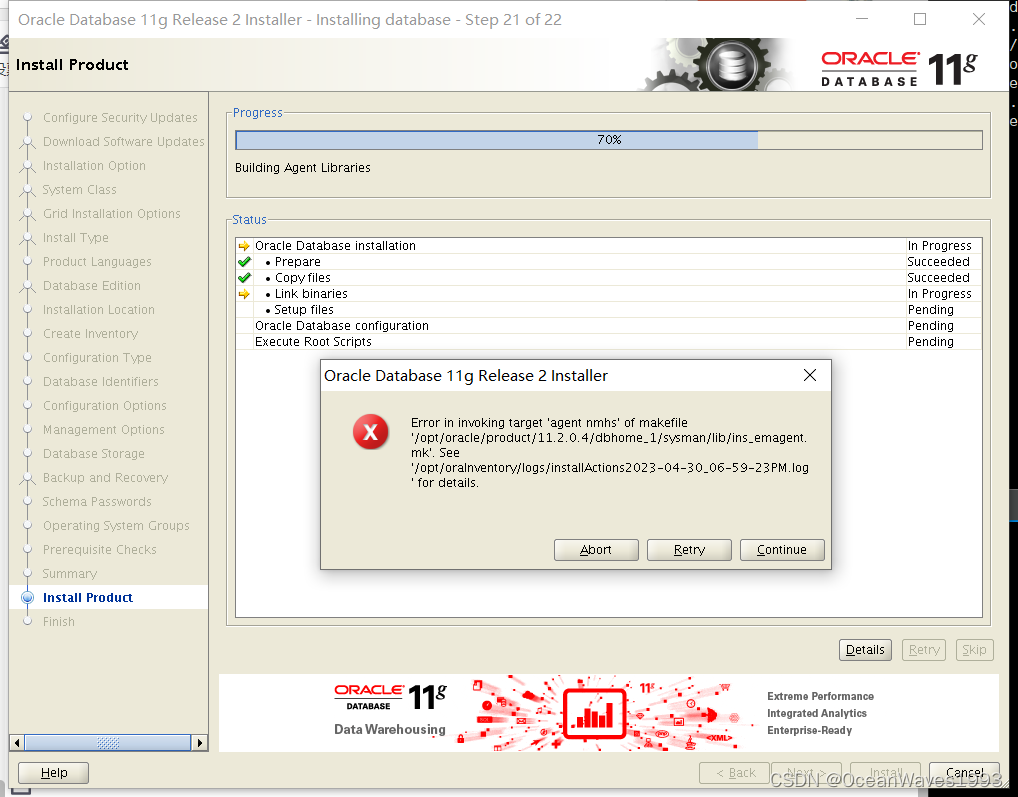
cp /opt/oracle/product/11.2.0.4/dbhome_1/sysman/lib/ins_emagent.mk /opt/oracle/product/11.2.0.4/dbhome_1/sysman/lib/ins_emagent.mk.bak
编辑/opt/oracle/product/11.2.0.4/dbhome_1/sysman/lib/ins_emagent.mk
vi /opt/oracle/product/11.2.0.4/dbhome_1/sysman/lib/ins_emagent.mk
搜索MK_EMAGENT_NMECTL
把 $(MK_EMAGENT_NMECTL) 改为 $(MK_EMAGENT_NMECTL) -lnnz11
在$(MK_EMAGENT_NMECTL) 后面添加 -lnnz11
修改前

修改后

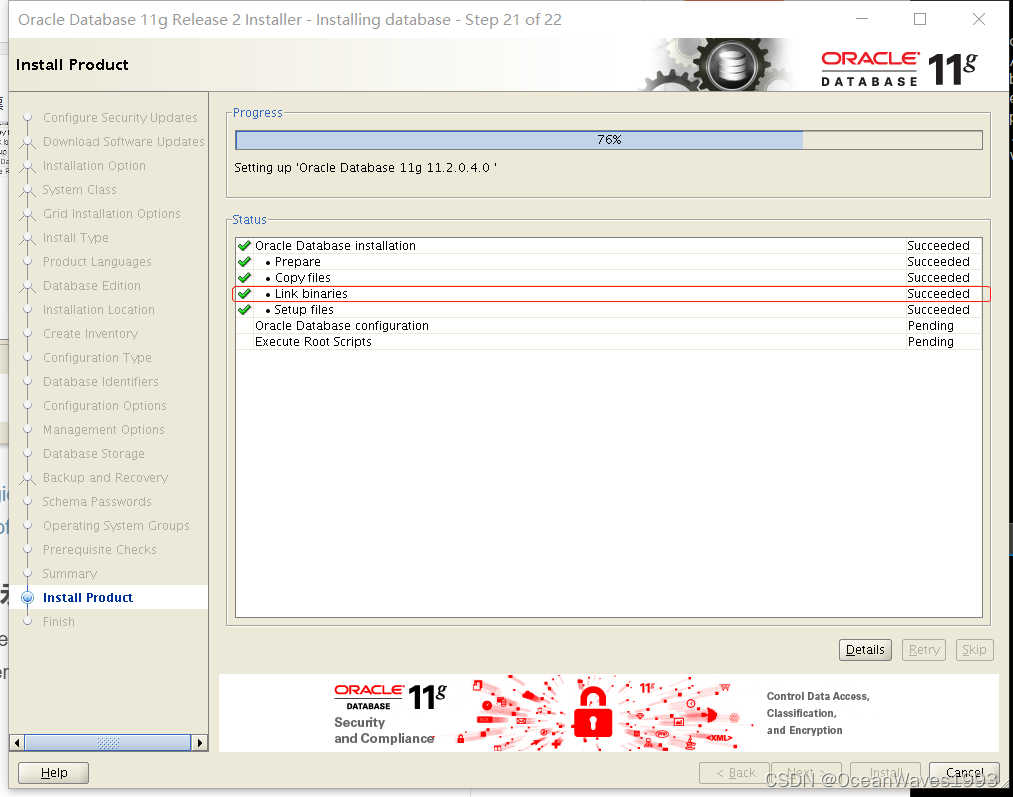
Retry 不再报错
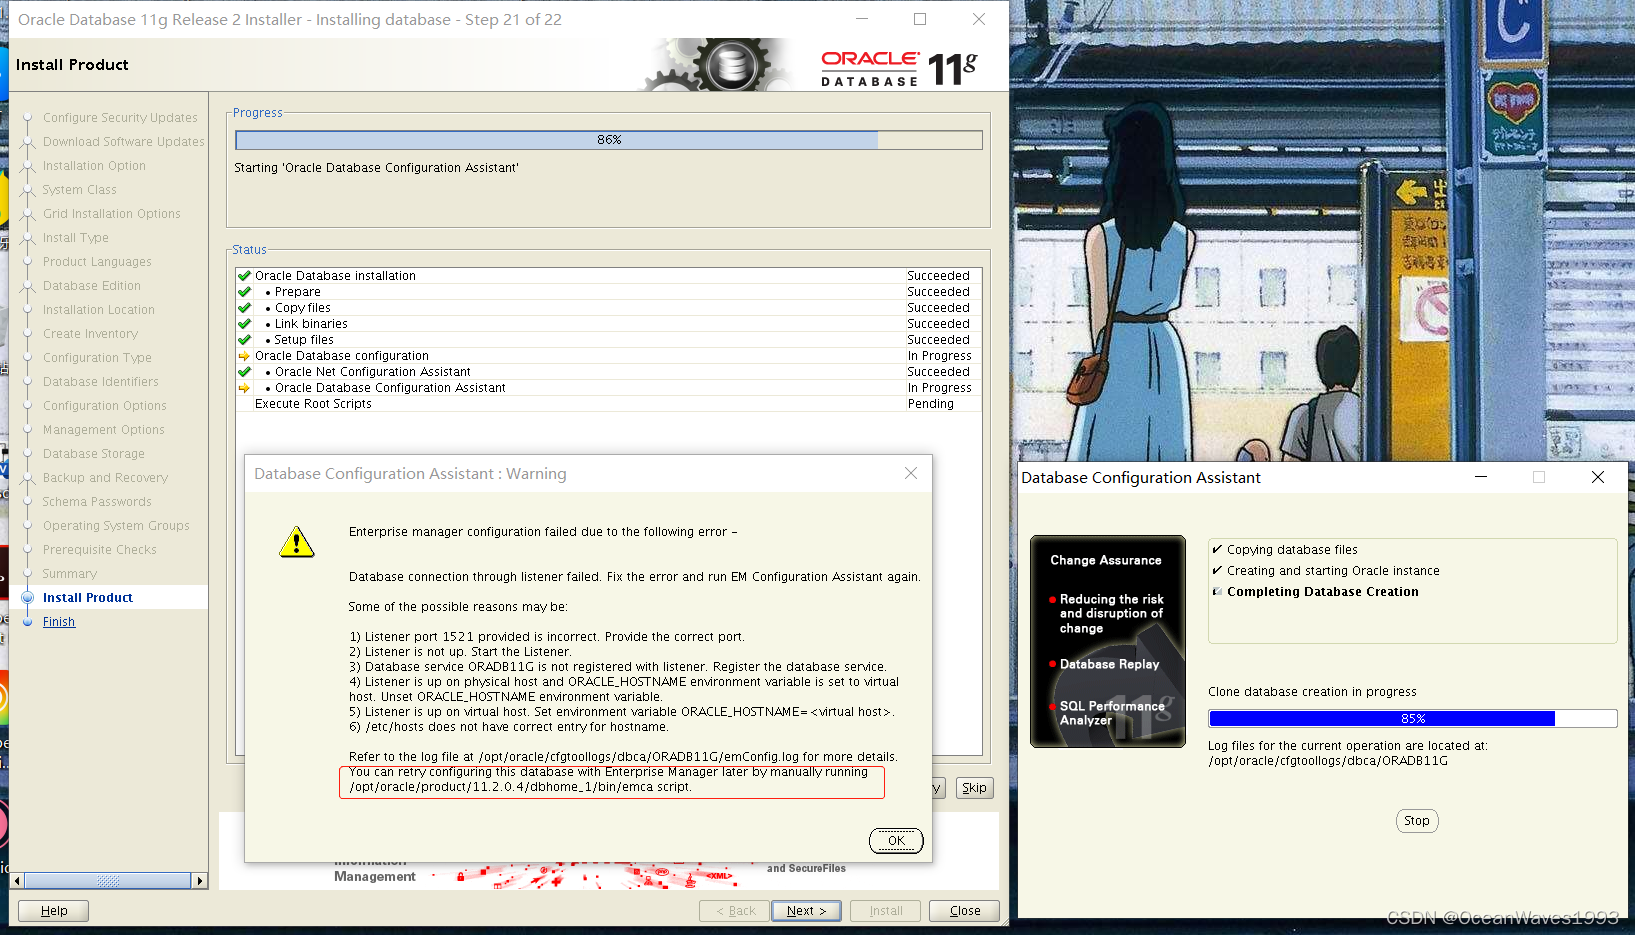
3.2.4.2、无这个错误请忽略本节。出现这个错误的根本原因是ORACLE_HOSTNAME变量和真实的主机名不同。报错 [INS-20802] Oracle Net Configuration Assistant failed.
这个错误虽然可以忽略,待安装完成再配置监听文件中的主机名,但是比较繁琐(需要手动启动监听、手动启动oracle数据库)。如果出现这个错误只能忽略这个错误,结果就是忽略这个错误的结果是:安装oracle数据库完成后监听程序不在、数据库进程不在,全部需要手工启动。
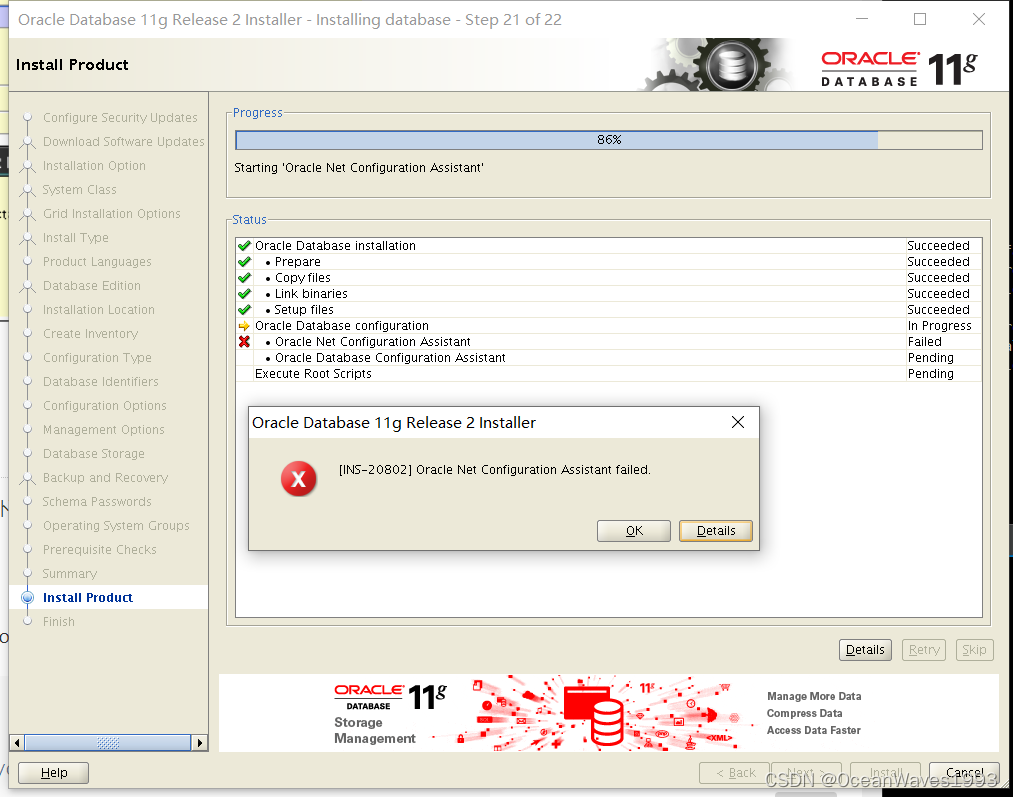
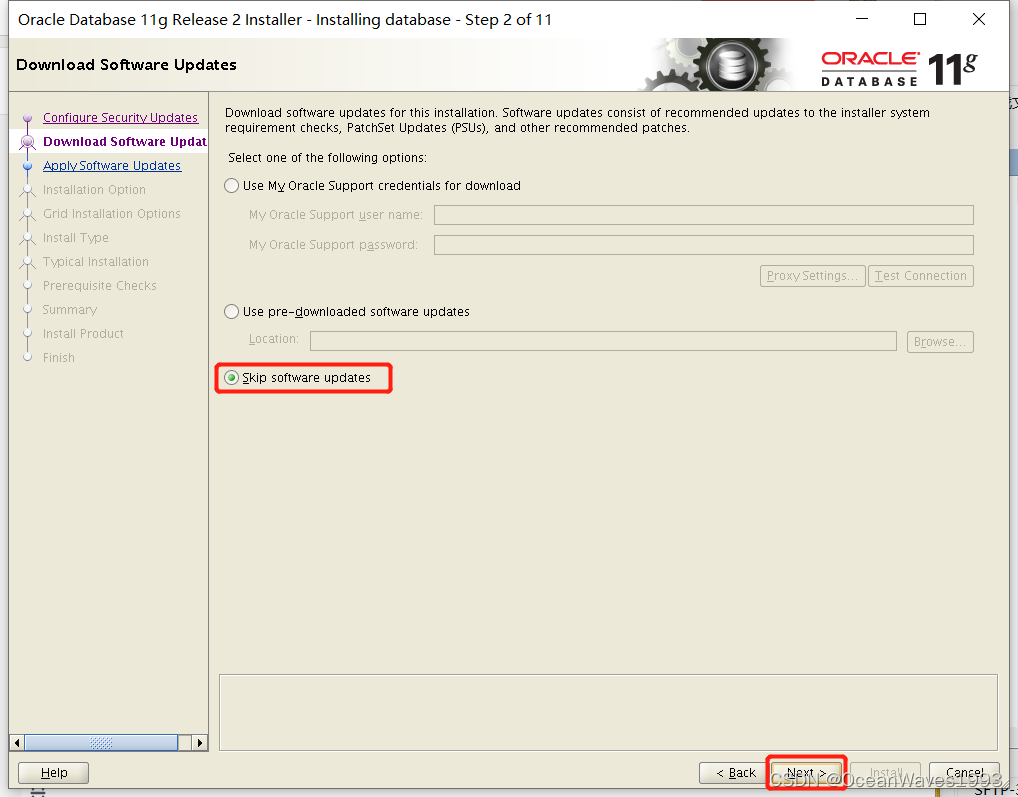
点击Skip
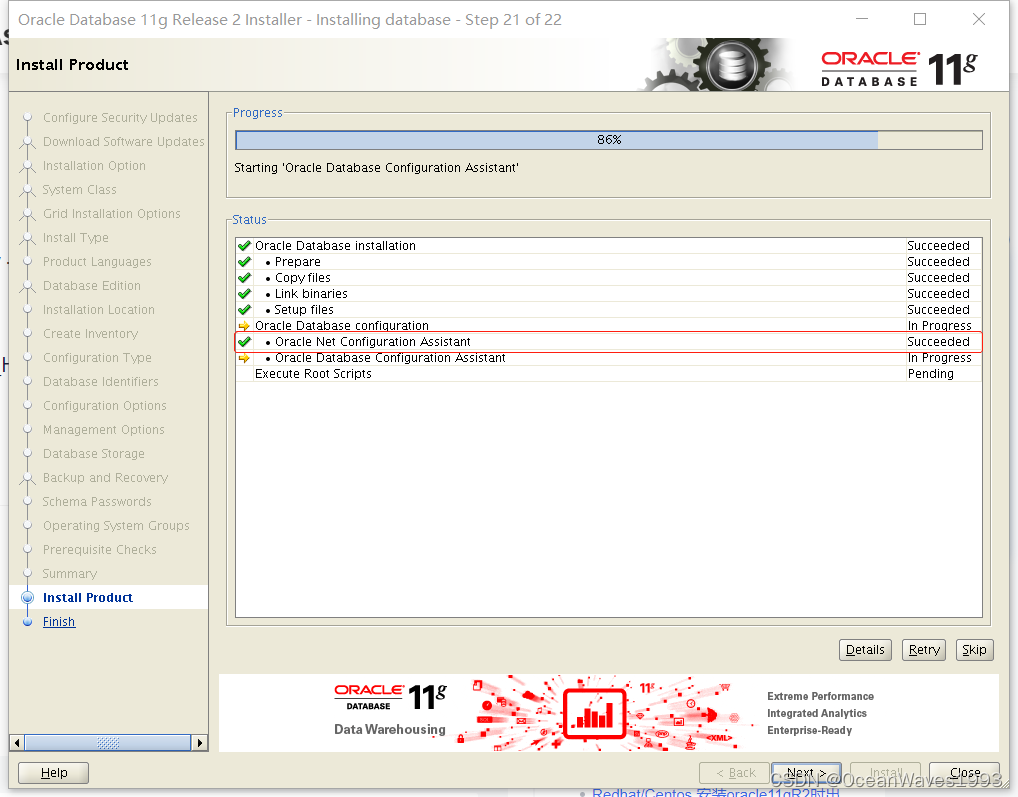
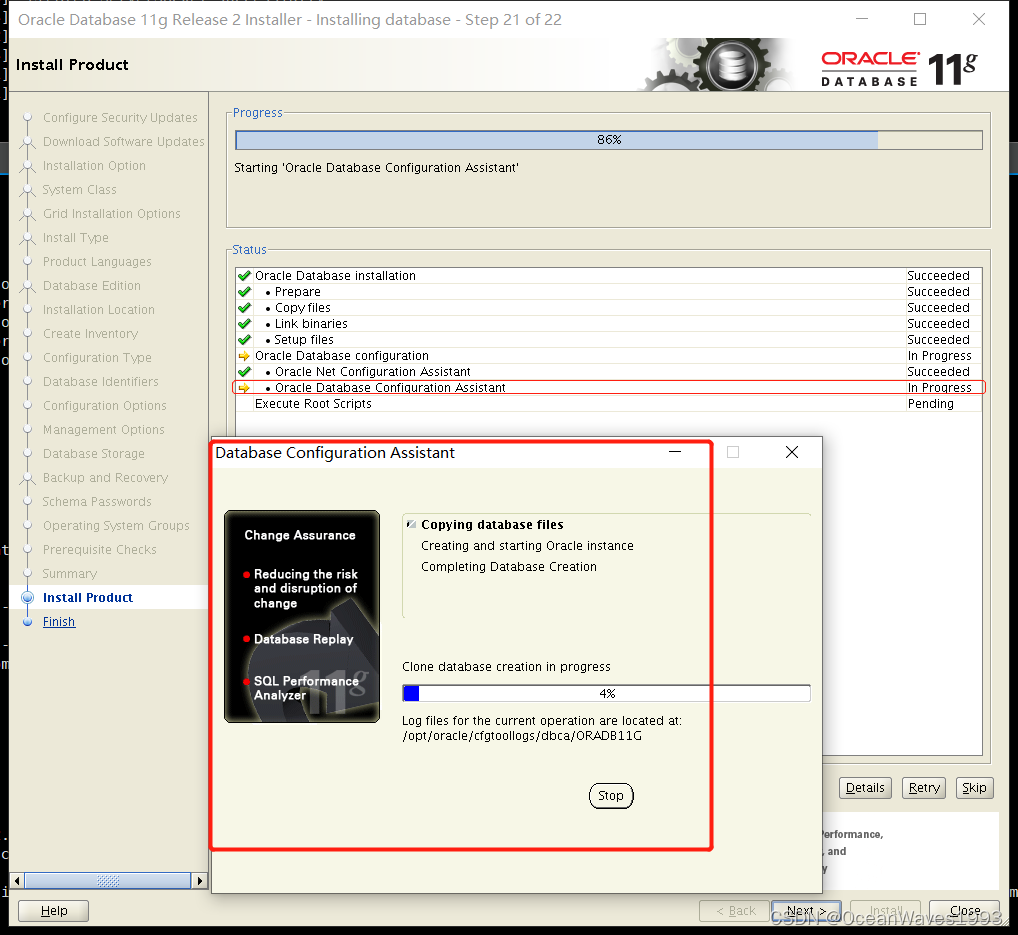
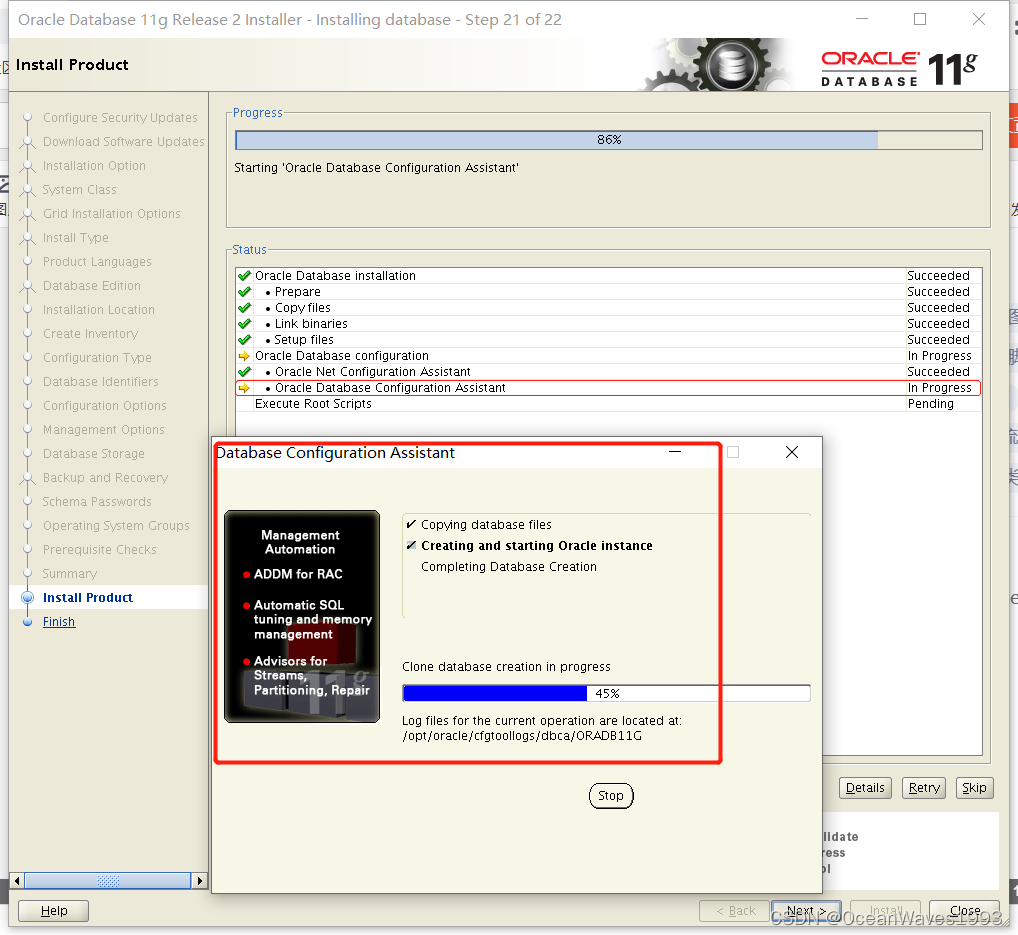
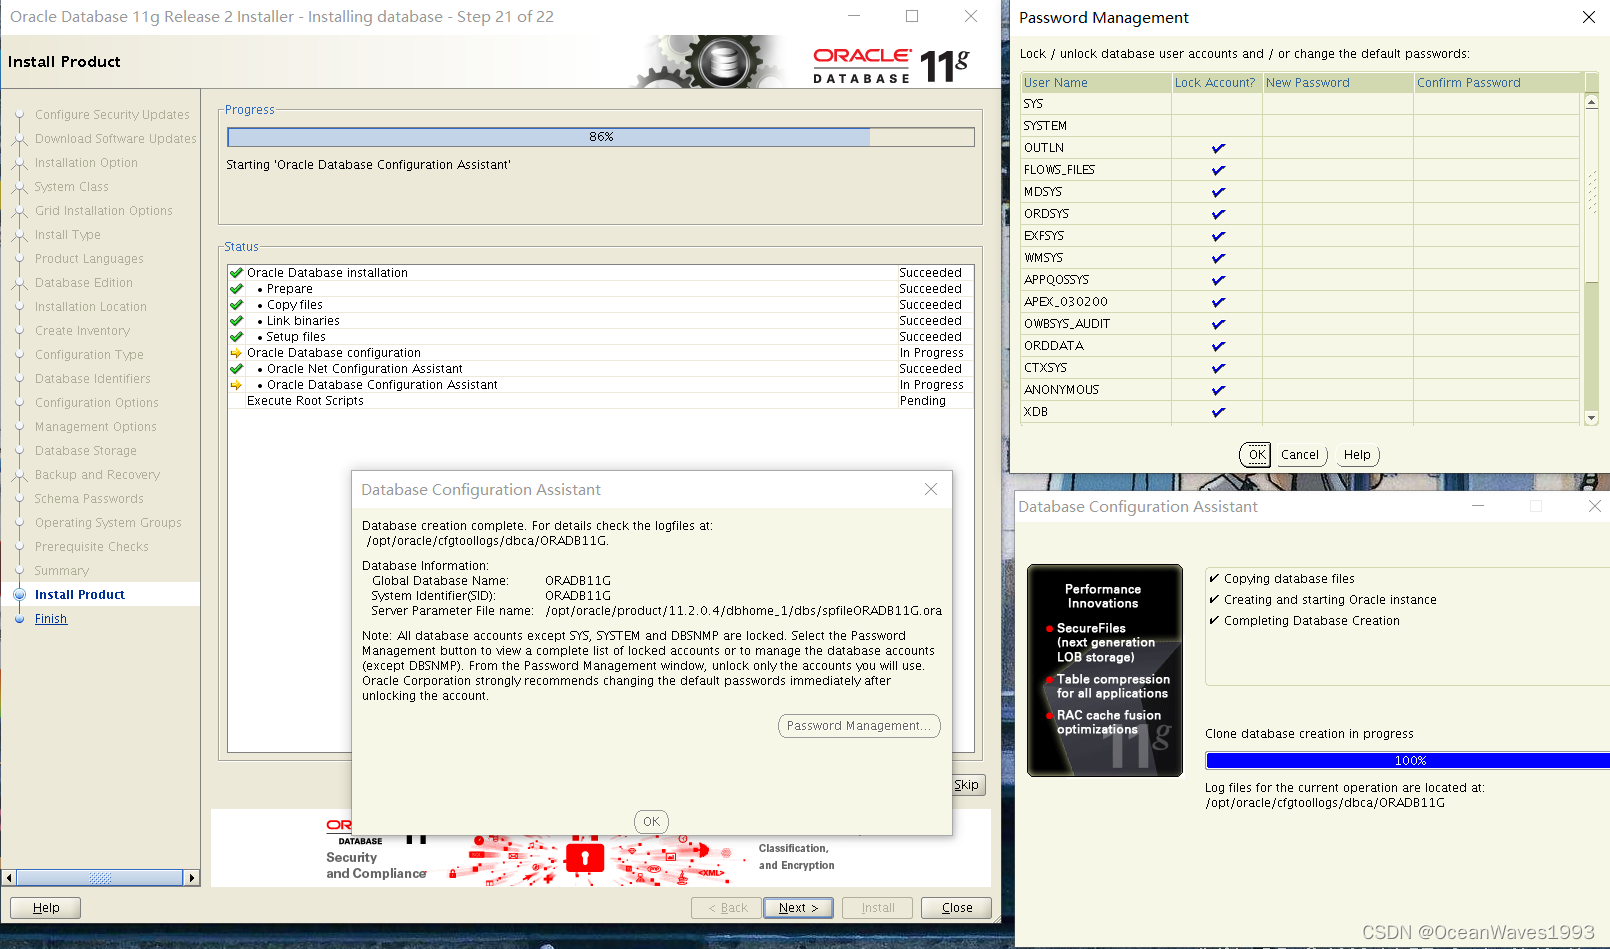
安装程序继续进行
不用管这个 点击OK 跳过就行

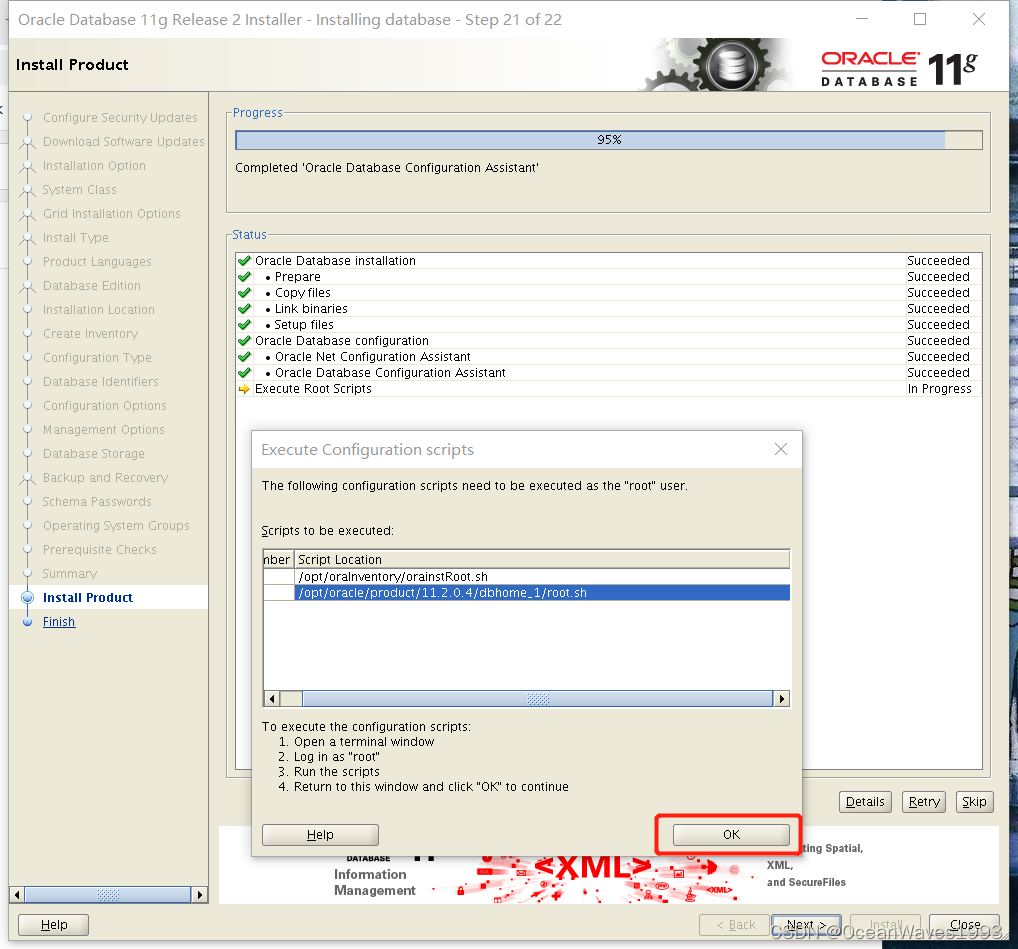
以root用户执行2个脚本
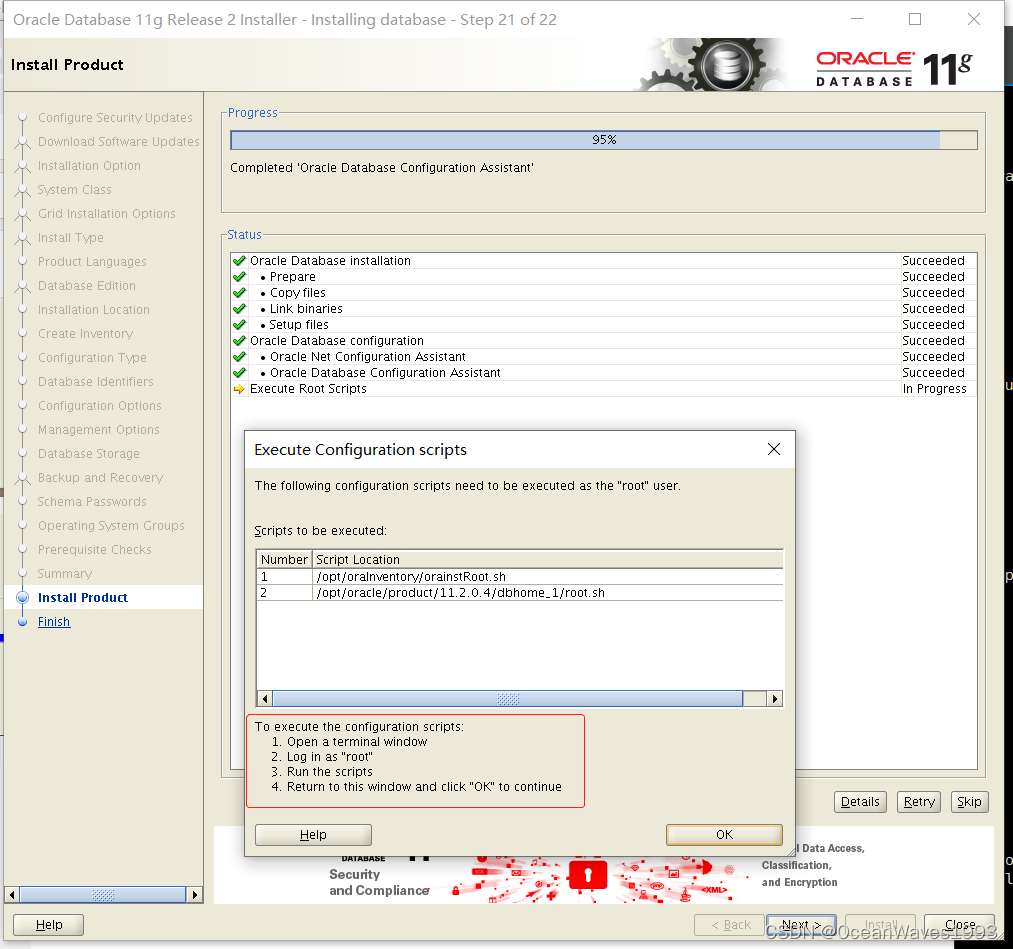
脚本执行记录
[root@rhel 11.2.0.4]# /opt/oraInventory/orainstRoot.sh
Changing permissions of /opt/oraInventory.
Adding read,write permissions for group.
Removing read,write,execute permissions for world.

Changing groupname of /opt/oraInventory to oinstall.
The execution of the script is complete.
[root@rhel 11.2.0.4]# /opt/oracle/product/11.2.0.4/dbhome_1/root.sh
Performing root user operation for Oracle 11g

The following environment variables are set as:
    ORACLE_OWNER= oracle
    ORACLE_HOME=  /opt/oracle/product/11.2.0.4/dbhome_1

Enter the full pathname of the local bin directory: [/usr/local/bin]:
   Copying dbhome to /usr/local/bin ...
   Copying oraenv to /usr/local/bin ...
   Copying coraenv to /usr/local/bin ...


Creating /etc/oratab file...
Entries will be added to the /etc/oratab file as needed by
Database Configuration Assistant when a database is created
Finished running generic part of root script.
Now product-specific root actions will be performed.
Finished product-specific root actions.
[root@rhel 11.2.0.4]#
执行完脚本 点击OK 继续
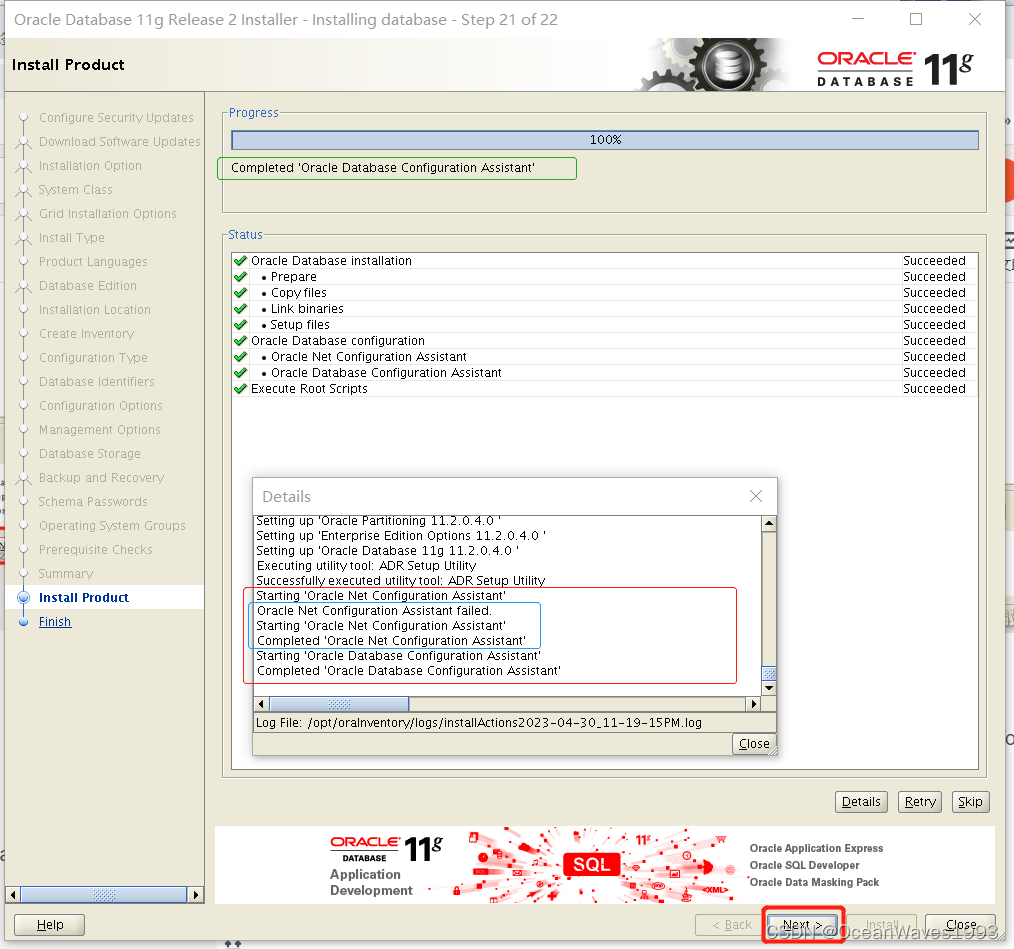
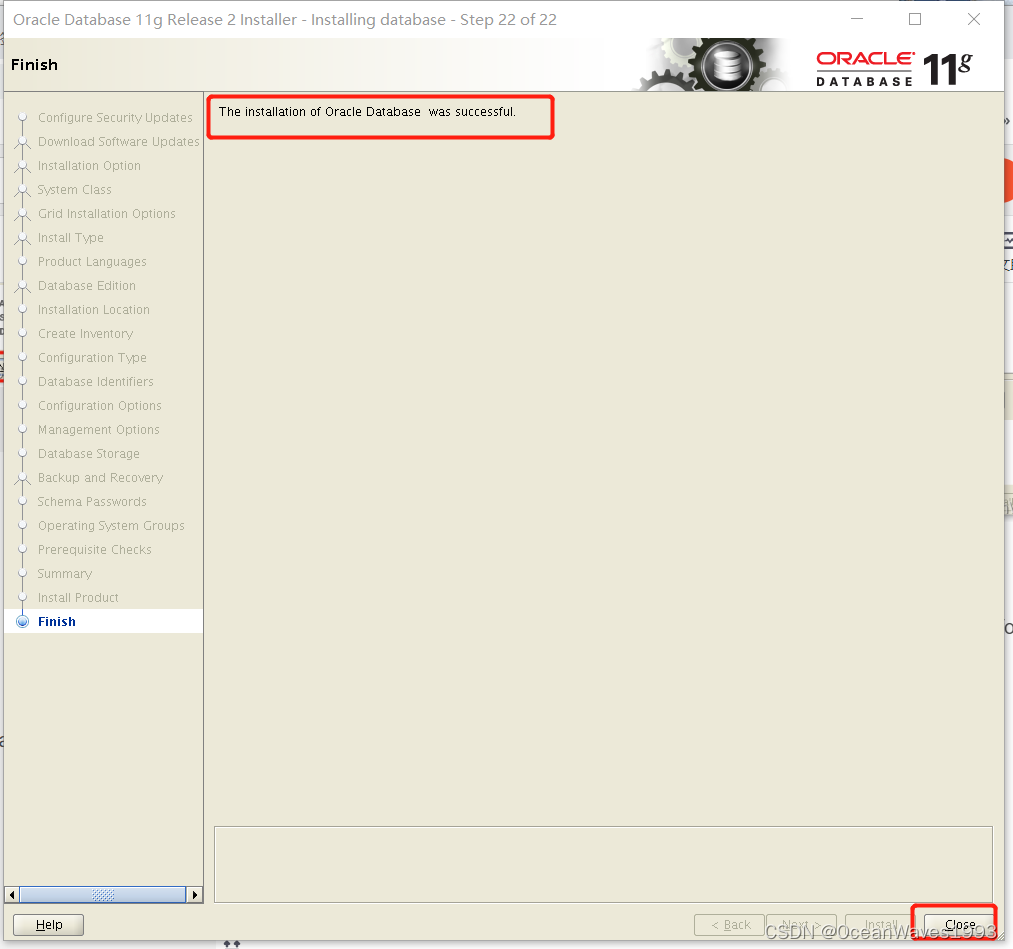
这是没有[INS-20802] Oracle Net Configuration Assistant failed. 这个错误时的安装成功界面。
4、安装后查看数据库状态
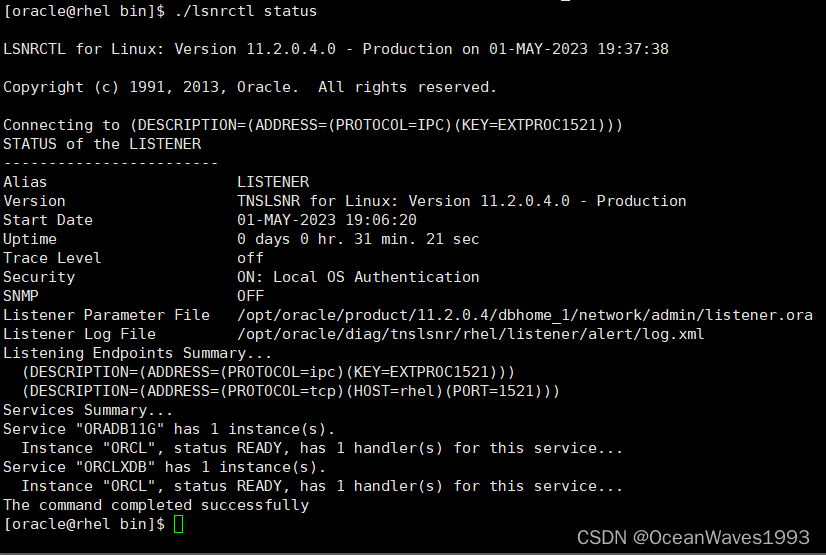
4.1、查看监听
su - oracle
cd /opt/oracle/product/11.2.0.4/dbhome_1/bin
查看监听状态
./lsnrctl status
4.2、查看数据库进程
4.2.1、 查看监听
ss -anlp|grep 1521

4.2.2、查看数据库进程
ps -elf|grep ora
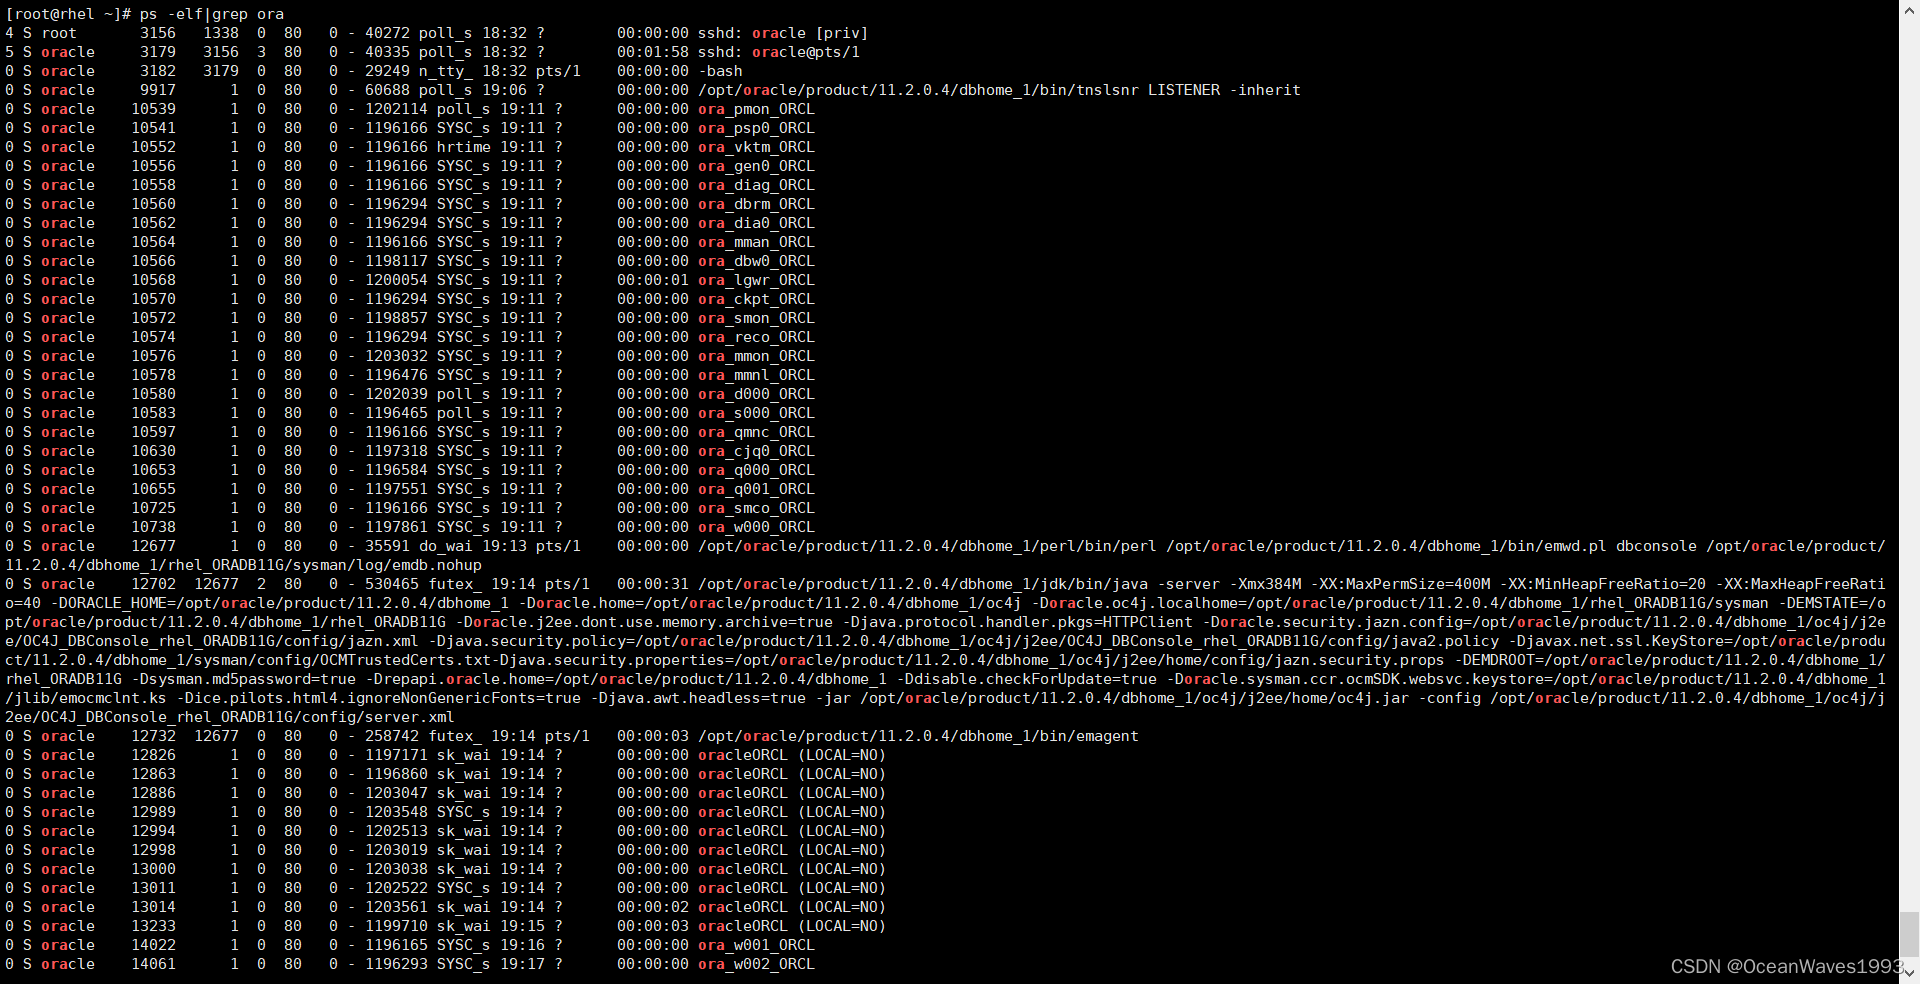

至此Oracle 11g 11.2.0.4安装完成。
5、使用oracle数据库
5.1、重启系统后查看数据库状态
5.1.1、数据库进程不在
su - oracle
ps -elf|grep ora

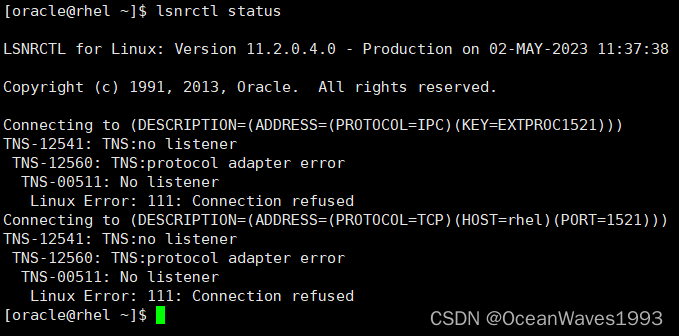
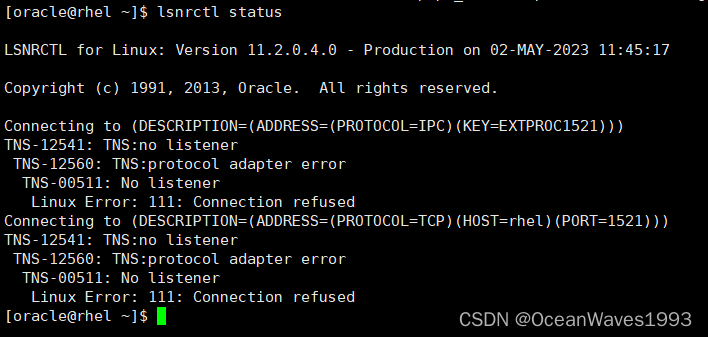
5.1.2、监听不在
su - oracle
lsnrctl status
5.2、手动开启/停止监听、启动/停止数据库
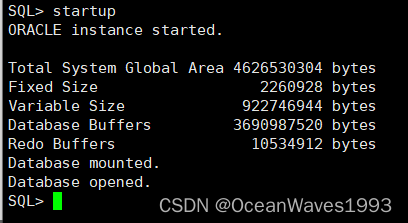
5.2.1、启动数据库
su - oracle
sqlplus / as sysdba
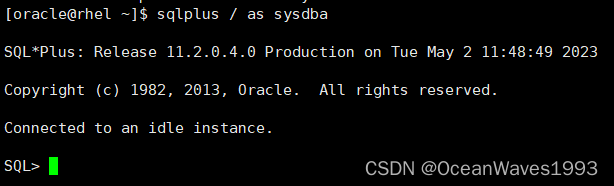
startup
退出sql

启动前查看数据库进程
ps -elf|grep ora

启动后查看数据库进程
ps -elf|grep ora

5.2.2、查看监听状态
su - oracle
lsnrctl status
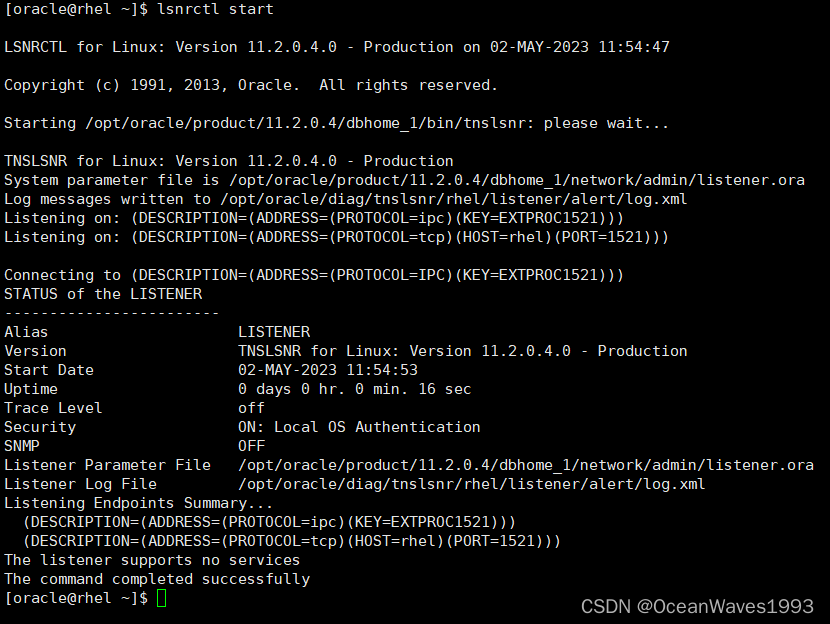
5.2.3、 开启监听
su - oracle
lsnrctl start
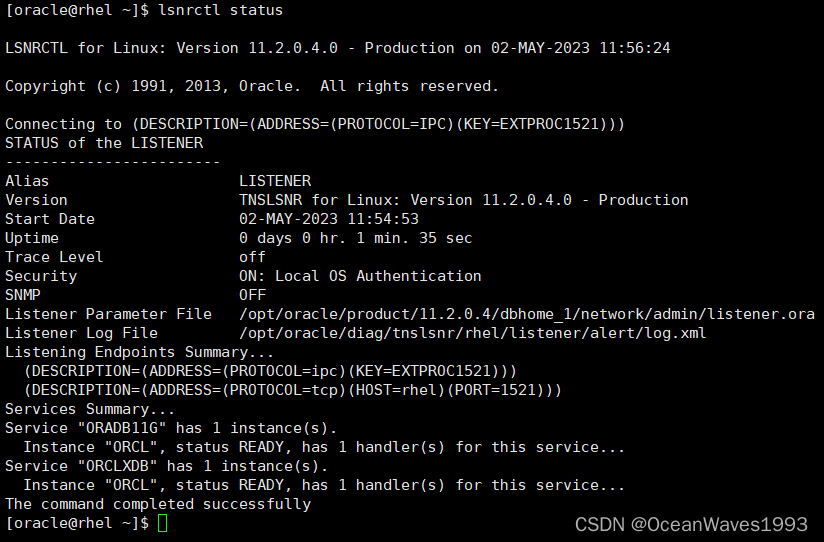
5.2.4、开启监听后再次查看监听状态
su - oracle
lsnrctl status
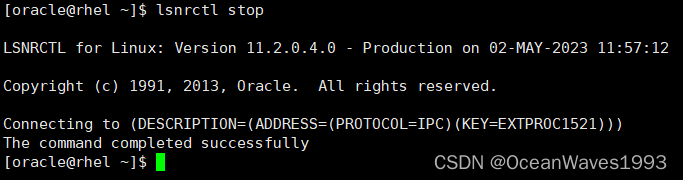
5.2.5、停止监听
su - oracle
lsnrctl stop
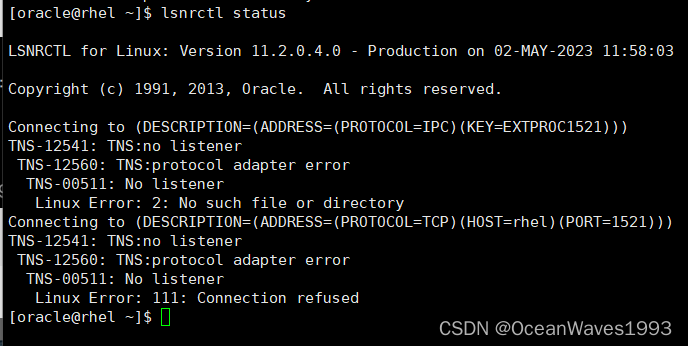
5.2.6、停止监听后再次查看监听状态
su - oracle
lsnrctl status
5.3、查看数据库信息
5.3.0、登录数据库
cd /opt/oracle/product/11.2.0.4/dbhome_1/bin
./sqlplus /nolog
conn /as sysdba
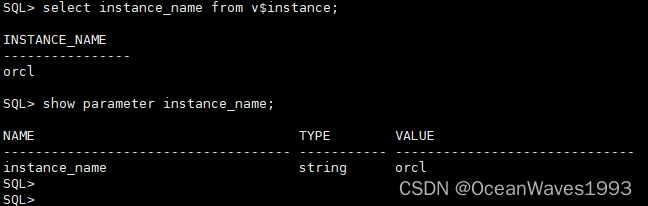
5.3.1、查看实例名
show parameter instance_name;
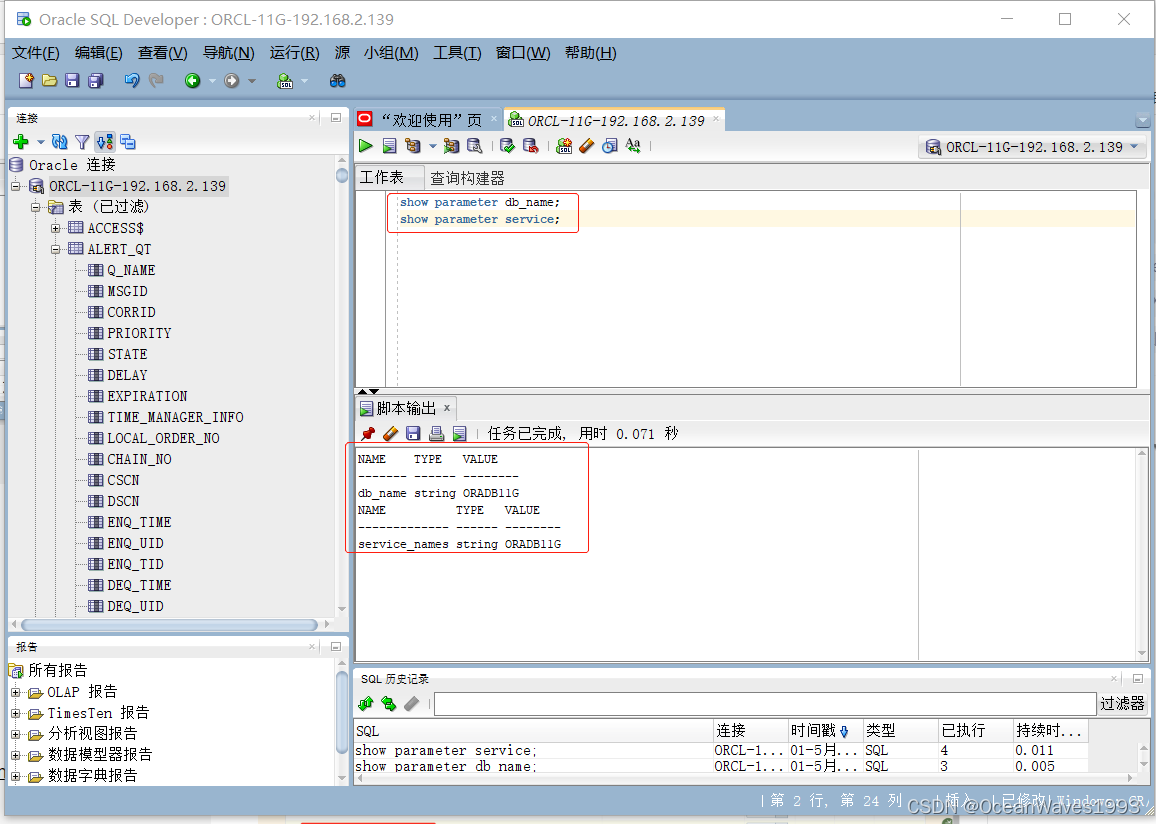
5.3.2、查看数据库名
show parameter db_name;

5.3.3、查看数据库服务名
show parameter service;

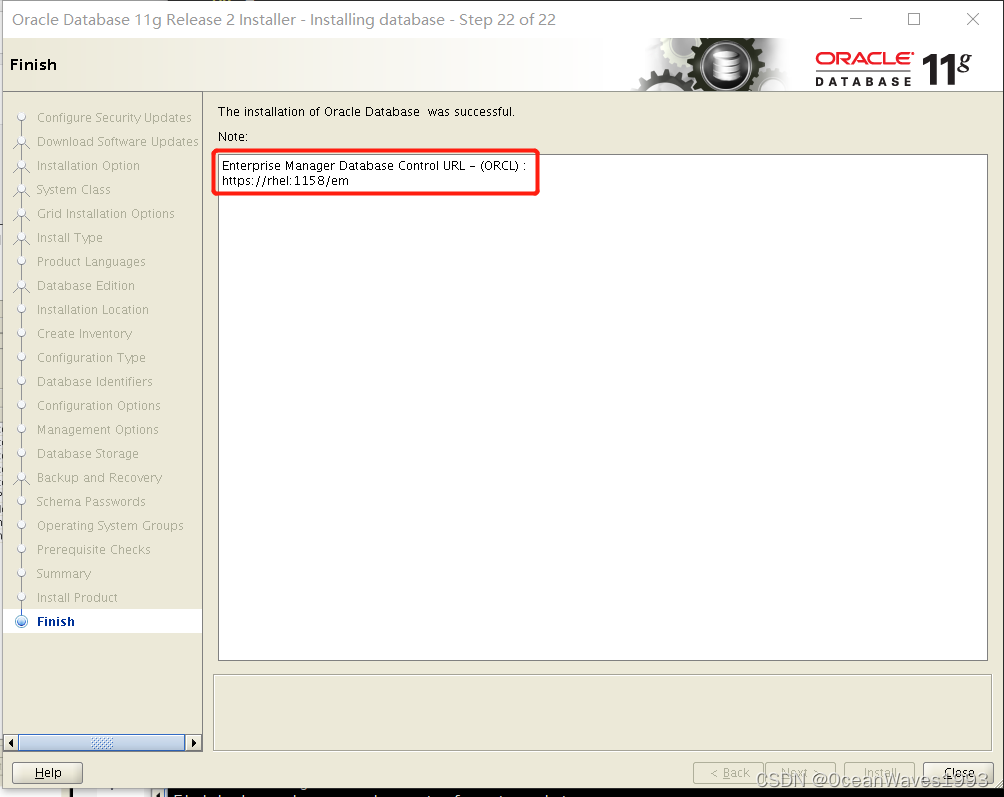
5.4、手动开启/停止 Oracle Enterprise Manager Database Control
5.4.1、查看Oracle Enterprise Manager Database Control状态
su - oracle
emctl status dbconsole
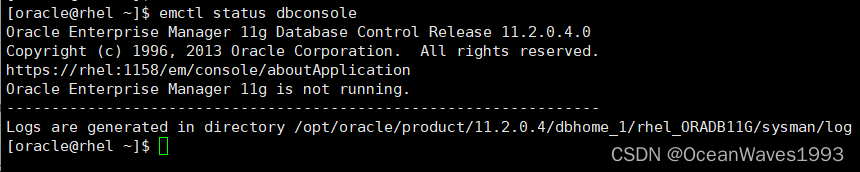
查看Enterprise Manager端口 1158 不在监听

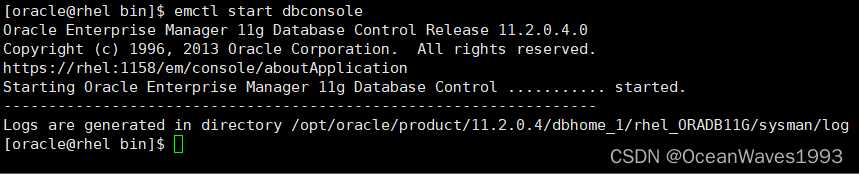
5.4.2、 手动开启Oracle Enterprise Manager Database Control
su - oracle
cd $ORACLE_HOME/bin
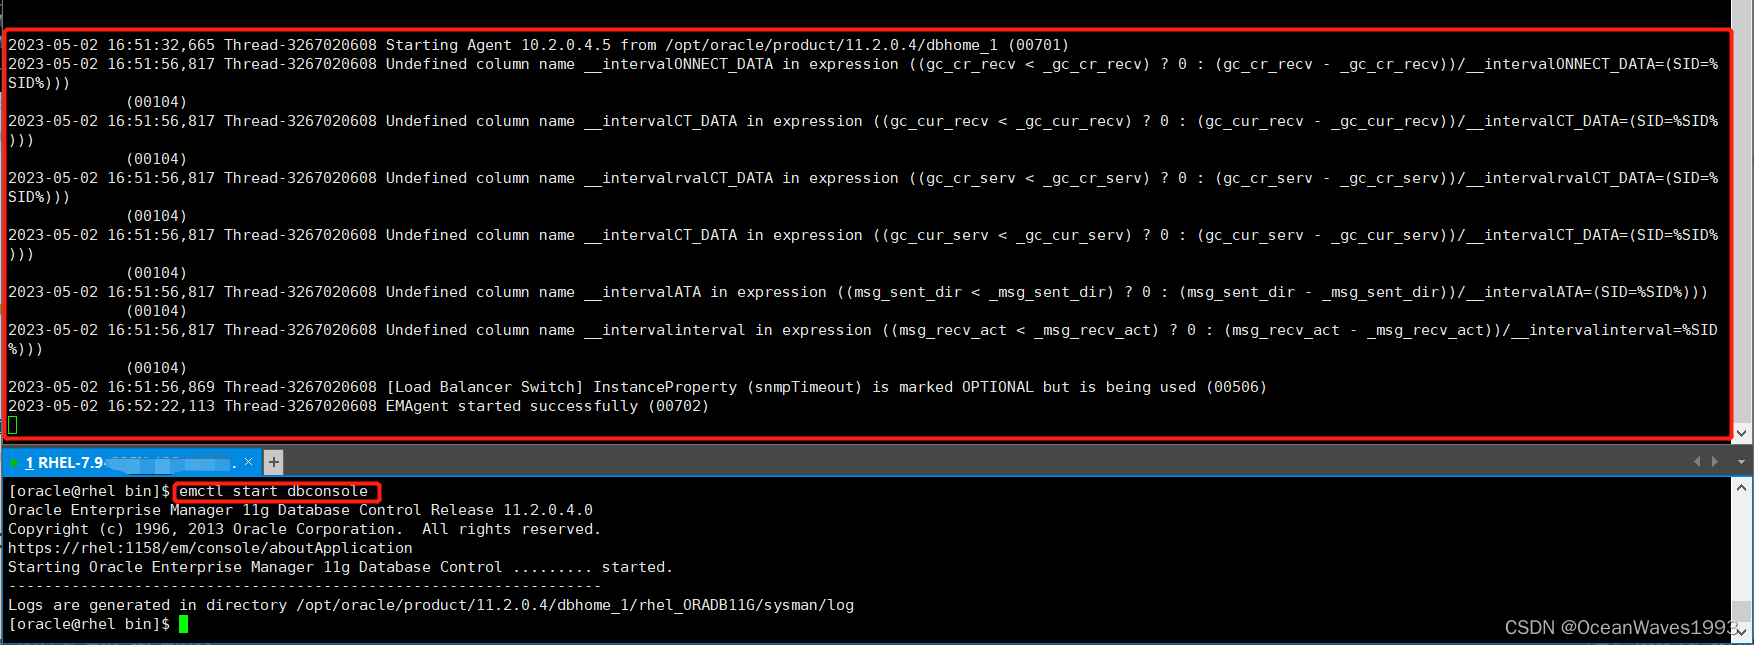
./emctl start dbconsole

查看相关端口
cat $ORACLE_HOME/install/portlist.ini

查看操作日志
tail -f $ORACLE_HOME/rhel_ORADB11G/sysman/log/emagent.log
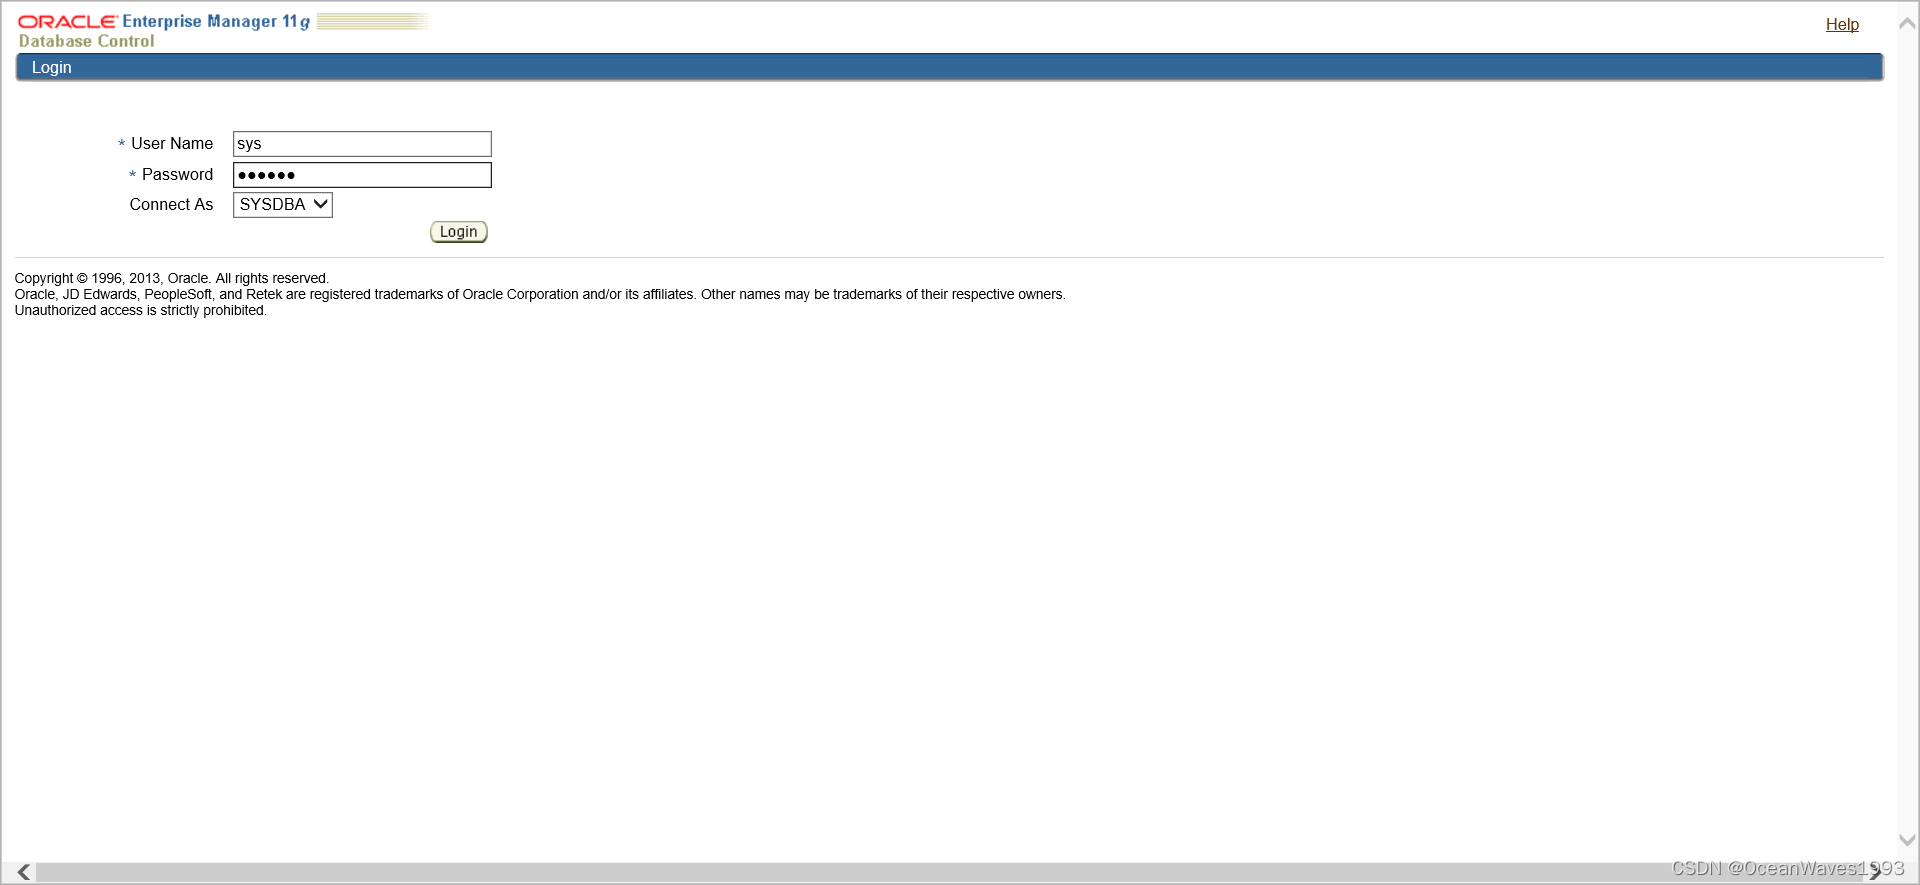
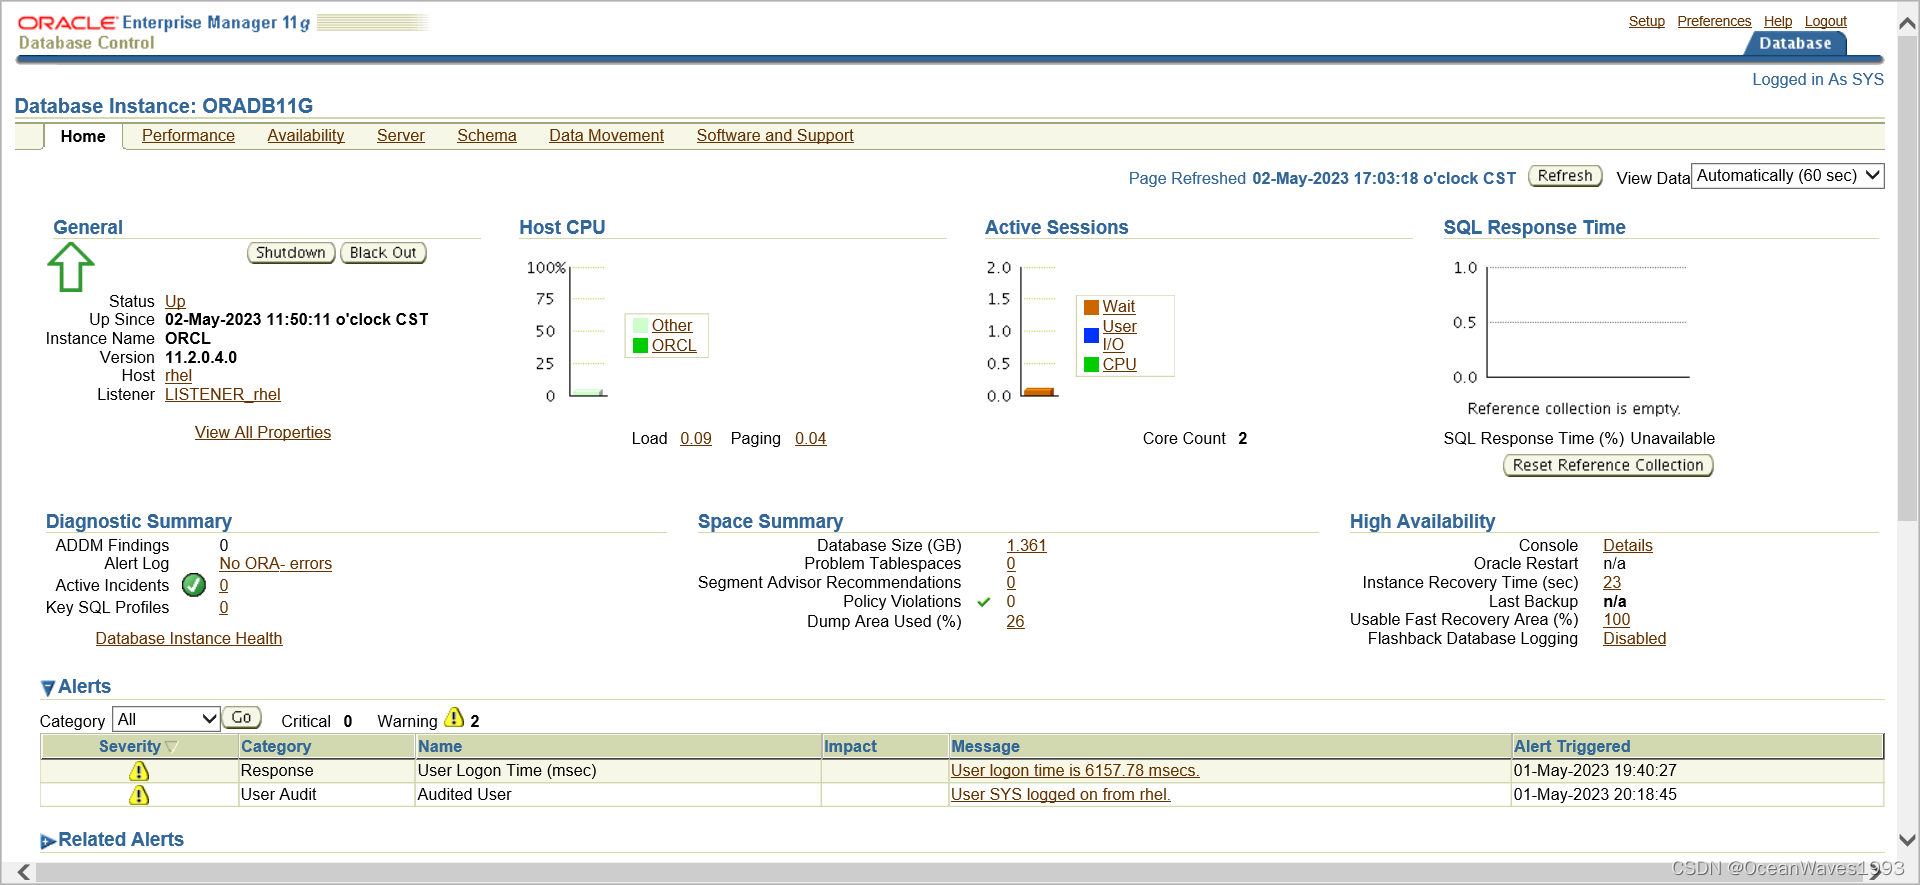
访问web操作台
https://ip:1158/em 用户名sys 以sysdba登录
参考链接: Configuring Database Control Using EMCA
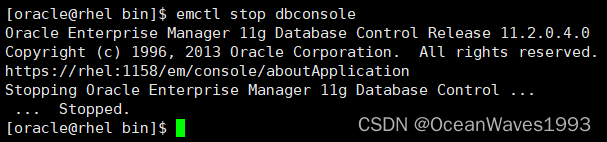
5.4.3、 手动停止Oracle Enterprise Manager Database Control
su - oracle
cd $ORACLE_HOME/bin
./emctl stop dbconsole
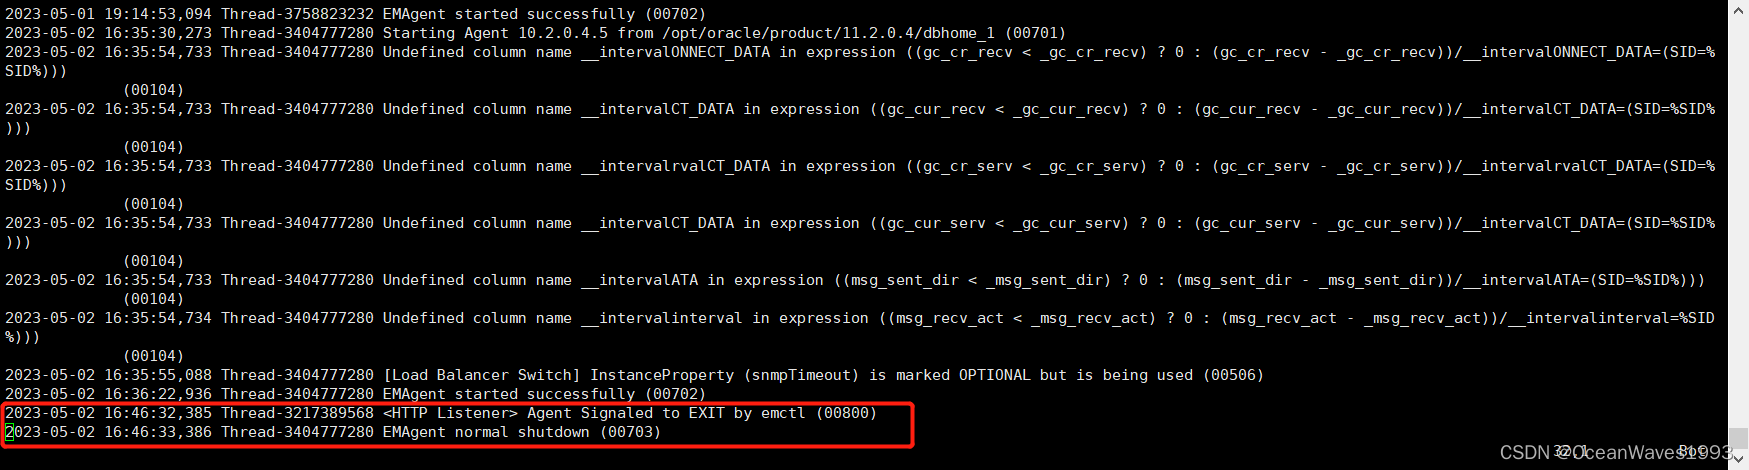
查看操作日志
vi $ORACLE_HOME/rhel_ORADB11G/sysman/log/emagent.log
5.5、oracle数据库组件使用的端口和协议
| Component and Description | Default Port Number | Port Range | Protocol |
|---|---|---|---|
| Oracle Net Services Listener Enables Oracle client connections to the database over the Oracle Net Services protocol. You can configure it during installation. To reconfigure this port, use Net Configuration Assistant. | 1521 | Port number changes to the next available port. Modifiable manually to any available port. | TCP |
| Connection Manager Listening port for Oracle client connections to Oracle Connection Manager. It is not configured during installation, but can be configured manually by editing the cman.ora parameter file. You can find the file under /network/admin directory. | 1630 | 1630 | TCP |
| Oracle Enterprise Manager Database Control HTTP port for Enterprise Manager Database Control. It is configured during installation. “Changing the Oracle Enterprise Manager Database Control Ports” explains how to modify its port number. | 1158 | 5500–5519 | HTTP |
| Oracle Enterprise Manager Database Control RMI port for Enterprise Manager Database Control. It is configured during installation. “Changing the Oracle Enterprise Manager Database Control Ports” explains how to modify its port number. | 5520 | 5520–5539 | TCP |
| Oracle Enterprise Manager Database Control JMS port for Enterprise Manager Database Control. It is configured during installation. “Changing the Oracle Enterprise Manager Database Control Ports” explains how to modify its port number. | 5540 | 5540–5559 | TCP |
| Enterprise Manager Database Control Agent HTTP port for Enterprise Management Agent. It is configured during installation. “Changing the Oracle Enterprise Management Agent Port” explains how to modify its port number. | 3938 | 1830–1849 | HTTP |
| Oracle XML DB The Oracle XML DB HTTP port is used if web-based applications must access an Oracle database from an HTTP listener. It is configured during installation, but you cannot view it afterward. See Also :“Using HTTP(S) on a Standard Port Instead of an Oracle XML DB Default Port” in Oracle XML DB Developer’s Guide | 0 | Configured Manually | HTTP |
| Oracle XML DB The Oracle XML DB FTP is used when applications must access an Oracle database from an FTP listener. It is configured during installation, but you cannot view it afterward. See Also:“Using FTP on the Standard Port Instead of the Oracle XML DB Default Port” in Oracle XML DB Developer’s Guide | 0 | Configured Manually | FTP |
| Cluster Synchronization Service (CSS) CSS daemon internode connection for the GM layer. The port number is assigned automatically. You cannot view or modify it. This port is used exclusively with the cluster interconnect, which is private network that is physically separated from the public network. | 42424 | Dynamic | UDP |
| Oracle Cluster Registry The port number is assigned automatically during installation. You cannot view or modify it afterward. | Dynamic | Dynamic | UDP |
5.6、配置oracle数据库自启动
以下命令使用root用户执行
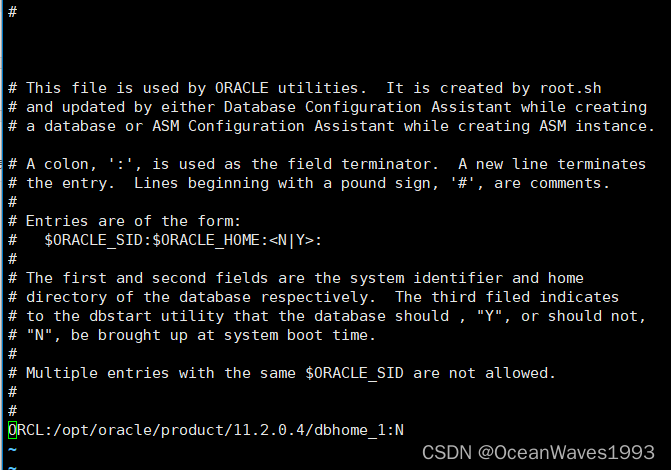
5.6.1、编辑/etc/oratab文件
vi /etc/oratab
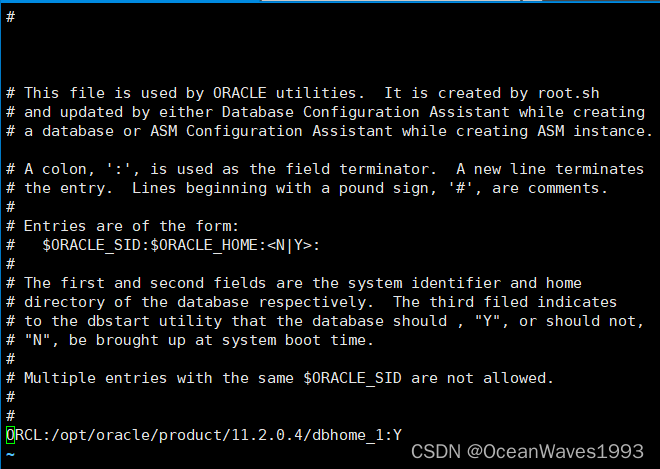
把需要启动的数据库第三项改为Y,Y表示自启动,N表示不自启动,默认为N。
更改前
更改后
5.6.2、新建自启动脚本
vi /etc/init.d/dbora
#! /bin/bash
# dbora Oracle auto start-stop script.
# chkconfig: 035 10 90
# description: Automatically start Oracle Database when the system starts, and to automatically shut it down when the system shuts down.
#              Automating database startup and shutdown guards against incorrect database shutdown.
#              And so is the Oracle Database Enterprise Manager.
#
# Set ORACLE_HOME to be equivalent to the $ORACLE_HOME
# from which you wish to execute dbstart and dbshut;
#
# Set ORA_OWNER to the user id of the owner of the
# Oracle database in ORACLE_HOME.

ORA_HOME=/opt/oracle/product/11.2.0.4/dbhome_1
ORA_OWNER=oracle

case "$1" in
'start')
    # Start the Oracle databases:
    # The following command assumes that the oracle login
    # will not prompt the user for any values
    # Remove "&" if you don't want startup as a background process.
    echo "Starting Oracle Databases ... " >> /var/log/oracle
    echo "-------------------------------------------------" >> /var/log/oracle
    date +" %T %a %D : Starting Oracle Databases as part of system up." >> /var/log/oracle
    su - $ORA_OWNER -c "$ORA_HOME/bin/dbstart $ORA_HOME" 2>&1 >>/var/log/oracle  &
    echo "Starting Oracle Databases done ..." >> /var/log/oracle
    echo "-------------------------------------------------" >> /var/log/oracle

    # Start the Oracle Database Enterprise Manager:
    # The following command assumes that the oracle login
    # will not prompt the user for any values
    # Remove "&" if you don't want startup as a background process.
    echo "Starting Oracle Databases Enterprise Manager ... " >> /var/log/oracle
    echo "-------------------------------------------------" >> /var/log/oracle
    date +" %T %a %D : Starting Oracle Databases Enterprise Manager as part of system up." >> /var/log/oracle
    su - $ORA_OWNER -c "$ORA_HOME/bin/emctl start dbconsole" 2>&1 >>/var/log/oracle  &
    echo "Starting Oracle Databases Enterprise Manager done ..." >> /var/log/oracle
    echo "-------------------------------------------------" >> /var/log/oracle
    touch /var/lock/subsys/dbora
    ;;

'stop')
    # Stop the Oracle Database Enterprise Manager:
    # The following command assumes that the oracle login
    # will not prompt the user for any values
    # Remove "&" if you don't want startup as a background process.
    echo "Stoping Oracle Databases Enterprise Manager ... " >> /var/log/oracle
    echo "-------------------------------------------------" >> /var/log/oracle
    date +" %T %a %D : Stoping Oracle Databases Enterprise Manager as part of system up." >> /var/log/oracle
    su - $ORA_OWNER -c "$ORA_HOME/bin/emctl stop dbconsole" 2>&1 >>/var/log/oracle  &
    echo "Stoping Oracle Databases Enterprise Manager done ..." >> /var/log/oracle
    echo "-------------------------------------------------" >> /var/log/oracle
    rm -f /var/lock/subsys/dbora

    # Stop the Oracle databases:
    # The following command assumes that the oracle login
    # will not prompt the user for any values
    echo "Stoping Oracle Databases ... " >> /var/log/oracle
    echo "-------------------------------------------------" >> /var/log/oracle
    date +" %T %a %D : Stoping Oracle Databases as part of system up." >> /var/log/oracle
    su - $ORA_OWNER -c "$ORA_HOME/bin/dbshut $ORA_HOME" 2>&1 >>/var/log/oracle  &
    echo "Stoping Oracle Databases done ..." >> /var/log/oracle
    echo "-------------------------------------------------" >> /var/log/oracle
    ;;

'restart')
    $0 stop
    $0 start
    ;;

'*')
    echo "Please use start or stop or restart as first argument"
    ;;
esac
5.6.3、设置启动文件的用户组和权限
Change the group of the dbora file to the OSDBA group (typically dba), and set the permissions to 750
chgrp dba /etc/init.d/dbora
chmod 750 /etc/init.d/dbora
5.6.4、添加到开机自启动
chkconfig --level 035 dbora on
参考链接: Automating Shutdown and Startup
5.5、linu服务器端oracle配置工具使用
5.5.1、配置netca(Oracle Netwoak Configuration Assistant)
su - oracle
cd /opt/oracle/product/11.2.0.4/dbhome_1/bin/
./netca
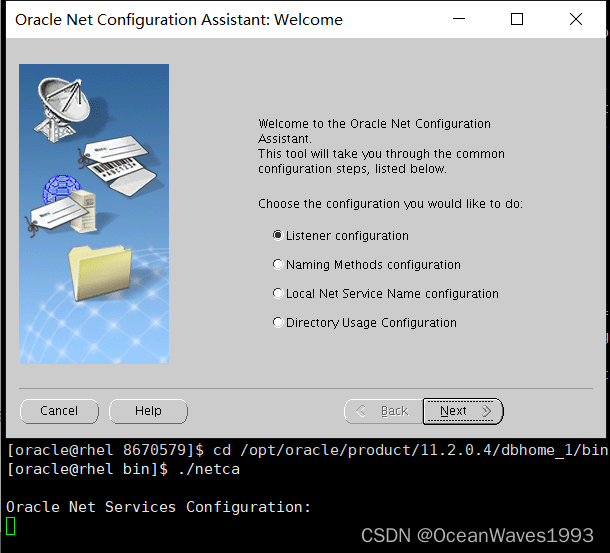
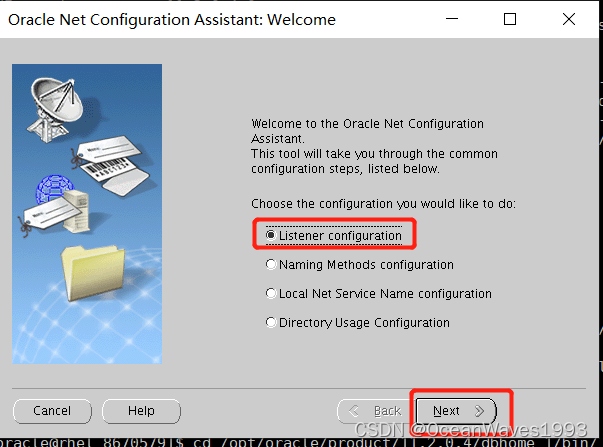
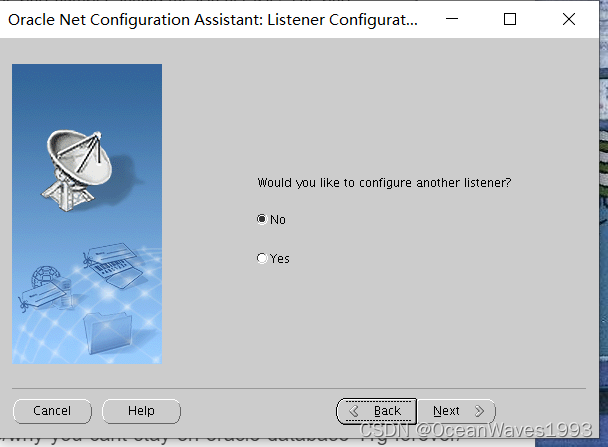
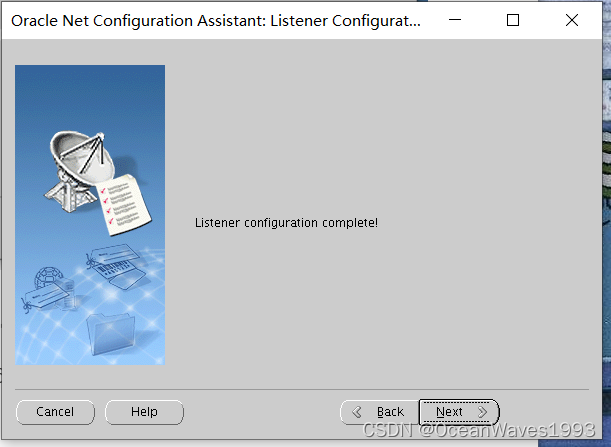
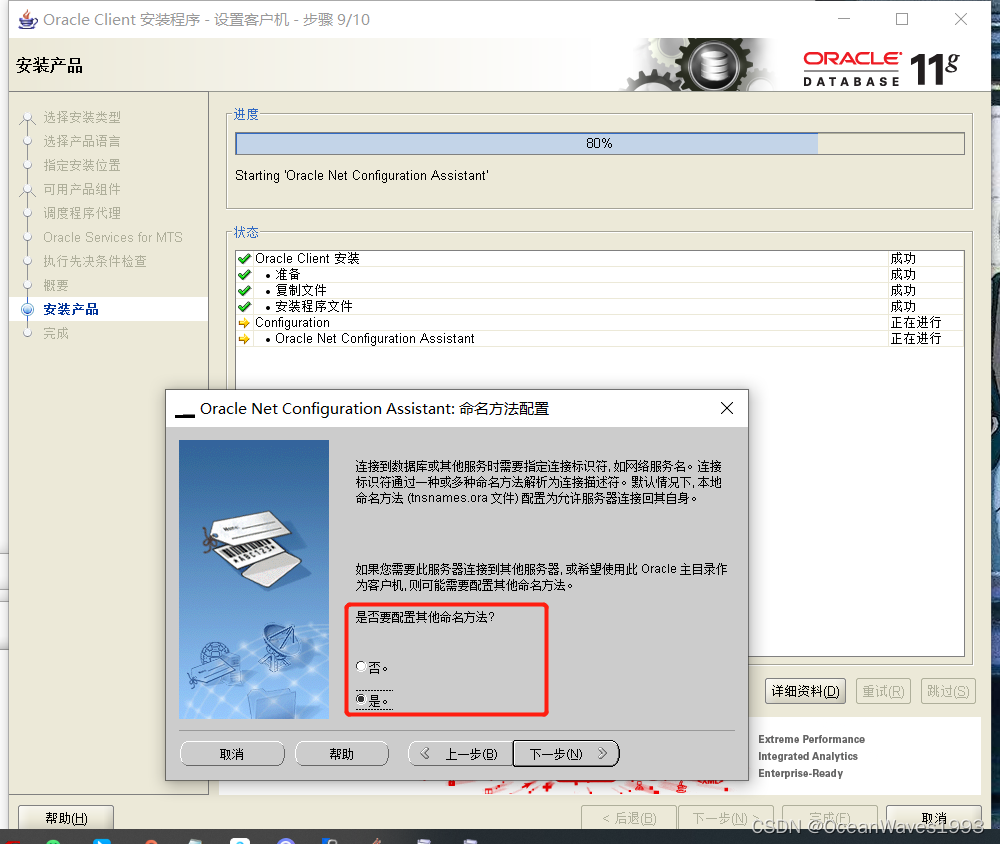
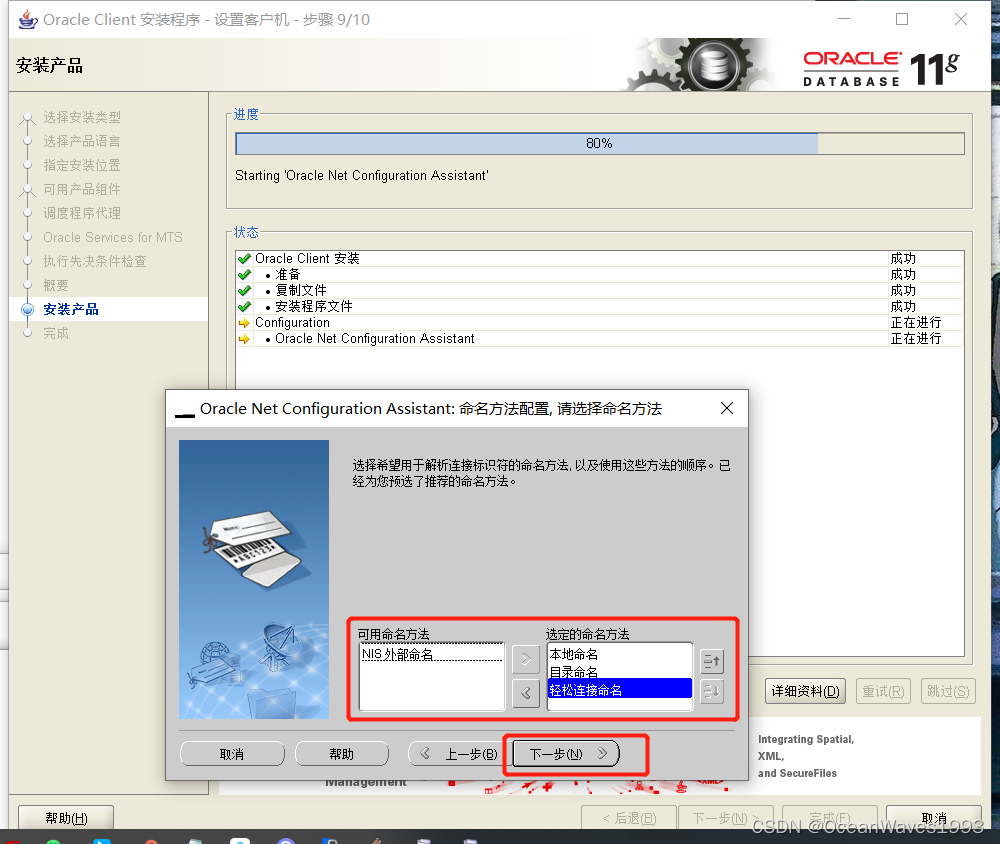
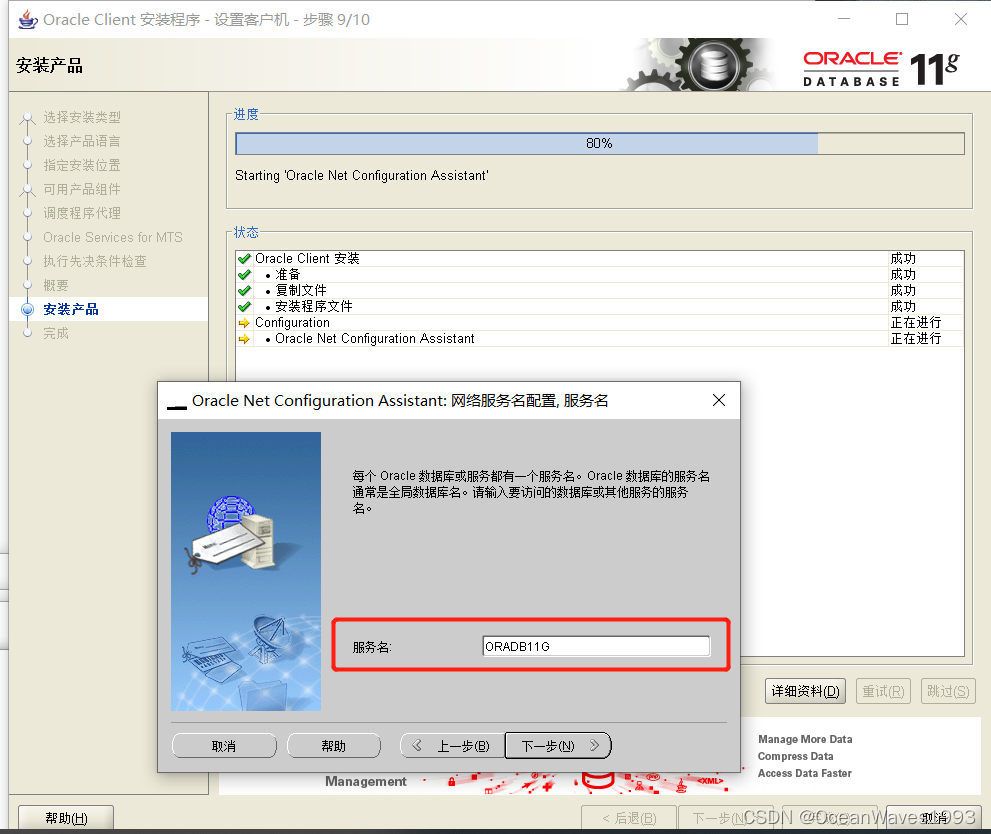
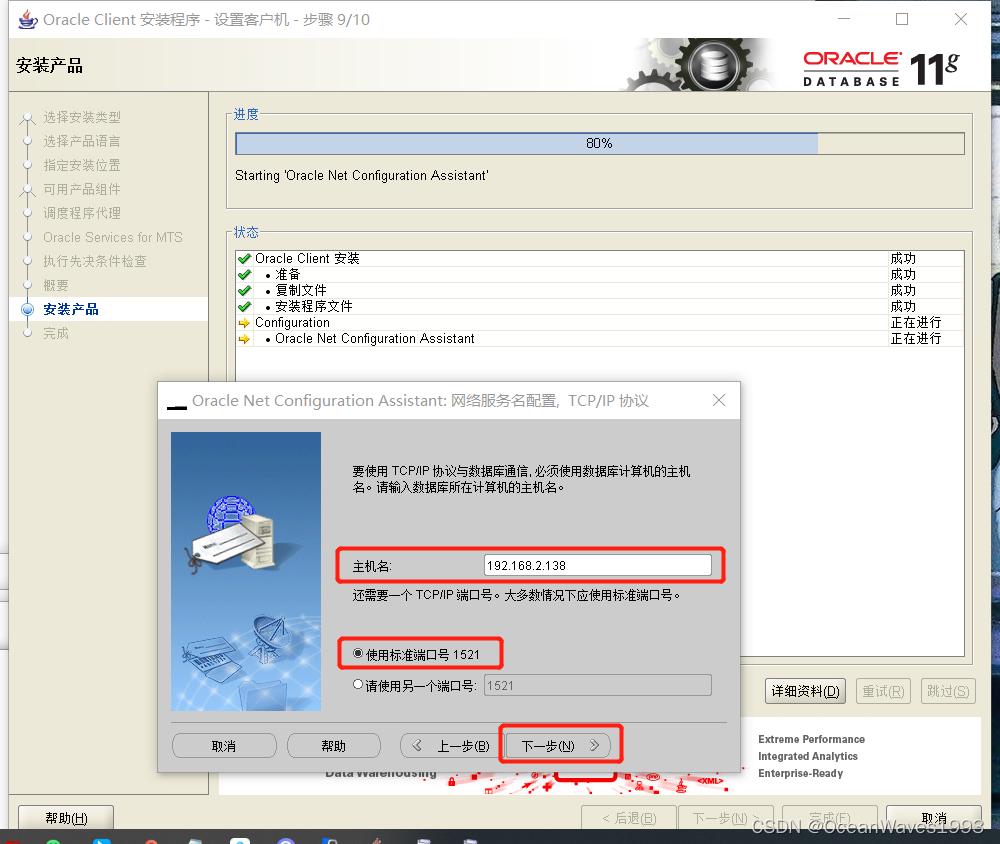
5.5.1.1、Listener Configuration
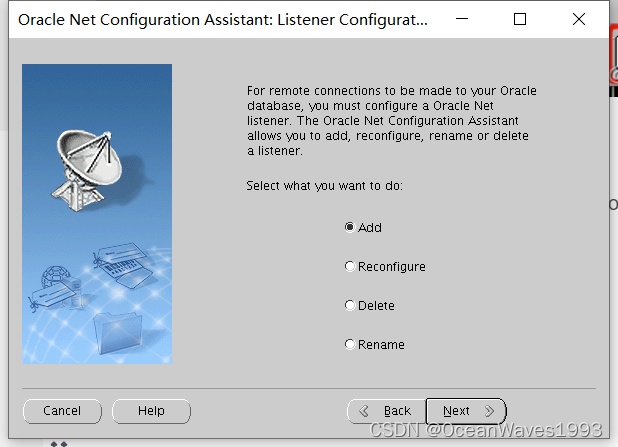
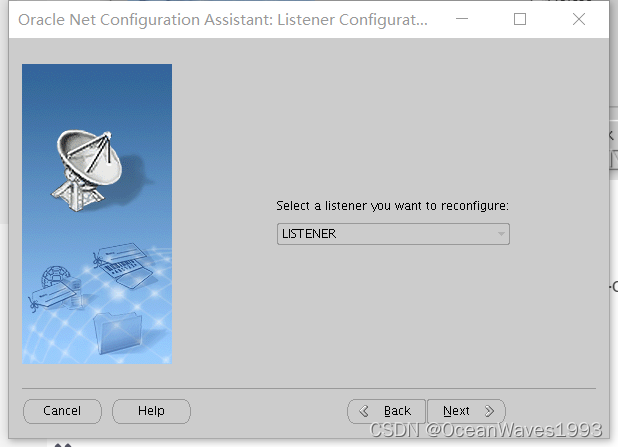
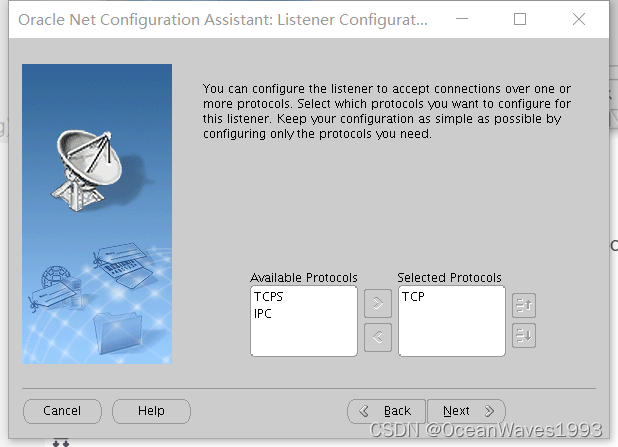
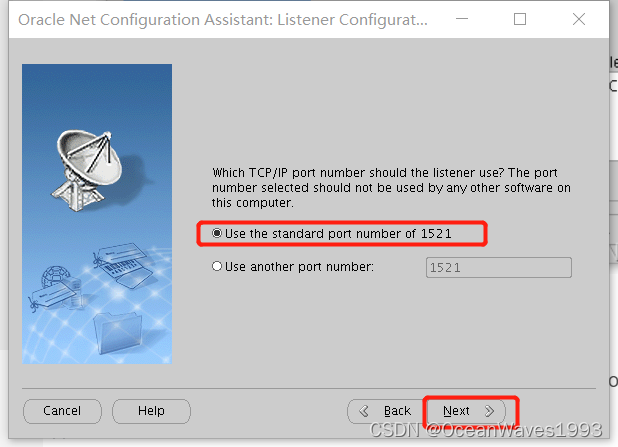
选择 YES
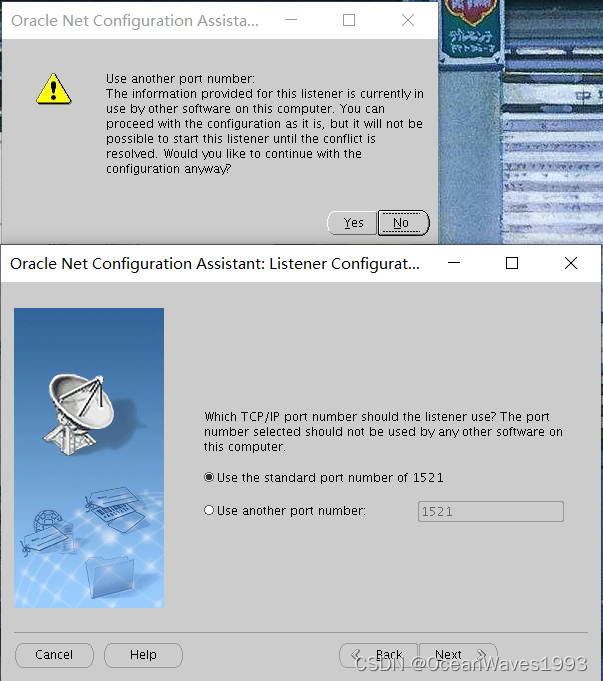
选择NO
5.5.2、配置dbca
6、SQL Developer 安装
6.1、下载 SQL Developer
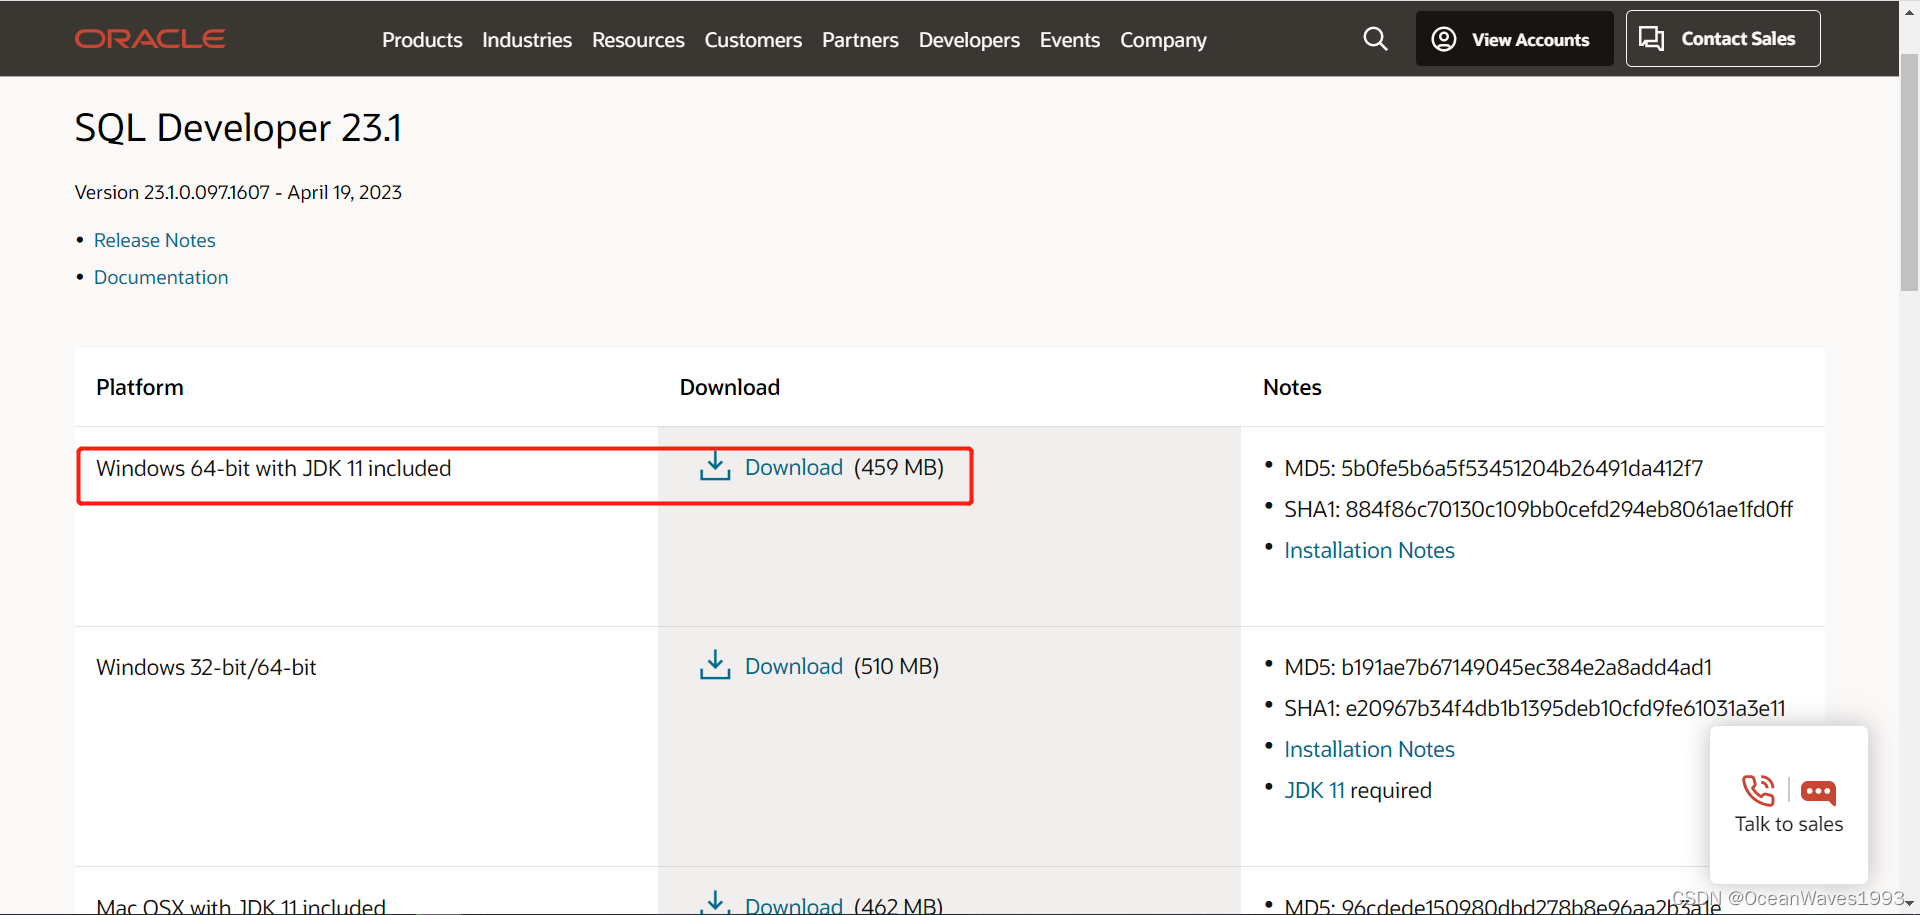
SQL Developer 23.1 With JDK11
下载链接:https://www.oracle.com/database/sqldeveloper/technologies/download/
文件名:sqldeveloper-23.1.0.097.1607-x64.zip
MD5: 5b0fe5b6a5f53451204b26491da412f7
SHA1: 884f86c70130c109bb0cefd294eb8061ae1fd0ff
安装手册
Windows Installation Notes

Windows 64-bit with JDK 11 Included
This archive includes both SQL Developer and an embedded copy of the Java 11 Development Kit
(JDK). Simply extract the zip to a fresh directory and run the sqldeveloper.exe in the top
directory. The EXE is configured to run the embedded JDK by default.

Note: the Windows EXE requires a MSVCR100.dll to run. Most computers will already have this file
and in the Windows PATH. However, if the first copy of the file found by the EXE is a 32-bit copy
of the DLL, then SQL Developer will fail to start. You can fix this by copying a 64-bit version
of the DLL into the BIN directory or updating your OS PATH such that a 64 bit copy of the DLL is
found first.
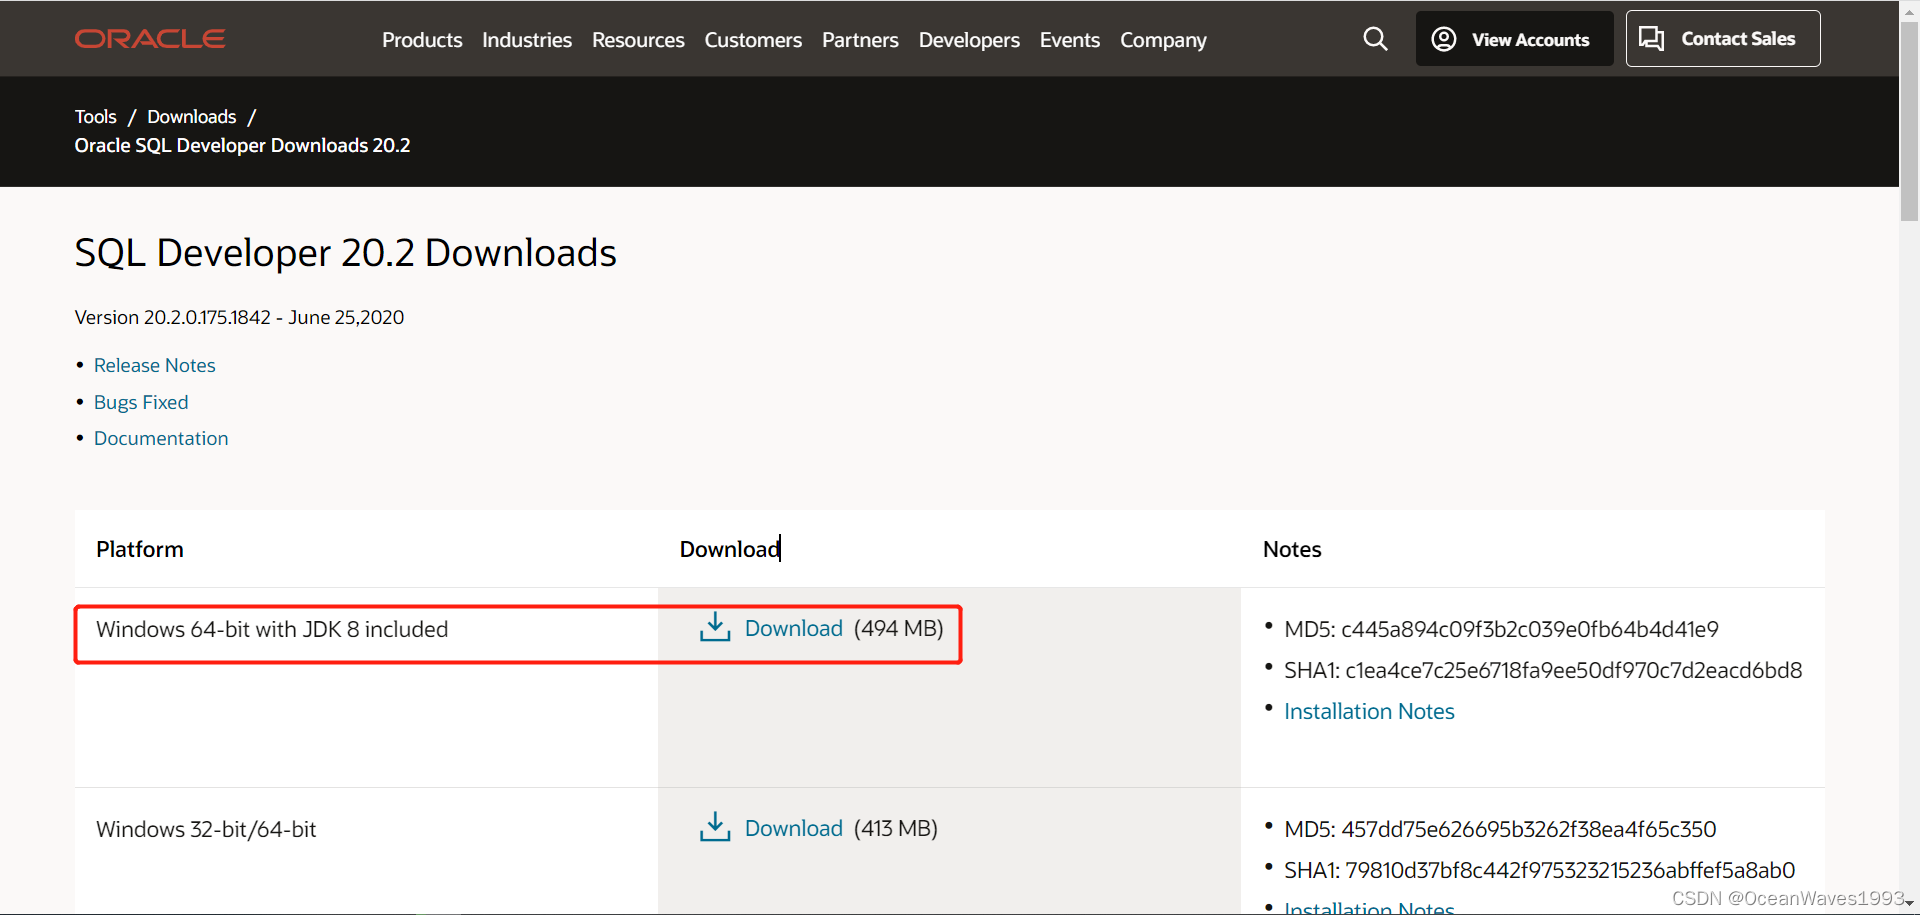
SQL Developer 20.2 With JDK8
下载链接:链接: https://www.oracle.com/tools/downloads/sqldev-downloads-202.html#sqldev-install-windows
文件名:sqldeveloper-20.2.0.175.1842-x64.zip
MD5: c445a894c09f3b2c039e0fb64b4d41e9
SHA1: c1ea4ce7c25e6718fa9ee50df970c7d2eacd6bd8
安装手册
Windows Installation Notes

Windows 64-bit with JDK 8 Included
This archive includes both SQL Developer and an embedded copy of the Java 8 Development Kit
(JDK). Simply extract the zip to a fresh directory and run the sqldeveloper.exe in the top
directory. The EXE is configured to run the embedded JDK by default.

Note: the Windows EXE requires a MSVCR100.dll to run. Most computers will already have this file
and in the Windows PATH. However, if the first copy of the file found by the EXE is a 32-bit copy
of the DLL, then SQL Developer will fail to start. You can fix this by copying a 64-bit version
of the DLL into the BIN directory or updating your OS PATH such that a 64 bit copy of the DLL is found first.
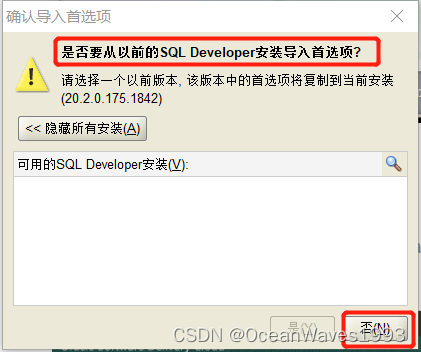
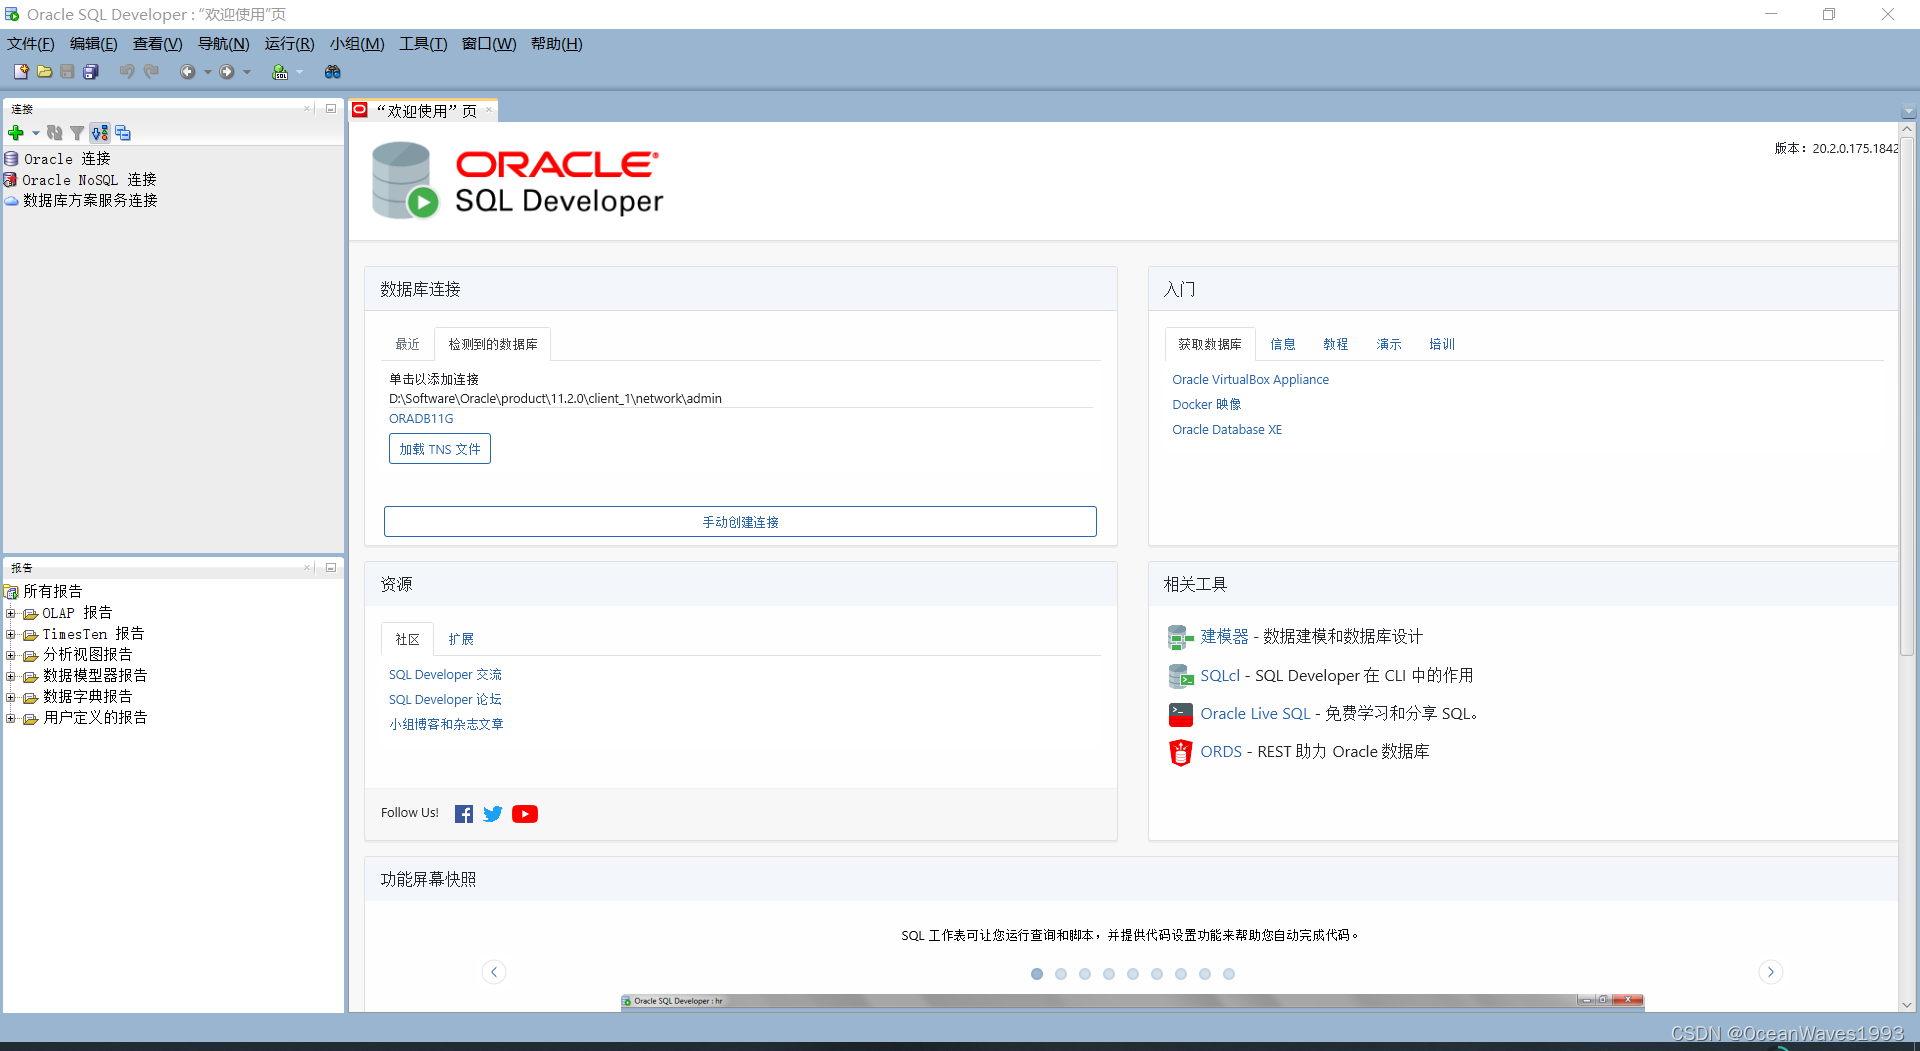
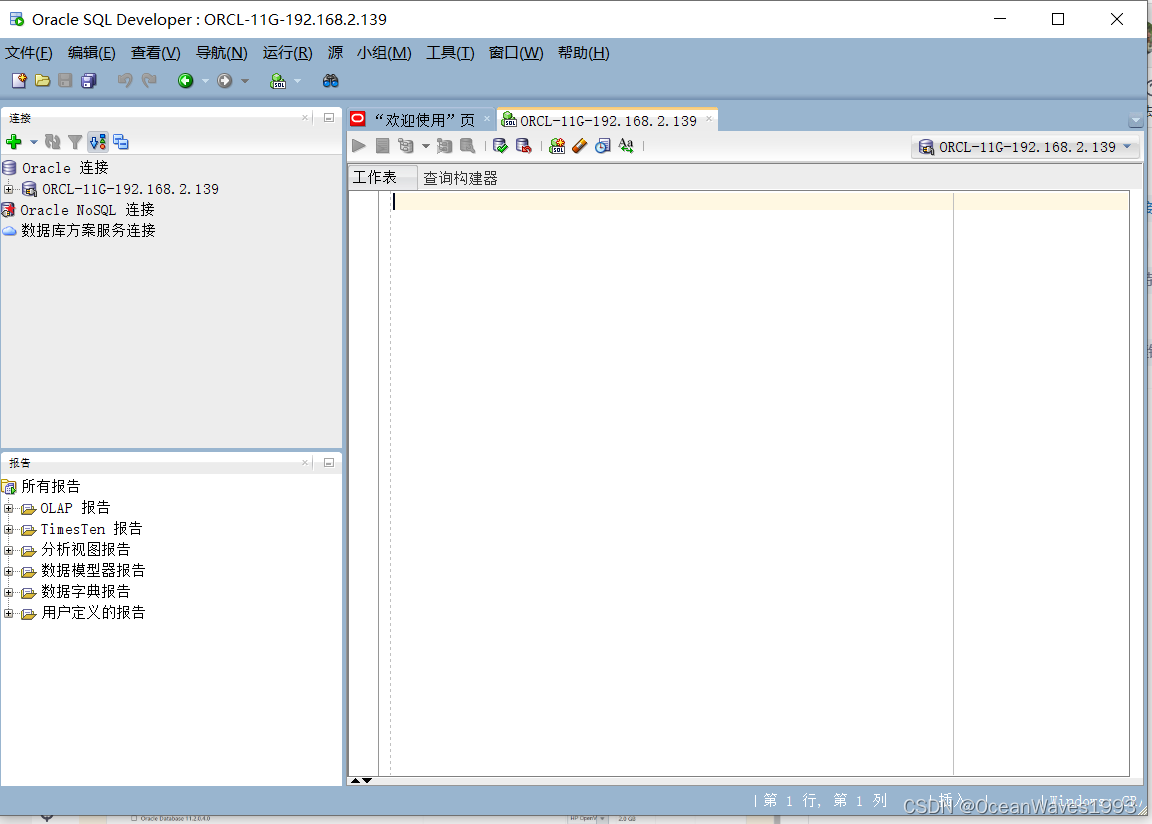
6.2、启动 SQL Developer
安装SQL Developer 20.2 With JDK8
解压安装包,进入安装包目录,运行 sqldeveloper.exe

6.3、新建数据库连接
参考文档: https://qurosity.com/create-new-user-connection-in-sql-developer/
新建连接到Oracle数据库 点击文件->新建连接

选择连接->数据库连接
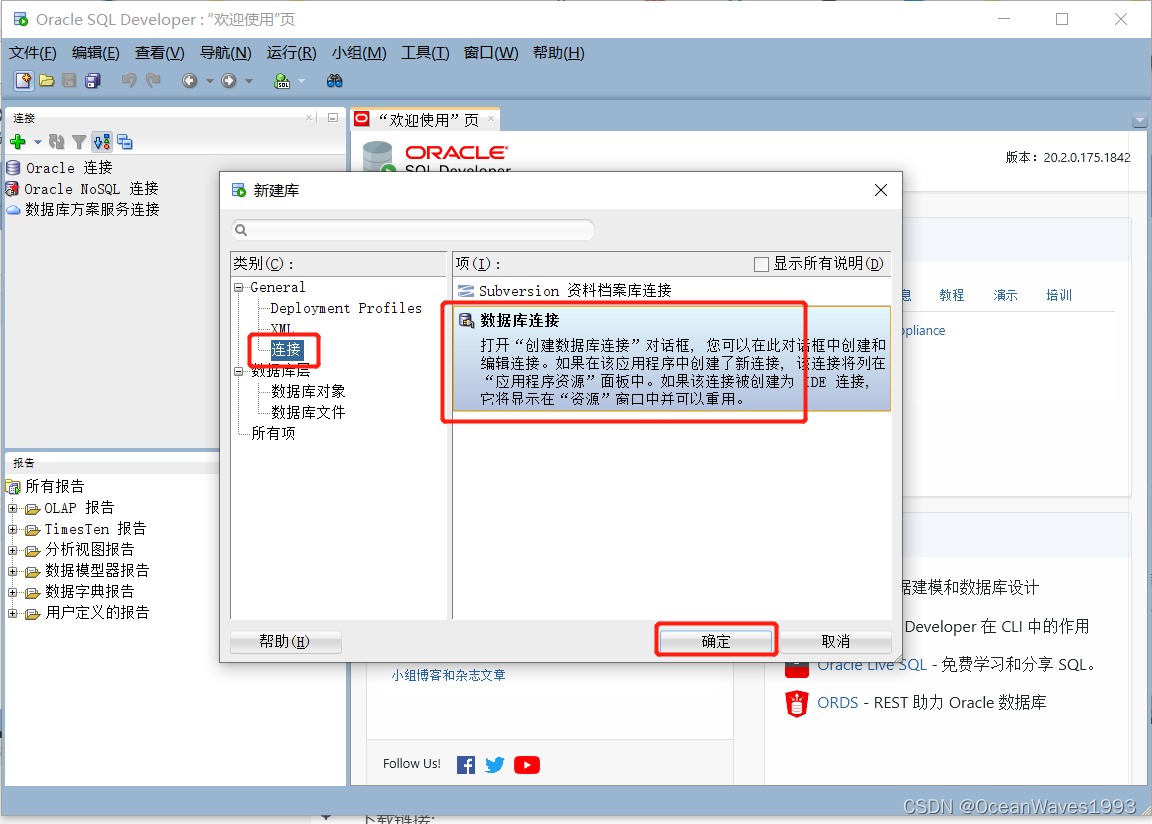
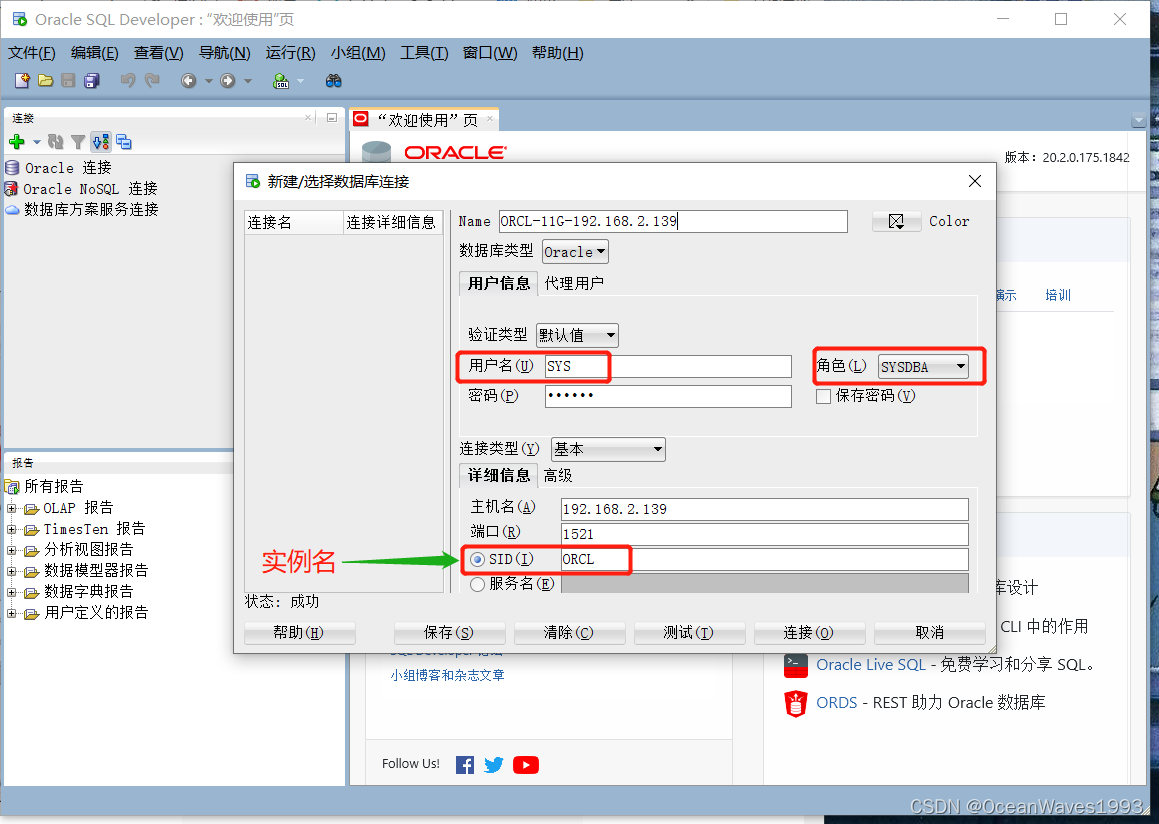
点击连接 输入密码


执行sql查询

点左上角的绿色运行图标,光标定位在哪行,就会执行这行的SQL语句,并在下方脚本输出框输出执行结果。
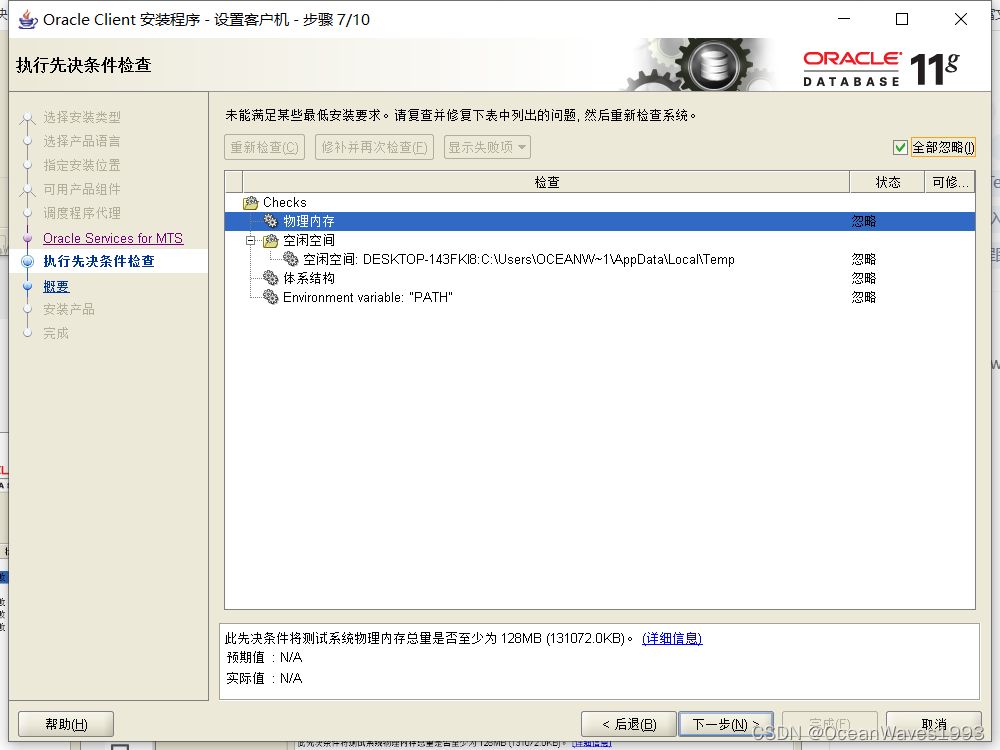
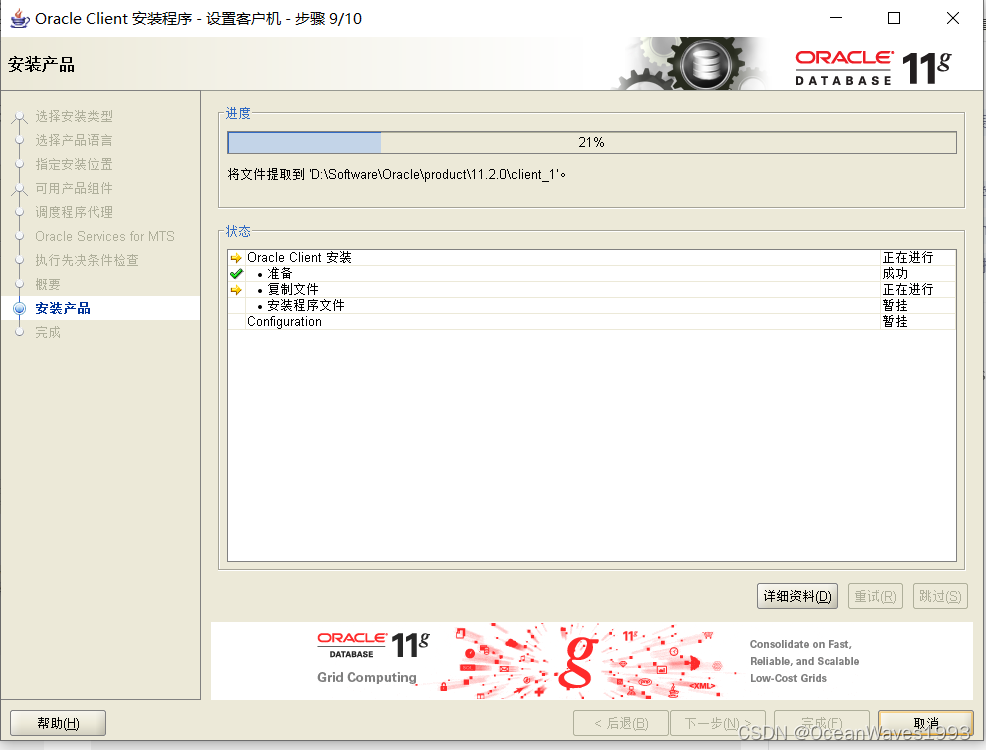
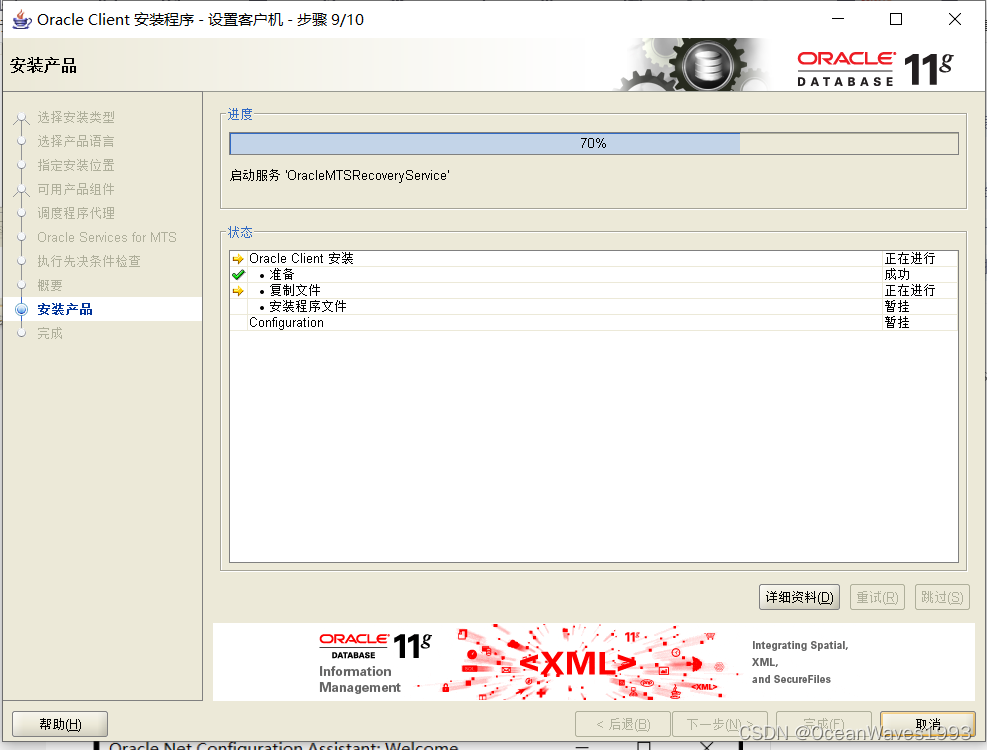
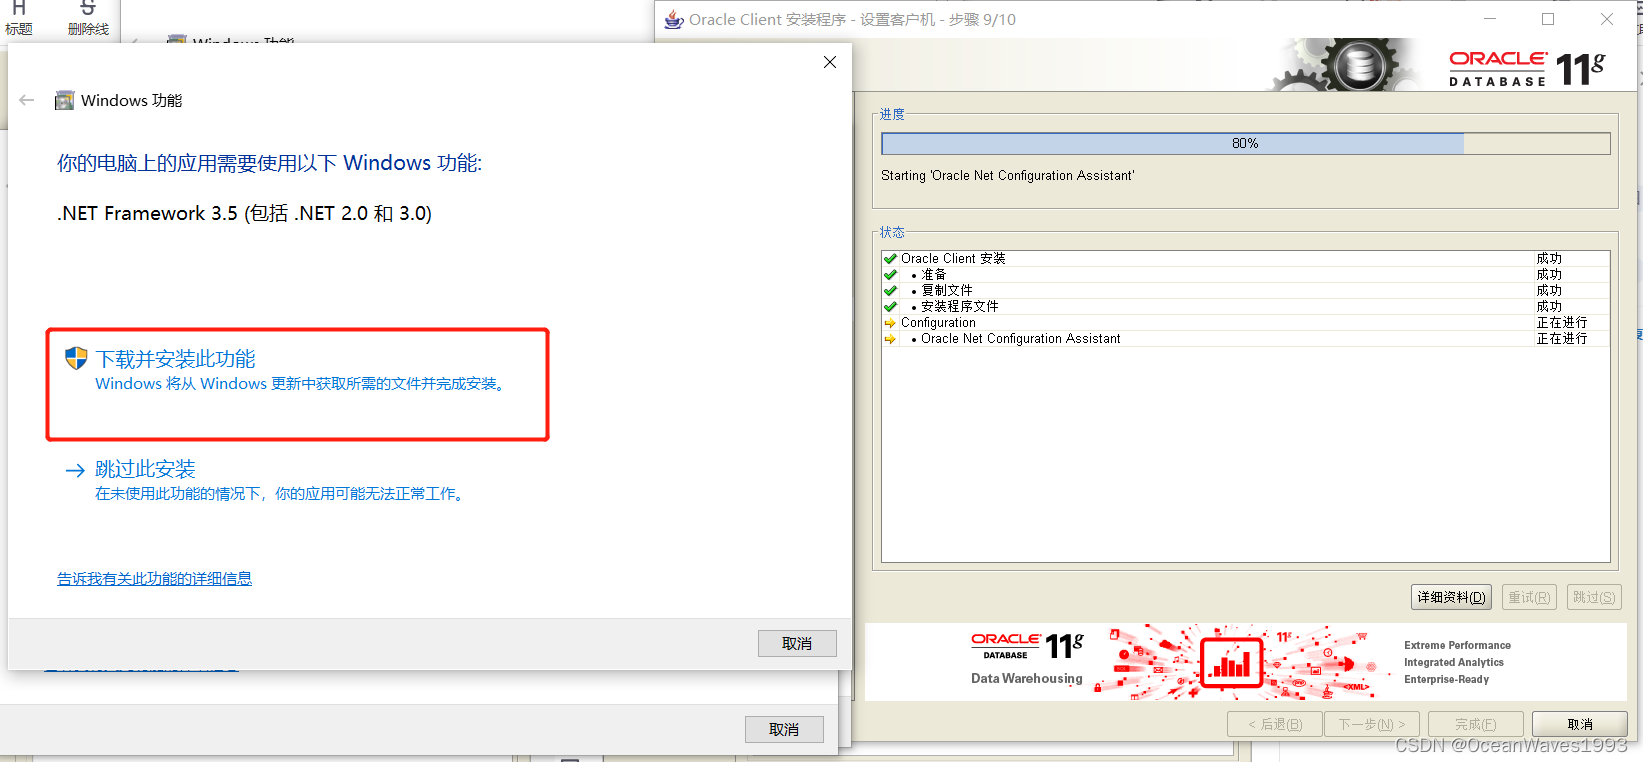
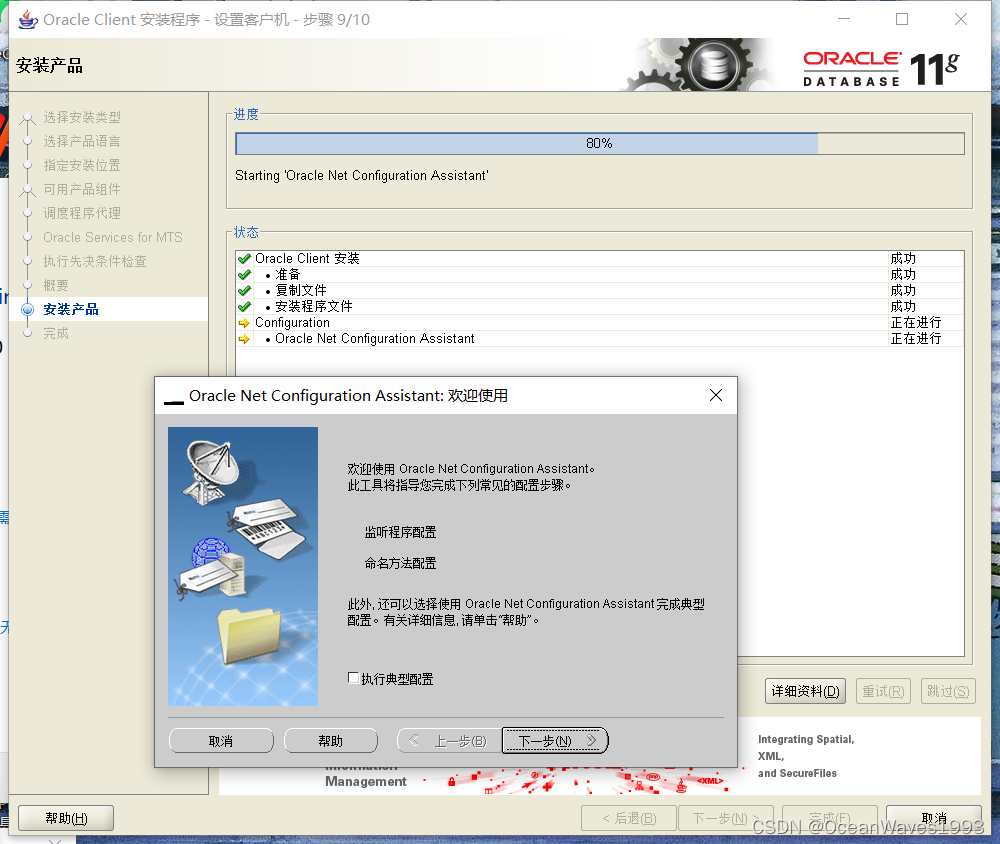
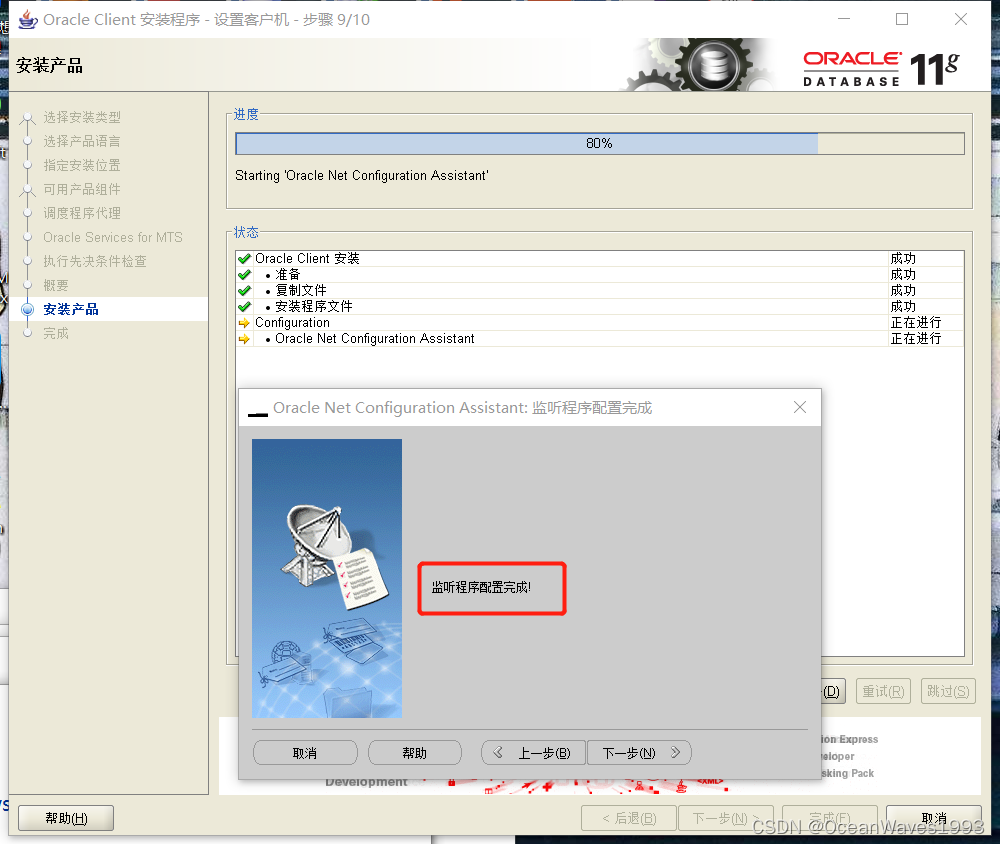
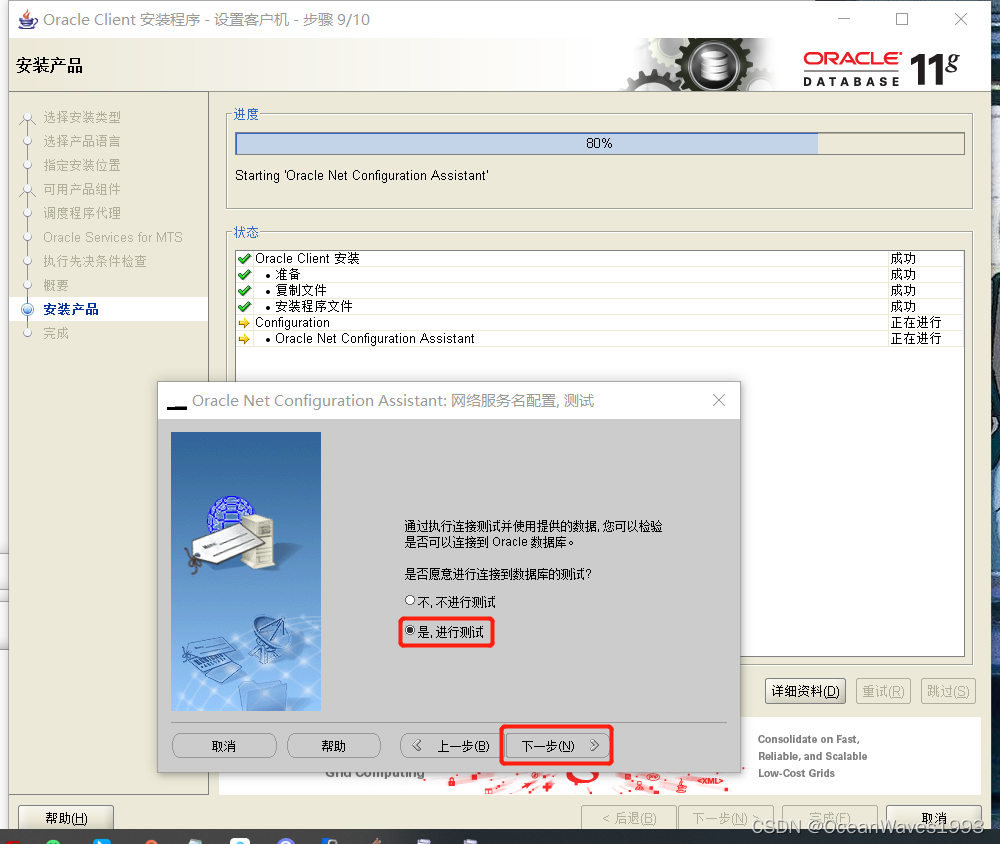
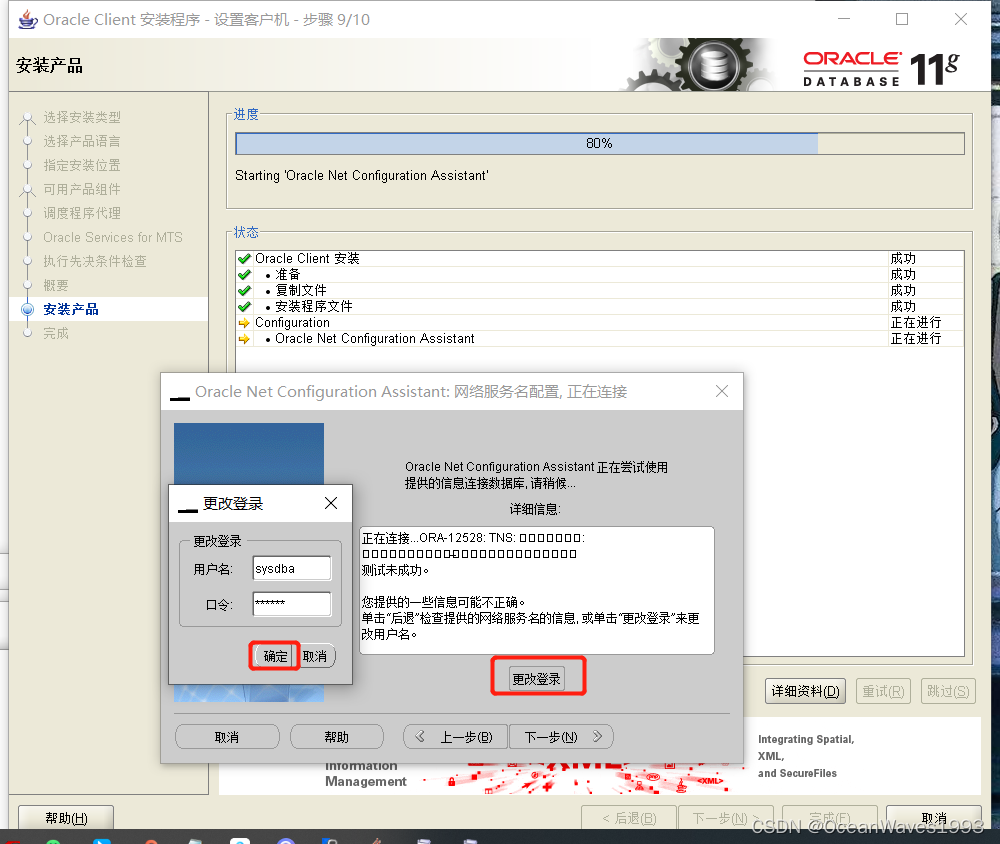
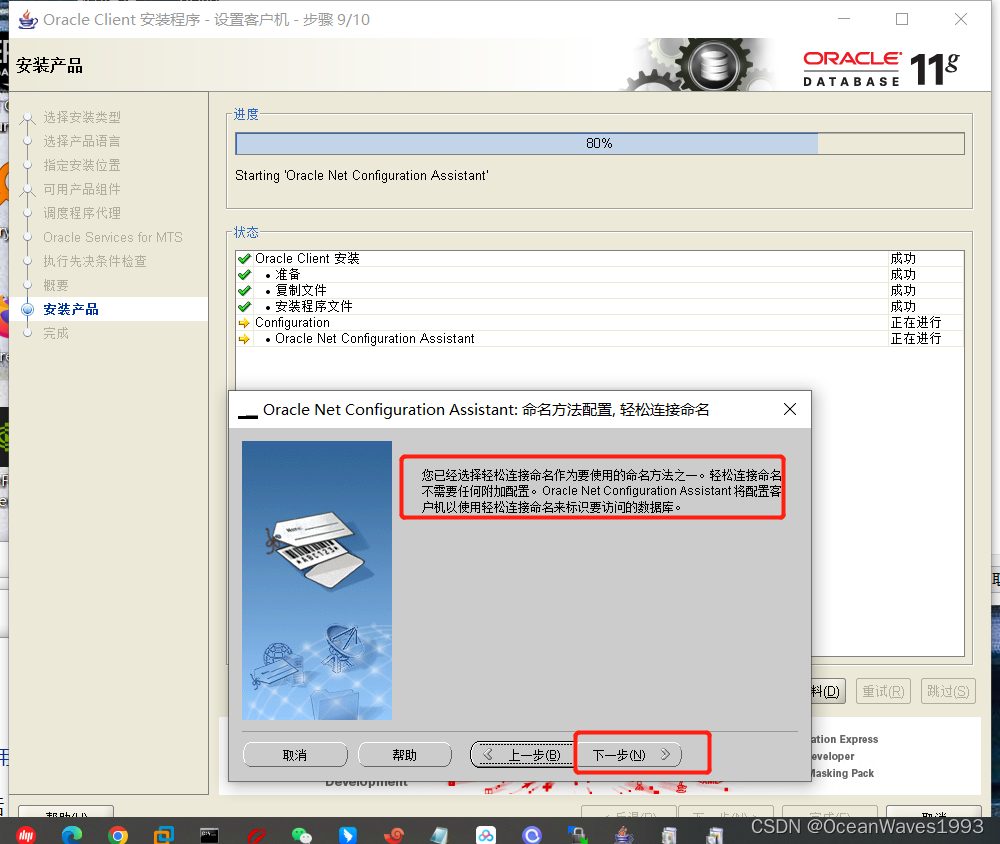
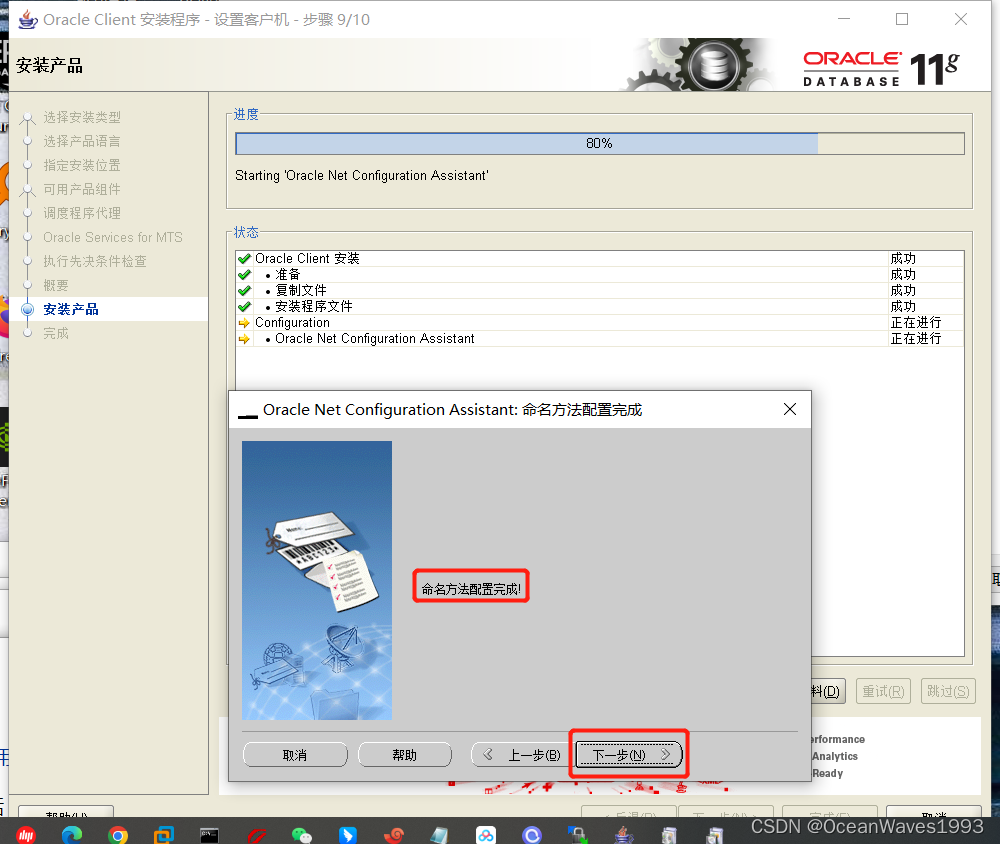
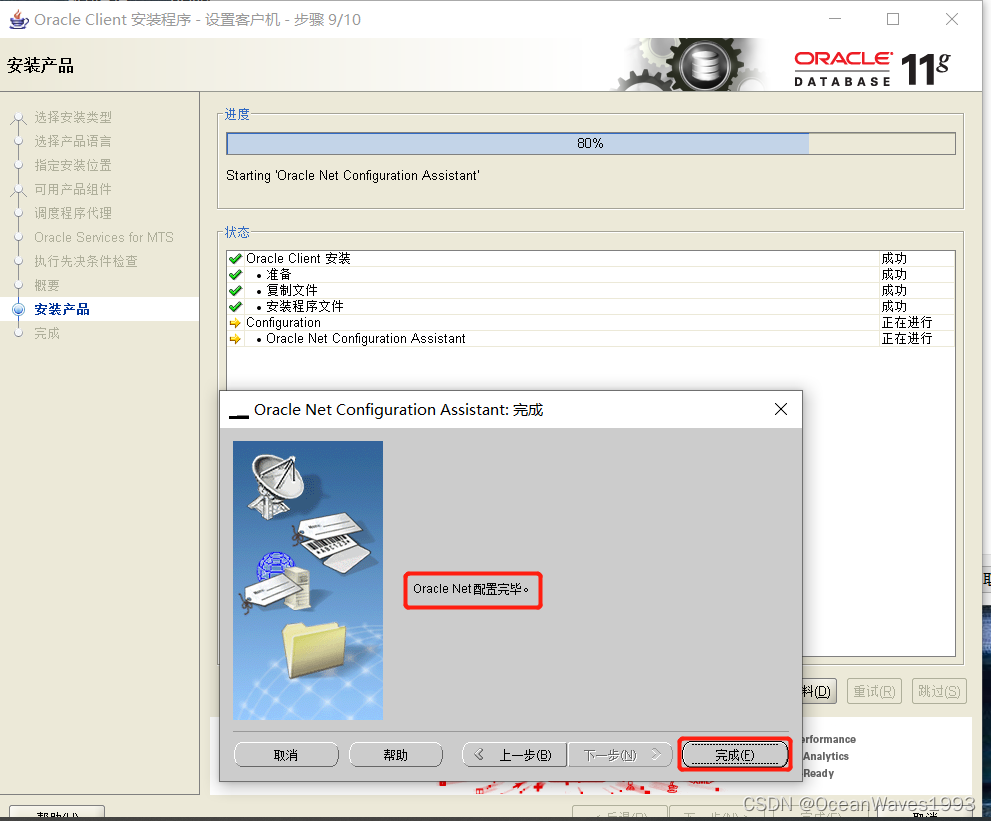
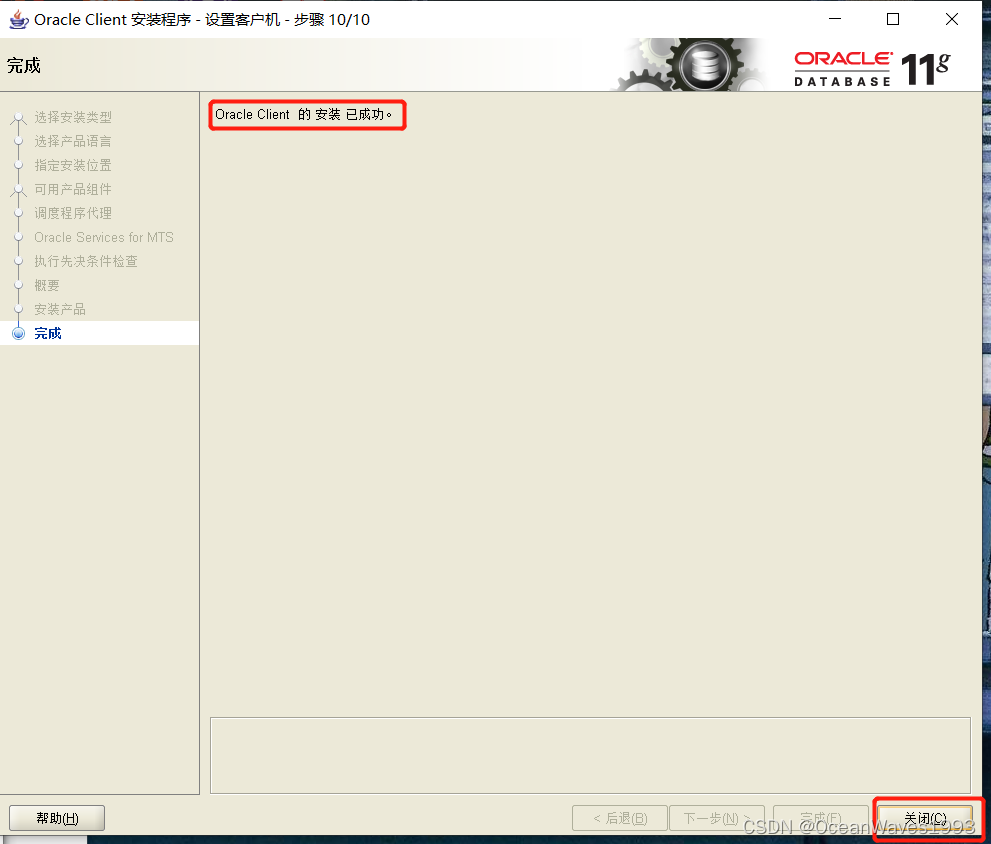
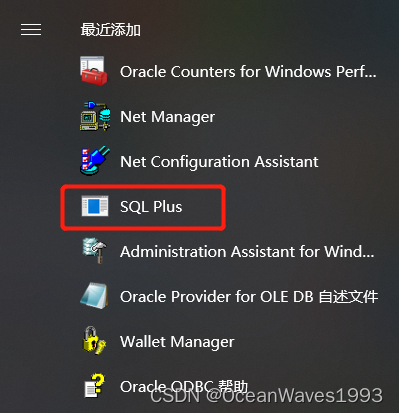
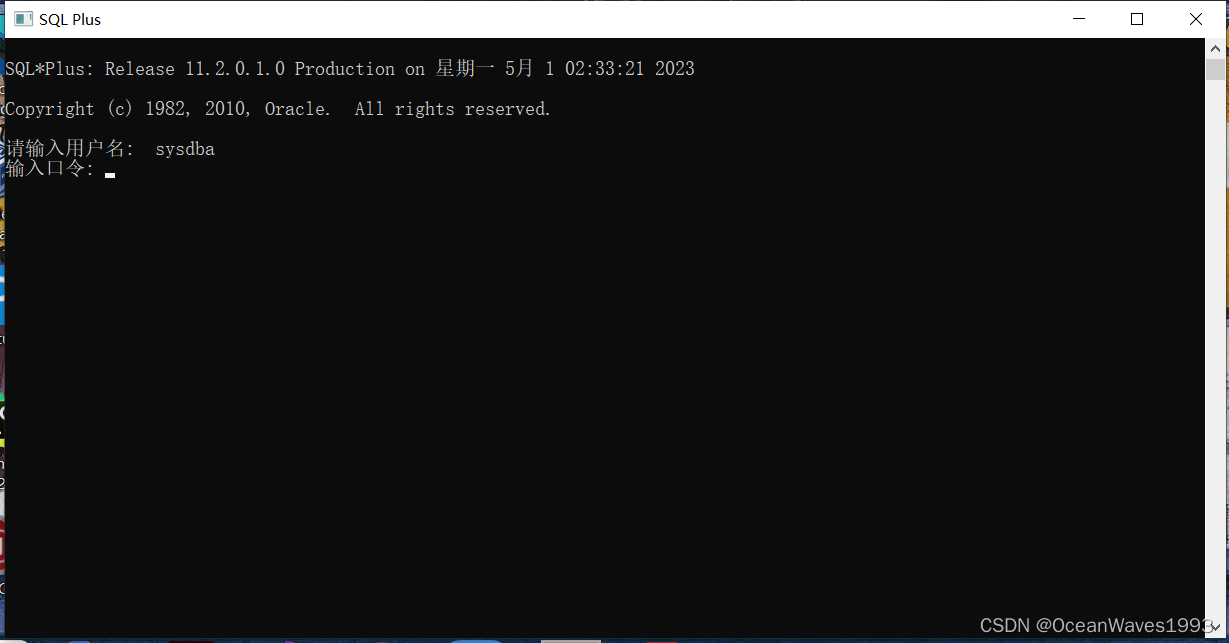
7、windows客户端安装
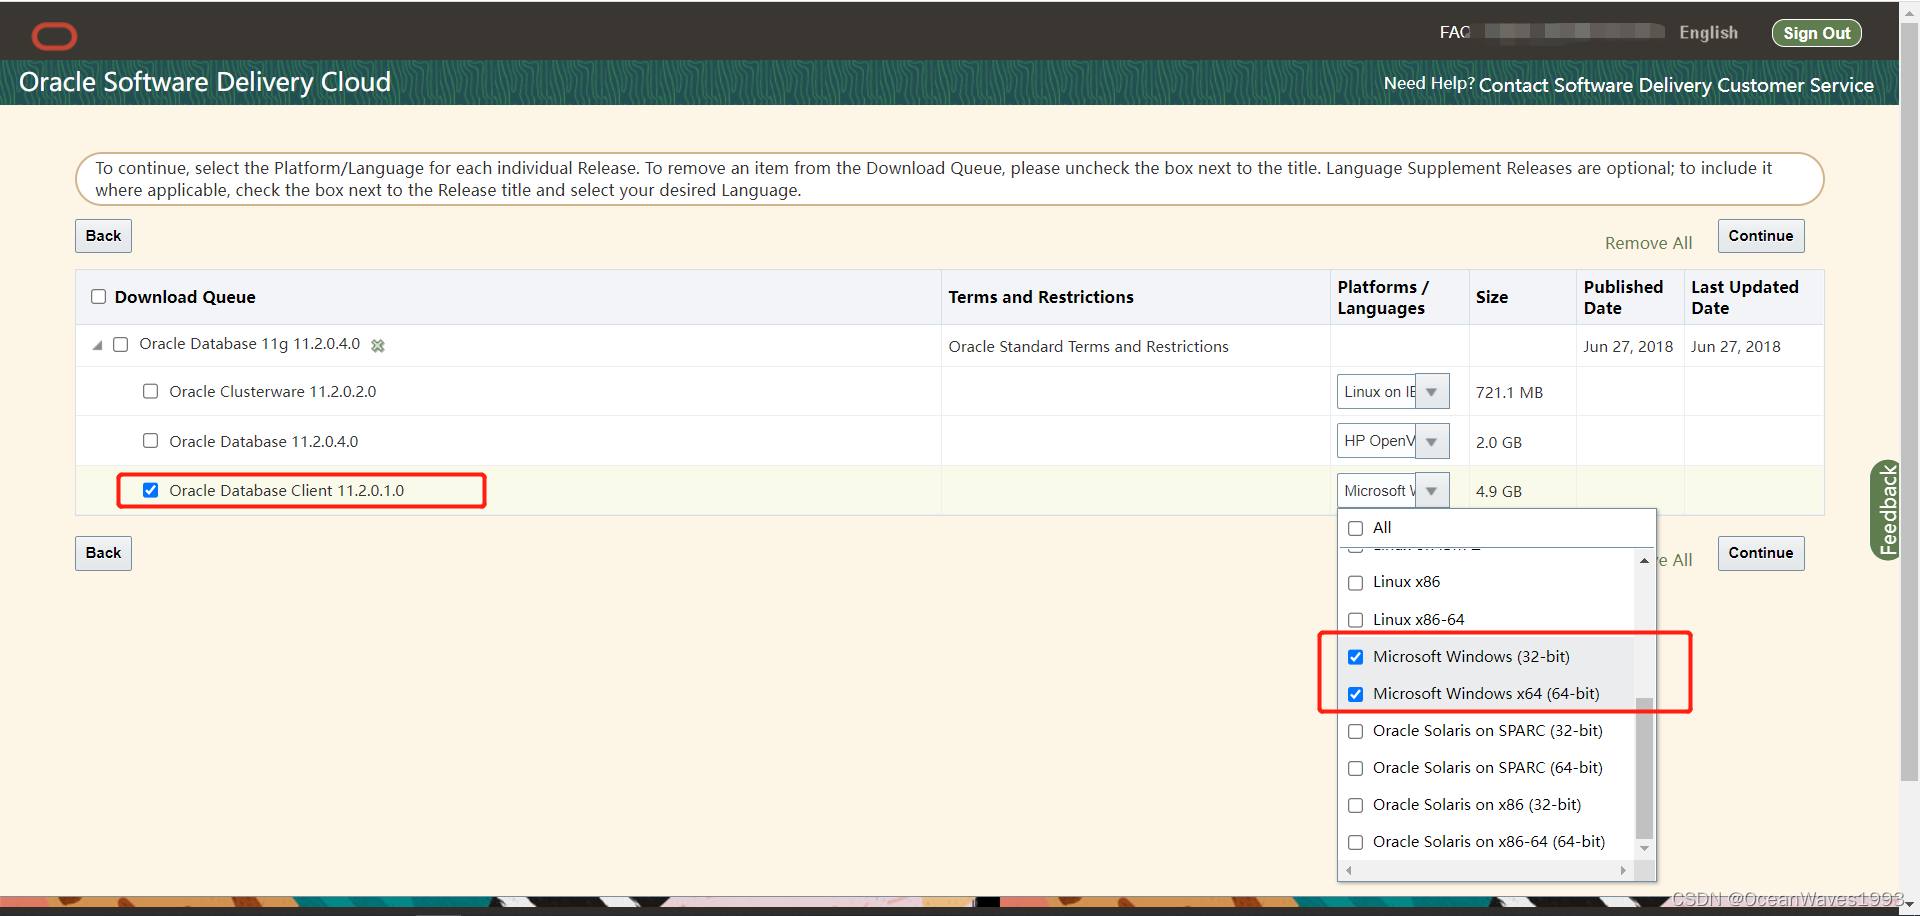
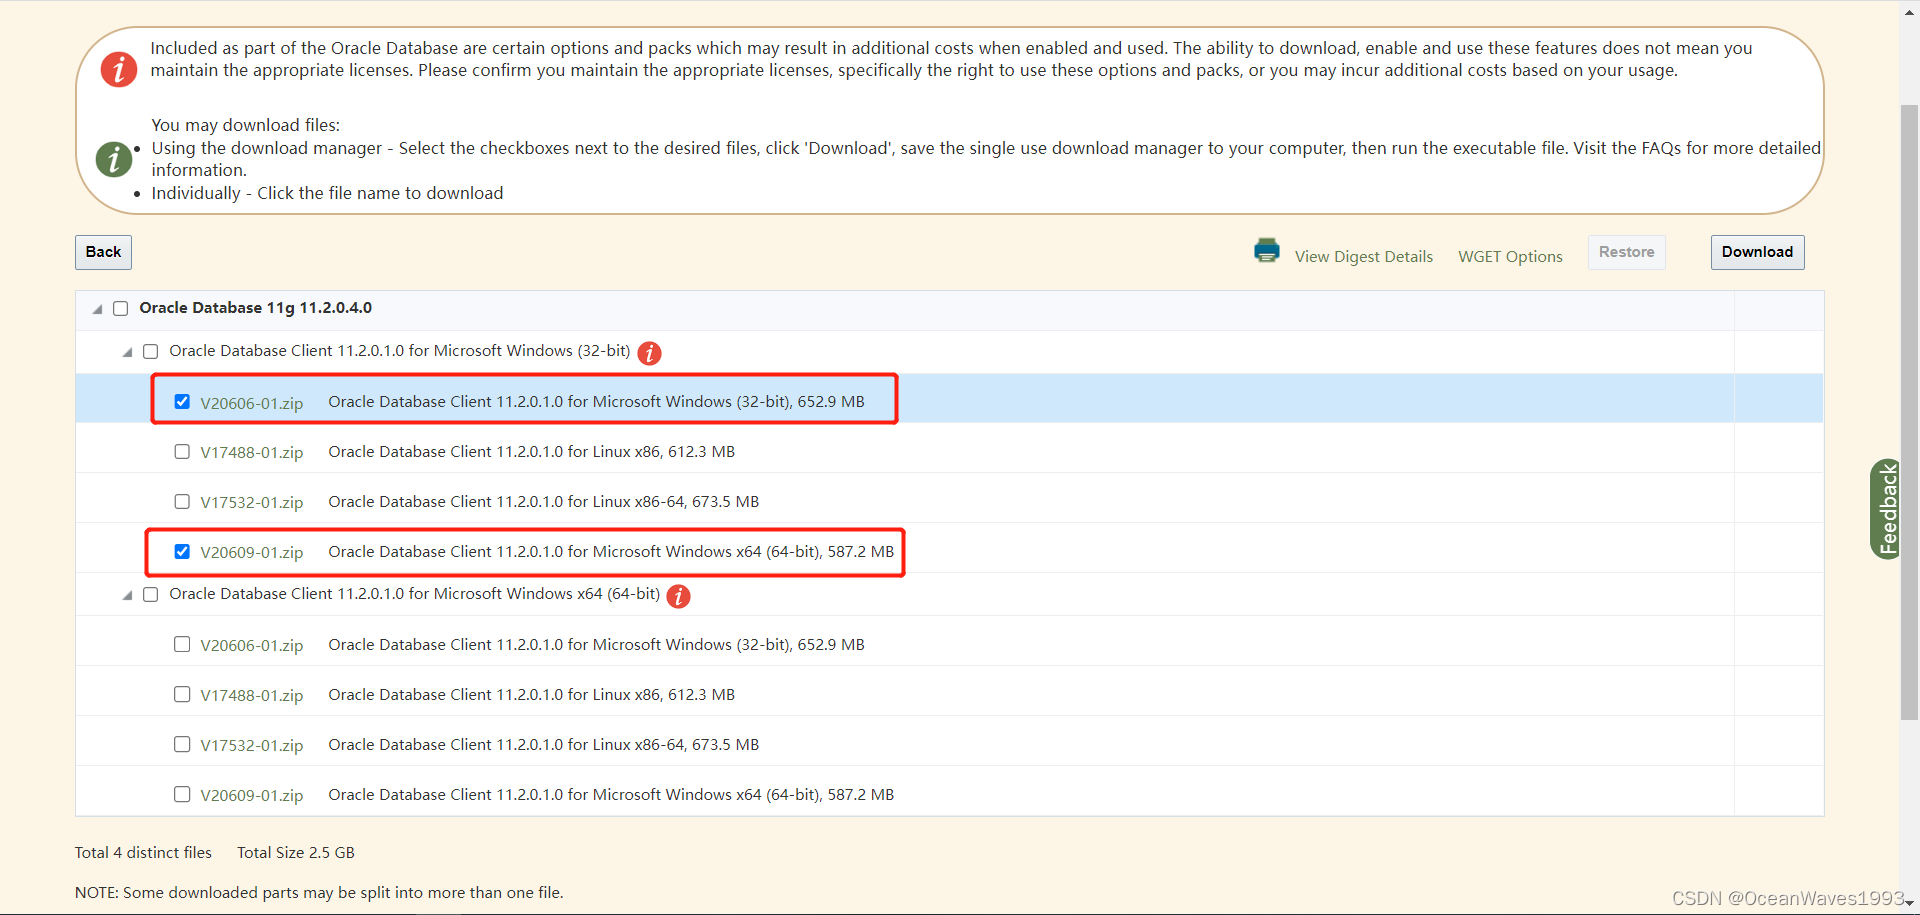
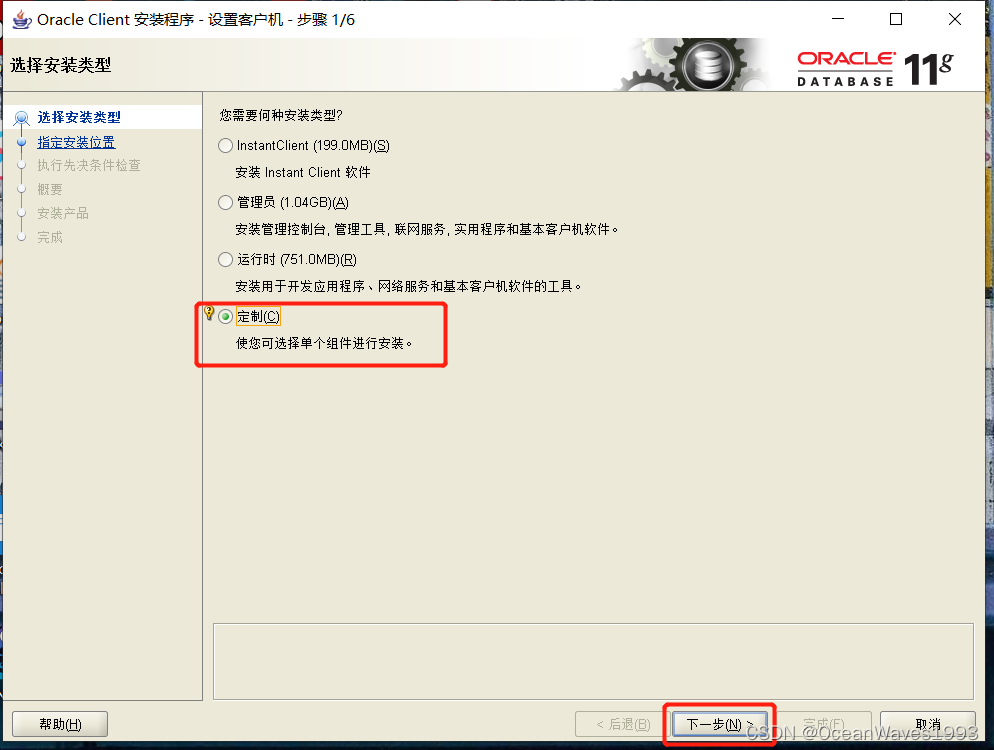
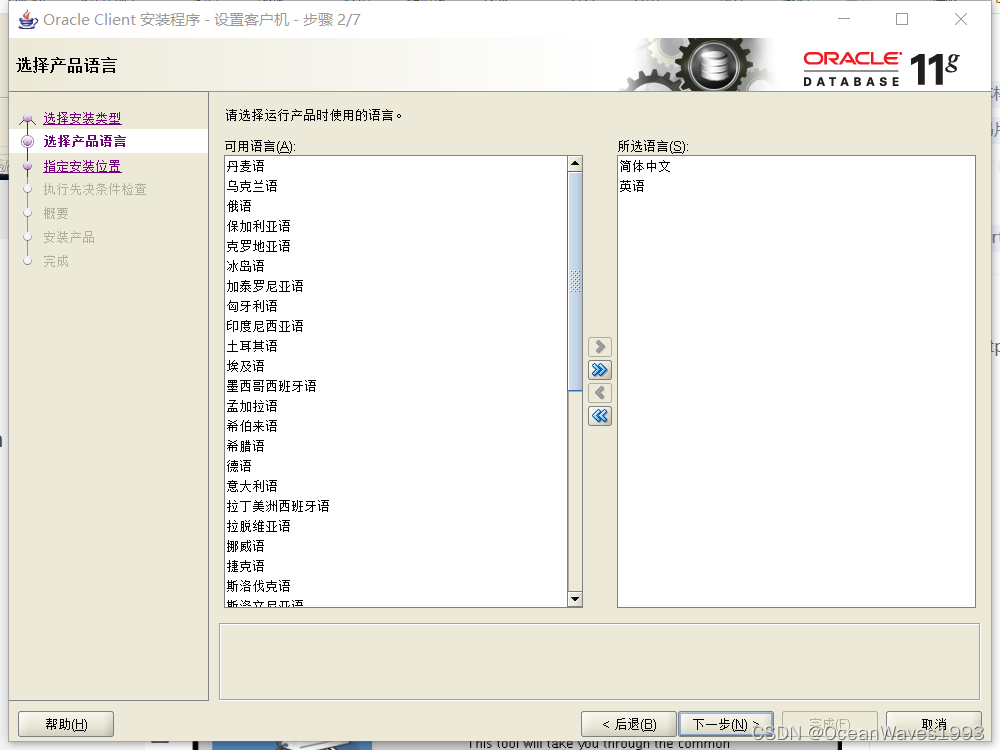
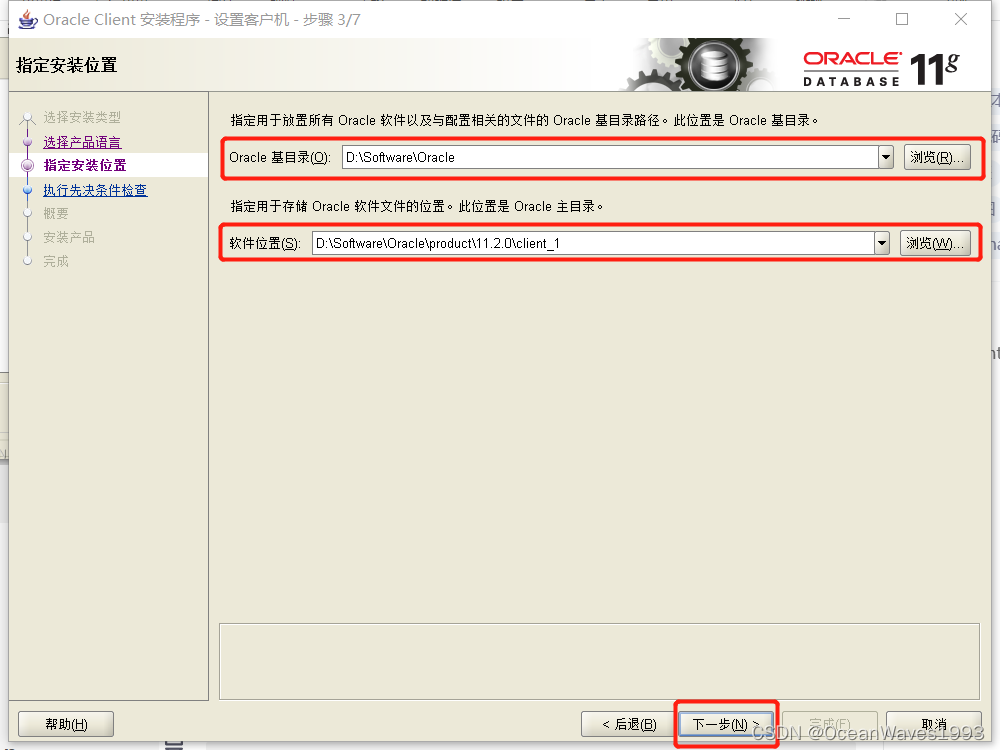
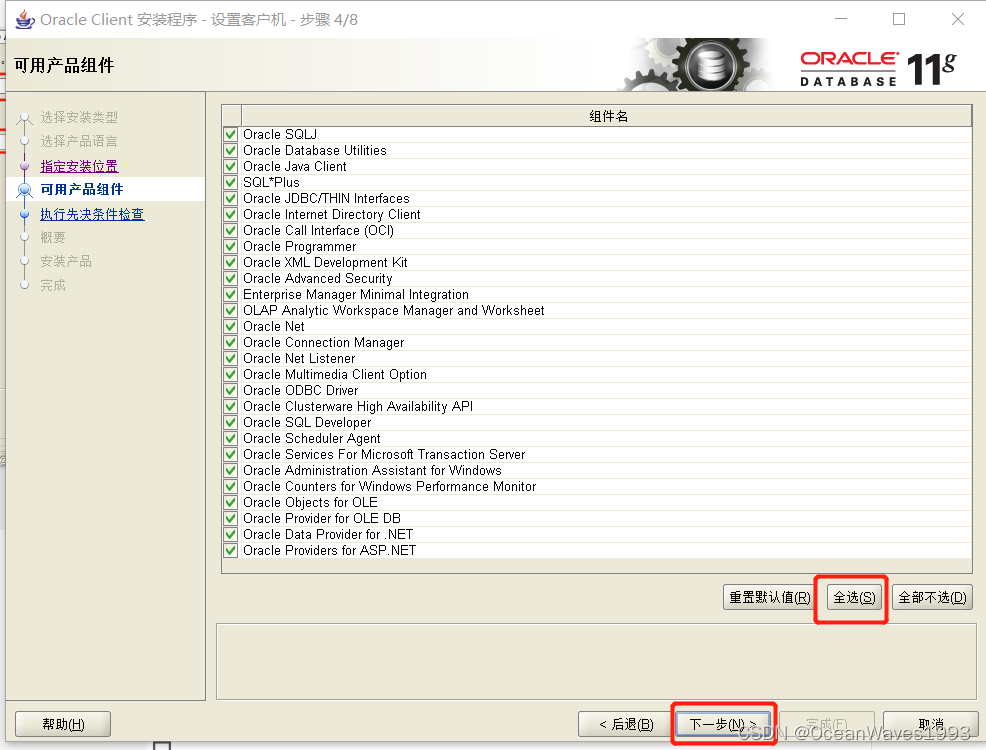
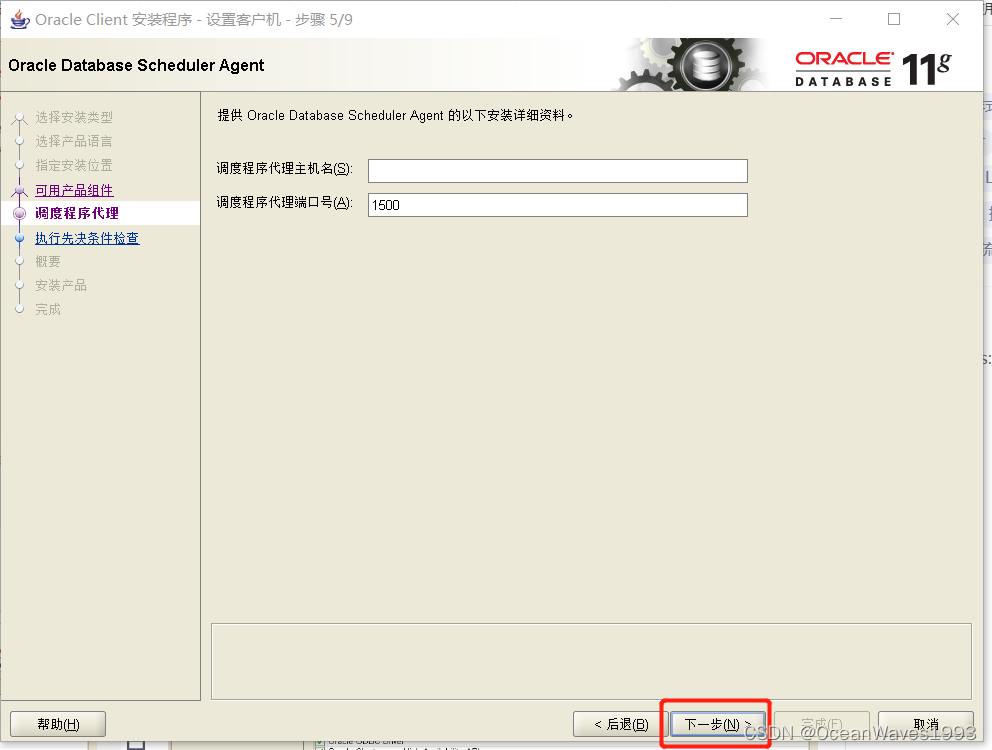
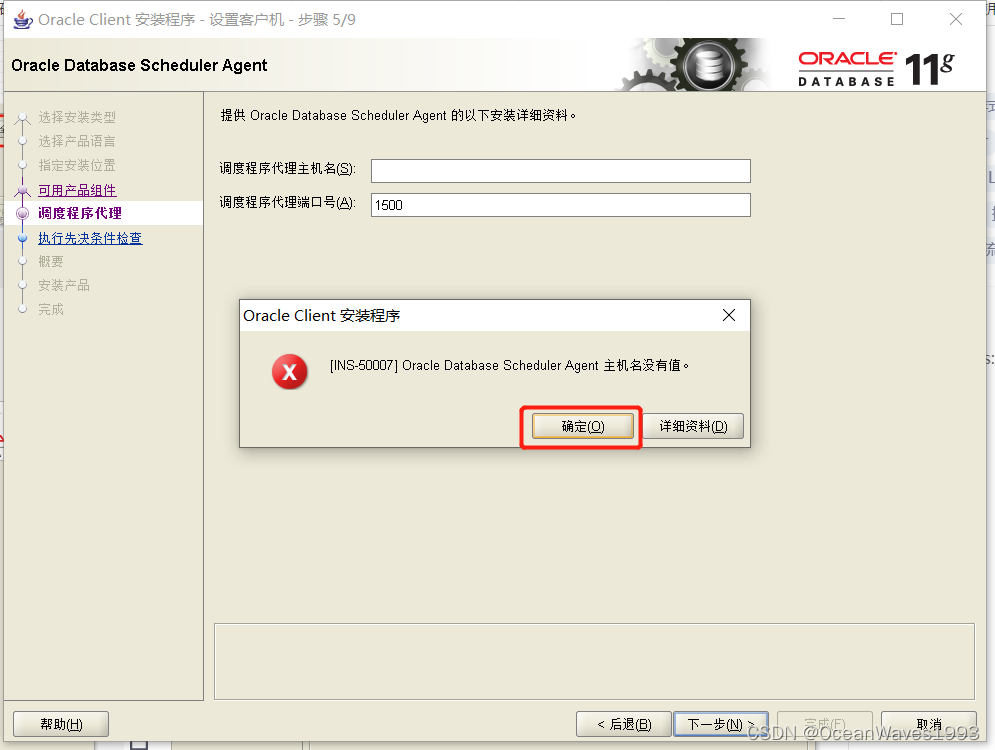
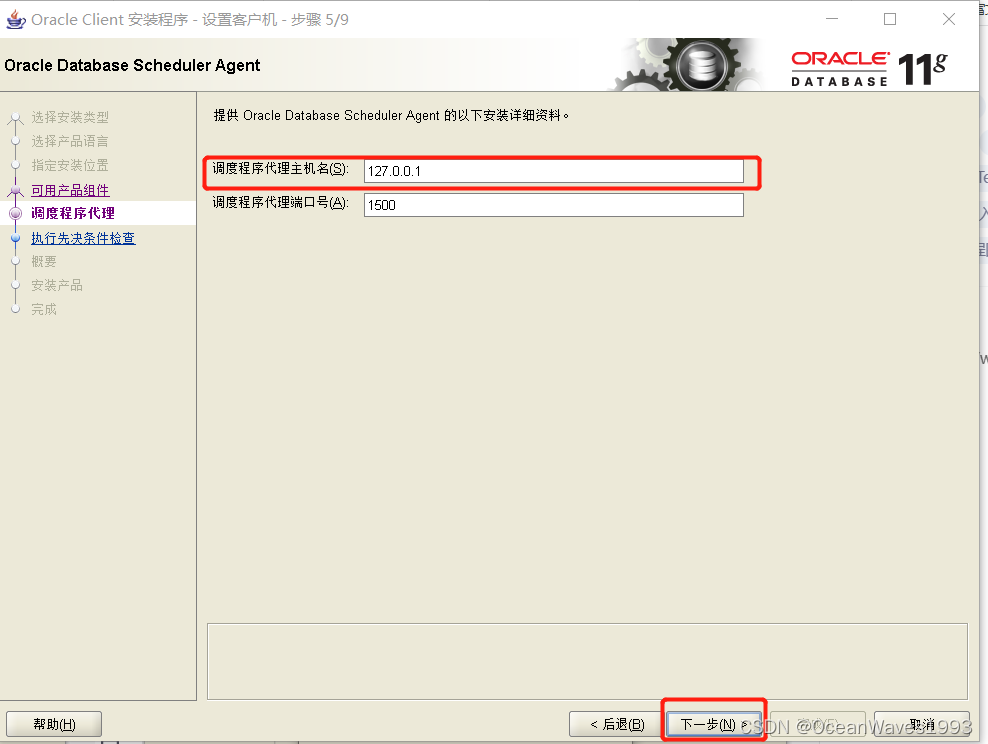
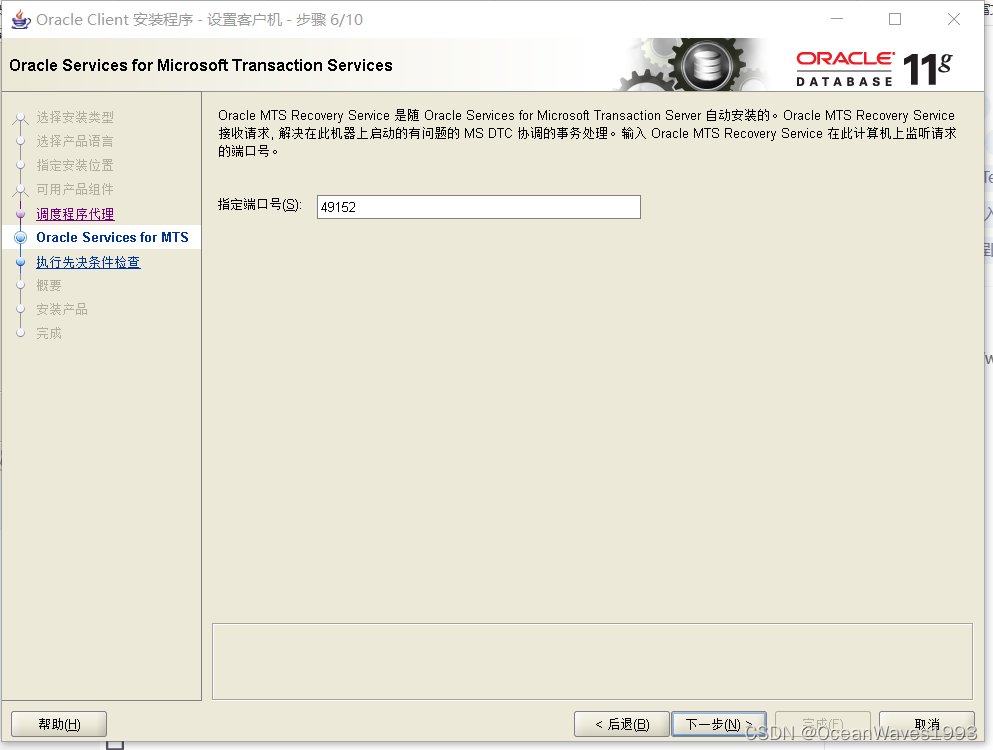
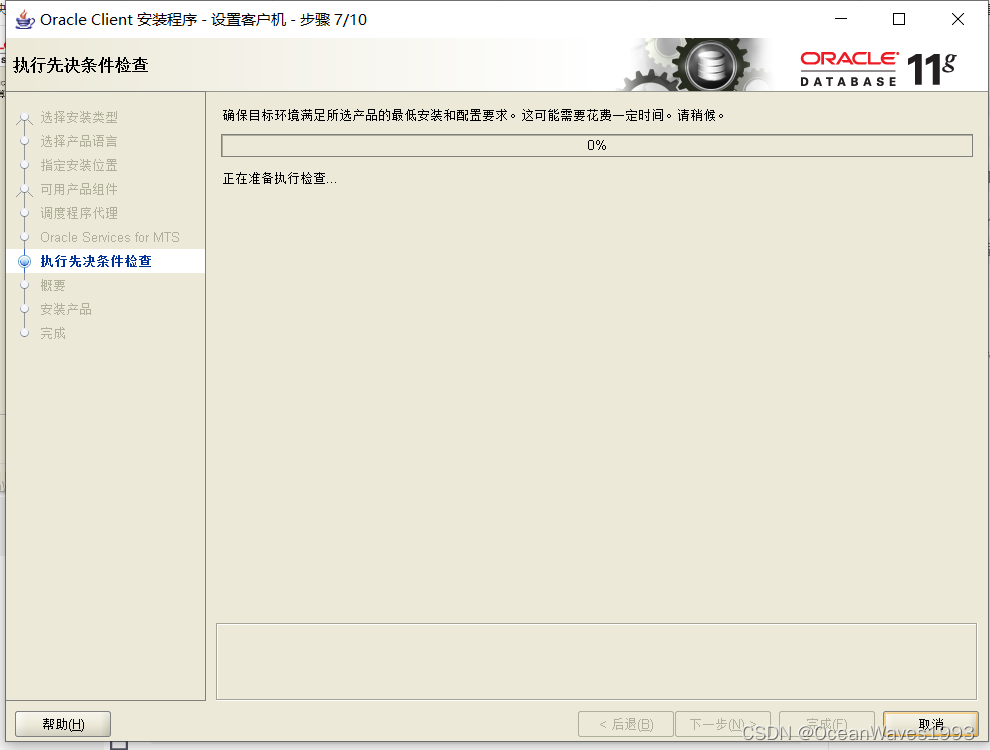
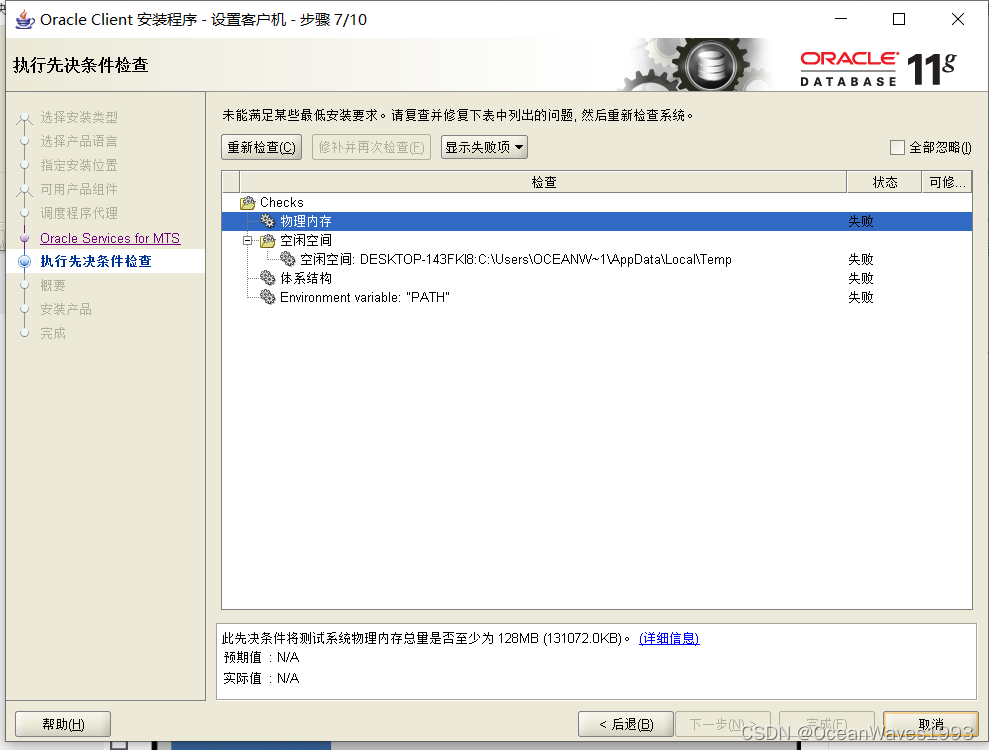
全部忽略


8、为什么不能永远停留在11g
因为已经没有官方技术支持了。建议安装长期支持版本oracle 19C。
参考链接: https://mikedietrichde.com/2022/04/06/why-you-cant-stay-on-oracle-database-11g-forever/


 2306
2306


 被折叠的 条评论
为什么被折叠?
被折叠的 条评论
为什么被折叠?
 到【灌水乐园】发言


