


关于SSH框架
ssh框架为 (struts+spring+hibernate)的一个集成框架,是目前较流行的一种Web应用程序开源框架。
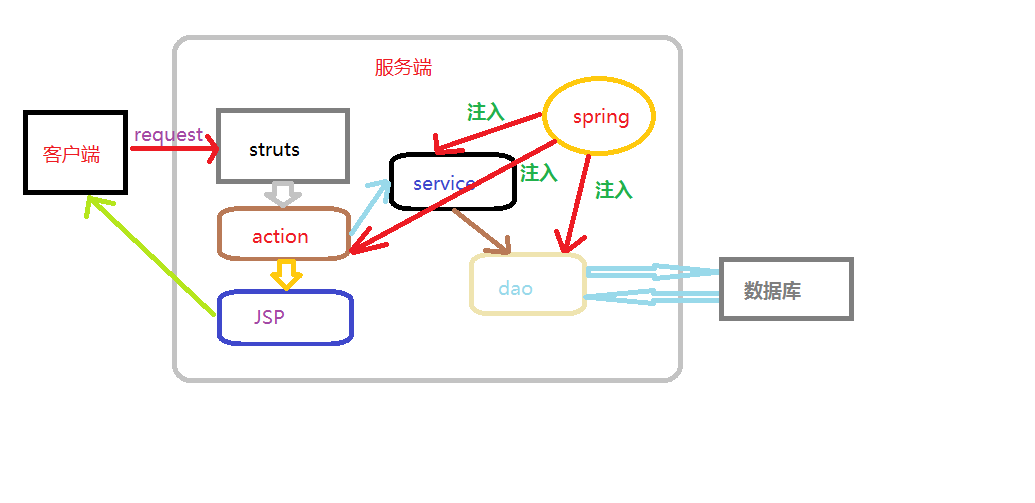
集成SSH框架的系统从职责上分为四层:表示层(jsp)、业务逻辑层(service)、数据持久层(dao)和域模块层(entity)。开发人员在使用ssh框架搭建项目时,可在较短时间便搭建好一个易维护,逻辑结构清晰、可复用性好的项目。
其中ssh框架中struts充当着对客户端所有请求都过滤的部分(相当于一条看门狗)并控制着项目的业务跳转与传值,hibernate则充当着项目文件与数据库的桥梁(让开发人员不再自己编写SQL语句操作数据库),spring则充当着为struts,hibernate做一个后备支持的作用(相当于一只鹰,时刻为struts与hibernate进行注入实体)。
下面是ssh简易架构图:
首先搭建struts2
搭建 struts2时可以先去http://struts.apache.org/download.cgi#struts252下载struts的压缩包(本人使用的是struts-2.3.30版本的)
然后使用eclipse先创建一个javaWeb项目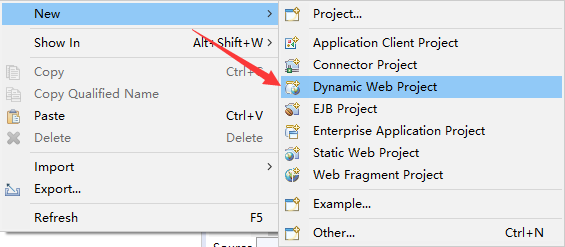

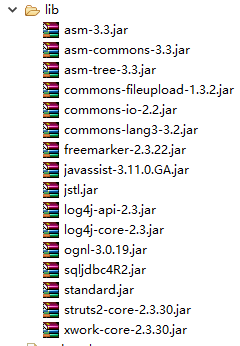
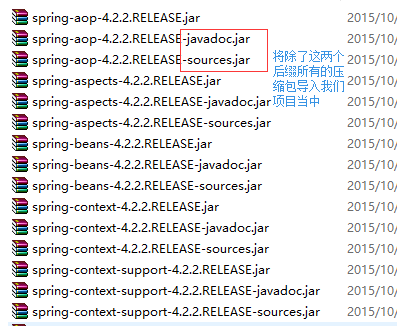
再去到struts-2.3.30–>lib将以下的jar包都导入项目的WEB-INF/lib包当中
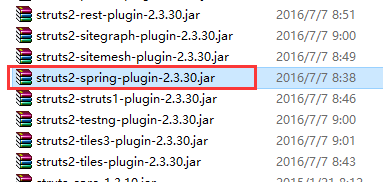
当然,当你要加入spring的时候 你还需要导入一个jar包
导完包之后先去改写最基本的web.xml配置文件里的代码
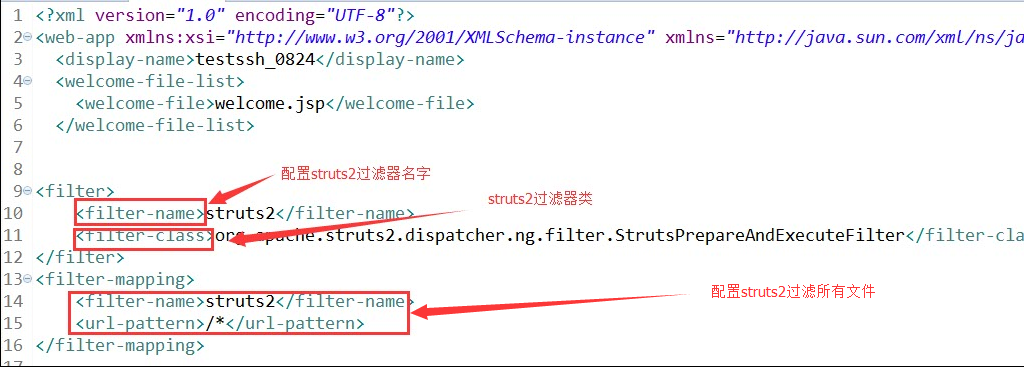
struts配置web.xml的作用:即为我们可以配置哪些请求需要经过struts2处理,比如说struts2的标签、领域模型、数据绑定等都是过滤器的功能,过滤器对常用的功能进行了封装,减少了我们的工作量。(上方只进行了对所有请求都使用struts2进行过滤)
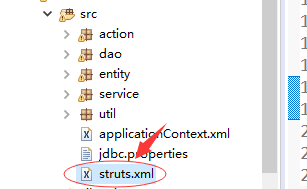
配置完web.xml后还要进行struts.xml的配置
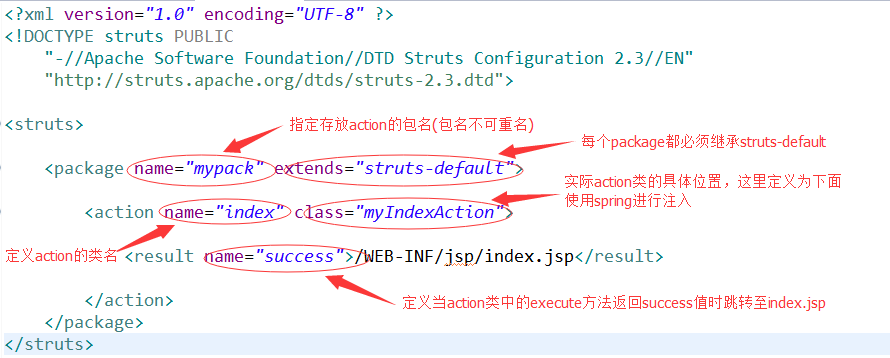
下面我给出简易的struts.xml配置代码
这样,我们简易的struts2框架就搭建完成可以使用了,大家可以试试。
当然,我们也可以尝试使用DMI

然后搭建spring(将项目交给spring去托管)
其实,spring就只是一个监听器,时刻地监听着我们对于项目的操作,在我们需要创建实例的时候,给我们注入实例,以实现我们项目的解耦。
我们可以先去到
https://repo.spring.io/webapp/#/artifacts/browse/tree/General/libs-release-local/org/springframework/spring/4.2.2.RELEASE/spring-framework-4.2.2.RELEASE-dist.zip
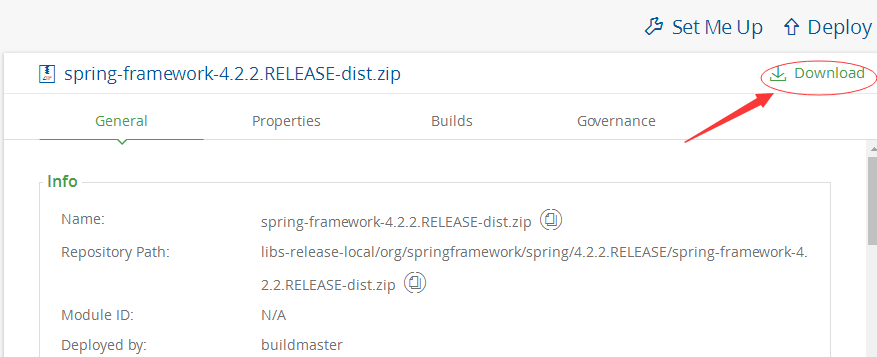
去下载我们spring 4.2.2版本的压缩包
之后我们解压,打开spring文件夹可以看到有libs文件夹,之后便可以
导完包之后,我们首先要去到web.xml文件中进行添加我们spring监听器

之后我们再去到我们的struts.xml中加入下面这句代码

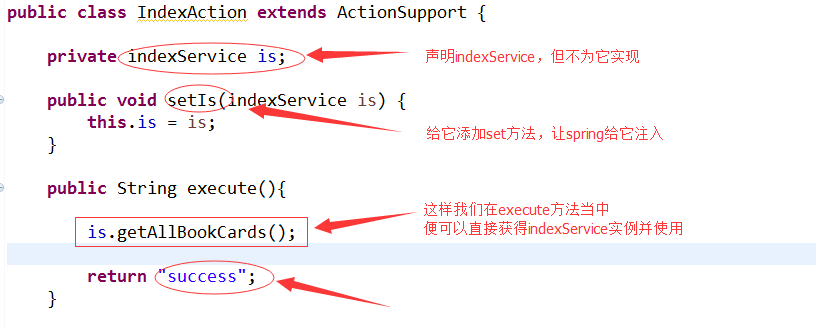
之后我们去到action类,将以下代码加入
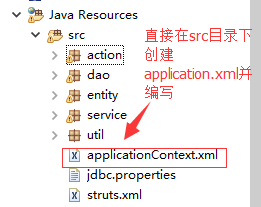
然后我们再添加编写applicationContext.xml文件
<?xml version="1.0" encoding="UTF-8"?>
<beans xmlns="http://www.springframework.org/schema/beans"
        xmlns:xsi="http://www.w3.org/2001/XMLSchema-instance"
        xmlns:p="http://www.springframework.org/schema/p"
        xmlns:aop="http://www.springframework.org/schema/aop"
        xmlns:context="http://www.springframework.org/schema/context"
        xmlns:jee="http://www.springframework.org/schema/jee"
        xmlns:tx="http://www.springframework.org/schema/tx"
        xsi:schemaLocation="
            http://www.springframework.org/schema/aop http://www.springframework.org/schema/aop/spring-aop-4.2.xsd
            http://www.springframework.org/schema/beans http://www.springframework.org/schema/beans/spring-beans-4.2.xsd
            http://www.springframework.org/schema/context http://www.springframework.org/schema/context/spring-context-4.2.xsd
            http://www.springframework.org/schema/jee http://www.springframework.org/schema/jee/spring-jee-4.2.xsd
            http://www.springframework.org/schema/tx http://www.springframework.org/schema/tx/spring-tx-4.2.xsd">
    <!-- 类似于财务部门一样,类就是钱,所有需要类的实例都交由srping去管托 -->
        <!-- 给 Struts2 注入相应的实现类 -->
    <bean id="myIndexAction" class="ssh.action.IndexAction" scope="prototype">
        <!-- 等价于 setIs(myIndexService),实现注入实例 -->
        <property name="is" ref="myIndexService"/>
    </bean>

    <!-- 等价于myIndexService = new ssh.service.IndexServiceImpl() -->
    <bean id="myIndexService" class="ssh.service.IndexServiceImpl" scope="prototype">
        <property name="id" ref="myIndexDao"/>
    </bean>
    <!-- 同上 -->
    <bean id="myIndexDao" class="ssh.dao.IndexDaoImpl" scope="prototype">
     <!-- 加入 hibernate 的配置信息,这里先不用管 -->
        <property name="sf" ref="sessionFactory"></property>
    </bean>
</beans>
通过以上,简易的spring框架也搭建完成。
最后加入hibernate配置
hibernate,是服务器与数据库交互的媒介,对jdbc进行了封装,可以自动生成sql语句。使用了hibernate即可自动实现对数据库的操作。
我们继续在已经搭建了struts、spring的框架上搭建hibernate。
首先依旧是导包,可以先去
http://nchc.dl.sourceforge.net/project/hibernate/hibernate-orm/5.2.2.Final/hibernate-release-5.2.2.Final.zip
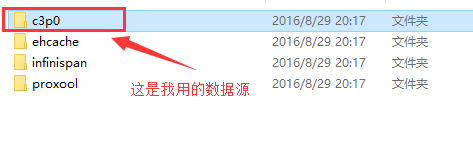
下载我们hibernate 5.2.2版本的压缩包,下载完成之后解压 打开hibernate-release-5.2.2.Final- ->lib- ->optional - ->c3p0 将里面的包都导入项目中(这里的c3p0的jar包是下面我们需要用到的数据源)
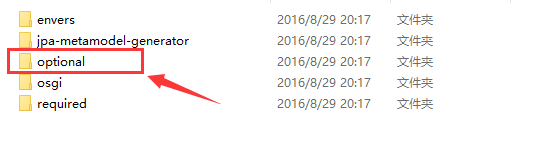

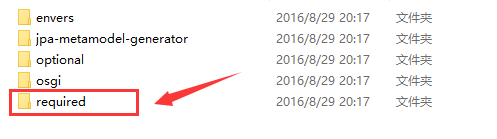
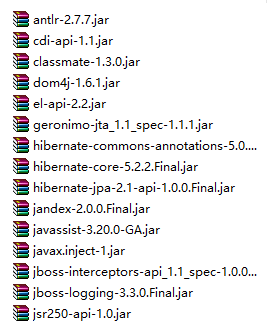
接着继续打开hibernate-release-5.2.2.Final- ->lib- ->required 将里面所有的jar包都导入项目当中
导完包之后我们继续在applicationContext.xml中加入以下代码
<bean id="mySessionFactory" class="org.springframework.orm.hibernate5.LocalSessionFactoryBean">
        <!-- 注入连接池,包含了数据库用户名,密码等等信息 -->
        <property name="dataSource" ref="myDataSource"/>

        <!-- 配置Hibernate的其他的属性 -->
        <property name="hibernateProperties">
            <props>
                <prop key="hibernate.dialect">org.hibernate.dialect.MySQL5Dialect</prop>
                <prop key="hibernate.show_sql">true</prop>
                <prop key="hibernate.format_sql">true</prop>
                <prop key="hibernate.connection.autocommit">false</prop>
                <!-- 开机自动生成表 -->
                <prop key="hibernate.hbm2ddl.auto">update</prop>
            </props>
        </property>
        <property name="mappingResources">
            <list>
                <value>ssh/entity/BookCard.hbm.xml</value>
            </list>
        </property>
    </bean>

     <!-- 这里使用的是c3p0的数据源 -->
    <bean id="myDataSource" class="com.mchange.v2.c3p0.ComboPooledDataSource">
        <property name="driverClass" value="${jdbc.driver}"/>
        <property name="jdbcUrl" value="${jdbc.url}"/>
        <property name="user" value="${jdbc.user}"/>
        <property name="password" value="${jdbc.password}"/>
        <!-- 每300秒检查所有连接池中的空闲连接 -->
        <property name="idleConnectionTestPeriod" value="300"></property>
        <!-- 最大空闲时间,900秒内未使用则连接被丢弃。若为0则永不丢弃 -->
        <property name="maxIdleTime" value="900"></property>
        <!-- 最大连接数 -->
        <property name="maxPoolSize" value="2"></property>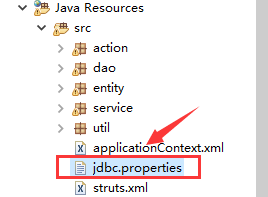
</bean>这里我们还将数据库的驱动类、url等通过外部引入,所以我们还需要再创建一个jbdc.properties文件(直接创建在我们的src目录下)并编辑
jdbc.driver=com.mysql.jdbc.Driver    //数据库驱动
jdbc.url=jdbc:mysql://localhost:3306/CardDB   //数据库连接url
jdbc.user=root      //用户名
jdbc.password=123456        //密码
并且在applicationContext.xml中加入外部引入文件的配置信息
<!-- 引入外部属性文件 -->
    <context:property-placeholder location="classpath:jdbc.properties"/>
最后 再在我们的实体包内创建hibernate关系映射文件
<?xml version="1.0" encoding="UTF-8"?>
<hibernate-mapping xmlns="http://www.hibernate.org/xsd/hibernate-mapping">

    <!-- name为我们实体类的包名类名,table为我们要映射的数据库中的表 -->
    <class name="ssh.entity.BookCard" table="BookCard">
        <!-- id为定义我们的主键,并且为主键添加自动增长的属性 -->
        <id name="cid" column="cid">
            <generator class="native"></generator>
        </id>
         <!-- 以下为我们实体类的属性以及对应表中的列名、属性 -->
        <property name="name" type="string" length="50" column="name" not-null="true"></property>
        <property name="sex" type="string" length="2" column="sex"></property>
        <property name="cardDate" type="date" column="cardDate"></property>
        <property name="deposit" type="double" column="deposit"></property>
    </class>
</hibernate-mapping>
以上便已经搭建起一个可以运行的简易ssh框架了。


 666
666


 被折叠的 条评论
为什么被折叠?
被折叠的 条评论
为什么被折叠?
 到【灌水乐园】发言


