


Docker-Compose
dockerCompose是Docker公司推出的一个工具软件,可以管理多个Docker容器组成一个应用。你需要定义一个YAML格式的配置文件docker-compose.yml,写好多个容器之间的调用关系。然后只需要一个命令,就能同时启动/关闭这些容器。
官网:https://docs.docker.com/compose/compose-file/compose-file-v3/
官网下载:https://docs.docker.com/compose/install/
新版的docker自带的有compose,不用下载
1. 核心概念
一文件:docker-compose.yml
两要素:
- 服务:一个个应用容器实例,比如订单微服务、库存微服务、mysql容器等
- 工程:由一组关联的应用容器组成的一个完整业务单元,在docker-compose.yml文件中定义
工程=多个服务(容器应用实例)
不使用compose,会有什么问题?
- 先后顺序要求固定,先mysql+redis才能微服务访问成功
- 多个run命令…
- 容器间的启停或宕机,有可能导致IP地址对应的容器实例变化,映射出错,要么生产IP写死(可以但是不推荐),要么通过服务调用
2. compose使用的三个流程
- 编写Dockerfile定义各个微服务应用并构建出对应的镜像
- 使用docker-compose.yml定义一个完整业务单元,安排好整体应用中的各个容器服务
- 最后执行docker-compose up命令来启动并运行整个应用程序,完成一键部署上线

3. 案例
3.1 步骤
使用dockercompose安装mysql,redis和nginx,并完成持久化操作
需要的目录:
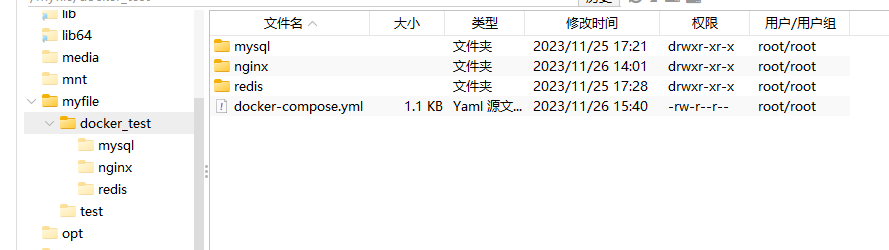
mkdir -p /myfile/docker_test
cd /myfile/docker_test
在docker_test存放docker-compose.yml文件和相应的容器挂载目录
需要的镜像:
docker pull mysql:8.0.33
docker pull nginx
docker pull redis:6.0.8
编写的docker-compose.yml文件
你们用的时候可以改一下挂载目录和mysql密码啥的
version: "3"

services:
  # Redis服务
  redis:
    image: redis:6.0.8
    ports:
      - "6379:6379"
    volumes:
      - /myfile/docker_test/redis/redis.conf:/etc/redis/redis.conf
      - /myfile/docker_test/redis/data:/data
    command: redis-server /etc/redis/redis.conf

  # MySQL服务
  mysql:
    image: mysql:8.0.33
    environment:
      MYSQL_ROOT_PASSWORD: '123456'
      MYSQL_ALLOW_EMPTY_PASSWORD: 'no'
      MYSQL_DATABASE: 'db2023'
      MYSQL_USER: 'zhuyi'
      MYSQL_PASSWORD: '123456'
    ports:
      - "3306:3306"
    volumes:
      - /myfile/docker_test/mysql/db:/var/lib/mysql
      - /myfile/docker_test/mysql/conf/my.cnf:/etc/my.cnf
      - /myfile/docker_test/mysql/init:/docker-entrypoint-initdb.d
    command: --default-authentication-plugin=mysql_native_password # 解决外部无法访问

  # Nginx服务
  nginx:
    image: nginx:latest
    restart: always # 开机自动重启
    ports:
      - '80:80'
      - '443:443'
    volumes:
      - /myfile/docker_test/nginx/conf/nginx.conf:/etc/nginx/nginx.conf
      - /myfile/docker_test/nginx/log:/var/log/nginx
      - /myfile/docker_test/nginx/html:/etc/nginx/html
检查docker-compose.yml配置有没有问题,有问题才输出
docker compose config -q
启动所有docker-compose服务
docker compose up -d

一些配置文件
- nginx的配置文件
nginx.conf
#user  nobody;
worker_processes  1;

#error_log  logs/error.log;
#error_log  logs/error.log  notice;
#error_log  logs/error.log  info;

#pid        logs/nginx.pid;


events {
    worker_connections  1024;
}


http {
    include       mime.types;
    default_type  application/octet-stream;

    #log_format  main  '$remote_addr - $remote_user [$time_local] "$request" '
    #                  '$status $body_bytes_sent "$http_referer" '
    #                  '"$http_user_agent" "$http_x_forwarded_for"';

    #access_log  logs/access.log  main;

    sendfile        on;
    #tcp_nopush     on;

    #keepalive_timeout  0;
    keepalive_timeout  65;

    #gzip  on;

    server {
        listen       80;
        server_name  192.168.223.129;

        #charset koi8-r;

        #access_log  logs/host.access.log  main;

        location / {
            root   html;
            index  index.html index.htm;
        }

        #error_page  404              /404.html;

        # redirect server error pages to the static page /50x.html
        #
        error_page   500 502 503 504  /50x.html;
        location = /50x.html {
            root   html;
        }

        # proxy the PHP scripts to Apache listening on 127.0.0.1:80
        #
        #location ~ \.php$ {
        #    proxy_pass   http://127.0.0.1;
        #}

        # pass the PHP scripts to FastCGI server listening on 127.0.0.1:9000
        #
        #location ~ \.php$ {
        #    root           html;
        #    fastcgi_pass   127.0.0.1:9000;
        #    fastcgi_index  index.php;
        #    fastcgi_param  SCRIPT_FILENAME  /scripts$fastcgi_script_name;
        #    include        fastcgi_params;
        #}

        # deny access to .htaccess files, if Apache's document root
        # concurs with nginx's one
        #
        #location ~ /\.ht {
        #    deny  all;
        #}
    }


    # another virtual host using mix of IP-, name-, and port-based configuration
    #
    #server {
    #    listen       8000;
    #    listen       somename:8080;
    #    server_name  somename  alias  another.alias;

    #    location / {
    #        root   html;
    #        index  index.html index.htm;
    #    }
    #}


    # HTTPS server
    #
    #server {
    #    listen       443 ssl;
    #    server_name  localhost;

    #    ssl_certificate      cert.pem;
    #    ssl_certificate_key  cert.key;

    #    ssl_session_cache    shared:SSL:1m;
    #    ssl_session_timeout  5m;

    #    ssl_ciphers  HIGH:!aNULL:!MD5;
    #    ssl_prefer_server_ciphers  on;

    #    location / {
    #        root   html;
    #        index  index.html index.htm;
    #    }
    #}

}
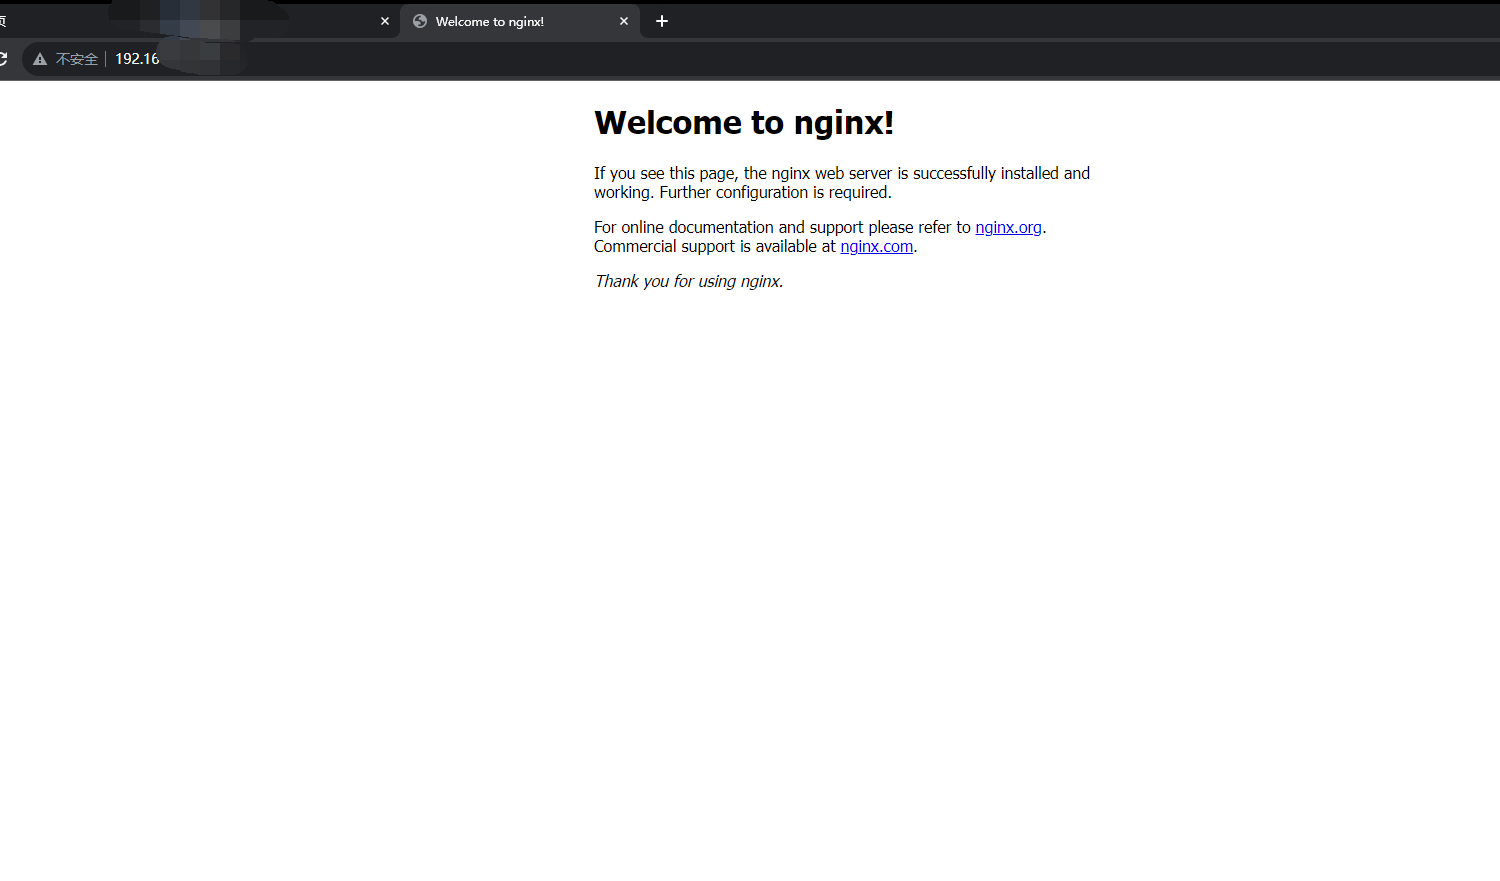
nginx的默认启动页面,放在html目录里
index.html
<!DOCTYPE html>
<html>
<head>
<title>Welcome to nginx!</title>
<style>
    body {
        width: 35em;
        margin: 0 auto;
        font-family: Tahoma, Verdana, Arial, sans-serif;
    }
</style>
</head>
<body>
<h1>Welcome to nginx!</h1>
<p>If you see this page, the nginx web server is successfully installed and
working. Further configuration is required.</p>

<p>For online documentation and support please refer to
<a href="http://nginx.org/">nginx.org</a>.<br/>
Commercial support is available at
<a href="http://nginx.com/">nginx.com</a>.</p>

<p><em>Thank you for using nginx.</em></p>
</body>
</html>
- redis的配置文件
redis我只简单开启了持久化的设置
redis.conf
appendonly yes
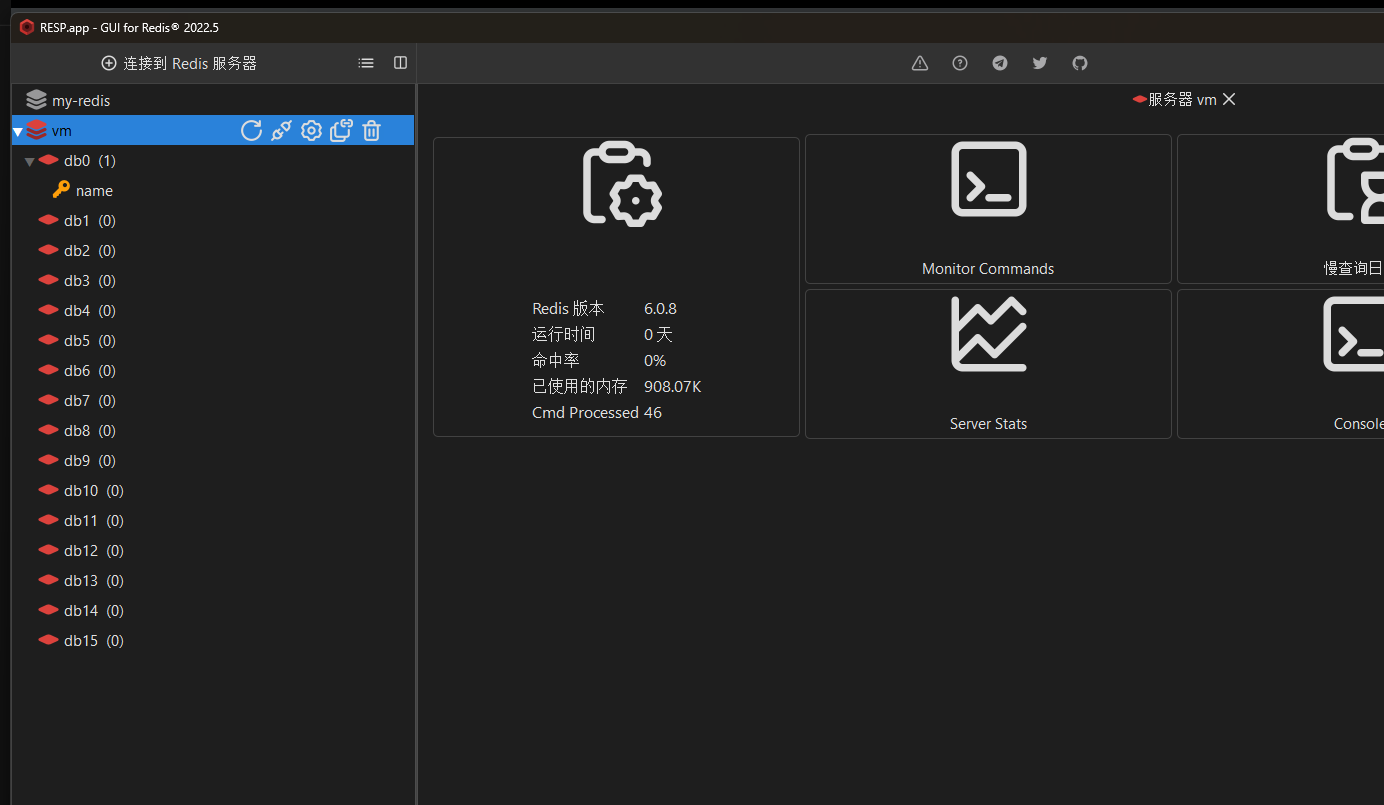
3.2 测试
mysql能远程连接上
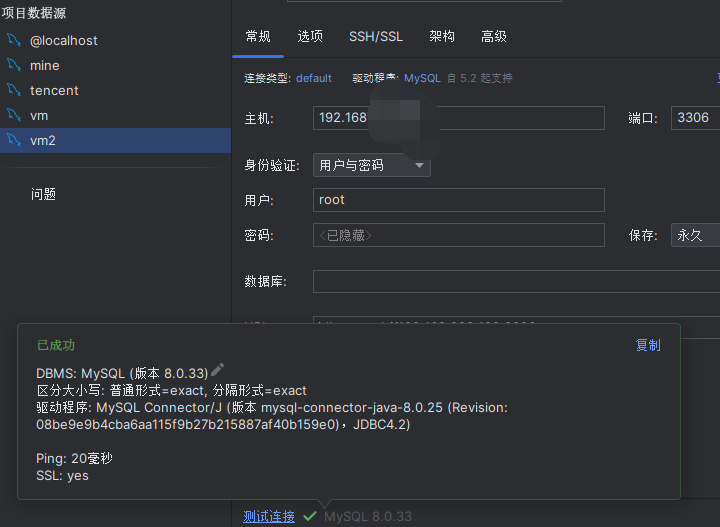
mysql能远程连接上
nginx的默认页面也能出来
- 如果远程连接不上,应该是你的docker网络的问题,可以试试重新来一遍compose的流程,重启docker或者检查一下docker网络
- 通过docker compose down可以停止并删除编排后产生的容器,网络,卷,镜像
经过测试,删除容器并再一次创建容器后,原来的数据还在


 1万+
1万+


 被折叠的 条评论
为什么被折叠?
被折叠的 条评论
为什么被折叠?
 到【灌水乐园】发言


