


Ansible playbook
1. 简介
-
理解
- Playbooks 是 Ansible的配置、部署、编排语言,他们可以被描述为一个需要希望远程主机执行命令的方案,或者一组IT程序运行的命令集合
- Playbooks 与 ad-hoc相比,是一种完全不同的运用ansible的方式,是非常之强大的。
- 简单来说,playbooks是一种简单的配置管理系统与多机器部署系统的基础,与现有的其他系统有不同之处,且非常适合于复杂应用的部署。
- playbook是ansible用于配置,部署,和管理被控节点的剧本。
- 通过playbook的详细描述,执行其中的一系列tasks,可以让远端主机达到预期的状态。playbook就像Ansible控制器给被控节点列出的的一系列to-do-list,而被控节点必须要完成。
- 也可以这么理解,playbook 字面意思,即剧本,现实中由演员按照剧本表演,在Ansible中,这次由计算机进行表演,由计算机安装,部署应用,提供对外服务,以及组织计算机处理各种各样的事情
-
Ansible playbook 使用场景
- 执行一些简单的任务,使用ad-hoc命令可以方便的解决问题,但是有时一个设施过于复杂,需要大量的操作时候,执行的ad-hoc命令是不适合的,这时最好使用playbook。
- 就像执行shell命令与写shell脚本一样,也可以理解为批处理任务,不过playbook有自己的语法格式。
- 使用playbook你可以方便的重用这些代码,可以移植到不同的机器上面,像函数一样,最大化的利用代码。在你使用Ansible的过程中,你也会发现,你所处理的大部分操作都是编写playbook。可以把常见的应用都编写成playbook,之后管理服务器会变得十分简单。(2)
-
特性
YAML的可读性好
YAML和脚本语言的交互性好
YAML使用实现语言的数据类型
YAML有一个一致的信息模型
YAML易于实现
YAML可以基于流来处理
YAML表达能力强,扩展性好
2. Ansible playbook 格式
-
介绍
- playbook由YMAL语言编写。YAML( /ˈjæməl/ )参考了其他多种语言,包括:XML、C语言、Python、Perl以及电子邮件格式RFC2822,Clark Evans在2001年5月在首次发表了这种语言,另外Ingy döt Net与Oren Ben-Kiki也是这语言的共同设计者
- YMAL格式是类似于JSON的文件格式,便于人理解和阅读,同时便于书写。首先学习了解一下YMAL的格式,对我们后面书写playbook很有帮助。以下为playbook常用到的YMAL格式。
-
语法介绍
在单一档案中,可用连续三个连字号(---)区分多个档案。另外,还有选择性的连续三个点号( ... )用来表示档案结尾 次行开始正常写Playbook的内容,一般建议写明该Playbook的功能 使用#号注释代码 缩进必须是统一的,不能空格和tab混用 缩进的级别也必须是一致的,同样的缩进代表同样的级别,程序判别配置的级别是通过缩进结合换行来实现的 YAML文件内容是区别大小写的,k/v的值均需大小写敏感 k/v的值可同行写也可换行写。同行使用:分隔 v可是个字符串,也可是另一个列表 一个完整的代码块功能需最少元素需包括 name: task 一个name只能包括一个task YAML文件扩展名通常为yml或yaml -
Playbooks 配置文件的基础组件
- **hosts:**运行指定任务的目标主机;使用hosts指示使用哪个主机或主机组来运行下面的tasks,每个playbook都必须指定hosts,hosts也可以使用通配符格式。主机或主机组在inventory清单中指定,可以使用系统默认的/etc/ansible/hosts,也可以自己编辑,在运行的时候加上-i选项,指定清单的位置即可。在运行清单文件的时候,-list-hosts选项会显示那些主机将会参与执行task的过程中
- remoute_user: 在远程主机上执行任务的用户;指定远端主机中的哪个用户来登录远端系统,在远端系统执行task的用户,可以任意指定,也可以使用sudo,但是用户必须要有执行相应task的权限。
- sudo_user:
- **tasks:任务列表;**指定远端主机将要执行的一系列动作。tasks的核心为ansible的模块,前面已经提到模块的用法。
- tasks:包含name和要执行的模块,name是可选的,只是为了便于用户阅读,不过还是建议加上去,模块是必须的,同时也要给予模块相应的参数。
- templates:包含了模板语法的文本文件;
- variables 变量
- handlers:由特定条件触发的任务;
-
注意:shell和command模块后面直接跟命令,而非key=value类的参数列表;
- 某任务的状态在运行后为changed时,可通过"notify"通知给相应的handlers,两个文件名称要一致;
- 任务可以通过"tags"打标签,而后可在ansible-playbook命令上使用**-t 标签名,**指定进行调用;
-
variables 变量的定义:
-
facts:可直接调用;
-
注意:可使用setup模块直接获取目标主机的facters;
-
用户自定义变量:
1.ansible-playbook命令的命令行中的

  -e VARS, --extra-vars=VARS

2.在playbook中定义变量的方法:

vars:

  - var1: value1
     var2: value2
-
-
执行playbook剧本
- 使用ansible-playbook运行playbook文件,得到如下输出信息,输出内容为JSON格式。并且由不同颜色组成,便于识别。一般而言
- 绿色代表执行成功,系统保持原样
- 黄色代表系统代表系统状态发生改变
- 红色代表执行失败,显示错误输出。
- 使用ansible-playbook运行playbook文件,得到如下输出信息,输出内容为JSON格式。并且由不同颜色组成,便于识别。一般而言
3. playbook剧本书写及运行方式
-
ansible-playbook <filename.yml> … [options]
-
常见选项
--check -C 只检测可能会发生的改变,但不真正执行操作 --list-hosts 列出运行任务的主机 --list-tags 列出tag --list-tasks 列出task --limit 主机列表 只针对主机列表中的主机执行 -v -vv -vvv 显示过程 -
示例
ansible-playbook file.yml --check 只检测 ansible-playbook file.yml ansible-playbook file.yml --limit websrvs -
ansible-playbook示例:
注意:复制的httpd.conf配置文件只能适用于同一版本的httpd配置文件,centos6和centos7不能共用:
--- - hosts: webs remote_user: root tasks: - name: create group group: name=apache system=yes gid=80 - name: create user user: name=apache group=apache uid=80 shell=/sbin/nonlogin home=/usr/share/httpd system=yes password=$1$TGp21j8c$L3Q8BYFXsCBFt53nmw0t.0 - name: install package yum: name=httpd - name: config file copy: src=/root/playbook/httpd.conf dest=/etc/httpd/conf/ backup=yes - name: service service: name=httpd state=started enabled=yes-
执行结果:
[root@ansibledata]#ansible-playbook install_httpd.yml   执行此playbook
[root@ansibledata]#ansible webs -a "ss -nlt"  查询当前端口已经开启80端口
192.168.34.103 | CHANGED | rc=0 >>
State      Recv-Q Send-Q Local Address:Port               Peer Address:Port
LISTEN     0      128          *:22                       *:*
LISTEN     0      100    127.0.0.1:25                       *:*
LISTEN     0      128         :::80                      :::*
LISTEN     0      128         :::22                      :::*
LISTEN     0      100        ::1:25                      :::*

[root@ansibledata]#ansible webs -a "getent passwd apache"  查询用户账号,已经创建
192.168.34.103 | CHANGED | rc=0 >>
apache:x:80:80:Apache:/usr/share/httpd:/sbin/nonlogin
-
-
在剧本中加入handlers 触发任务
-
前提背景:如playbook 中有一系列tasks,但有时只需改动少个tasks 就要触发另一个操作;若再把剧本执行一遍,浪费资源和时间;此时可以设置handlers 触发任务
-
注意:如果执行killall 命令,需要其他机器有该命令才能执行。
-
vim /data/install_httpd.yml
--- - hosts: webs remote_user: root tasks: - name: create group group: name=apache system=yes gid=80 - name: create user user: name=apache group=apache uid=80 shell=/sbin/nonlogin home=/usr/share/httpd system=yes password=$1$TGp21j8c$L3Q8BYFXsCBFt53nmw0t.0 - name: install package yum: name=httpd - name: config file copy: src=/root/playbook/httpd.conf dest=/etc/httpd/conf/ backup=yes notify: - restart service - check httpd - name: service service: name=httpd state=started enabled=yes handlers: - name: restart service service: name=httpd state=restarted - name: check httpd - shell: /usr/bin/killall -0 httpd &> /tmp/httpd.log-
修改要复制的/data/http.conf配置文件的端口号为81,执行playbook后,就会重启httpd服务,查看当前的端口号就是81
[root@ansibledata]#vim httpd.conf 将data下要复制的配置文件端口改为81 # prevent Apache from glomming onto all bound IP addresses. # #Listen 12.34.56.78:80 Listen 81 [root@ansibledata]#ansible-playbook install_httpd.yml 此时执行playbook,复制过去的端口就是81 [root@ansibledata]#ansible webs -a "ss -nlt" 查看到重启的端口httpd就是81端口 192.168.34.103 | CHANGED | rc=0 >> State Recv-Q Send-Q Local Address:Port Peer Address:Port LISTEN 0 128 *:22 *:* LISTEN 0 100 127.0.0.1:25 *:* LISTEN 0 128 :::81 :::* LISTEN 0 128 :::22 :::* LISTEN 0 100 ::1:25 :::* -
查看当前检测的信号里放置的临时文件没有任何内容,说明执行成功,如果有错误,就会在里边显示错误内容。

-
-
-
tags 标签在playbook中使用:
-
一个动作可以执行多个标签,也可以多个动作执行多个标签,执行标签动作需要加上-t选项:
-
ansible-playbook -t config insall.yml 触发一个标签
-
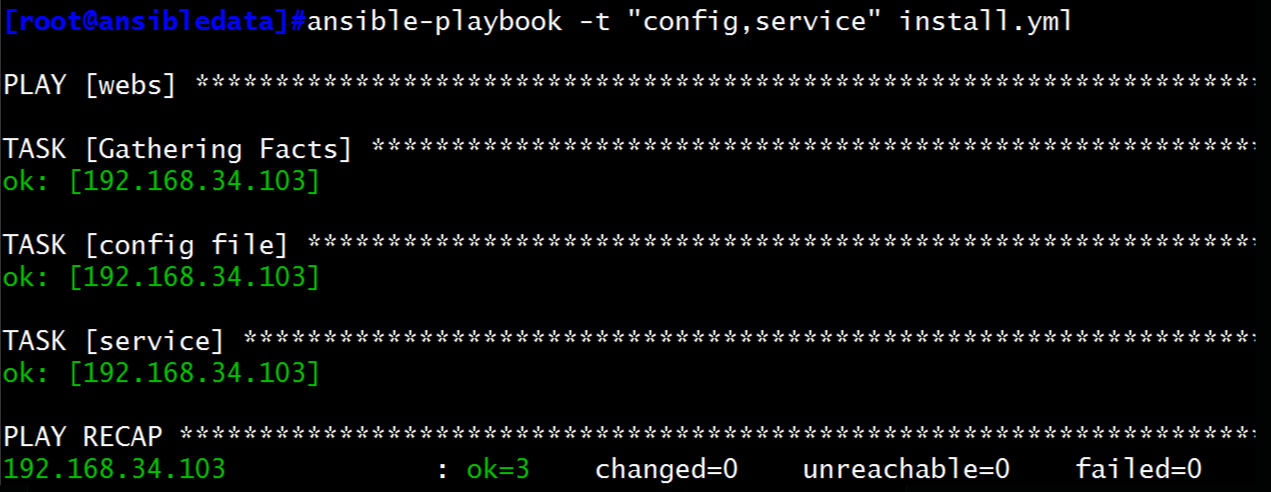
ansible-playbook -t “config,service” install.yml 触发两个标签
--- - hosts: webs remote_user: root tasks: - name: create group group: name=apache system=yes gid=80 - name: create user user: name=apache group=apache uid=80 shell=/sbin/nonlogin home=/usr/share/httpd system=yes password=$1$TGp21j8c$L3Q8BYFXsCBFt53nmw0t.0 - name: install package yum: name=httpd - name: config file copy: src=/data/httpd.conf dest=/etc/httpd/conf/ backup=yes tags: config,copy 其中一个动作可以标注多个标签,执行config和copy都可以 notify: - restart service - check httpd - name: service tags: service service标签 service: name=httpd state=started enabled=yes handlers: - name: restart service service: name=httpd state=restarted - name: check httpd shell: /usr/bin/killall -0 httpd &> /tmp/httpd.log -
我们将要复制的httpd.conf配置文件的端口号改为82,用copy标签执行下面的内容,只会执行下面一个动作,也会执行触发器里边的动作,即nodity和handlers动作

-
可以看到当前httpd服务启动后的端口号变为82端口。

-
我们也可以执行多个标签的动作,具体如下操作:
-
-
vars变量使用:
-
变量可以不定义在playbook 中,直接在命令行给出
[root@ansibledata]#vim install_httpd.yml --- - hosts: webs remote_user: root tasks: - name: install package yum: name="{{ servername }}" 使用name变量 - name: service service: name="{{ servername }}" state=started enabled=yes-
给变量servername赋值,就可以执行相应的动作:其中-e servername=vsftpd 指定当前变量的为vsftpd
-
ansible-playbook -e servername=vsftpd install_httpd.yml 将servername赋值为vsftpd,就可以安装此服务,此服务端口为21,已经打开.
-
执行结果如下:
[root@ansibledata]#ansible-playbook -e name=vsftpd install_httpd.yml
 [WARNING]: Found variable using reserved name: name


PLAY [webs] **********************************************************************************************************

TASK [Gathering Facts] ***********************************************************************************************
ok: [192.168.34.103]

TASK [install package] ***********************************************************************************************
ok: [192.168.34.103]

TASK [service] *******************************************************************************************************
changed: [192.168.34.103]

PLAY RECAP ***********************************************************************************************************
192.168.34.103             : ok=3    changed=1    unreachable=0    failed=0    skipped=0    rescued=0    ignored=0

[root@ansibledata]#ansible webs -a "ss -nlt"
192.168.34.103 | CHANGED | rc=0 >>
State      Recv-Q Send-Q Local Address:Port               Peer Address:Port
LISTEN     0      128          *:22                       *:*
LISTEN     0      100    127.0.0.1:25                       *:*
LISTEN     0      128         :::82                      :::*
LISTEN     0      32          :::21   21端口打开                   :::*
LISTEN     0      128         :::22                      :::*
LISTEN     0      100        ::1:25                      :::*
-
-
赋予两个不同的变量名,servername1为包名,servername2为服务名
[root@ansibledata]#vim install_httpd.yml --- - hosts: webs remote_user: root tasks: - name: install package yum: name="{{ servername1 }}" 赋予一个变量name1,作为包名 - name: service service: name="{{ servername2 }}" state=started enabled=yes 启动name2,服务名-
将servername1赋予包名,servername2赋予服务名
-
ansible-playbook -e "servername1=samba servername2=smb’ install_httpd.yml
[root@ansibledata]#ansible-playbook -e "servername1=samba servername2=smb" install_httpd.yml

PLAY [webs] **********************************************************************************************************

TASK [Gathering Facts] ***********************************************************************************************
ok: [192.168.34.103]

TASK [install package] ***********************************************************************************************
changed: [192.168.34.103]

TASK [service] *******************************************************************************************************
changed: [192.168.34.103]

PLAY RECAP ***********************************************************************************************************
192.168.34.103             : ok=3    changed=2    unreachable=0    failed=0    skipped=0    rescued=0
-
-
也可以直接定义在playbook 中:
--- - hosts: webs remote_user: root vars: - servername1: samba 定义在playbook内容中 - servername2: smb tasks: - name: install package yum: name="{{ servername1 }}" - name: service service: name="{{ servername2 }}" state=started enabled=yes-
执行成功结果:

-
-
在独立的变量YAML文件中定义(推荐使用此方法)
-
新建一个vars.yml文件,指定存放要执行的变量,servername: httpd
[root@ansibleplaybook]#vim vars.yml servername: httpd -
将写好的变量文件赋予到此playbook内容中
--- - hosts: webs remote_user: root vars_files: 定义一个vars.yml文件 - vars.yml tasks: - name: install package yum: name="{{ servername }}" - name: service: name="{{ servername }}" state=started enabled=yes -
执行结果
[root@ansibleplaybook]#ansible-playbook test.yml PLAY [webs] ********************************************************************************************************** TASK [Gathering Facts] *********************************************************************************************** ok: [192.168.34.102] ok: [192.168.34.103] TASK [install] ******************************************************************************************************* ok: [192.168.34.103] ok: [192.168.34.102] TASK [config file] *************************************************************************************************** ok: [192.168.34.103] ok: [192.168.34.102] TASK [service] ******************************************************************************************************* ok: [192.168.34.102] ok: [192.168.34.103] PLAY RECAP *********************************************************************************************************** 192.168.34.102 : ok=4 changed=0 unreachable=0 failed=0 skipped=0 rescued=0 ignored=0 192.168.34.103 : ok=4 changed=0 unreachable=0 failed=0 skipped=0 rescued=0 ignored=0 -
ansible webs -a “ss -nlt” 可以查看到当前的80端口已经安装好
[root@ansibleplaybook]#ansible webs -a "ss -nlt"
192.168.34.103 | CHANGED | rc=0 >>
State      Recv-Q Send-Q Local Address:Port               Peer Address:Port
LISTEN     0      50           *:139                      *:*
LISTEN     0      128          *:22                       *:*
LISTEN     0      100    127.0.0.1:25                       *:*
LISTEN     0      50           *:445                      *:*
LISTEN     0      50          :::139                     :::*
LISTEN     0      128         :::80                      :::*
LISTEN     0      32          :::21                      :::*
LISTEN     0      128         :::22                      :::*
LISTEN     0      100        ::1:25                      :::*
LISTEN     0      50          :::445                     :::*
-
-
在 在/etc/ansible/hosts中定义变量
-
普通变量:此时在webs组的IP后面追加命名nodename=centos7_1,可以将远程的机器的名称改为centos7_1
[root@ansibleplaybook]#vim /etc/ansible/hosts [webs] 192.168.34.103 nodename=centos7_1 -
定义yml内容,将hosts的文件名定义到变量中:
--- - hosts: webs remote_user: root tasks: - name: hostname hostname: name="{{ nodename }}" -
此时执行ansible-playbook test.yml ,就会将远程的主机名称修改,具体如下:
[root@ansibleplaybook]#ansible-playbook  test.yml  执行此playbook变量内容

PLAY [webs] **********************************************************************************************************

TASK [Gathering Facts] ***********************************************************************************************
ok: [192.168.34.103]

TASK [hostname] ******************************************************************************************************
changed: [192.168.34.103]

PLAY RECAP ***********************************************************************************************************
192.168.34.103             : ok=2    changed=1
[root@ansibleplaybook]#ansible  webs -a "hostname"  查询远程主机的主机名为centos7_1
192.168.34.103 | CHANGED | rc=0 >>
centos7_1
-
-
定义组变量:将主机名之前的内容统一追加一个相同的内容:
vim /etc/ansible/hosts [webs] 192.168.34.103 nodename=centos7_1 主机名 [webs:vars] name=baidu.com 添加后缀名-
将后缀的变量名称放到后面:
--- - hosts: webs remote_user: root tasks: - name: hostname hostname: name="{{ nodename }}"."{{ name }}" #定义的变量追加的内容 -
执行结果如下:
[root@ansibleplaybook]#ansible-playbook test.yml

PLAY [webs] **********************************************************************************************************

TASK [Gathering Facts] ***********************************************************************************************
ok: [192.168.34.103]

TASK [hostname] ******************************************************************************************************
changed: [192.168.34.103]

PLAY RECAP ***********************************************************************************************************
192.168.34.103             : ok=2    changed=1    unreachable=0    failed=0    skipped=0    rescued=0    ignored=0

[root@ansibleplaybook]#ansible webs -a "hostname"
192.168.34.103 | CHANGED | rc=0 >>
centos7_1.baidu.com      # 此时的主机名后缀有baidu.com
-
-
4. 在剧本中加入模板 templates
-
介绍
template模板为我们提供了动态配置服务,使用jinja2语言,里面支持多种条件判断、循环、逻辑运算、比较操作等。其实说白了也就是一个文件,和之前配置文件使用copy一样,只是使用copy,不能根据服务器配置不一样进行不同动态的配置。这样就不利于管理。
-
说明:
- 多数情况下都将
template文件放在和playbook文件同级的templates目录下(手动创建),这样playbook文件中可以直接引用,会自动去找这个文件。如果放在别的地方,也可以通过绝对路径去指定。
- 多数情况下都将
-
支持:
- 字符串:使用单引号或双引号;
- 数字:整数,浮点数;
- 列表:[item1, item2, …]
- 元组:(item1, item2, …)
- 字典:{key1:value1, key2:value2, …}
- 布尔型:true/false
- 算术运算:+, -, *, /, //, %, **
- 比较操作:==, !=, >, >=, <, <=
- 逻辑运算:and, or, not
-
先创建一个模板文件,以**.j2** 结尾
$ cp /etc/nginx/nginx.conf /playbook/nginx.conf.j2
$ vim /playbook/nginx.conf.j2
$ worker_processes {{ ansible_processor_count*2 }}; #该变量是setup 模块查看CPU核数的变量,此时将CPU核数乘以2
$ listen {{ nginx_port}}; #自定义在playbook 中的变量
$ yum install nginx  #安装nginx
- “ansible_processor_count”: 1** 查看当前的CPU核数有几个
-
当前的模板,将本机的源文件复制到目标地址,将CPU个数成倍增涨,并将端口号改为82:
[root@ansibleplaybook]#vim test1.yml --- - hosts: webs remote_user: root tasks: - name: install yum: name=nginx - name: template 定制模板 template: src=nginx.conf.j2 dest=/etc/nginx/nginx.conf 将源文件复制到目标地址 notify: restart - name: service service: name=nginx state=started enabled=yes handlers: - name: restart service: name=nginx state=restarted enabled=yes -
templates目录下的nginx.confj2配置文件,将当前的CPU核数乘以四,并将端口号定义变量"{{nginx_port}}":
[root@ansibleplaybook]#vim templates/nginx.conf.j2 worker_processes {{ansible_processor_count*4}}; CPU乘以4倍 server { listen "{{nginx_port}}" default_server; 将此IPV4的端口号定义为变量 listen [::]:80 default_server; 下面的是IPV6的端口号 -
/etc/ansible/hosts配置文件的端口号,定义变量,可以修改当前的nginx的端口号:
$ vim /etc/ansible/hosts [webs] 192.168.34.103 nodename=centos7_1 nginx_port=82 -
执行nginx.yml的剧本:
[root@ansibleplaybook]#ansible-playbook nginx.yml PLAY [webs] ********************************************************************************************************** TASK [Gathering Facts] *********************************************************************************************** ok: [192.168.34.103] TASK [install] ******************************************************************************************************* ok: [192.168.34.103] TASK [template] ****************************************************************************************************** ok: [192.168.34.103] TASK [service] ******************************************************************************************************* ok: [192.168.34.103] PLAY RECAP *********************************************************************************************************** 192.168.34.103 : ok=4 changed=0 unreachable=0 failed=0 skipped=0 rescued=0 ignored=0 -
查询执行结果,此时已有四个CPU运行。
[root@ansibleplaybook]#ansible webs -m shell -a "ps aux | grep nginx" 查询单签的nginx的运行情况 192.168.34.103 | CHANGED | rc=0 >> root 29927 0.0 0.1 120796 2252 ? Ss 01:51 0:00 nginx: master process /usr/sbin/nginx nginx 29928 0.0 0.2 121180 3332 ? S 01:51 0:00 nginx: worker process 此时可以查看到有四个CPU nginx 29929 0.0 0.2 121180 3332 ? S 01:51 0:00 nginx: worker process nginx 29930 0.0 0.2 121180 3332 ? S 01:51 0:00 nginx: worker process nginx 29931 0.0 0.1 121180 3128 ? S 01:51 0:00 nginx: worker process root 29996 0.0 0.0 113176 1216 pts/1 S+ 01:51 0:00 /bin/sh -c ps aux | grep nginx root 29998 0.0 0.0 112708 956 pts/1 S+ 01:51 0:00 grep nginx -
查看82端口号运行情况:
[root@ansibleplaybook]#ansible webs -a "ss -nlt"
192.168.34.103 | CHANGED | rc=0 >>
State      Recv-Q Send-Q Local Address:Port               Peer Address:Port
LISTEN     0      50           *:139                      *:*
LISTEN     0      128          *:82                       *:*                  此时查看到82端口已经打开
LISTEN     0      128          *:22                       *:*
LISTEN     0      100    127.0.0.1:25                       *:*
LISTEN     0      50           *:445                      *:*
LISTEN     0      50          :::139                     :::*
LISTEN     0      128         :::80                      :::*
LISTEN     0      32          :::21                      :::*
LISTEN     0      128         :::86                      :::*
LISTEN     0      128         :::22                      :::*
LISTEN     0      100        ::1:25                      :::*
LISTEN     0      50          :::445                     :::*
-
5、templates之when
-
条件测试:如果需要根据变量、
facts或此前任务的执行结果来做为某task执行与否的前提时要用到条件测试,通过when语句执行,在task中使用jinja2的语法格式、 -
when语句:在
task后添加when子句即可使用条件测试;when语句支持jinja2表达式语法。 -
“ansible_distribution_major_version”: "7"查看当前的系统版本号
-
将/etc/ansible/hosts配置文件的端口号改为http_port
$ vim /etc/ansible/hosts [apps] 192.168.34.103 http_port=86 192.168.34.105 http_port=87 -
将centos6的httpd的配置文件复制到centos7的templates目录下,起名为httpd6.conf.j2 ,准备的是centos6的配置文件
-
将centos7的httpd的配置文件复制到templates目录下,起名叫httpd7.conf.j2,准备的是centos7的配置文件
[root@centos6~]#scp /etc/httpd/conf/httpd.conf 192.168.34.101:/root/playbook/templates/httpd6.conf.j2 [root@ansibleplaybook]#cp /etc/httpd/conf/httpd.conf templates/httpd7.conf.j2 -
修改复制后的httpd6.conf.j2和httpd7.conf.j2配置文件的端口:
$ vim httpd6.conf.j2 Listen {{http_port}} $ vim httpd7.conf.j2 Listen {{http_port}} -
书写template模板内的when可以将centos6和centos7的httpd版本不同问题解决,针对不同的系统版本,安装不同版本的系统
--- - hosts: apps remote_user: root tasks: - name: install yum: name=httpd - name: template1 template: src=httpd6.conf.j2 dest=/etc/httpd/conf/httpd.conf when: ansible_distribution_major_version=="6" #判断当前的操作系统是6版本,安装版本6的httpd服务 notify: restart - name: template2 template: src=httpd7.conf.j2 dest=/etc/httpd/conf/httpd.conf when: ansible_distribution_major_version=="7" notify: restart - name: service service: name=httpd state=started enabled=yes handlers: - name: restart service: name=httpd state=restarted -
查看httpd安装后的结果,此时的86和87端口都已经打开
[root@ansibleplaybook]#ansible apps -a "ss -nlt"
192.168.34.103 | CHANGED | rc=0 >>
State      Recv-Q Send-Q Local Address:Port               Peer Address:Port
LISTEN     0      50           *:139                      *:*
LISTEN     0      128          *:80                       *:*
LISTEN     0      128          *:22                       *:*
LISTEN     0      100    127.0.0.1:25                       *:*
LISTEN     0      50           *:445                      *:*
LISTEN     0      50          :::139                     :::*
LISTEN     0      128         :::80                      :::*
LISTEN     0      32          :::21                      :::*
LISTEN     0      128         :::86                      :::*
LISTEN     0      128         :::22                      :::*
LISTEN     0      100        ::1:25                      :::*
LISTEN     0      50          :::445                     :::*

192.168.34.105 | CHANGED | rc=0 >>
State      Recv-Q Send-Q        Local Address:Port          Peer Address:Port
LISTEN     0      128               127.0.0.1:6010                     *:*
LISTEN     0      128                     ::1:6010                    :::*
LISTEN     0      128                      :::55642                   :::*
LISTEN     0      128                      :::111                     :::*
LISTEN     0      128                       *:111                      *:*
LISTEN     0      128                       *:57810                    *:*
LISTEN     0      128                      :::22                      :::*
LISTEN     0      128                       *:22                       *:*
LISTEN     0      128                      :::87                      :::*
LISTEN     0      64                       :::23                      :::*
LISTEN     0      128               127.0.0.1:631                      *:*
LISTEN     0      128                     ::1:631                     :::*
LISTEN     0      100                     ::1:25                      :::*
LISTEN     0      100               127.0.0.1:25                       *:*
6. template之with_items
with_items迭代,当有需要重复性执行的任务时,可以使用迭代机制。- 对迭代项的引用,固定变量名为
“item”,要在task中使用with_items给定要迭代的元素列表。 - 列表格式:
- 字符串
- 字典
6.1 示例一:
-
在本机新建十个文件,然后将本机的文件复制到其他文件中
[root@ansibleplaybook]#mkdir files [root@ansibleplaybook]#touch files/file{1..10} -
将本地的三个文件复制到对方主机的data目录下,编写playbook:
[root@ansibleplaybook]#vim test_temp.yml --- - hosts: webs remote_user: root tasks: - name: copy files copy: src="{{item}}" dest=/data/ mode=600 with_items: - file1 - file2 - file3 -
执行playbook命令,查看执行结果:
[root@ansibleplaybook]#ansible-playbook  test_temp.yml   执行命令

PLAY [webs] **********************************************************************************************************

TASK [Gathering Facts] ***********************************************************************************************
ok: [192.168.34.103]

TASK [copy files] ****************************************************************************************************
changed: [192.168.34.103] => (item=file1)
changed: [192.168.34.103] => (item=file2)
changed: [192.168.34.103] => (item=file3)

PLAY RECAP ***********************************************************************************************************
192.168.34.103             : ok=2    changed=1    unreachable=0    failed=0    skipped=0    rescued=0    ignored=0

[root@ansibleplaybook]#ansible webs -a "ls /data/ -l"  查看对方的主机已经有600权限的三个文件
192.168.34.103 | CHANGED | rc=0 >>
total 0
-rw------- 1 root root  0 Nov  6 04:14 file1
-rw------- 1 root root  0 Nov  6 04:14 file2
-rw------- 1 root root  0 Nov  6 04:14 file3
6.2 示例二:通过嵌套子变量创建用户并加入不同的组
-
编写playbook:
vim test.yml --- - hosts: webs remote_user: root tasks: - name: create groups group: name="{{item}}" state=present(默认,不需要写) with_items: - g1 - g2 - g3 - name: create users state=present(默认,可以不写) user: name="{{item.name}}" group="{{item.group}}" with_items: - {name: 'user1',group: 'g1'} - {name: 'user2',group: 'g2'} - {name: 'user3',group: 'g3'} -
执行剧本并查看执行结果,此时可以看到对方主机已经创建了三个用户:
[root@ansibleplaybook]#ansible-playbook test_temp.yml   执行剧本内容

PLAY [webs] **********************************************************************************************************

TASK [Gathering Facts] ***********************************************************************************************
ok: [192.168.34.103]

TASK [create  groups] ************************************************************************************************
changed: [192.168.34.103] => (item=g1)
changed: [192.168.34.103] => (item=g2)
changed: [192.168.34.103] => (item=g3)

TASK [create users] **************************************************************************************************
changed: [192.168.34.103] => (item={u'group': u'g1', u'name': u'user1'})
changed: [192.168.34.103] => (item={u'group': u'g2', u'name': u'user2'})
changed: [192.168.34.103] => (item={u'group': u'g3', u'name': u'user3'})

PLAY RECAP ***********************************************************************************************************
192.168.34.103             : ok=3    changed=2    unreachable=0    failed=0    skipped=0    rescued=0    ignored=0

[root@ansibleplaybook]#ansible webs -a "id user1"  查看执行后的用户,核实是否正确
192.168.34.103 | CHANGED | rc=0 >>
uid=1002(user1) gid=1002(g1) groups=1002(g1)

[root@ansibleplaybook]#ansible webs -a "id user2"
192.168.34.103 | CHANGED | rc=0 >>
uid=1003(user2) gid=1003(g2) groups=1003(g2)

[root@ansibleplaybook]#ansible webs -a "id user3"
192.168.34.103 | CHANGED | rc=0 >>
uid=1004(user3) gid=1004(g3) groups=1004(g3)
6.3 示例三:
-
同时安装多个包:
[root@ansibleplaybook]#vim test.yml --- - hosts: webs remote_user: root tasks: - name: install yum: name=httpd,vsftpd,memcached -
执行剧本,并查看当前的已经安装好的包:
[root@ansibleplaybook]#ansible-playbook test.yml 执行剧本 PLAY [webs] ********************************************************************************************************** TASK [Gathering Facts] *********************************************************************************************** ok: [192.168.34.103] TASK [install] ******************************************************************************************************* changed: [192.168.34.103] PLAY RECAP *********************************************************************************************************** 192.168.34.103 : ok=2 changed=1 unreachable=0 failed=0 skipped=0 rescued=0 ignored=0 [root@ansibleplaybook]#ansible webs -a "rpm -q httpd,vsftp,memcached" 查看此时的包是否被安装 [WARNING]: Consider using the yum, dnf or zypper module rather than running 'rpm'. If you need to use command because yum, dnf or zypper is insufficient you can add 'warn: false' to this command task or set 'command_warnings=False' in ansible.cfg to get rid of this message. 192.168.34.103 | FAILED | rc=1 >> package httpd,vsftp,memcached is not installednon-zero return code -
等同于上面的写法:也是同时安装多个软件
[root@ansibleplaybook]#vim test.yml

---
- hosts: webs
  remote_user: root

  tasks:
    - name: install
      yum: name="{{item}}"
      with_items:
        - httpd
        - vsftpd
        - memcached
7. template之for和if
-
通过使用
for,if可以更加灵活的生成配置文件等需求,还可以在里面根据各种条件进行判断,然后生成不同的配置文件、或者服务器配置相关等。 -
编写playbook
[root@ansibleplaybook]#vim for_temp.yml --- - hosts: webs remote_user: root vars: ports: - 81 - 82 - 83 tasks: - name: template template: src=test_for.conf.j2 dest=/data/test_for.conf -
模板文件编写
$ vim templates/test_for.conf.j2 {% for i in ports %} server{ listen {{i}} } {% endfor %} -
执行剧本并查看复制到对方主机的文件内容:
[root@ansibleplaybook]#ansible-playbook for_temp.yml PLAY [webs] ********************************************************************************************************** TASK [Gathering Facts] *********************************************************************************************** ok: [192.168.34.103] TASK [template] ****************************************************************************************************** changed: [192.168.34.103] PLAY RECAP *********************************************************************************************************** 192.168.34.103 : ok=2 changed=1 unreachable=0 failed=0 skipped=0 rescued=0 ignored=0 [root@ansibleplaybook]#ansible webs -a "cat /data/test_for.conf " 192.168.34.103 | CHANGED | rc=0 >> server{ listen 81 } server{ listen 82 } server{ listen 83 } -
用字典写法将上面的内容输出同样的名称:
[root@ansibleplaybook]#vim for_temp.yml

---
- hosts: webs
  remote_user: root
  vars:
    ports:
      - listen_port: 81
      - listen_port: 82
      - listen_port: 83

  tasks:
    - name: template
      template: src=test_for.conf.j2  dest=/data/test_for.conf
-
修改模板内容,和上面的for语句输出内容一致:
[root@ansibleplaybook]#vim templates/test_for.conf.j2

{% for i in ports %}
server{
       listen {{i.lsiten_port}}
}
{% endfor %}
~
7.1 示例:
-
编写playbook
[root@ansibleplaybook]#vim for_temp.yml --- - hosts: webs remote_user: root vars: vhosts: - host1: listen_port: 81 host_name: www.a.com dirname: /data/www1 - host2: listen_port: 82 host_name: www.b.com dirname: /data/www2 - host3: listen_port: 83 host_name: www.c.com dirname: /data/www3 tasks: - name: template template: src=test_for.conf.j2 dest=/data/test_for.conf -
编写jianjia2(j.2)文件
[root@ansibleplaybook]#vim templates/test_for.conf.j2 {% for i in vhosts %} server{ listen {{i.listen_port}} server_name {{i.host_name}} root {{i.dirname}} } {% endfor %} -
执行playbook并查看对方的目录文件
[root@ansibleplaybook]#ansible-playbook  for_temp.yml

[root@ansibleplaybook]#ansible webs -a "cat /data/test_for.conf"
192.168.34.103 | CHANGED | rc=0 >>
server{
       listen 81
       server_name www.a.com
       root /data/www1
}
server{
       listen 82
       server_name www.b.com
       root /data/www2
}
server{
       listen 83
       server_name www.c.com
       root /data/www3
}
7.2 示例:在for循环中再嵌套if判断,让生成的配置文件更加灵活
-
编写playbook
--- - hosts: webs remote_user: root vars: vhosts: - host1: listen_port: 81 host_name: www.a.com dirname: /data/www1 - host2: listen_port: 82 #host_name: www.b.com 将此行注释掉 dirname: /data/www2 - host3: listen_port: 83 host_name: www.c.com dirname: /data/www3 tasks: - name: template template: src=test_for.conf.j2 dest=/data/test_for.conf -
编写jianjia2文件(j.2)
[root@ansibleplaybook]#vim templates/test_for.conf.j2 {% for i in vhosts %} server{ listen {{i.listen_port}} {% if i.host_name is defined %} server_name {{i.host_name}} {% endif %} root {{i.dirname}} } {% endfor %} -
执行playbook并查看执行结果:
[root@ansibleplaybook]#ansible-playbook  for_temp.yml

[root@ansibleplaybook]#ansible webs -a "cat /data/test_for.conf"
192.168.34.103 | CHANGED | rc=0 >>
server{
       listen 81
       server_name www.a.com
       root /data/www1
}
server{
       listen 82   此时中间就少了server_name定义的值
       root /data/www2
}
server{
       listen 83
       server_name www.c.com
       root /data/www3
}


 3万+
3万+


 被折叠的 条评论
为什么被折叠?
被折叠的 条评论
为什么被折叠?
 到【灌水乐园】发言


