


学习Reate Native的踩坑之路
搭建环境
本人环境:mac10.15.4、Xcode11.4、brew:2.2.16、Pods:1.9.1、npm:6.14.4、react-native: 0.62.2
这里环境搭建就不多说了,官网跟着走就是了(注意官方给出的文档中黄色区域非常重要,仔细阅读)。
巨坑:Podfile配置
官方给的Podfile配置是过时了的,反正我是一路翻红
[!] CocoaPods could not find compatible versions for pod "React/Core":
  In Podfile:
    React/Core (from `../node_modules/react-native`)

None of your spec sources contain a spec satisfying the dependency: `React/Core (from `../node_modules/react-native`)`.

You have either:
 * out-of-date source repos which you can update with `pod repo update` or with `pod install --repo-update`.
 * mistyped the name or version.
 * not added the source repo that hosts the Podspec to your Podfile.
遇到这个问题莫慌,先检查你的所有配置环境是否最新,reate-native老版本的对应环境版本官方没说,我也不知道,所以保持最新就好了,除了你的配置环境版本不匹配之外就是Podfile的配置问题,这里给出我的配置:
# 对于Swift应用来说下面两句是必须的
platform :ios, '9.0'
require_relative '../node_modules/@react-native-community/cli-platform-ios/native_modules'

use_frameworks!
#消除三方库的警告
inhibit_all_warnings!

target 'RNRecordLearn' do

  pod 'FBLazyVector', :path => "../node_modules/react-native/Libraries/FBLazyVector"
  pod 'FBReactNativeSpec', :path => "../node_modules/react-native/Libraries/FBReactNativeSpec"
  pod 'RCTRequired', :path => "../node_modules/react-native/Libraries/RCTRequired"
  pod 'RCTTypeSafety', :path => "../node_modules/react-native/Libraries/TypeSafety"
  pod 'React', :path => '../node_modules/react-native/'
  pod 'React-Core', :path => '../node_modules/react-native/'
  pod 'React-CoreModules', :path => '../node_modules/react-native/React/CoreModules'
  pod 'React-Core/DevSupport', :path => '../node_modules/react-native/'
  pod 'React-RCTActionSheet', :path => '../node_modules/react-native/Libraries/ActionSheetIOS'
  pod 'React-RCTAnimation', :path => '../node_modules/react-native/Libraries/NativeAnimation'
  pod 'React-RCTBlob', :path => '../node_modules/react-native/Libraries/Blob'
  pod 'React-RCTImage', :path => '../node_modules/react-native/Libraries/Image'
  pod 'React-RCTLinking', :path => '../node_modules/react-native/Libraries/LinkingIOS'
  pod 'React-RCTNetwork', :path => '../node_modules/react-native/Libraries/Network'
  pod 'React-RCTSettings', :path => '../node_modules/react-native/Libraries/Settings'
  pod 'React-RCTText', :path => '../node_modules/react-native/Libraries/Text'
  pod 'React-RCTVibration', :path => '../node_modules/react-native/Libraries/Vibration'
  pod 'React-Core/RCTWebSocket', :path => '../node_modules/react-native/'

  pod 'React-cxxreact', :path => '../node_modules/react-native/ReactCommon/cxxreact'
  pod 'React-jsi', :path => '../node_modules/react-native/ReactCommon/jsi'
  pod 'React-jsiexecutor', :path => '../node_modules/react-native/ReactCommon/jsiexecutor'
  pod 'React-jsinspector', :path => '../node_modules/react-native/ReactCommon/jsinspector'
  pod 'ReactCommon/callinvoker', :path => "../node_modules/react-native/ReactCommon"
  pod 'ReactCommon/turbomodule/core', :path => "../node_modules/react-native/ReactCommon"
  pod 'Yoga', :path => '../node_modules/react-native/ReactCommon/yoga'

  pod 'DoubleConversion', :podspec => '../node_modules/react-native/third-party-podspecs/DoubleConversion.podspec'
  pod 'glog', :podspec => '../node_modules/react-native/third-party-podspecs/glog.podspec'
  pod 'Folly', :podspec => '../node_modules/react-native/third-party-podspecs/Folly.podspec'

#  use_native_modules!

  target 'RNRecordLearnTests' do
    inherit! :search_paths
    # Pods for testing
  end

  target 'RNRecordLearnUITests' do
    # Pods for testing
  end

end
pod init 后见绿,那么恭喜你RN已经集成完成了
然后就是怎么用的了
首先在项目根目录下创建一个空的index.js(最好是命名:index.ios.js)文件,测试内容例如:
import React from 'react';
import {AppRegistry, StyleSheet, Text, View} from 'react-native';

class RNHighScores extends React.Component {
    render() {
        return (
            <View style={styles.container}>
                <Text style={styles.hello}>我是第一个页面,我进来了哦</Text>
        </View>
    );
    }
}
const styles = StyleSheet.create({
    container: {
        flex: 1,
        justifyContent: 'center',
    },
    hello: {
        fontSize: 20,
        textAlign: 'center',
        margin: 10,
    },
});

AppRegistry.registerComponent('RNHighScores', () => RNHighScores);
要把index加载到我们原生项目里面有两种方式:
1、通过启动开发服务器( Packager,它负责实时监测 js 文件的变动并实时打包,输出给客户端运行),进入跟项目根目录(index.js所在目录)
执行命令:$ npm start

就这样,然后在你想要加载的地方输入代码后运行程序:
let jsCodeLocation: URL = URL(string: "http://localhost:8081/index.bundle?platform=ios")!
//与RN的通信,这里可以传值
let mockData: [AnyHashable : Any] = [:]

let rootView = RCTRootView(bundleURL: jsCodeLocation, moduleName: "RNHighScores", initialProperties: mockData, launchOptions: nil)
let rnLear = RNLearToolController()
rnLear.view = rootView
self.navigationController?.pushViewController(rnLear, animated: true)
2、将js项目打包成xxx.jsbundle文件
- 在RN项目的根目录下创建release_ios文件夹
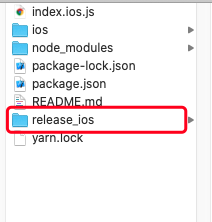
- 在RN根目录下执行命令
$ react-native bundle --entry-file index.ios.js --platform ios --dev false --bundle-output release_ios/main.jsbundle --assets-dest release_ios/然后你就会发现release_ios文件夹下面出现了一些文件,我这里没有图片等资源,所以只有main.jsbundle一个文件

然后将main.jsbundle拖到你的原生项目里面

然后在你想要加载的地方输入代码后运行程序,RNLearToolController是我自己创建的ViewController来接收RCTRootView
//与RN的通信,这里可以传值
let mockData: [AnyHashable : Any] = [:]

let jsCodeLocation2: URL = Bundle.main.url(forResource: "main", withExtension: "jsbundle")!

let rootView = RCTRootView(bundleURL: jsCodeLocation2, moduleName: "RNHighScores", initialProperties: mockData, launchOptions: nil)
let rnLear = RNLearToolController()
rnLear.view = rootView
self.navigationController?.pushViewController(rnLear, animated: true)
集成RN就到此结束了!!!


 2821
2821


 被折叠的 条评论
为什么被折叠?
被折叠的 条评论
为什么被折叠?
 到【灌水乐园】发言


