


文章目录
| 主机 | ip |
|---|---|
| master | 192.168.220.10 |
| node1 | 192.168.220.20 |
| node2 | 192.168.220.30 |
安装要求
在开始之前,部署Kubernetes集群机器需要满足以下几个条件:
至少3台机器,操作系统 CentOS7+
- 硬件配置:2GB或更多RAM,2个CPU或更多CPU,硬盘20GB或更多
- 集群中所有机器之间网络互通
- 可以访问外网,需要拉取镜像
- 禁止swap分区
准备环境
修改主机名
[root@localhost ~]# hostnamectl set-hostname master
[root@localhost ~]# bash
[root@master ~]#

[root@localhost ~]# hostnamectl set-hostname node1
[root@localhost ~]# bash
[root@node1 ~]#

[root@localhost ~]# hostnamectl set-hostname node2
[root@localhost ~]# bash
[root@node2 ~]#
关闭防火墙
systemctl disable --now firewalld //三台都要做
关闭selinux
 sed -i 's/enforcing/disabled/' /etc/selinux/config   //三台都要做
setenforce 0
关闭swap分区
vim /etc/fstab   //三台都要做
#/dev/mapper/cs-swap     none                    swap    defaults        0 0  //注释这一行
配置hosts文件
[root@master ~]# vim /etc/hosts   //三台都要做
192.168.220.10 master
192.168.220.20 node1
192.168.220.30 node2
将桥接的IPv4流量传递到iptables的链
[root@master ~]# cat > /etc/sysctl.d/k8s.conf << EOF    //三台都要做
net.bridge.bridge-nf-call-ip6tables = 1
net.bridge.bridge-nf-call-iptables = 1
EOF

[root@master ~]# sysctl --system
* Applying /usr/lib/sysctl.d/10-default-yama-scope.conf ...
kernel.yama.ptrace_scope = 0
* Applying /usr/lib/sysctl.d/50-coredump.conf ...
kernel.core_pattern = |/usr/lib/systemd/systemd-coredump %P %u %g %s %t %c %h %e
kernel.core_pipe_limit = 16
* Applying /usr/lib/sysctl.d/50-default.conf ...
kernel.sysrq = 16
kernel.core_uses_pid = 1
kernel.kptr_restrict = 1
net.ipv4.conf.all.rp_filter = 1
net.ipv4.conf.all.accept_source_route = 0
net.ipv4.conf.all.promote_secondaries = 1
net.core.default_qdisc = fq_codel
fs.protected_hardlinks = 1
fs.protected_symlinks = 1
* Applying /usr/lib/sysctl.d/50-libkcapi-optmem_max.conf ...
net.core.optmem_max = 81920
* Applying /usr/lib/sysctl.d/50-pid-max.conf ...
kernel.pid_max = 4194304
* Applying /etc/sysctl.d/99-sysctl.conf ...
* Applying /etc/sysctl.d/k8s.conf ...    //能看到这个 就生效了
* Applying /etc/sysctl.conf ...
配置时间同步
yum install chrony -y    //三台都要做
systemctl enable --now chronyd   //开机自启
免密登陆
[root@master ~]# ssh-keygen -t rsa
[root@master ~]# ssh-copy-id master
[root@master ~]# ssh-copy-id node1
[root@master ~]# ssh-copy-id node2
安装需要工具
yum install wget vim
所有节点安装Docker/kubeadm/kubelet
安装Docker
#获取yum源
wget https://mirrors.aliyun.com/docker-ce/linux/centos/docker-ce.repo -O /etc/yum.repos.d/docker-ce.repo

yum -y install --allowerasing docker-ce
systemctl enable --now docker.service


#docker加速
cat > /etc/docker/daemon.json << EOF
{
   "registry-mirrors": ["https://r6xz17yj.mirror.aliyuncs.com"],
   "exec-opts": ["native.cgroupdriver=systemd"],
   "log-driver": "json-file",
   "log-opts": {
     "max-size": "100m"
   },
   "storage-driver": "overlay2"
}
EOF
添加kubernetes阿里云YUM软件源
cat > /etc/yum.repos.d/kubernetes.repo << EOF
[kubernetes]
name=Kubernetes
baseurl=https://mirrors.aliyun.com/kubernetes/yum/repos/kubernetes-el7-x86_64
enabled=1
gpgcheck=0
repo_gpgcheck=0
gpgkey=https://mirrors.aliyun.com/kubernetes/yum/doc/yum-key.gpg https://mirrors.aliyun.com/kubernetes/yum/doc/rpm-package-key.gpg
EOF

systemctl daemon-reload
systemctl restart docker
安装kubeadm,kubelet和kubectl
由于版本更新频繁,这里指定版本号部署:
yum install -y kubelet-1.25.0 kubeadm-1.25.0 kubectl-1.25.04
systemctl enable kubelet
部署Kubernetes Master
在Master主机执行
[root@master ~]# cd /etc/containerd/
[root@master containerd]# mv config.toml /opt/
[root@master containerd]# containerd config default > config.toml
[root@master containerd]# ls
config.toml
[root@master containerd]# vim config.toml
:%s#k8s.gcr.io#registry.cn-beijing.aliyuncs.com/abcdocker#g  //在编辑模式输入这个
[root@master containerd]# systemctl restart containerd

#初始化
[root@master ~]# kubeadm init --apiserver-advertise-address 192.168.220.10 --image-repository registry.aliyuncs.com/google_containers --kubernetes-version v1.25.0 --service-cidr 10.96.0.0/12 --pod-network-cidr 10.244.0.0/16


#看到这个就是初始化成功
Your Kubernetes control-plane has initialized successfully!

To start using your cluster, you need to run the following as a regular user:

  mkdir -p $HOME/.kube
  sudo cp -i /etc/kubernetes/admin.conf $HOME/.kube/config
  sudo chown $(id -u):$(id -g) $HOME/.kube/config

Alternatively, if you are the root user, you can run:

  export KUBECONFIG=/etc/kubernetes/admin.conf

You should now deploy a pod network to the cluster.
Run "kubectl apply -f [podnetwork].yaml" with one of the options listed at:
  https://kubernetes.io/docs/concepts/cluster-administration/addons/

Then you can join any number of worker nodes by running the following on each as root:

kubeadm join 192.168.220.10:6443 --token otj9oi.opzr5snvd32kh9ty \
        --discovery-token-ca-cert-hash sha256:0d94973231d2deea0ae4ed41b5df86ad0d8cafeb5b706825919fded7d4c2a3a6
  //后续会用到
由于默认拉取镜像地址k8s.gcr.io国内无法访问,这里指定阿里云镜像仓库地址。
使用kubectl工具:
#当用户为root操作
[root@master ~]# vim /etc/profile.d/k8s.sh
[root@master ~]# cat /etc/profile.d/k8s.sh
export KUBECONFIG=/etc/kubernetes/admin.conf
[root@master ~]# source /etc/profile.d/k8s.sh
[root@master ~]# echo $KUBECONFIG
/etc/kubernetes/admin.conf
[root@master ~]# kubectl get nodes
NAME     STATUS     ROLES           AGE     VERSION
master   NotReady   control-plane   4m31s   v1.25.0


#如果是普通用户,那么
# mkdir -p $HOME/.kube
# sudo cp -i /etc/kubernetes/admin.conf $HOME/.kube/config
# sudo chown $(id -u):$(id -g) $HOME/.kube/config
# kubectl get nodes
安装Pod网络插件(CNI)
[root@master ~]# kubectl apply -f https://raw.githubusercontent.com/coreos/flannel/master/Documentation/kube-flannel.yml
namespace/kube-flannel created
clusterrole.rbac.authorization.k8s.io/flannel created
clusterrolebinding.rbac.authorization.k8s.io/flannel created
serviceaccount/flannel created
configmap/kube-flannel-cfg created
daemonset.apps/kube-flannel-ds created
加入Kubernetes Node
#将master内的文件传到node1和2上
[root@master containerd]# scp /etc/containerd/config.toml node1:/etc/containerd/
config.toml                                      100% 6952     6.8MB/s   00:00
[root@master containerd]# scp /etc/containerd/config.toml node2:/etc/containerd/
config.toml                                      100% 6952     5.5MB/s   00:00


#将node1加入到集群
[root@node1 ~]# systemctl restart containerd
[root@node1 ~]# kubeadm join 192.168.220.10:6443 --token otj9oi.opzr5snvd32kh9ty \
>         --discovery-token-ca-cert-hash sha256:0d94973231d2deea0ae4ed41b5df86ad0d8cafeb5b706825919fded7d4c2a3a6
[preflight] Running pre-flight checks
        [WARNING FileExisting-tc]: tc not found in system path
[preflight] Reading configuration from the cluster...
[preflight] FYI: You can look at this config file with 'kubectl -n kube-system get cm kubeadm-config -o yaml'
[kubelet-start] Writing kubelet configuration to file "/var/lib/kubelet/config.yaml"
[kubelet-start] Writing kubelet environment file with flags to file "/var/lib/kubelet/kubeadm-flags.env"
[kubelet-start] Starting the kubelet
[kubelet-start] Waiting for the kubelet to perform the TLS Bootstrap...

This node has joined the cluster:
* Certificate signing request was sent to apiserver and a response was received.
* The Kubelet was informed of the new secure connection details.

Run 'kubectl get nodes' on the control-plane to see this node join the cluster.   //看到这个就是成功了


#将node2也加入
[root@node2 ~]# kubeadm join 192.168.220.10:6443 --token otj9oi.opzr5snvd32kh9ty \
>         --discovery-token-ca-cert-hash sha256:0d94973231d2deea0ae4ed41b5df86ad0d8cafeb5b706825919fded7d4c2a3a6
[preflight] Running pre-flight checks
        [WARNING FileExisting-tc]: tc not found in system path
[preflight] Reading configuration from the cluster...
[preflight] FYI: You can look at this config file with 'kubectl -n kube-system get cm kubeadm-config -o yaml'
[kubelet-start] Writing kubelet configuration to file "/var/lib/kubelet/config.yaml"
[kubelet-start] Writing kubelet environment file with flags to file "/var/lib/kubelet/kubeadm-flags.env"
[kubelet-start] Starting the kubelet
[kubelet-start] Waiting for the kubelet to perform the TLS Bootstrap...

This node has joined the cluster:
* Certificate signing request was sent to apiserver and a response was received.
* The Kubelet was informed of the new secure connection details.

Run 'kubectl get nodes' on the control-plane to see this node join the cluster.
在node节点上配置使kubectl get nodes 命令可以使用
[root@master ~]# scp /etc/kubernetes/admin.conf node1:/etc/kubernetes/
admin.conf                                       100% 5638     5.0MB/s   00:00
[root@master ~]# scp /etc/kubernetes/admin.conf node2:/etc/kubernetes/
admin.conf                                       100% 5638     4.9MB/s   00:00
[root@master ~]# scp /etc/profile.d/k8s.sh node1:/etc/profile.d/
k8s.sh                                           100%   46    36.0KB/s   00:00
[root@master ~]# scp /etc/profile.d/k8s.sh node2:/etc/profile.d/
k8s.sh                                           100%   46    35.6KB/s   00:00

#切换到node1和2节点 bush生效
[root@node1 ~]# bash
[root@node1 ~]# kubectl get nodes
NAME     STATUS   ROLES           AGE     VERSION
master   Ready    control-plane   25m     v1.25.0
node1    Ready    <none>          7m32s   v1.25.0
node2    Ready    <none>          4m46s   v1.25.0


[root@node2 ~]# bash
[root@node2 ~]# kubectl get nodes
NAME     STATUS   ROLES           AGE     VERSION
master   Ready    control-plane   25m     v1.25.0
node1    Ready    <none>          7m53s   v1.25.0
node2    Ready    <none>          5m7s    v1.25.0
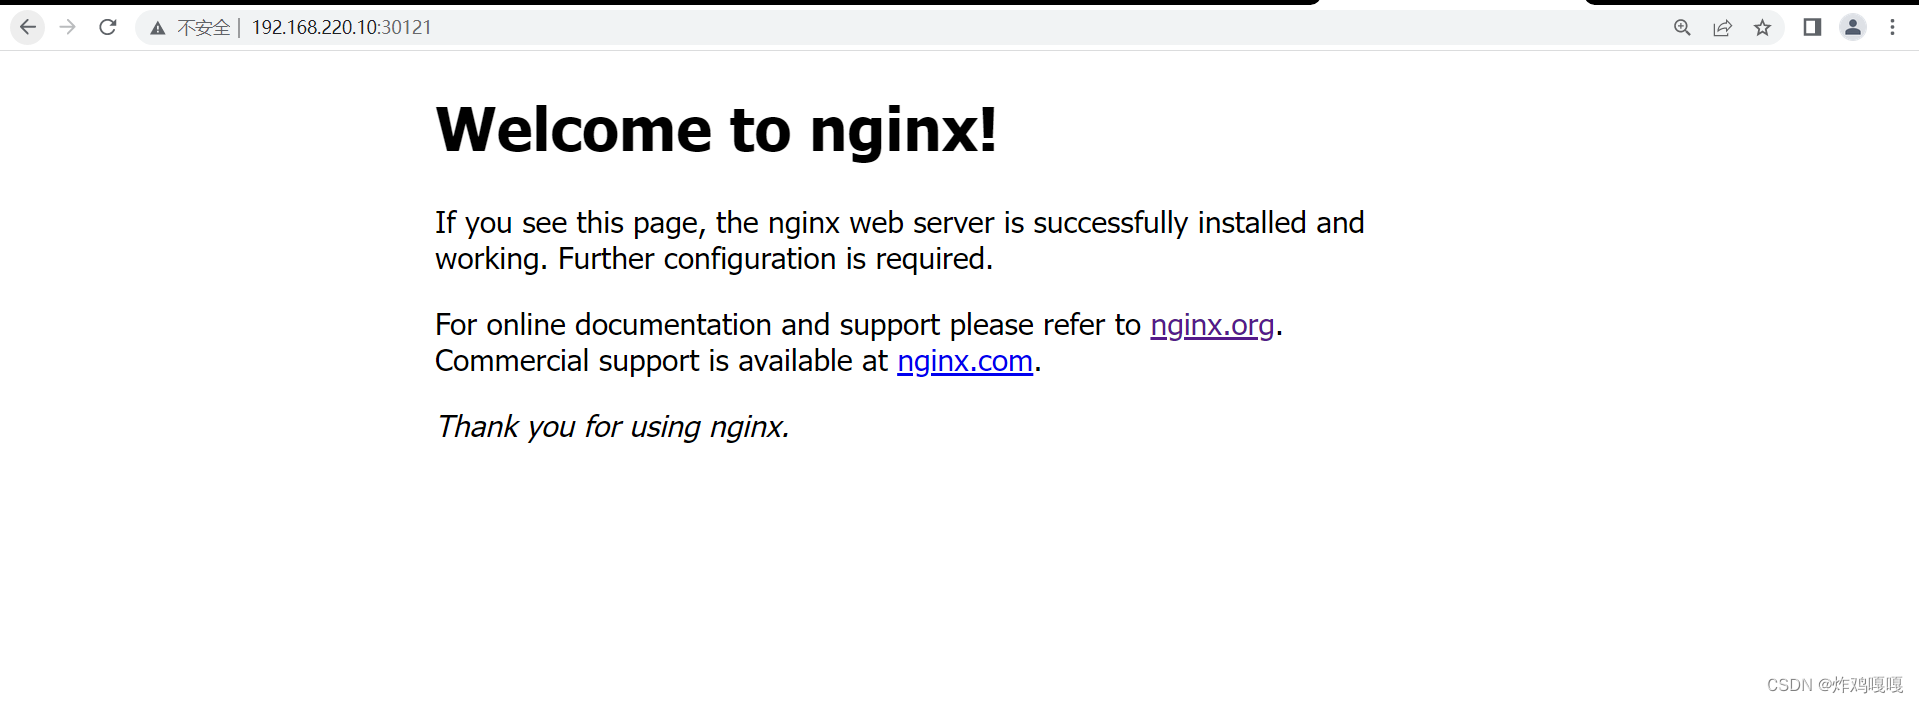
测试kubernetes集群
创建一个pod 生成一个nginx
[root@master ~]# kubectl create deployment nginx --image=nginx
deployment.apps/nginx created
[root@master ~]# kubectl expose deployment nginx --port=80 --type=NodePort
service/nginx exposed
[root@master ~]#
[root@master ~]# kubectl get pod,svc
NAME                        READY   STATUS              RESTARTS   AGE
pod/nginx-76d6c9b8c-9lpqc   0/1     ContainerCreating   0          27s

NAME                 TYPE        CLUSTER-IP      EXTERNAL-IP   PORT(S)        AGE
service/kubernetes   ClusterIP   10.96.0.1       <none>        443/TCP        28m
service/nginx        NodePort    10.109.79.162   <none>        80:30121/TCP   14s
[root@master ~]# ss -antl
State        Recv-Q       Send-Q              Local Address:Port              Peer Address:Port      Process
LISTEN       0            128                     127.0.0.1:10249                  0.0.0.0:*
LISTEN       0            128                192.168.220.10:2379                   0.0.0.0:*
LISTEN       0            128                     127.0.0.1:2379                   0.0.0.0:*
LISTEN       0            128                192.168.220.10:2380                   0.0.0.0:*
LISTEN       0            128                     127.0.0.1:2381                   0.0.0.0:*
LISTEN       0            128                     127.0.0.1:10257                  0.0.0.0:*
LISTEN       0            128                     127.0.0.1:35921                  0.0.0.0:*
LISTEN       0            128                     127.0.0.1:10259                  0.0.0.0:*
LISTEN       0            128                       0.0.0.0:22                     0.0.0.0:*
LISTEN       0            128                     127.0.0.1:10248                  0.0.0.0:*
LISTEN       0            128                             *:10250                        *:*
LISTEN       0            128                             *:6443                         *:*
LISTEN       0            128                             *:10256                        *:*
LISTEN       0            128                          [::]:22                        [::]:*
浏览器访问


 1549
1549


 被折叠的 条评论
为什么被折叠?
被折叠的 条评论
为什么被折叠?
 到【灌水乐园】发言


