


我们在第一次使用一个app的时候或多或少都会有引导页的存在,在这个帖子中我已经整理好了相关的类容
下面是部分截图
先创建一个空的activity叫StartActivity里面的代码为
public class StartActivity extends AppCompatActivity {

    private ViewPager startViewpager;
    public List<View> introductionList;
    private IntroductionAdapter introductionAdapter;
    private Button cButton;

    @Override
    protected void onCreate(Bundle savedInstanceState) {
        super.onCreate(savedInstanceState);
        setContentView(R.layout.activity_start);

        initView();
        initAdapter();
        initClick();
    }

    /**
     * 初始化数组将引导页添加到数组里去
     */
    private void initView() {
        startViewpager = findViewById(R.id.start_viewpager);
        introductionList = new ArrayList<>();
        introductionList.add(getView(R.layout.introduction_a));
        introductionList.add(getView(R.layout.introduction_b));
        introductionList.add(getView(R.layout.introduction_c));

    }

    /**
     * 初始化适配器
     */
    private void initAdapter() {
        introductionAdapter = new IntroductionAdapter(introductionList);
        startViewpager.setAdapter(introductionAdapter);
    }

    /**
     * 初始化布局填充器把上面数组里的布局添加到这里面去
     */
    private View getView(int resId) {
        View view = LayoutInflater.from(this).inflate(resId, null);
        return view;
    }

    /**
     * 初始化尾页的点击事件
     */
    private void initClick() {
       cButton=introductionList.get(2).findViewById(R.id.c_button);
       cButton.setOnClickListener(new View.OnClickListener() {
           @Override
           public void onClick(View v) {
               Toast.makeText(StartActivity.this, "测试点击", Toast.LENGTH_SHORT).show();
           }
       });
    }
}
创建适配器 IntroductionAdapter 并且继承PagerAdapter
public class IntroductionAdapter extends PagerAdapter {

    private List<View>pageList;

    /**
     * 这里面的list是从java代码里传递过来的list*/
    public IntroductionAdapter(List<View>list){
        this.pageList=list;
    }

    /**
     * @return ViewPager
     * 返回一共有多少个子页面,将需要展示的页面存到数组里然后返回长度,在ViewPager创建后自动执行只会执行一次
     * */
    @Override
    public int getCount() {
        return pageList.size();
    }

    /**
     * ViewPager里面对每个页面的管理是key-value形式的,也就是说每个page都有个对应的id(id是object类型),需要对page操作的时候都是通过id来完成的
     *
     * 这个函数就是用来告诉框架,这个view的id是不是这个object。
     * 谷歌官方推荐把view当id用,所以常规的instantiateItem()函数的返回值是你自己定义的view,而isViewFromObject()的返回值是view == object。
     * */
    @Override
    public boolean isViewFromObject(@NonNull View view, @NonNull Object object) {
        return view==object;
    }

    /**
     * 这是pageAdapter里的函数,功能就是往PageView里添加自己需要的page。同时注意它还有个返回值object,这就是那个id。
     *
     * ViewPager会预加载子页面
     *      *    在预加载时会自动调用这个方法
     *      *    虽然一共有几个子页面已经知道了,但这些页面并未创建出来
     *      *    我们要在这个方法中创建子页面 并且将要展示的内容添加到子页面中
     *      * ② 当ViewPage第一次加载时会执行这个函数并且执行两次
     *      *    第一次执行加载第0页面, 第二次执行加载第1页
     *      * ③ 当从第0页滑动到第1页后 会触发这个函数 预加载第2页
     *      *    当从第1页滑到第2页后  会触发这个函数 预加载第3页
     *      *    以类此推
     *      *    同理,反向滑动也是一样的
     *
     *      * ④ 这个方法要返回预加载的子页面要显示的组件对象
     *      * @param container 使用这个适配器的 ViewPager 对象
     *      * @param position 预加载页面(要创建的页面)的编号(从0开始计)
     *      * @return 预加载的子页面要显示的组件对象
     *
     * */
    @NonNull
    @Override
    public Object instantiateItem(@NonNull ViewGroup container, int position) {
        View view=pageList.get(position);
        container.addView(view);
        return view;
    }

    /**
     * ① 这个方法用来销毁某个子页面释放资源
     * ② 当刚进入 ViewPager 时 这时已经加载了 0号页与1号页
     *    此时用户处于0号页 用户可能还要滑到1号页 此时哪个页面都不会销毁
     * ② 当用户从0号页滑到1号页 这时已加载的页面时 0、1、2 页
     *    此时用户即可能滑到 0号页 也可能滑到 2号页  所以也不会触发这个函数
     * ③ 当用户从 1号页 滑到 2号页 此时已加载的有  0、1、2、3 页
     *    用户处于 2号页 不可能会直接滑到0号页 所以,此时会触发这个函数来销毁 0号页
     *    通过这个规律 我们就能知道这个方法何时会调用了
     * @param container 使用这个适配器的 ViewPager 对象
     * @param position 要销毁的页面编号
     * @param object 在 instantiateItem()方法 中 return的组件对象会传给它
     */
    @Override
    public void destroyItem(@NonNull ViewGroup container, int position, @NonNull Object object) {
       /**
        * 根据 object 删除子页面
        *子页面都是以 k-v 的形式管理的
        *而 instantiateItem()方法 return的对象就是当时创建的那个子页面的key,所以destroyItem()方法的第三个参数就是页面的key
        * 所以可以根据第三个参数销毁子页面*/
       container.removeView(pageList.get(position));

    }

}
在androidmainfest文件中修改首页启动
    <application
        android:allowBackup="true"
        android:icon="@mipmap/ic_launcher"
        android:label="@string/app_name"
        android:roundIcon="@mipmap/ic_launcher_round"
        android:supportsRtl="true"
        android:theme="@style/Theme.Lightbrigade">


        <activity android:name=".activities.StartActivity" android:exported="true">
            <intent-filter>
                <action android:name="android.intent.action.MAIN" />
                <category android:name="android.intent.category.LAUNCHER" />
            </intent-filter>
        </activity>

        <activity android:name=".MainActivity" android:exported="true" />
    </application>

</manifest>
在activity_start.xml中添加布局
<RelativeLayout xmlns:android="http://schemas.android.com/apk/res/android"
    xmlns:app="http://schemas.android.com/apk/res-auto"
    xmlns:tools="http://schemas.android.com/tools"
    android:layout_width="match_parent"
    android:layout_height="match_parent"
    tools:context=".activities.StartActivity"
    android:orientation="vertical">
    <LinearLayout
        android:layout_width="match_parent"
        android:layout_height="match_parent">

        <androidx.viewpager.widget.ViewPager
            android:id="@+id/start_viewpager"
            android:layout_width="match_parent"
            android:layout_height="match_parent"/>
    </LinearLayout>
</RelativeLayout>
创建三个引导页 introduction_a
<?xml version="1.0" encoding="utf-8"?>
<LinearLayout xmlns:android="http://schemas.android.com/apk/res/android"
    android:layout_width="match_parent"
    android:layout_height="match_parent"
    android:orientation="vertical"
    android:gravity="center">


    <TextView
        android:layout_width="wrap_content"
        android:layout_height="wrap_content"
        android:text="引导页A"
        android:textSize="50sp"
        />
</LinearLayout>
introduction_b
<?xml version="1.0" encoding="utf-8"?>
<LinearLayout xmlns:android="http://schemas.android.com/apk/res/android"
    android:layout_width="match_parent"
    android:layout_height="match_parent"
    android:orientation="vertical"
    android:gravity="center">


    <TextView
        android:layout_width="wrap_content"
        android:layout_height="wrap_content"
        android:text="引导页B"
        android:textSize="50sp"
        />

</LinearLayout>
introduction_c
<?xml version="1.0" encoding="utf-8"?>
<LinearLayout xmlns:android="http://schemas.android.com/apk/res/android"
    android:layout_width="match_parent"
    android:layout_height="match_parent"
    android:orientation="vertical"
    android:gravity="center">


    <TextView
        android:layout_width="wrap_content"
        android:layout_height="wrap_content"
        android:text="引导页C"
        android:textSize="50sp"
        />

    <Button
        android:id="@+id/c_button"
        android:layout_width="200dp"
        android:layout_height="wrap_content"
        android:text="立即体验"
        android:textSize="20sp"
        android:textColor="@color/black"
        />
</LinearLayout>
编译安装即可
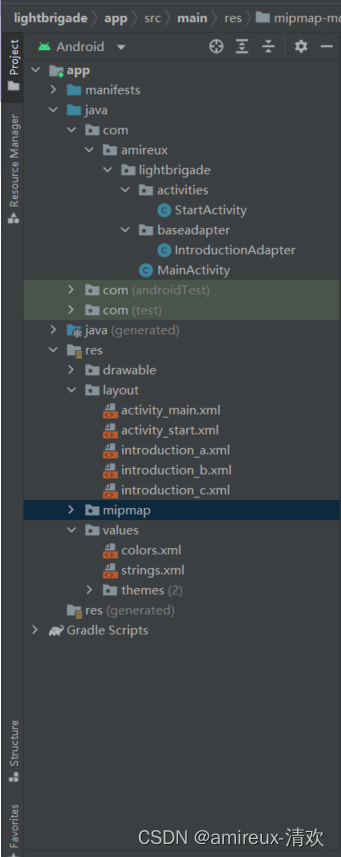
工程目录截图
gitee 地址:


 1万+
1万+


 被折叠的 条评论
为什么被折叠?
被折叠的 条评论
为什么被折叠?
 到【灌水乐园】发言


