


内容
阿里云内容审核SDK更新
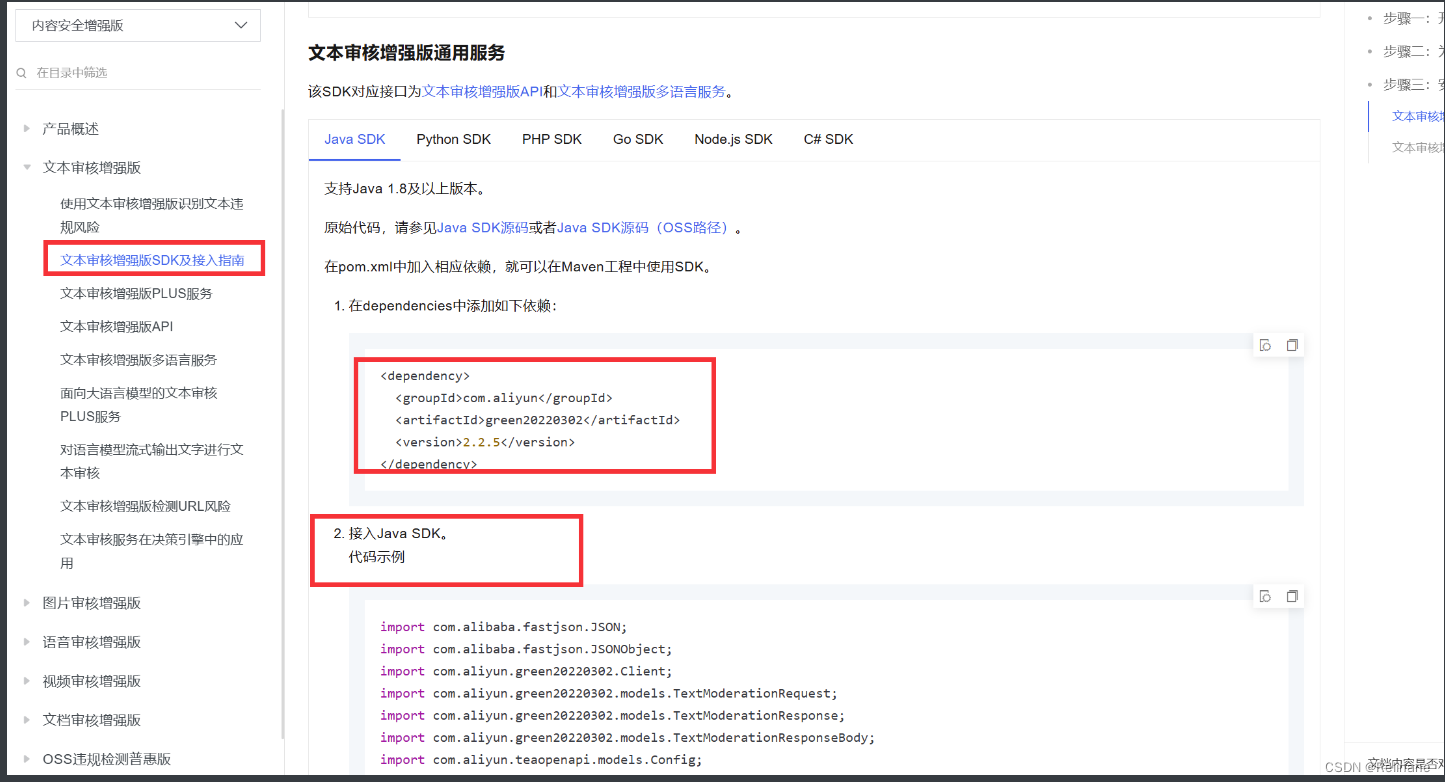
项目比较久远,在使用以前的阿里云SDK进行内容审核时候,发现用不了,所以需要去阿里云官网调整使用最新增强版的SDK
(1)文本内容审核
详细的代码示例,可以登录网页看,如图(步骤:1.导包 2.复制代码 3.改一改accessKey, secrectKey, endpoint即可输入内容一键运行)
这里对主要代码进行调整即可:
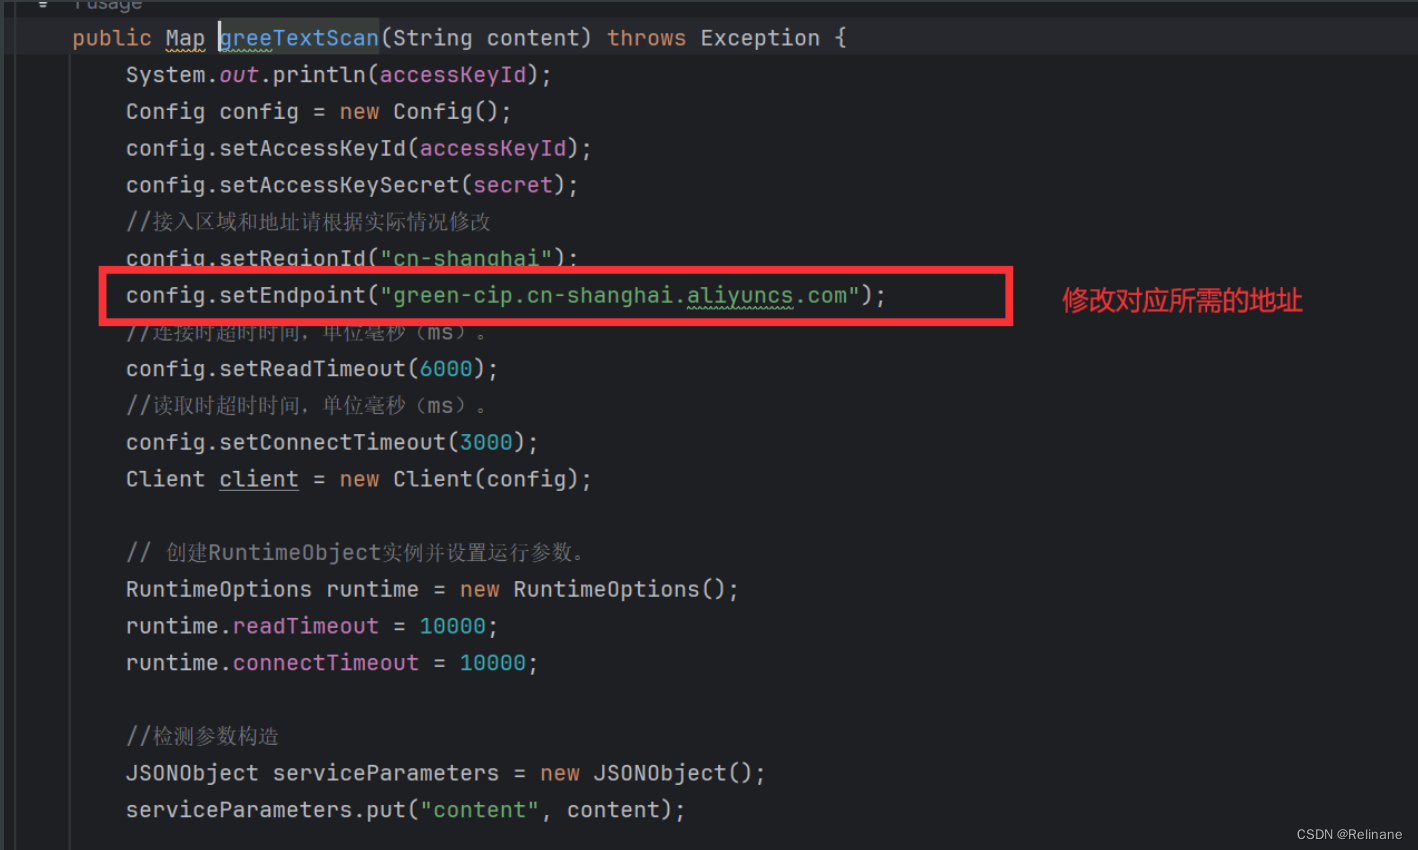
完整代码如下:
@Getter
@Setter
@Component
@ConfigurationProperties(prefix = "aliyun")
public class GreenTextScan {
private String accessKeyId;
private String secret;
public Map greeTextScan(String content) throws Exception {
System.out.println(accessKeyId);
Config config = new Config();
config.setAccessKeyId(accessKeyId);
config.setAccessKeySecret(secret);
//接入区域和地址请根据实际情况修改
config.setRegionId("cn-shanghai");
config.setEndpoint("green-cip.cn-shanghai.aliyuncs.com");
//连接时超时时间,单位毫秒(ms)。
config.setReadTimeout(6000);
//读取时超时时间,单位毫秒(ms)。
config.setConnectTimeout(3000);
Client client = new Client(config);
// 创建RuntimeObject实例并设置运行参数。
RuntimeOptions runtime = new RuntimeOptions();
runtime.readTimeout = 10000;
runtime.connectTimeout = 10000;
//检测参数构造
JSONObject serviceParameters = new JSONObject();
serviceParameters.put("content", content);
//检测结果构造
Map<String,String> resultMap = new HashMap<>();
if (serviceParameters.get("content") == null || serviceParameters.getString("content").trim().length() == 0) {
resultMap.put("suggestion","检测内容为空");
System.out.println("text moderation content is empty");
return resultMap;
}
TextModerationRequest textModerationRequest = new TextModerationRequest();
/*
文本检测service:内容安全控制台文本增强版规则配置的serviceCode,示例:chat_detection
*/
textModerationRequest.setService("comment_detection");
textModerationRequest.setServiceParameters(serviceParameters.toJSONString());
try {
// 调用方法获取检测结果。
TextModerationResponse response = client.textModerationWithOptions(textModerationRequest, runtime);
// 自动路由。
if (response != null) {
// 服务端错误,区域切换到cn-beijing。
if (500 == response.getStatusCode() || (response.getBody() != null && 500 == (response.getBody().getCode()))) {
// 接入区域和地址请根据实际情况修改。
config.setRegionId("cn-beijing");
config.setEndpoint("green-cip.cn-beijing.aliyuncs.com");
client = new Client(config);
response = client.textModerationWithOptions(textModerationRequest, runtime);
}
}
// 打印检测结果。
if (response != null) {
if (response.getStatusCode() == 200) {
TextModerationResponseBody result = response.getBody();
System.out.println(JSON.toJSONString(result));
Integer code = result.getCode();
if (code != null && code == 200) {
TextModerationResponseBody.TextModerationResponseBodyData data = result.getData();
if (data.getLabels().isEmpty() && data.getReason().isEmpty()) {
resultMap.put("suggestion", "pass");
}else {
resultMap.put("suggestion","block");
resultMap.put("labels",data.getLabels());
resultMap.put("reason", data.getReason());
}
System.out.println("labels = [" + data.getLabels() + "]");
System.out.println("reason = [" + data.getReason() + "]");
} else {
System.out.println("text moderation not success. code:" + code);
}
} else {
System.out.println("response not success. status:" + response.getStatusCode());
}
}
} catch (Exception e) {
e.printStackTrace();
}
return resultMap;
}
}
(2)图片审核增强SDK
这个SDK获取方式和文本内容是一样的,就不再详细演示了
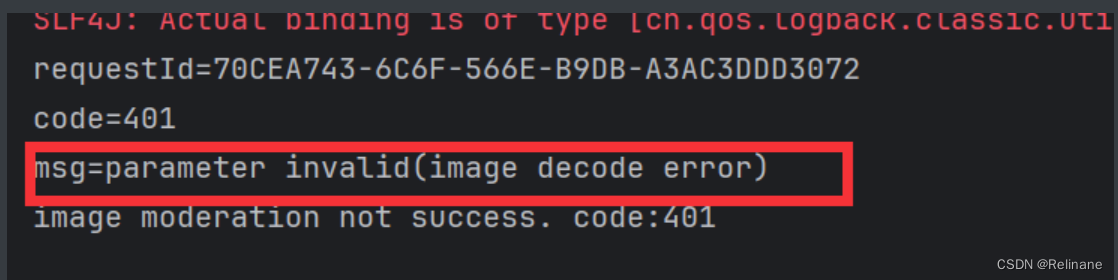
注意阿里云提供了三种方式1.公网URL获取图片 2.本地图片测试 3.阿里云OSS获取图片
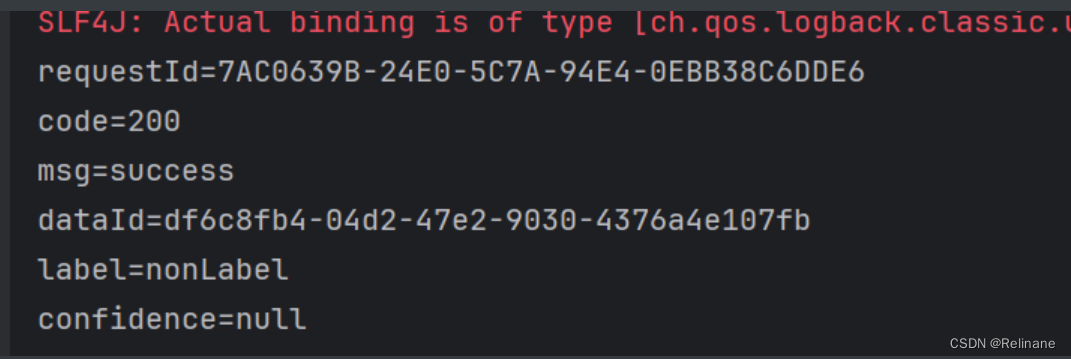
本人对前两种都做了一遍,提供给公网的图片却总是审核失败,提示解码错误(如图),而把图片放到本地就能审核通过,也非常不解,如果有人会还希望指点一二。
提供公网图片URL审核结果:
提供本地测试URL结果:
docker内网穿透
如果对如何把docker服务提供到公网里面感兴趣的可以接着往下看:
docker服务运行在本地,如果需要把本地服务,让别人也能访问,可以直接进行内网穿透即可,即把服务的IP暴露到公网
详细步骤如下:
1.在Liunx执行以下命令,一键下载cploar
curl -L https://www.cpolar.com/static/downloads/install-release-cpolar.sh | sudo bash
(如果下载失败如图,出现timeout现象,就是url下载速度太慢了,需要额外的配置镜像)

2.配置中科院、阿里云镜像
// 打开镜像编辑文件
vi /etc/docker/daemon.json
// 下拉找到如下配置,往数组里面多加以下镜像服务
{
"registry-mirrors":["https://docker.mirrors.ustc.edu.cn", "https://6kx4zyno.mirror.aliyuncs.com"]
}
重启docker后,再次执行下载cpolar即可
2.向系统添加服务,并启动cpolar
sudo systemctl enable cpolar sudo systemctl start cpolar
3.配置http隧道,暴露到公网上即可进行访问
执行以下任一Liunx命令即可
cploar http 9000 // 将本机9000服务建立隧道 cpolar http -region=cn_vip 9000 // 指定服务区
执行完之后,稍等一会就会出现Forwarding以下两个url链接,使用这两个链接中的一个就能访问到我们docker里面的9000端口服务啦
(但是属于白嫖的内网穿透,所以访问会有点慢)

想详细学习cploar的,可以到cploar官网学习


 被折叠的 条评论
为什么被折叠?
被折叠的 条评论
为什么被折叠?
 到【灌水乐园】发言


