


实验并解读github上三个DeepDream的Pytorch代码
今天在学习DeepDream的有关内容,关于论文的翻译已经在启发主义——深入神经网络(Inceptionism: Going Deeper into Neural Networks)一文中进行,而关于代码的实践则在这篇博文中展开。
google官方个给出的开源代码是基于Caffe框架的ipynb文件,但在我的环境中运行Caffe必须要在sudo的情况下运行,直接运行ipynb文件会报错:“No module named ‘caffe’”,因此为了尽快实现DeepDream,直接转向Pytorch~
在github上搜到三个关于DeepDream的Pytorch代码程序,链接如下:
sar-gupta/deep-dream-pytorch
XavierLinNow/deepdream_pytorch
duc0/deep-dream-in-pytorch
文章目录
首先,ubuntu上使用ipynb的方法在百度上可以轻易搜索到,当年我安装设置的方法也已经遗忘了,因此这里不敢胡乱写。在终端直接输入:
~$ ipython notebook
即可在浏览器中打开ipynb,找到代码程序所在文件夹位置,即可开始使用ipynb。
1. sar-gupta/deep-dream-pytorch
# coding:utf-8
# 加载必要的库
import torch
import torch.nn as nn
from torch.autograd import Variable
from torchvision import models
from torchvision import transforms, utils
import numpy as np
import matplotlib.pyplot as plt
%matplotlib inline
# PIL.ImageFilter是Python中的图像滤波,主要对图像进行平滑、锐化、边界增强等滤波处理
# PIL.ImageChops模块包含一些算术图形操作,叫做channel operations(“chops”)。这些操作可用于诸多目的,比如图像特效,图像组合,算法绘图等等
from PIL import Image, ImageFilter, ImageChops
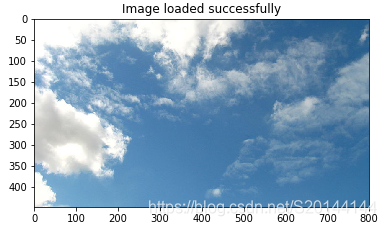
# 加载图像并显示
def load_image(path):
image = Image.open(path)
plt.imshow(image)
plt.title("Image loaded successfully")
return image
# 对数据集的标准化设置——减去均值再除以标准差
normalise = transforms.Normalize(
mean=[0.485, 0.456, 0.406],
std=[0.229, 0.224, 0.225]
)
# 数据集的预处理,包括缩放、转换成Tensor、标准化
preprocess = transforms.Compose([
transforms.Resize((224,224)),
transforms.ToTensor(),
normalise
])
# 逆向处理过程,逆标准化,图像乘以标准差再加上均值
def deprocess(image):
return image * torch.Tensor([0.229, 0.224, 0.225]).cuda() + torch.Tensor([0.485, 0.456, 0.406]).cuda()
# 下载vgg16的预训练模型,传到GPU上,输出网络结构
vgg = models.vgg16(pretrained=True)
vgg = vgg.cuda()
print(vgg)
modulelist = list(vgg.features.modules())
输出:
VGG(
  (features): Sequential(
    (0): Conv2d(3, 64, kernel_size=(3, 3), stride=(1, 1), padding=(1, 1))
    (1): ReLU(inplace)
    (2): Conv2d(64, 64, kernel_size=(3, 3), stride=(1, 1), padding=(1, 1))
    (3): ReLU(inplace)
    (4): MaxPool2d(kernel_size=2, stride=2, padding=0, dilation=1, ceil_mode=False)
    (5): Conv2d(64, 128, kernel_size=(3, 3), stride=(1, 1), padding=(1, 1))
    (6): ReLU(inplace)
    (7): Conv2d(128, 128, kernel_size=(3, 3), stride=(1, 1), padding=(1, 1))
    (8): ReLU(inplace)
    (9): MaxPool2d(kernel_size=2, stride=2, padding=0, dilation=1, ceil_mode=False)
    (10): Conv2d(128, 256, kernel_size=(3, 3), stride=(1, 1), padding=(1, 1))
    (11): ReLU(inplace)
    (12): Conv2d(256, 256, kernel_size=(3, 3), stride=(1, 1), padding=(1, 1))
    (13): ReLU(inplace)
    (14): Conv2d(256, 256, kernel_size=(3, 3), stride=(1, 1), padding=(1, 1))
    (15): ReLU(inplace)
    (16): MaxPool2d(kernel_size=2, stride=2, padding=0, dilation=1, ceil_mode=False)
    (17): Conv2d(256, 512, kernel_size=(3, 3), stride=(1, 1), padding=(1, 1))
    (18): ReLU(inplace)
    (19): Conv2d(512, 512, kernel_size=(3, 3), stride=(1, 1), padding=(1, 1))
    (20): ReLU(inplace)
    (21): Conv2d(512, 512, kernel_size=(3, 3), stride=(1, 1), padding=(1, 1))
    (22): ReLU(inplace)
    (23): MaxPool2d(kernel_size=2, stride=2, padding=0, dilation=1, ceil_mode=False)
    (24): Conv2d(512, 512, kernel_size=(3, 3), stride=(1, 1), padding=(1, 1))
    (25): ReLU(inplace)
    (26): Conv2d(512, 512, kernel_size=(3, 3), stride=(1, 1), padding=(1, 1))
    (27): ReLU(inplace)
    (28): Conv2d(512, 512, kernel_size=(3, 3), stride=(1, 1), padding=(1, 1))
    (29): ReLU(inplace)
    (30): MaxPool2d(kernel_size=2, stride=2, padding=0, dilation=1, ceil_mode=False)
  )
  (classifier): Sequential(
    (0): Linear(in_features=25088, out_features=4096, bias=True)
    (1): ReLU(inplace)
    (2): Dropout(p=0.5)
    (3): Linear(in_features=4096, out_features=4096, bias=True)
    (4): ReLU(inplace)
    (5): Dropout(p=0.5)
    (6): Linear(in_features=4096, out_features=1000, bias=True)
  )
)
# 这是deep dream的实际代码,特定层的梯度被设置为等于该层的响应,这导致了该层响应最大化。换句话说,我们正在增强一层检测到的特征,对输入图像(octaves)应用梯度上升算法。
def dd_helper(image, layer, iterations, lr):
    # 一开始的输入是图像经过预处理、在正数第一个维度上增加一个维度以匹配神经网络的输入、传到GPU上
    input = Variable(preprocess(image).unsqueeze(0).cuda(), requires_grad=True)
    # vgg梯度清零
    vgg.zero_grad()
    # 开始迭代
    for i in range(iterations):
    	# 一层一层传递输入
        out = input
        for j in range(layer):
            out = modulelist[j+1](out)
        # 损失是输出的范数
        loss = out.norm()
        # 损失反向传播
        loss.backward()
        # 输入的数据是上次迭代时的输入数据+学习率×输入的梯度
        input.data = input.data + lr * input.grad.data
    # 将从网络结构中取出的输入数据的第一个维度去掉
    input = input.data.squeeze()
    # 矩阵转置
    input.transpose_(0,1)
    input.transpose_(1,2)
    # 将输入逆标准化后强制截断在0到1的范围内
    input = np.clip(deprocess(input), 0, 1)
    # 得到像素值为0到255的图像
    im = Image.fromarray(np.uint8(input*255))
    return im


# 这是一个递归函数,用于创建octaves,并且将由一次递归调用生成的图像与由上一级递归调用生成的图像相融合
def deep_dream_vgg(image, layer, iterations, lr, octave_scale, num_octaves):
    # 若octave序号大于0,即还未到达最底层的octave时,一层一层递归
    if num_octaves>0:
        # 对图像进行高斯滤波(高斯模糊)
        image1 = image.filter(ImageFilter.GaussianBlur(2))
        # 判断是否缩放
        if(image1.size[0]/octave_scale < 1 or image1.size[1]/octave_scale<1):
            size = image1.size
        else:
            size = (int(image1.size[0]/octave_scale), int(image1.size[1]/octave_scale))
        # 图像缩放
        image1 = image1.resize(size,Image.ANTIALIAS)
        # 递归调用,直至num_octave==0
        image1 = deep_dream_vgg(image1, layer, iterations, lr, octave_scale, num_octaves-1)
        size = (image.size[0], image.size[1])
        # 将图像缩放到最初输入图像的大小
        image1 = image1.resize(size,Image.ANTIALIAS)
        # 将最初输入的图像与合成的相同尺寸大小的图像融合
        image = ImageChops.blend(image, image1, 0.6)
#     print("-------------- Recursive level: ", num_octaves, '--------------')
    # 按照dd_helper中的流程生成图像
    img_result = dd_helper(image, layer, iterations, lr)
    # 图像缩放并显示
    img_result = img_result.resize(image.size)
    plt.imshow(img_result)
    return img_result


# 加载蓝天的图像(原始图像)
sky = load_image('sky-dd.jpeg')
输出:
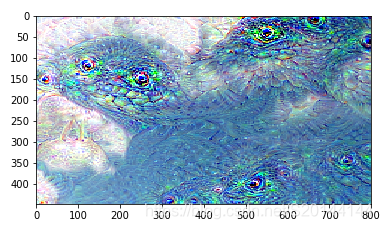
# 对于vgg16最后一个卷积层conv5_3,迭代5次,学习率为0.2,octave缩放比例为2,octave从第20层开始
sky_28 = deep_dream_vgg(sky, 28, 5, 0.2, 2, 20)
输出:
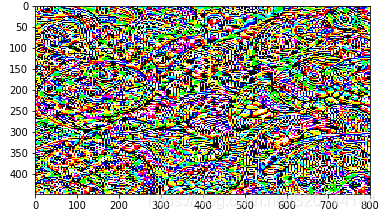
# 对于vgg16最后一个卷积层conv5_3,迭代500次,学习率为0.1,octave缩放比例为2,octave从第20层开始
sky_28 = deep_dream_vgg(sky, 28, 500, 0.1, 2, 20)
输出:
2. XavierLinNow/deepdream_pytorch
未完待续。。。
3. duc0/deep-dream-in-pytorch
未完待续。。。


 被折叠的 条评论
为什么被折叠?
被折叠的 条评论
为什么被折叠?
 到【灌水乐园】发言


