目录
说在前面
因为偷懒,所有工程内测试的部分就没有展示了,只有最终在页面上的展示测试。而且本应该在test里进行测试,可test部分是GBK编码,我是用的UTF-8编码,不想改所以我都不是在test里测试的。
每一个模块写完都install了,如果尝试deploy的话是会报错的,根据老师所说原因是IDEA创建的只有这一个工程,而deploy只能给工程,而子模块是可以install而不能deploy的。
但是捏,我还是在工程的deploy时报错了:Failed to execute goal org.apache.maven.plugins:maven-deploy-plugin:2.7:deploy (default-deploy) on project java_maven_02: Deployment failed: repository element was not specified in the POM inside distributionManagement element or in -DaltDeploymentRepository=id::layout::url parameter -> [Help 1],我估计是我没有配私服的原因,暂时我也用不上就不深究了。
如果像我这样全部配置了UTF-8编码的话,用test测试就全英文就好。
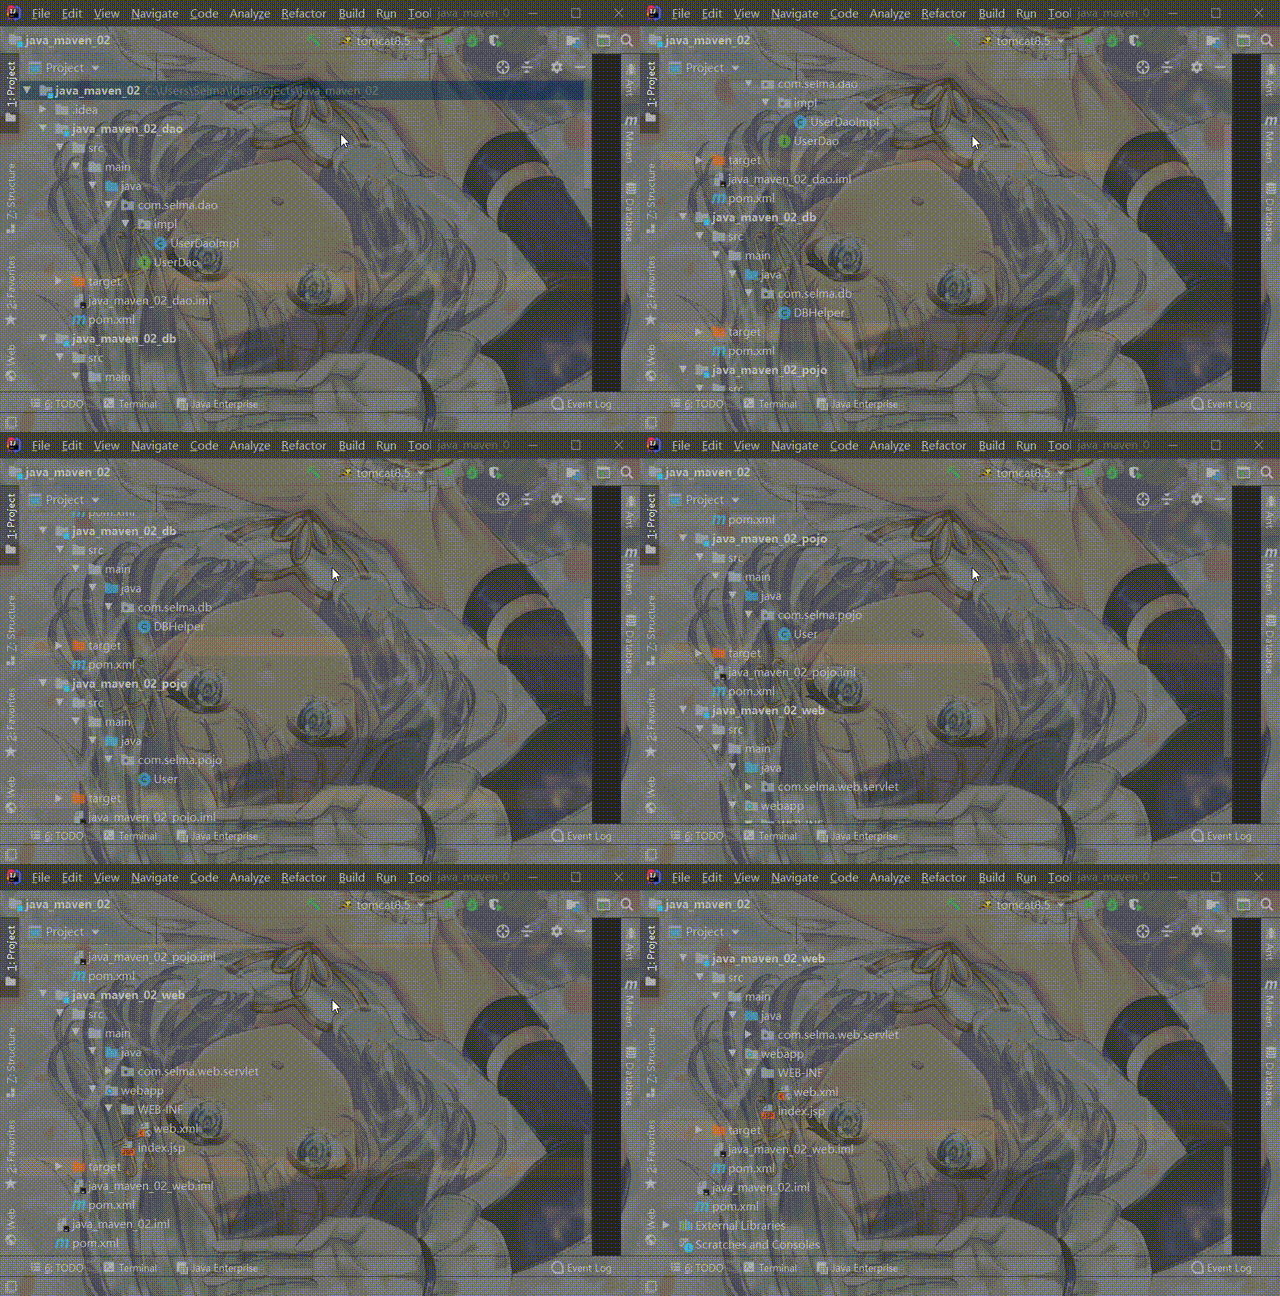
项目结构

环境
数据库:Server version: 5.5.27 MySQL Community Server (GPL)
集成环境:IntelliJ IDEA 2019.3.3
Java version: 1.8(jdk1.8.0_221)
Maven version:apache-maven-3.3.9
系统:Windows 10 家庭中文版
编码:UTF-8(Test部分是GBK,不想改所以不用Test测试。)
步骤
1.新建工程(主模块)
手动建,不使用框架。
为了记住我自己的学习进度我的工程名是java_maven_02,如果真的是一个多模块开发的话,这个父模块的工程名就应该会是什么什么管理系统啊之类的这样。
这个主模块可以说是不干活,所以文件夹都可以删了。我这里只删掉了src文件夹。
实际项目开发中可以横着切可以竖着切,因为我暂时只是想熟悉一下流程,所以我就采用横着切的方式拆分,即pojo为一个子模块、dao为一个子模块这样。(竖着切大概就是,注册模块、支付模块、用户管理模块这种。)
1.1编写pom.xml
需要设置包配置为pom,另外子工程需要的一些依赖包可以配在此处,减少代码冗余。但是不提示就很烦,也不知道是什么原理,在子工程的pom.xml里配了依赖包也不提示…
<?xml version="1.0" encoding="UTF-8"?>
<project xmlns="http://maven.apache.org/POM/4.0.0"
         xmlns:xsi="http://www.w3.org/2001/XMLSchema-instance"
         xsi:schemaLocation="http://maven.apache.org/POM/4.0.0 http://maven.apache.org/xsd/maven-4.0.0.xsd">
    <modelVersion>4.0.0</modelVersion>

    <groupId>com.selma</groupId>
    <artifactId>java_maven_02</artifactId>
    <version>1.0-SNAPSHOT</version>
    <packaging>pom</packaging>

    <modules>
        <module>java_maven_02_pojo</module>
        <module>java_maven_02_db</module>
        <module>java_maven_02_dao</module>
        <module>java_maven_02_web</module>
    </modules>

    <properties>
        <project.build.sourceEncoding>UTF-8</project.build.sourceEncoding>
        <maven.compiler.source>1.8</maven.compiler.source>
        <maven.compiler.target>1.8</maven.compiler.target>
    </properties>
    <dependencies>
        <dependency>
            <groupId>mysql</groupId>
            <artifactId>mysql-connector-java</artifactId>
            <version>5.1.29</version>
            <!-- 默认是compile,runtime指只运行时需要该包。 -->
            <scope>runtime</scope>
        </dependency>
        <dependency>
            <groupId>javax.servlet.jsp.jstl</groupId>
            <artifactId>jstl</artifactId>
            <version>1.2</version>
            <!-- 默认是这个 -->
            <scope>compile</scope>
            <!-- <scope>system</scope> -->
            <!-- <systemPath>第三方包的网址</systemPath> -->
        </dependency>
        <dependency>
            <groupId>javax.servlet.jsp</groupId>
            <artifactId>jsp-api</artifactId>
            <version>2.0</version>
            <scope>provided</scope>
        </dependency>
        <dependency>
            <groupId>javax.servlet</groupId>
            <artifactId>servlet-api</artifactId>
            <version>2.5</version>
            <scope>provided</scope>
        </dependency>
    </dependencies>
</project>
2.建子模块(pojo)
不一定要建Maven工程了,随意,我这里就还是创建Maven工程。而子模块其实就可以看作一个工程。
在这里我建了一个java_maven_02_pojo的子工程,并在该工程里只写了pojo类(简单起见只写了一个做测试)。
在主模块的pom.xml文件中出现了modules标签,将该模块加入其中。
2.1编写pom.xml
<?xml version="1.0" encoding="UTF-8"?>
<project xmlns="http://maven.apache.org/POM/4.0.0"
         xmlns:xsi="http://www.w3.org/2001/XMLSchema-instance"
         xsi:schemaLocation="http://maven.apache.org/POM/4.0.0 http://maven.apache.org/xsd/maven-4.0.0.xsd">
    <parent>
        <artifactId>java_maven_02</artifactId>
        <groupId>com.selma</groupId>
        <version>1.0-SNAPSHOT</version>
    </parent>

    <modelVersion>4.0.0</modelVersion>

    <artifactId>java_maven_02_pojo</artifactId>
    <packaging>jar</packaging>

    <properties>
        <project.build.sourceEncoding>UTF-8</project.build.sourceEncoding>
        <maven.compiler.source>1.8</maven.compiler.source>
        <maven.compiler.target>1.8</maven.compiler.target>
    </properties>
</project>
2.2编写User类
package com.selma.pojo;

import java.io.Serializable;

public class User implements Serializable {
    private Integer userId;
    private String userName;
    private String userPassword;
    private String userIdentity;
    public Integer getUserId() {
        return userId;
    }
    public void setUserId(Integer userId) {
        this.userId = userId;
    }
    public String getUserName() {
        return userName;
    }
    public void setUserName(String userName) {
        this.userName = userName;
    }
    public String getUserPassword() {
        return userPassword;
    }
    public void setUserPassword(String userPassword) {
        this.userPassword = userPassword;
    }
    public String getUserIdentity() {
        return userIdentity;
    }
    public void setUserIdentity(String userIdentity) {
        this.userIdentity = userIdentity;
    }
    public String toString() {
        return "User{" +
                "userId=" + userId +
                ", userName='" + userName + '\'' +
                ", userPassword='" + userPassword + '\'' +
                ", userIdentity='" + userIdentity + '\'' +
                '}';
    }
}
2.3安装
使用maven的install命令对pojo模块进行安装,这样可以在需要的地方引入安装了的jar包,便可以直接使用了。(就是正常使用jar包一样。)
子工程里出现target(橙色)文件夹就是安装成功了。
3.建子模块(db)
工程名:java_maven_02_db
3.1编写pom.xml
<?xml version="1.0" encoding="UTF-8"?>
<project xmlns="http://maven.apache.org/POM/4.0.0"
         xmlns:xsi="http://www.w3.org/2001/XMLSchema-instance"
         xsi:schemaLocation="http://maven.apache.org/POM/4.0.0 http://maven.apache.org/xsd/maven-4.0.0.xsd">
    <parent>
        <artifactId>java_maven_02</artifactId>
        <groupId>com.selma</groupId>
        <version>1.0-SNAPSHOT</version>
    </parent>

    <modelVersion>4.0.0</modelVersion>

    <artifactId>java_maven_02_db</artifactId>
    <packaging>jar</packaging>

    <properties>
        <project.build.sourceEncoding>UTF-8</project.build.sourceEncoding>
        <maven.compiler.source>1.8</maven.compiler.source>
        <maven.compiler.target>1.8</maven.compiler.target>
    </properties>
</project>
3.2编写DBHelper类
package com.selma.db;

import java.sql.Connection;
import java.sql.DriverManager;

public class DBHelper {
    public static final String DRIVER = "com.mysql.jdbc.Driver";
    public static final String URL = "jdbc:mysql//localhost:3306/csdn";
    public static final String USERNAME = "root";
    public static final String PASSWORD = "123456";

    static {
        try {
            Class.forName(DRIVER);
        } catch (ClassNotFoundException e) {
            e.printStackTrace();
        }
    }
    public static Connection getConnection(){
        Connection connection = null;
        try {
            connection = DriverManager.getConnection(URL,USERNAME,PASSWORD);
        }catch (Exception e){
            e.printStackTrace();
        }
        return connection;
    }
    public static void closeConnection(Connection connection){
        try {
            if(connection != null && !connection.isClosed()){
                connection.close();
            }
        }catch (Exception e){
            e.printStackTrace();
        }
    }
    //关闭结果集之类的就偷懒没写了。
}
3.3安装
使用maven的install命令对db模块进行安装。
子工程里出现target(橙色)文件夹就是安装成功了。
4.建子模块(dao)
工程名:java_maven_02_dao
在子模块dao中我们需要用到子模块pojo和子模块db的东西,为了方便我就在dao的子模块的pom.xml里引入子模块pojo和子模块db的依赖包。
4.1编写pom.xml
<?xml version="1.0" encoding="UTF-8"?>
<project xmlns="http://maven.apache.org/POM/4.0.0"
         xmlns:xsi="http://www.w3.org/2001/XMLSchema-instance"
         xsi:schemaLocation="http://maven.apache.org/POM/4.0.0 http://maven.apache.org/xsd/maven-4.0.0.xsd">
    <parent>
        <artifactId>java_maven_02</artifactId>
        <groupId>com.selma</groupId>
        <version>1.0-SNAPSHOT</version>
    </parent>
    <modelVersion>4.0.0</modelVersion>

    <artifactId>java_maven_02_dao</artifactId>
    <packaging>jar</packaging>

    <properties>
        <project.build.sourceEncoding>UTF-8</project.build.sourceEncoding>
        <maven.compiler.source>1.8</maven.compiler.source>
        <maven.compiler.target>1.8</maven.compiler.target>
    </properties>
    <dependencies>
        <dependency>
            <groupId>com.selma</groupId>
            <artifactId>java_maven_02_pojo</artifactId>
            <version>1.0-SNAPSHOT</version>
        </dependency>
        <dependency>
            <groupId>com.selma</groupId>
            <artifactId>java_maven_02_db</artifactId>
            <version>1.0-SNAPSHOT</version>
        </dependency>
    </dependencies>
</project>
4.2编写UserDao类
package com.selma.dao;

import com.selma.pojo.User;

import java.util.List;

public interface UserDao {
    public Boolean insertOneUser(User user);
    public Boolean deleteOneUser(Integer userId);
    public Boolean updateOneUser(User user);
    public User selectOneUser(Integer userId);
    public List<User> selectAllUsers();
}
4.3编写UserDaoImpl类
package com.selma.dao.impl;

import com.selma.dao.UserDao;
import com.selma.db.DBHelper;
import com.selma.pojo.User;

import java.sql.Connection;
import java.sql.PreparedStatement;
import java.sql.ResultSet;
import java.util.ArrayList;
import java.util.List;

public class UserDaoImpl implements UserDao {
    public Boolean insertOneUser(User user) {
        Boolean flag = false;
        String sql = "INSERT INTO user(user_name, user_password, user_identity) VALUES(?, ?, ?)";
        Connection connection = DBHelper.getConnection();
        try{
            PreparedStatement preparedStatement = connection.prepareStatement(sql);
            preparedStatement.setString(1, user.getUserName());
            preparedStatement.setString(2, user.getUserPassword());
            preparedStatement.setString(3, user.getUserIdentity());
            if(preparedStatement.executeUpdate() > 0) {
                flag = true;
            }
        }catch(Exception e){
            e.printStackTrace();
        }finally {
            DBHelper.closeConnection(connection);
        }
        return flag;
    }

    public Boolean deleteOneUser(Integer userId) {
        Boolean flag = false;
        String sql = "DELETE FROM user WHERE user_id = ?";
        Connection connection = DBHelper.getConnection();
        try{
            PreparedStatement preparedStatement = connection.prepareStatement(sql);
            preparedStatement.setString(1, String.valueOf(userId));
            if(preparedStatement.executeUpdate() > 0) {
            flag = true;
        }
        }catch(Exception e){
            e.printStackTrace();
        }finally {
            DBHelper.closeConnection(connection);
        }
        return flag;
    }

    public Boolean updateOneUser(User user) {
        Boolean flag = false;
        String sql = "UPDATE user SET user_name = ?, user_password = ?, user_identity = ? WHERE user_id = ?";
        Connection connection = DBHelper.getConnection();
        try{
            PreparedStatement preparedStatement = connection.prepareStatement(sql);
            preparedStatement.setString(1, user.getUserName());
            preparedStatement.setString(2, user.getUserPassword());
            preparedStatement.setString(3, user.getUserIdentity());
            preparedStatement.setString(4, String.valueOf(user.getUserId()));
            if(preparedStatement.executeUpdate() > 0) {
                flag = true;
            }
        }catch(Exception e){
            e.printStackTrace();
        }finally {
            DBHelper.closeConnection(connection);
        }
        return flag;
    }

    public User selectOneUser(Integer userId) {
        User user = new User();
        String sql = "SELECT * FROM user WHERE user_id = ?";
        Connection connection = DBHelper.getConnection();
        try{
            PreparedStatement preparedStatement = connection.prepareStatement(sql);
            preparedStatement.setString(1, String.valueOf(userId));
            ResultSet resultSet = preparedStatement.executeQuery();
            if (resultSet.next()){
                user.setUserId(resultSet.getInt("user_id"));
                user.setUserName(resultSet.getString("user_name"));
                user.setUserPassword(resultSet.getString("user_password"));
                user.setUserIdentity(resultSet.getString("user_identity"));
            }
        }catch(Exception e){
            e.printStackTrace();
        }finally {
            DBHelper.closeConnection(connection);
        }
        return user;
    }

    public List<User> selectAllUsers() {
        List<User> userList = new ArrayList<User>();
        String sql = "SELECT * FROM user";
        Connection connection = DBHelper.getConnection();
        try{
            PreparedStatement preparedStatement = connection.prepareStatement(sql);
            ResultSet resultSet = preparedStatement.executeQuery();
            while (resultSet.next()){
                User user = new User();
                user.setUserId(resultSet.getInt("user_id"));
                user.setUserName(resultSet.getString("user_name"));
                user.setUserPassword(resultSet.getString("user_password"));
                user.setUserIdentity(resultSet.getString("user_identity"));
                userList.add(user);
            }
        }catch(Exception e){
            e.printStackTrace();
        }finally {
            DBHelper.closeConnection(connection);
        }
        return userList;
    }
}
4.4安装
使用maven的install命令对dao模块进行安装。(这里我的安装一直在报错,然后我是去点击的主模块的安装才ok的,但是我全部写完再clean-install又没有问题了,不知道我前面搞错啥了)
5.建子模块(web)
工程名:java_maven_02_web
所需要的jstl、jsp-api和servlet-api都在主模块里加入了依赖。
为了方便我就在web的子模块的pom.xml里引入子模块pojo、子模块dao和子模块db的依赖包。
5.1编写pom.xml
<?xml version="1.0" encoding="UTF-8"?>
<project xmlns="http://maven.apache.org/POM/4.0.0"
         xmlns:xsi="http://www.w3.org/2001/XMLSchema-instance"
         xsi:schemaLocation="http://maven.apache.org/POM/4.0.0 http://maven.apache.org/xsd/maven-4.0.0.xsd">
    <parent>
        <artifactId>java_maven_02</artifactId>
        <groupId>com.selma</groupId>
        <version>1.0-SNAPSHOT</version>
    </parent>
    <modelVersion>4.0.0</modelVersion>

    <artifactId>java_maven_02_web</artifactId>
    <packaging>war</packaging>

    <dependencies>
    	<dependency>
            <groupId>com.selma</groupId>
            <artifactId>java_maven_02_pojo</artifactId>
            <version>1.0-SNAPSHOT</version>
        </dependency>
        <dependency>
            <groupId>com.selma</groupId>
            <artifactId>java_maven_02_db</artifactId>
            <version>1.0-SNAPSHOT</version>
        </dependency>
        <dependency>
            <groupId>com.selma</groupId>
            <artifactId>java_maven_02_dao</artifactId>
            <version>1.0-SNAPSHOT</version>
        </dependency>
    </dependencies>
</project>
5.2编写index.jsp
没啥实质性的东西,就测试一下能不能跳转。
然后测试各个子模块的类能不能成功创建。
<%--
  Created by IntelliJ IDEA.
  User: Selma
  Date: 2022-07-22
  Time: 11:53
  To change this template use File | Settings | File Templates.
--%>
<%@ page pageEncoding="UTF-8" contentType="text/html;charset=UTF-8" language="java" %>
<html>
  <head>
    <title>登录</title>
  </head>
  <body>
    <a href="/java_maven_02_web/login">点击进入登录页面。</a>
  </body>
</html>
5.3编写web.xml
<?xml version="1.0" encoding="UTF-8"?>
<web-app xmlns="http://java.sun.com/xml/ns/javaee"
         xmlns:xsi="http://www.w3.org/2001/XMLSchema-instance"
         xsi:schemaLocation="http://java.sun.com/xml/ns/javaee
		  http://java.sun.com/xml/ns/javaee/web-app_3_0.xsd"
         version="3.0">
    <servlet>
        <servlet-name>loginServlet</servlet-name>
        <servlet-class>com.selma.web.servlet.LoginServlet</servlet-class>
    </servlet>
    <servlet-mapping>
        <servlet-name>loginServlet</servlet-name>
        <url-pattern>/login</url-pattern>
    </servlet-mapping>
</web-app>
5.4编写LoginServlet类
5.3和5.4其实没啥先后之分,这里是因为我没有导入注解的包,所以servlet就xml配置了。
package com.selma.web.servlet;

import com.selma.dao.impl.UserDaoImpl;
import com.selma.db.DBHelper;
import com.selma.pojo.User;

import javax.servlet.ServletException;
import javax.servlet.http.HttpServlet;
import javax.servlet.http.HttpServletRequest;
import javax.servlet.http.HttpServletResponse;
import java.io.IOException;

public class LoginServlet extends HttpServlet {
    protected void doGet(HttpServletRequest req, HttpServletResponse resp) throws ServletException, IOException {
        this.doPost(req, resp);
    }

    protected void doPost(HttpServletRequest req, HttpServletResponse resp) throws ServletException, IOException {
        System.out.println("enter LoginServlet");
        //测试能不能获得到。
        System.out.println(new User());
        System.out.println(DBHelper.getConnection());
        System.out.println(new UserDaoImpl());

    }
}
5.5配置tomcat并运行
5.6安装
使用maven的install命令对web模块进行安装。
子工程里出现target(橙色)文件夹就是安装成功了。
说在后面
开发项目大致就是这个模式,但是具体工作中咋用我也不清楚,还需要继续努力。


 2897
2897


 被折叠的 条评论
为什么被折叠?


