


1. 流程
- 服务器开启VNC使用的端口
- 服务器安装Ubuntu桌面与VNC Server
- 客户端安装VNC Viewer
- 连接
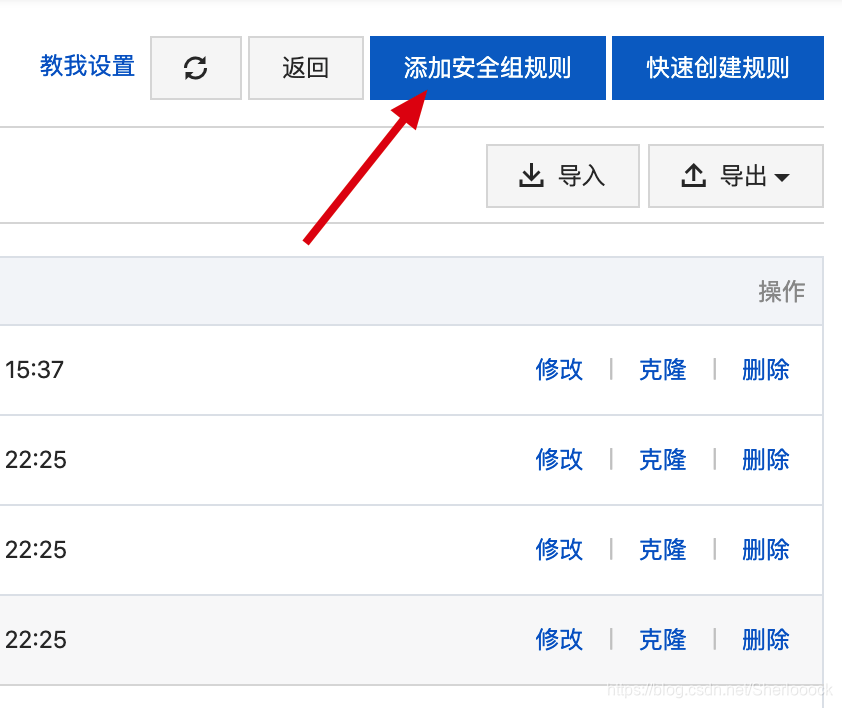
2. 服务器开启VNC使用的端口
以阿里云服务器为例
- 进入安全组


- 添加安全组规则

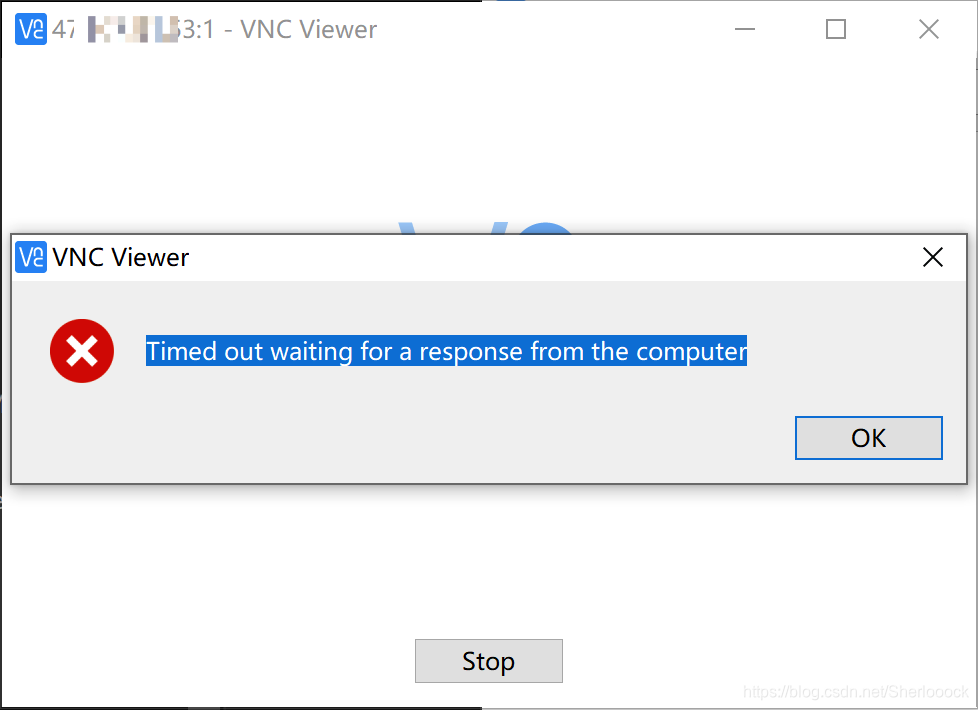
⚠️ 注意:若端口未开启,用VNC Viewer连接时会出现如下提示:
3. 服务器安装Ubuntu桌面与VNC Server
# 1. 更新apt
sudo apt-get update && sudo apt-get upgrade -y

------------------------
# 2. 安装桌面
# 安装过程中,若出现是否将系统文件改为新版本的提示,请输入'y'并回车
# 安装过程大概持续10min
sudo apt-get install ubuntu-desktop gnome-panel gnome-settings-daemon metacity nautilus gnome-terminal

------------------------
# 3. 安装VNC Server
sudo apt-get install vnc4server

------------------------
# 4. 启动VNC Server并创建一个会话
# >>> 注意'vncserver'与':'间有一个空格 <<<
# 接下来需设置密码
vncserver :1

------------------------
# 5. 关闭会话
vncserver -kill :1

------------------------
# 6. 编辑~/.vnc/xstartup
# 该文件只有在第一次启动VNC Sever后才会创建
nano ~/.vnc/xstartup

# >>> nano部分操作:'ctrl + o' 保存, 'Enter' 确认,'ctrl + x' 退出 <<<
# 7. 将文件改为:

#!/bin/sh

# Uncomment the following two lines for normal desktop:
# unset SESSION_MANAGER
# exec /etc/X11/xinit/xinitrc

[ -x /etc/vnc/xstartup ] && exec /etc/vnc/xstartup
[ -r $HOME/.Xresources ] && xrdb $HOME/.Xresources
xsetroot -solid grey
vncconfig -iconic &
x-terminal-emulator -geometry 80x24+10+10 -ls -title "$VNCDESKTOP Desktop" &
x-window-manager &

gnome-panel &
gnome-settings-daemon &
metacity &
nautilus &
# 8. 再次打开VNC Server
vncserver :1
4. 客户端安装VNC Viewer(略)
获取VNC Viewer (Mac / Win)
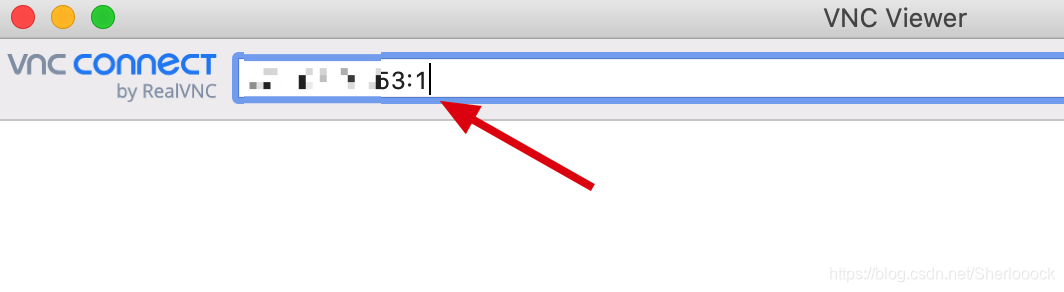
5. 连接🔗
- 输入
服务器IP+:1,回车
- 输入密码(命令行第一次输入
vncserver :1后设置的密码),点击OK

- √ 大功告成!😆
 再测试一下网络~

相关内容:


 1712
1712


 被折叠的 条评论
为什么被折叠?
被折叠的 条评论
为什么被折叠?
 到【灌水乐园】发言


