


目录
2.5 线程使用进程开辟的动态内存,主线程提前释放内存会造成的问题
1. 什么是线程
1.1 进程与线程
进程是操作系统资源调度的基本单位
线程是操作系统调度的基本单位
1.2 线程
线程,被称为轻量级进程(Lightweight Process,LWP),是程序执行流的最小单元
1.3 线程的发展史
2.2版本的内核中, 没有线程, 进程的个数也有限, 4090个, 线程是轻量级的进程, 2.4版本的内核中, 有了线程的概念, 线程的个数可以无限, 协程是更轻量级的线程
2. 如何创建,使用线程
2.1 pthread_create函数创建线程

创建并执行线程,执行代码为线程函数,并且和当前主线程并行
2.2 pthread_create函数的使用
//使用pthread_create 创建一个线程
#include <stdio.h>
#include <unistd.h>
#include <pthread.h>

void* pFunc(void* arg){
	int m = 1;
	while(1){
		printf("线程 --- m: %d\n",m++);
		sleep(1);
	}
}
int main(){
	int n = 1;
	//创建一个线程
	pthread_t pid;
	pthread_create(&pid,NULL,pFunc,NULL);
	while(1){
		printf("主函数 --- n: %d\n",n++);
		sleep(1);
	}
	return 0;
} 
2.3 主线程结束, 分支线程也会随之结束
//当主线程结束,分支线程也会随即结束
#include <stdio.h>
#include <unistd.h>
#include <pthread.h>

void* pFunc(void* arg){
	int m = 1;
	while(1){
		printf("线程 --- m: %d\n",m++);
		sleep(1);
	}
}
int main(){
	int n = 1;
	//创建一个线程
	pthread_t pid;
	pthread_create(&pid,NULL,pFunc,NULL);
	for(int i = 0; i < 5; i++){
		printf("主函数 --- n: %d\n",n++);
		sleep(1);
	}
	return 0;
} 
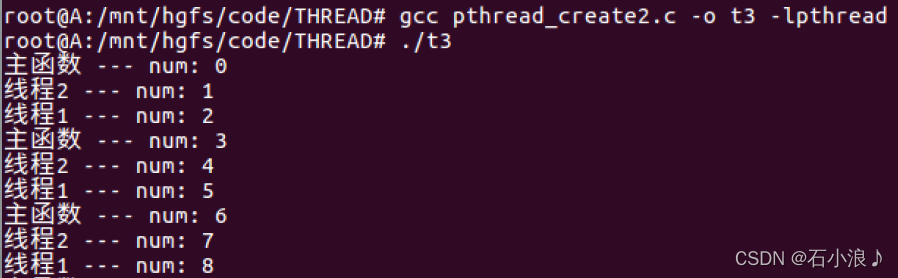
2.4 同一进程内多个线程共用进程资源
//同一进程内的线程共用进程的资源
#include <stdio.h>
#include <unistd.h>
#include <pthread.h>

int num = 0;
void* pFunc1(void* arg){
	while(1){
		printf("线程1 --- num: %d\n",num++);
		sleep(1);
	}
}

void* pFunc2(void* arg){	//先于线程一执行
	while(1){
		printf("线程2 --- num: %d\n",num++);
		sleep(1);
	}
}

int main(){
	//创建一个线程
	pthread_t pid1,pid2;
	pthread_create(&pid1,NULL,pFunc1,NULL);
	pthread_create(&pid2,NULL,pFunc2,NULL);
	while(1){
		printf("主函数 --- num: %d\n",num++);
		sleep(1);
	}
	return 0;
}
2.5 线程使用进程开辟的动态内存,主线程提前释放内存会造成的问题
//当使用动态内存申请时,主线程提前将内存释放会造成的问题
#include <stdio.h>
#include <unistd.h>
#include <stdlib.h>
#include <pthread.h>

void* pFunc(void* arg){
	while(1){
		printf("线程 --- arg: %d\n",*(int*)arg);
		sleep(1);
	}
}
int main(){
	int* n = (int*)malloc(4);
	*n = 666;
	//创建一个线程
	pthread_t pid;
	pthread_create(&pid,NULL,pFunc,n);
	for(int i = 0; i < 5; i++){
		if(i == 2){
			free(n);
			n = NULL;
		}
		printf("主函数 --- n: %d\n",(*n)++);
		sleep(1);
	}
	return 0;
}
2.6 使用地址传递传递数据到线程运行函数
//使用变量的地址传参 &
#include <stdio.h>
#include <unistd.h>
#include <pthread.h>

void* pFunc(void* arg){
	while(1){
		printf("线程 --- arg: %d\n",(*(int*)arg)++);
		sleep(1);
	}
}
int main(){
	int n = 666;
	//创建一个线程
	pthread_t pid;
	pthread_create(&pid,NULL,pFunc,&n);
	while(1){
		printf("主函数 --- n: %d\n",n++);
		sleep(1);
	}
	return 0;
}
2.7 使用值传递传递数据到线程运行函数
//使用(void*)变量直接传参
#include <stdio.h>
#include <unistd.h>
#include <pthread.h>

void* pFunc(void* arg){
	while(1){
		printf("线程 --- arg: %d\n",(int)arg++);
		sleep(1);
	}
}
int main(){
	int n = 666;
	//创建一个线程
	pthread_t pid;
	pthread_create(&pid,NULL,pFunc,(void*)n);
	while(1){
		printf("主函数 --- n: %d\n",n++);
		sleep(1);
	}
	return 0;
}
2.8 结构体数据类型的参数传递
//结构体类型的参数传递
#include <stdio.h>
#include <unistd.h>
#include <stdlib.h>
#include <pthread.h>

struct Student{
	char name[20];
	int age;
	double score;
};

void* pFunc(void* arg){
	struct Student* stu = (struct Student*)arg;
	while(1){
		printf("线程===\n");
		printf("name:%s,age:%d,score:%g\n",
			stu->name,stu->age,stu->score);
		sleep(1);
	}
}

int main(){

	struct Student stu = {"张三",18,66.66};
	pthread_t pid;
	pthread_create(&pid,NULL,pFunc,&stu);
	for(int i = 0; i < 5; i++){
		printf("主函数---\n");
		sleep(1);
	}

	return 0;
}
3. 线程的结束
3.1 自然结束
线程运行完自己应该执行的代码块后自然结束
3.2 主线程结束, 分支线程随之结束
注: 主线程最好等待分支线程结束再结束
pthread_join函数使用
#include <stdio.h>
#include <stdlib.h>
#include <unistd.h>
#include <pthread.h>

void* func(void* arg){
	while(1){
		sleep(2);
		printf("线程-----\n");
	}
}

int main(){
	pthread_t pid;

	pthread_create(&pid,NULL,func,NULL);

	printf("主线程-----\n");

	return 0;
}
没有pthread_join函数的情况 , 主线程不会等待分支线程结束后再结束
#include <stdio.h>
#include <stdlib.h>
#include <unistd.h>
#include <pthread.h>

void* func(void* arg){
	while(1){
		sleep(2);
		printf("线程-----\n");
	}
}

int main(){
	pthread_t pid;

	pthread_create(&pid,NULL,func,NULL);

	printf("主线程-----\n");

	pthread_join(pid,NULL);

	return 0;
}
有pthread_join的情况,主线程会等待分支线程结束后,自己再结束
3.3 线程自己结束自己
进程的结束使用 exit 或 _exit
线程的结束使用 pthread_exit
//线程自己结束自己pthread_exit
//void pthread_exit(void *retval); retval线程结束的返回值
#include <stdio.h>
#include <stdlib.h>
#include <unistd.h>
#include <pthread.h>

void* func(void* arg){
	int num = 666;
	for(int i = 0;i < 10; i++){
		if(i == 5){
			//pthread_exit((void*)num);
			pthread_exit((void*)"线程退出!");
		}
		printf("线程 >> %d\n",(*(int*)arg)++);
		sleep(1);
	}

}

int main(){
	int n = 1;
	void* pthread_res; //接收线程结束的返回值
	pthread_t pid;

	pthread_create(&pid,NULL,func,&n);

	pthread_join(pid,&pthread_res); //等待线程结束并接收返回值

	//printf("pthread_return: %d\n",(int)pthread_res);
	printf("pthread_return: %s\n",(char*)pthread_res);
	printf(" >> %d\n",n);

	return 0;
}
3.4 其它线程结束某个线程
pthread_cancel函数: 仅向线程发送一个结束请求, 至于是否结束看pthread_setcancelstate()函数参数一是忽略(PTHREAD_CANCEL_DISABLE)还是响应(PTHREAD_CANCEL_ENABLE)
#include <stdio.h>
#include <stdlib.h>
#include <unistd.h>
#include <pthread.h>

int n = 1;
pthread_t pid1;

void* func1(void* arg){
	while(1){
		printf("线程1 >> %d\n",n++);
		//PTHREAD_CANCEL_ENABLE(缺省:响应)
		//PTHREAD_CANCEL_DISABLE(忽略)
		pthread_setcancelstate(PTHREAD_CANCEL_DISABLE,NULL);
		pthread_setcanceltype(PTHREAD_CANCEL_DEFERRED,NULL);
		//PTHREAD_CANCEL_DEFERRED(下个取消点)
		//PTHREAD_CANCEL_ASYNCHRONOUS(异步(随时)取消)

		sleep(1);
	}
}

int main(){

	pthread_create(&pid1,NULL,func1,NULL);
	while(1){
		if(n == 5){
			pthread_cancel(pid1);
			break;
		}
	}

	pthread_join(pid1,NULL);

	printf(">> %d\n",n);

	return 0;
}
PTHREAD_CANCEL_ENABLE:
#include <stdio.h>
#include <stdlib.h>
#include <unistd.h>
#include <pthread.h>

int n = 1;
pthread_t pid1;

void* func1(void* arg){
	while(1){
		printf("线程1 >> %d\n",n++);
		//PTHREAD_CANCEL_ENABLE(缺省:响应)
		//PTHREAD_CANCEL_DISABLE(忽略)
		pthread_setcancelstate(PTHREAD_CANCEL_ENABLE,NULL);
		pthread_setcanceltype(PTHREAD_CANCEL_DEFERRED,NULL);
		//PTHREAD_CANCEL_DEFERRED(下个取消点)
		//PTHREAD_CANCEL_ASYNCHRONOUS(异步(随时)取消)
		//pthread_testcancel();  //加一个取消点

		printf("sleep1\n");
		sleep(1);

		printf("sleep2\n");
		sleep(1);

		printf("sleep3\n");
		sleep(1);
	}
}

int main(){

	pthread_create(&pid1,NULL,func1,NULL);
	while(1){
		if(n == 5){
			pthread_cancel(pid1);
			break;
		}
	}

	pthread_join(pid1,NULL);

	printf(">> %d\n",n);

	return 0;
}
4. 线程的同步
4.1 临界区域与临界数据
多个线程可以同时 访问 的 区域 称之为 临界区域
多个线程可以同时 操作 的 数据 称之为 临界数据
4.2 多个线程同时操作临界数据导致的问题
//多个线程同时操作临界数据,导致临界数据脏的问题
#include <stdio.h>
#include <unistd.h>
#include <stdlib.h>
#include <pthread.h>

int n = 0;
void* func1(void* arg){
	for(int i = 0; i < 25000000; i++)
		n++;
}

void* func2(void* arg){
	for(int i = 0; i < 25000000; i++)
		n++;
}

int main(){
	pthread_t p1,p2,p3,p4;

	pthread_create(&p1,NULL,func1,NULL);
	pthread_create(&p2,NULL,func2,NULL);
	pthread_create(&p3,NULL,func1,NULL);
	pthread_create(&p4,NULL,func2,NULL);

	pthread_join(p1,NULL); 	//等待线程结束
	pthread_join(p2,NULL); 	//等待线程结束
	pthread_join(p3,NULL); 	//等待线程结束
	pthread_join(p4,NULL); 	//等待线程结束

	printf("n: %d\n",n);	// <= 100000000

	return 0;
}
4.3 使用线程同步解决临界数据脏的方式
| 内核态 | 用户态 |
| 原子锁(atomic) | 读写锁(rwlock) |
| 自旋锁(spin) | 互斥锁(mutex) |
| 信号量(sem) | 临界变量(cond) |
4.3.1 原子锁(atomic)
#include <stdio.h>
#include <unistd.h>
#include <stdlib.h>
#include <pthread.h>

#define atomic_inc(x)  __sync_fetch_and_add(x,1)

void* func1(void* arg){
	for(int i = 0; i < 50000000; i++)
		atomic_inc((int*)arg);
}

void* func2(void* arg){
	for(int i = 0; i < 50000000; i++)
		atomic_inc((int*)arg);
}

int main(){
	pthread_t p1,p2;
	int n = 0;

	pthread_create(&p1,NULL,func1,&n);
	pthread_create(&p2,NULL,func2,&n);

	pthread_join(p1,NULL); 	//等待线程结束
	pthread_join(p2,NULL); 	//等待线程结束

	printf("n: %d\n",n);

	return 0;
}
4.3.2 自旋锁(spin)
自旋锁的建立消耗的资源少, 但是当线程阻塞时, 它会一直循环不断地检查锁是否可用, 因此当线程处于阻塞状态下, 消耗的资源相对较多
- 初始化自旋锁 pthread_spin_init
- 获取(上)锁 pthread_spin_lock
- 释放(解)锁 pthread_spin_unlock
- 销毁锁 pthread_spin_destroy
//自旋锁(spin)的使用
#include <stdio.h>
#include <unistd.h>
#include <stdlib.h>
#include <pthread.h>

int n = 0;
//0. 定义自旋锁
pthread_spinlock_t spin;

void* func1(void* arg){
	for(int i = 0; i < 50000000; i++){
		//2. 上锁
		pthread_spin_lock(&spin);
		//操作
		n++;
		//3. 解锁
		pthread_spin_unlock(&spin);
	}
}

void* func2(void* arg){
	for(int i = 0; i < 50000000; i++){
		//2. 上锁
		pthread_spin_lock(&spin);
		//操作
		n++;
		//3. 解锁
		pthread_spin_unlock(&spin);
	}
}

int main(){
	pthread_t p1,p2;

	//1. 初始化自旋锁
	pthread_spin_init(&spin,PTHREAD_PROCESS_PRIVATE);

	pthread_create(&p1,NULL,func1,NULL);
	pthread_create(&p2,NULL,func2,NULL);

	pthread_join(p1,NULL); 	//等待线程结束
	pthread_join(p2,NULL); 	//等待线程结束

	printf("n: %d\n",n);

	//4. 销毁自旋锁
	pthread_spin_destroy(&spin);

	return 0;
}
4.3.3 信号量(sem)
#include <stdio.h>
#include <unistd.h>
#include <stdlib.h>
#include <pthread.h>
#include <semaphore.h>

int n = 0;
//0. 定义信号量
sem_t sem;

void* func1(void* arg){
	//信号量值减一
	if(0 == sem_wait(&sem)){
		for(int i = 0; i < 50000000; i++){
			n++;
			//信号量值加一
			sem_post(&sem);
		}
	}
}

int main(){
	pthread_t p1,p2;

	//1. 初始化信号量
	//参数二 0 当前进程使用   1  多个进程间共享
	sem_init(&sem, 0, 2);

	pthread_create(&p1,NULL,func1,NULL);
	pthread_create(&p2,NULL,func1,NULL);

	pthread_join(p1,NULL); 	//等待线程结束
	pthread_join(p2,NULL); 	//等待线程结束

	printf("n: %d\n",n);

	//销毁信号量
	sem_destroy(&sem);

	return 0;
}
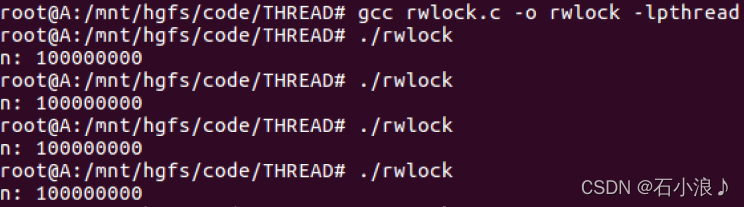
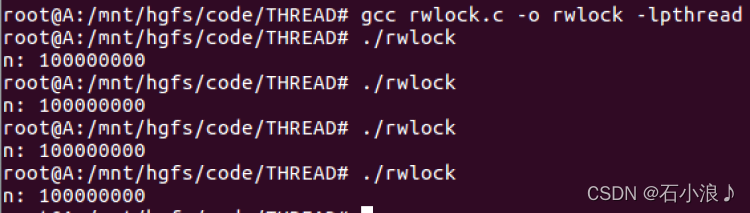
4.3.4 读写锁(rwlock)
- 初始化读写锁 pthread_rwlock_init
- 获取锁 pthread_rwlock_wrlock(写锁) pthread_rwlock_rdlock(读锁)
- 释放锁 pthread_rwlock_unlock
- 销毁锁 pthread_rwlock_destroy
//读写锁(rwlock)的使用	读读相容
#include <stdio.h>
#include <stdlib.h>
#include <unistd.h>
#include <pthread.h>

int n = 0;
//0. 定义读写锁变量
pthread_rwlock_t rwlock;

void* func1(void* arg){
	for(int i = 0; i < 50000000; i++){
		//2. 上锁(读锁)
		pthread_rwlock_rdlock(&rwlock);
		//pthread_rwlock_wrlock(&rwlock);
		//操作
		n++;
		//3. 解锁
		pthread_rwlock_unlock(&rwlock);
	}
}

void* func2(void* arg){
	for(int i = 0; i < 50000000; i++){
		//2. 上锁(读锁)
		pthread_rwlock_rdlock(&rwlock);
		//pthread_rwlock_wrlock(&rwlock);
		//操作
		n++;
		//3. 解锁
		pthread_rwlock_unlock(&rwlock);
	}
}

int main(){
	pthread_t p1,p2;

	//1. 初始化读写锁
	pthread_rwlock_init(&rwlock,NULL);

	pthread_create(&p1,NULL,func1,NULL);
	pthread_create(&p2,NULL,func2,NULL);

	pthread_join(p1,NULL); 	//等待线程结束
	pthread_join(p2,NULL); 	//等待线程结束

	printf("n: %d\n",n);

	//4. 销毁读写锁
	pthread_rwlock_destroy(&rwlock);

	return 0;
}
读读相容

void* func1(void* arg){
	for(int i = 0; i < 50000000; i++){
		//2. 上锁(读锁)
		pthread_rwlock_rdlock(&rwlock);
		//操作
		n++;
		//3. 解锁
		pthread_rwlock_unlock(&rwlock);
	}
}

void* func2(void* arg){
	for(int i = 0; i < 50000000; i++){
		//2. 上锁(写锁)
		pthread_rwlock_wrlock(&rwlock);
		//操作
		n++;
		//3. 解锁
		pthread_rwlock_unlock(&rwlock);
	}
}
读写相斥
void* func1(void* arg){
	for(int i = 0; i < 50000000; i++){
		//2. 上锁(写锁)
		pthread_rwlock_wrlock(&rwlock);
		//操作
		n++;
		//3. 解锁
		pthread_rwlock_unlock(&rwlock);
	}
}

void* func2(void* arg){
	for(int i = 0; i < 50000000; i++){
		//2. 上锁(写锁)
		pthread_rwlock_wrlock(&rwlock);
		//操作
		n++;
		//3. 解锁
		pthread_rwlock_unlock(&rwlock);
	}
}
写写相斥
4.3.5 互斥锁(mutex)
互斥锁适合频繁操作的情况
若等待时间较长, 突然要解决事务(注意临界数据安全的问题)
互斥锁的建立消耗的资源多, 但是当线程阻塞时, 不会循环不断地检查锁是否可用, 因此当线程处于阻塞状态下不消耗资源
因此自旋锁适用于阻塞时间很短的情况, 互斥锁适用于阻塞时间很长的情况
- 初始化互斥锁 pthread_mutex_init
- 获取(上)锁 pthread_mutex_lock
- 释放(解)锁 pthread_mutex_unlock
- 销毁锁 pthread_mutex_destroy
//互斥锁(mutex)的使用
#include <stdio.h>
#include <unistd.h>
#include <stdlib.h>
#include <pthread.h>

int n = 0;
//0. 定义互斥变量
pthread_mutex_t mutex;

void* func1(void* arg){
	for(int i = 0; i < 50000000; i++){
		//2. 上锁
		pthread_mutex_lock(&mutex);
		//操作
		n++;
		//3. 解锁
		pthread_mutex_unlock(&mutex);
	}
}

void* func2(void* arg){
	for(int i = 0; i < 50000000; i++){
		//2. 上锁
		pthread_mutex_lock(&mutex);
		//操作
		n++;
		//3. 解锁
		pthread_mutex_unlock(&mutex);
	}
}

int main(){
	pthread_t p1,p2;

	//1. 初始化互斥量
	pthread_mutex_init(&mutex,NULL);

	pthread_create(&p1,NULL,func1,NULL);
	pthread_create(&p2,NULL,func2,NULL);

	pthread_join(p1,NULL); 	//等待线程结束
	pthread_join(p2,NULL); 	//等待线程结束

	printf("n: %d\n",n);
	//4. 销毁互斥锁
	pthread_mutex_destroy(&mutex);

	return 0;
} 
4.3.6 临界变量(cond)
临界变量是互斥锁的升级(因此临界变量一般搭配互斥锁使用)
- 初始化互斥锁,临界变量 pthread_mutex_init pthread_cond_init
- 获取(上)锁, 临界变量等待 pthread_mutex_lock pthread_cond_wait
- 释放(解)锁 pthread_mutex_unlock
- 发信号给临界变量 pthread_cond_signal pthread_cond_broadcast
- 销毁锁,销毁临界变量 pthread_mutex_destroy pthread_cond_destroy
//临界(条件)变量(cond)的使用
#include <stdio.h>
#include <stdlib.h>
#include <unistd.h>
#include <pthread.h>

int n = 0;
//0. 定义互斥变量
pthread_mutex_t mutex;
//0. 定义临界变量
pthread_cond_t cond;

void* func1(void* arg){
	for(int i = 0; i <= 5; i++){
		//2. 上锁,临界变量等待
		pthread_mutex_lock(&mutex);
		pthread_cond_wait(&cond,&mutex);
		//操作
		printf("线程1 ------ %d\n",n++);
		//3. 解锁
		pthread_mutex_unlock(&mutex);
	}
}

void* func2(void* arg){
	for(int i = 0; i <= 5; i++){
		//2. 上锁,临界变量等待
		pthread_mutex_lock(&mutex);
		pthread_cond_wait(&cond,&mutex);
		//操作
		printf("线程2 ====== %d\n",n++);
		//3. 解锁
		pthread_mutex_unlock(&mutex);
	}
}

int main(){
	pthread_t p1,p2,p3,p4;

	//1. 初始化互斥锁和临界变量
	pthread_mutex_init(&mutex,NULL);
	pthread_cond_init(&cond,NULL);

	pthread_create(&p1,NULL,func1,NULL);
	pthread_create(&p2,NULL,func2,NULL);

	//4. 发信号给临界变量
	for(int i = 0; i < 13; i++){
		//解除全部线程的阻塞状态(一次)
		//pthread_cond_broadcast(&cond);
		//解除至少一个线程的阻塞状态(一次)
		pthread_cond_signal(&cond);
		//pthread_cond_signal(&cond);
		sleep(1);
	}

	pthread_join(p1,NULL); 	//等待线程结束
	pthread_join(p2,NULL); 	//等待线程结束

	printf("n: %d\n",n);

	//5. 销毁互斥锁和临界变量
	pthread_mutex_destroy(&mutex);
	pthread_cond_destroy(&cond);

	return 0;
}


 396
396


 被折叠的 条评论
为什么被折叠?
被折叠的 条评论
为什么被折叠?
 到【灌水乐园】发言


