


上面一篇文章中,学习了"Spring - 01 - 通过XML装配Bean",下面学习自动化装配Bean
自动化装配Bean
Spring从两个角度来实现自动化装配
组件扫描:Spring会自动发现应用上下文中所创建的bean
自动装配:Spring自动满足bean之间的依赖
一、创建可被发现的bean
直接上代码
package com.test.spring.server.test4;

/**
 * Created by CYX on 2018/4/17.
 */
public interface CompactDisc {

    void play();

}
package com.test.spring.server.test4;
import org.springframework.stereotype.Component;
/**
* @author CYX
* @create 2018-04-17-20:47
*/
//该注解表明该类会作为组件类,并告知Spring要为这个类创建bean。
@Component
public class SgtPeppers implements CompactDisc {
private String title = "Sgt. Pepper's Lonely Hearts Club Band";
private String artist = "The Beatles";
@Override
public void play() {
System.out.println("Playing " + title + " by " + artist);
}
}
<?xml version="1.0" encoding="UTF-8"?>
<beans xmlns="http://www.springframework.org/schema/beans"
       xmlns:xsi="http://www.w3.org/2001/XMLSchema-instance"
       xmlns:context="http://www.springframework.org/schema/context"
       xmlns:tx="http://www.springframework.org/schema/tx"
       xsi:schemaLocation="http://www.springframework.org/schema/beans http://www.springframework.org/schema/beans/spring-beans.xsd
       http://www.springframework.org/schema/tx http://www.springframework.org/schema/tx/spring-tx-3.1.xsd
       http://www.springframework.org/schema/context http://www.springframework.org/schema/context/spring-context-3.1.xsd">

    <context:component-scan base-package="com.test.spring.server.test4"/>

</beans>
通过XML启用组件扫描
测试主类
package com.test.spring.server.test4;

import org.springframework.context.ApplicationContext;
import org.springframework.context.support.ClassPathXmlApplicationContext;

/**
 * 测试组件扫描
 *
 * @author CYX
 * @create 2018-04-17-21:08
 */
public class Test4App {

    public static void main(String[] args) {

        ApplicationContext context = new ClassPathXmlApplicationContext("/spring/test4/applicationContext.xml");

        SgtPeppers sgtPeppers = context.getBean("sgtPeppers",SgtPeppers.class);

        sgtPeppers.play();
    }

}
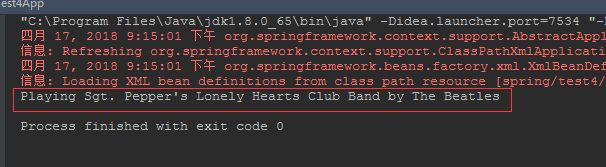
和之前 在XML中显示配置Bean(Spring - 01 - 通过XML装配Bean) 对比一下,我们并没有在applicationContext.xml配置文件中配置<bean>元素用来显示的声明bean。
只是在需要创建bean对象的类上增加了一个注解@Component。
@Component注解的作用是 把普通pojo对象 实例化到Spring容器中,相当于applicationContext.xml配置文件中的:
<bean id="sgtPeppers" class="com.test.spring.server.test4.SgtPeppers"></bean>
Indicates that an annotated class is a "component".
Such classes are considered as candidates for auto-detection when using annotation-based configuration and classpath scanning.
表示注释类是“组件”。
当使用基于注释的配置和类路径扫描时,这些类被认为是自动检测的候选对象。
当我们的类不属于各种归类时,我们就可以使用@Component来标注这个类。被标注的类,可以认为是"组件"
不过这里要注意,仅仅使用@Component注解时,我们并没有指定bean 的id,默认使用类名的首字母小写。
<context:component-scan>配置的作用是 开启组件自动扫描
<context:component-scan base-package="com.test.spring.server.test4"/>的含义是,扫描com.test.spring.server.test4包下的所有注解。
二、为组件扫描的bean命名
Spring应用 上下文 中所有的bean都会给定一个id。
在前面的例子中,我们并没有明确的为 SgtPeppers 指定 bean-id;
但Spring会为其指定一个id,具体的讲,这个bean所给定的id,为 sgtPeppers,也就是将类名的第一个字母变为小写。
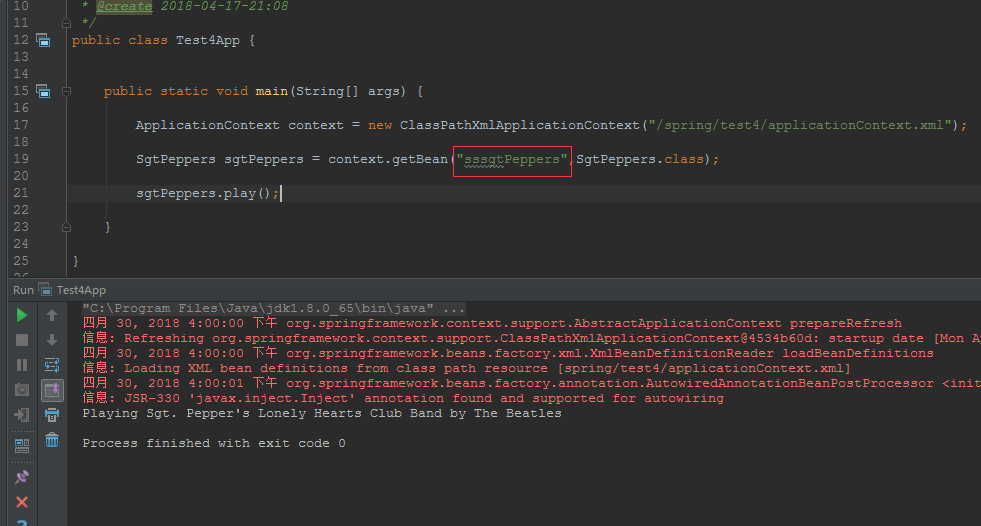
如果要为这个bean设置不同的bean-id,需要将 期望id 作为值,传递给@Component注解。
例如:
@Component("sssgtPeppers")
public class SgtPeppers implements CompactDisc {

    private String title = "Sgt. Pepper's Lonely Hearts Club Band";
    private String artist = "The Beatles";

    @Override
    public void play() {
        System.out.println("Playing " + title + " by " + artist);
    }
}
还有一种为bean命名的方式,这种方式不使用@Component注解,而是使用Java依赖注入规范所提供的的@Named注解来设置。
注意:使用@Named注解,需要添加依赖
<dependency>
        <groupId>javax.inject</groupId>
        <artifactId>javax.inject</artifactId>
        <version>1</version>
</dependency>
@Named("test4-sgtPeppers")
public class SgtPeppers implements CompactDisc {

    private String title = "Sgt. Pepper's Lonely Hearts Club Band";
    private String artist = "The Beatles";

    @Override
    public void play() {
        System.out.println("Playing " + title + " by " + artist);
    }
}
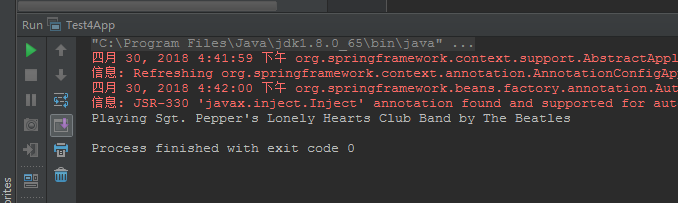
修改下主方法代码,看下运行结果:

Spring支持将@Named作为@Component注解的替代方案。
不过还是推荐@Component注解
三、使用Java Config自动装配Bean
在上面代码的基础上修改一下
package com.test.spring.server.test4;

/**
 * Created by CYX on 2018/4/17.
 */
public interface CompactDisc {

    void play();

}
package com.test.spring.server.test4;


import javax.inject.Named;

/**
 * @author CYX
 * @create 2018-04-17-20:47
 */
//该注解表明该类会作为组件类,并告知Spring要为这个类创建bean。
//@Component("sgtPeppers")
//@Component("sssgtPeppers")
@Named("test4-sgtPeppers")
public class SgtPeppers implements CompactDisc {

    private String title = "Sgt. Pepper's Lonely Hearts Club Band";
    private String artist = "The Beatles";

    @Override
    public void play() {
        System.out.println("Playing " + title + " by " + artist);
    }
}
package com.test.spring.server.test4;

import org.springframework.context.annotation.ComponentScan;
import org.springframework.context.annotation.Configuration;

/**
 * 类CDPlayerConfig通过Java代码定义了Spring的装配规则。
 * <p>
 * 在后面我们再详细介绍
 * <p>
 * 这里,我们只需要观察一下CDPlayerConfig类并没有显示的声明任何bean。
 * <p>
 * 只不过它使用了@ComponentScan注解,这个注解能够在Spring中启用组件扫描。
 * <p>
 * 如果没有其他配置的话,@ComponentScan默认会扫描与配置类相同的包。
 * <p>
 * Spring将会扫描这个包以及这个包下所有的子包,查找带有@Component注解的类。
 *
 * 这种方式,我们暂时注释掉,使用XML来开启组件扫描。
 *
 * @author CYX
 * @create 2018-04-17-20:57
 */
@Configuration
@ComponentScan(basePackages = "com.test.spring.server.test4")
public class CDPlayerConfig {
}
package com.test.spring.server.test4;
import org.springframework.context.ApplicationContext;
import org.springframework.context.annotation.AnnotationConfigApplicationContext;
/**
* 测试组件扫描
*
* @author CYX
* @create 2018-04-17-21:08
*/
public class Test4App {
public static void main(String[] args) {
// ApplicationContext context = new ClassPathXmlApplicationContext("/spring/test4/applicationContext.xml");
ApplicationContext context =new AnnotationConfigApplicationContext(CDPlayerConfig.class);
SgtPeppers sgtPeppers = context.getBean("test4-sgtPeppers",SgtPeppers.class);
sgtPeppers.play();
}
}
注意:这里我并没有使用applicationContext.xml,将之前XML配置文件中的
<context:component-scan base-package="com.test.spring.server.test4"/>注释掉,所以并没有贴出来。
输出结果:
创建Java Config类的关键在于为其添加@Configuration注解。
@Configuration注解表明这个类是一个配置类,该类应该包含在Spring应用上下文中如何创建bean的细节。
@ComponentScan注解默认会扫描与配置类相同的包,以及这个包下面所有的子包。
然后查找带有@Component注解,找到的话,就会为他们创建bean实例。
四、通过为bean添加注解实现自动装配
自动装配就是让Spring自动满足bean依赖的一种方法;
在满足依赖的过程中,会在Spring应用上下文中寻找某个bean需求的其他bean。
为了声明要进行自动装配,可以借助Spring 的@Autowired注解
代码优先
package com.test.spring.server.test05;

/**
 * Created by CYX on 2018/4/17.
 */
public interface CompactDisc {

    void play();

}
package com.test.spring.server.test05;

import org.springframework.stereotype.Component;

/**
 * @author CYX
 * @create 2018-04-30-17:09
 */
@Component
public class SayHello {

    public SayHello() {
        System.out.println("SayHello 默认构造器");
    }

    public void sayHelloWithName() {
        System.out.println("SayHello :hello cyx");
    }

    public void sayHelloWithAddress() {
        System.out.println("SayHello :hello 南京");
    }

}
package com.test.spring.server.test05;


import org.springframework.beans.factory.annotation.Autowired;
import org.springframework.stereotype.Component;

/**
 * @author CYX
 * @create 2018-04-17-20:47
 */
@Component("sssgtPeppers")
public class SgtPeppers implements CompactDisc {

    private String title = "Sgt. Pepper's Lonely Hearts Club Band";
    private String artist = "The Beatles";

//    @Autowired
    private SayHello sayHello;

    /*@Autowired
    public void setSayHello(SayHello sayHello) {
        this.sayHello = sayHello;
    }*/

    @Autowired
    public SgtPeppers(SayHello sayHello) {
        this.sayHello = sayHello;
    }

    @Override
    public void play() {
        System.out.println("Playing " + title + " by " + artist);
        sayHello.sayHelloWithAddress();
        sayHello.sayHelloWithName();
    }
}<?xml version="1.0" encoding="UTF-8"?>
<beans xmlns="http://www.springframework.org/schema/beans"
xmlns:xsi="http://www.w3.org/2001/XMLSchema-instance"
xmlns:context="http://www.springframework.org/schema/context"
xmlns:tx="http://www.springframework.org/schema/tx"
xsi:schemaLocation="http://www.springframework.org/schema/beans http://www.springframework.org/schema/beans/spring-beans.xsd
http://www.springframework.org/schema/tx http://www.springframework.org/schema/tx/spring-tx-3.1.xsd
http://www.springframework.org/schema/context http://www.springframework.org/schema/context/spring-context-3.1.xsd">
<context:component-scan base-package="com.test.spring.server.test05"/>
</beans>主方法
package com.test.spring.server.test05;

import org.springframework.context.ApplicationContext;
import org.springframework.context.support.ClassPathXmlApplicationContext;

/**
 * 测试组件扫描
 *
 * @author CYX
 * @create 2018-04-17-21:08
 */
public class Test5App {


    public static void main(String[] args) {

        ApplicationContext context = new ClassPathXmlApplicationContext("/spring/test05/applicationContext05.xml");

        SgtPeppers sgtPeppers = context.getBean("sssgtPeppers", SgtPeppers.class);

        sgtPeppers.play();

    }

}
运行结果:
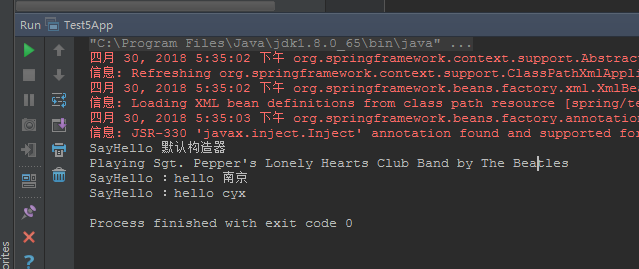
@Autowired 注解不仅可以放在成员变量、setter方法上,还可以放在构造器上。
五、通过Java代码装配Bean
在上面,我们已经初步使用过通过Java Config来装配Bean,下面详细的了解一下。
代码优先:
package com.test.spring.server.test06;

/**
 * Created by CYX on 2018/4/17.
 */
public interface CompactDisc {

    void play();

}
package com.test.spring.server.test06;


/**
 * @author CYX
 * @create 2018-04-17-20:47
 */
public class SgtPeppers implements CompactDisc {

    private String title = "Sgt. Pepper's Lonely Hearts Club Band";
    private String artist = "The Beatles";


    public SgtPeppers() {
    }

    public SgtPeppers(String title, String artist) {
        this.title = title;
        this.artist = artist;
    }

    @Override
    public void play() {
        System.out.println("Playing " + title + " by " + artist);
    }

    public String getTitle() {
        return title;
    }

    public void setTitle(String title) {
        this.title = title;
    }

    public String getArtist() {
        return artist;
    }

    public void setArtist(String artist) {
        this.artist = artist;
    }
}
package com.test.spring.server.test06;
import org.springframework.context.annotation.Bean;
import org.springframework.context.annotation.ComponentScan;
import org.springframework.context.annotation.Configuration;
/**
* @author CYX
* @create 2018-04-17-20:57
*/
@Configuration
@ComponentScan(basePackages = "com.test.spring.server.test06")
public class CDPlayerConfig {
@Bean(name = "sssgtPeppers")
public SgtPeppers initializationSgtPeppers() {
return new SgtPeppers("888888","99999");
}
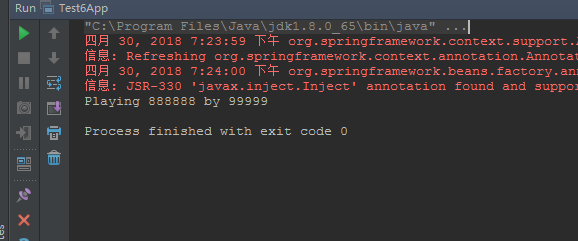
}主方法
package com.test.spring.server.test06;

import org.springframework.context.ApplicationContext;
import org.springframework.context.annotation.AnnotationConfigApplicationContext;

/**
 * 测试组件扫描
 *
 * @author CYX
 * @create 2018-04-17-21:08
 */
public class Test6App {


    public static void main(String[] args) {

        ApplicationContext context = new AnnotationConfigApplicationContext(CDPlayerConfig.class);
        SgtPeppers sgtPeppers = context.getBean("sssgtPeppers", SgtPeppers.class);

        sgtPeppers.play();

    }

}
主方法
注意:
SgtPeppers类中已经没有 @Component 注解了。
SgtPeppers类 的实例化,在 CDPlayerConfig类中实现。
@Bean注解 会告诉Spring这个方法将会返回一个对象,该对象要注册为Spring应用上下文中的bean。
@Bean(name = "sssgtPeppers") 同时,我们还为bean 设置了id。
在默认情况下,bean 的id 与带有@Bean注解的方法名是一样的。
在CDPlayerConfig类中进行bean 实例化的时候,咱们还可以对它进行一些初始化的操作。
这些都是根据业务来看...我这里模拟的话,只是,传入两个参数。
六、借助Java Config实现注入
代码优先
package com.test.spring.server.test06;

/**
 * Created by CYX on 2018/4/17.
 */
public interface CompactDisc {

    void play();

}
package com.test.spring.server.test06;

/**
 * @author CYX
 * @create 2018-04-30-17:09
 */
public class SayHello {

    public SayHello() {
        System.out.println("SayHello 默认构造器");
    }

    public void sayHelloWithName() {
        System.out.println("SayHello :hello cyx");
    }

    public void sayHelloWithAddress() {
        System.out.println("SayHello :hello 南京");
    }

}
package com.test.spring.server.test06;


import org.springframework.beans.factory.annotation.Autowired;

/**
 * @author CYX
 * @create 2018-04-17-20:47
 */
public class SgtPeppers implements CompactDisc {

    private String title = "Sgt. Pepper's Lonely Hearts Club Band";
    private String artist = "The Beatles";

    @Autowired
    private SayHello sayHello;


    public SgtPeppers() {
    }

    public SgtPeppers(SayHello sayHello) {
        this.sayHello = sayHello;
    }

    public SgtPeppers(String title, String artist) {
        this.title = title;
        this.artist = artist;
    }

    @Override
    public void play() {
        System.out.println("Playing " + title + " by " + artist);
        sayHello.sayHelloWithAddress();
        sayHello.sayHelloWithName();
    }

    public String getTitle() {
        return title;
    }

    public void setTitle(String title) {
        this.title = title;
    }

    public String getArtist() {
        return artist;
    }

    public void setArtist(String artist) {
        this.artist = artist;
    }
}
package com.test.spring.server.test06;

import org.springframework.context.annotation.Bean;
import org.springframework.context.annotation.ComponentScan;
import org.springframework.context.annotation.Configuration;

/**
 * @author CYX
 * @create 2018-04-17-20:57
 */
@Configuration
@ComponentScan(basePackages = "com.test.spring.server.test06")
public class CDPlayerConfig {

    @Bean(name = "sssgtPeppers")
    public SgtPeppers initializationSgtPeppers() {
        return new SgtPeppers("888888", "99999");
    }

    @Bean
    public SgtPeppers initializationSgtPeppersWithHello() {
        return new SgtPeppers(initializationSayHello());
    }

    @Bean
    public SayHello initializationSayHello() {
        return new SayHello();
    }

}
package com.test.spring.server.test06;

import org.springframework.context.ApplicationContext;
import org.springframework.context.annotation.AnnotationConfigApplicationContext;

/**
 * 测试组件扫描
 *
 * @author CYX
 * @create 2018-04-17-21:08
 */
public class Test6App {


    public static void main(String[] args) {

        ApplicationContext context = new AnnotationConfigApplicationContext(CDPlayerConfig.class);
        SgtPeppers sgtPeppers = context.getBean("sssgtPeppers", SgtPeppers.class);

        sgtPeppers.play();

    }

}
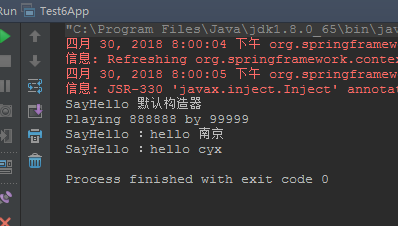
在CDPlayerConfig类中我们增加了两个bean,一个是用来注入的,另一个是被注入的。
在initializationSgtPeppersWithHello()方法中,并没有像之前那样子,传入参数,而是传入一个对象(方法)
看起来,SayHello对象,是通过调用initializationSayHello()方法得来的,但情况并非如此。
因为 initializationSayHello()方法上添加了@Bean注解,Spring将会拦截所有对它的调用,并确保直接返回该方法所创建的bean,而不是每次都对其进行实际的调用。
Java Config类换一种写法:
package com.test.spring.server.test06;

import org.springframework.context.annotation.Bean;
import org.springframework.context.annotation.ComponentScan;
import org.springframework.context.annotation.Configuration;

/**
 * @author CYX
 * @create 2018-04-17-20:57
 */
@Configuration
@ComponentScan(basePackages = "com.test.spring.server.test06")
public class CDPlayerConfig {

    @Bean(name = "sssgtPeppers")
    public SgtPeppers initializationSgtPeppers() {
        return new SgtPeppers("888888", "99999");
    }

    @Bean
    public SgtPeppers initializationSgtPeppersWithHello(SayHello sayHello) {
        return new SgtPeppers(sayHello);
    }

    @Bean
    public SayHello initializationSayHello() {
        return new SayHello();
    }

}
在这里,initializationSgtPeppersWithHello(SayHello sayHello) 方法直接将对象传入,这样子,好理解一点。
参考文章:
https://www.cnblogs.com/Ming8006/p/6323633.html
https://docs.spring.io/spring-framework/docs/current/javadoc-api/org/springframework/stereotype/Component.html
《Spring 实战》


 248
248


 被折叠的 条评论
为什么被折叠?
被折叠的 条评论
为什么被折叠?
 到【灌水乐园】发言


