


文档
Fab 浮动按钮
可拖动的悬浮窗按钮
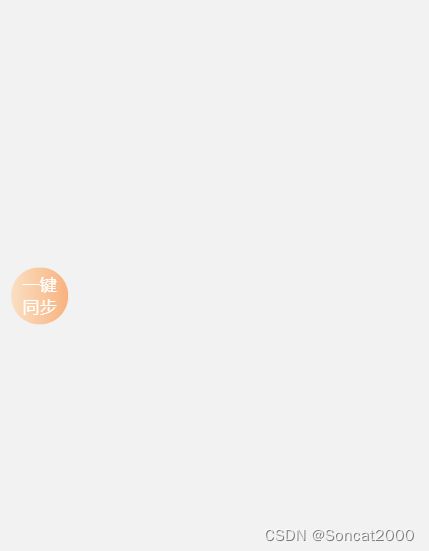
实际效果
可拖动,松手后会自动回位至屏幕边缘处
浮动气泡
Props
| 参数 | 说明 | 类型 | 可选值 | 默认值 |
|---|---|---|---|---|
| position | 距离对象 | Boolean | – | {left:0,right:0,top:0,bottom:0} |
| left | 左边距离(无需单位) | Number | – | 0 |
| right | 右边距离(无需单位) | Number/String | – | 0 |
| top | 顶部距离(无需单位) | Number/String | – | 0 |
| bottom | 底部距离(无需单位) | Number/String | – | 0 |
| h-margin | 拖动后的水平方向最小边距(左右边距) | Number/String | – | 10px |
| v-margin | 拖动后的垂直方向最小边距(上下边距) | Number/String | – | 10px |
注:rpx单位对应的是750的屏幕,上述属性取值使用375下的数值,如果是750设计稿在使用时需手动除2传入
浮动按钮位置仅推荐left、top / right 、bottom 两两使用,默认优先使用bottom、right配置
slots
| name | 说明 |
|---|---|
| default | 悬浮窗默认插槽,用户可自定义内容及大小 |
使用示例
<!-- 位于屏幕右下10rpx、100rpx的浮动按钮 -->
<c-fab bottom="100" right='10'>
  <view class="float" style="width:100rpx;height:100rpx;border-radius: 99em;background:#fad84c;color:#333;display:flex;align-items:center;justify-content: center;">活动</view>
</c-fab>
<!-- 给view加入下面这个属性可以增加点击效果 -->
 hover-class=""
组件完整代码
<movable-area>
  <movable-view bind:touchend="onTouchend" bind:touchmove="onTouchMove" bind:touchstart="addAnimation" animation="{{animation}}" style="width:{{elementWidth}}px;height:{{elementHeight}}px" x="{{x}}" y="{{y}}" direction="all">
    <view class="float-box" >
      <slot></slot>
    </view>
  </movable-view>
</movable-area>
Component({
  /**
   * 组件的属性列表
   */
  properties: {
    position: {
      type: Object,
      value: {
        left: 0,
        right: 0,
        bottom: 0,
        top: 0
      } // left、top、right、bottom
    },
    left: {
      type: Number,
      value: 0
    },
    right: {
      type: Number,
      value: 0
    },
    top: {
      type: Number,
      value: 0
    },
    bottom: {
      type: Number,
      value: 0
    },
    hMargin: { // 拖动后的水平方向最小边距(左右边距)
      type: Number,
      value: 10
    },
    vMargin: { // 拖动后的垂直方向最小边距(上下边距)
      type: Number,
      value: 10
    }
  },
  data: {
    x: 999,
    y: 999,
    windowWidth: wx.getSystemInfoSync().windowWidth,
    windowHeight: wx.getSystemInfoSync().windowHeight,
    elementWidth: 0,
    elementHeight: 0,
    animation: false,
    isMoved: false // 是否拖动
  },

  lifetimes: {
    attached() {
      // 初始化位置
      wx.createSelectorQuery().in(this).select('.float-box').boundingClientRect().exec((res) => {
        console.log(233, res);
        this.data.elementWidth = res[0].width;
        this.data.elementHeight = res[0].height;
        if (this.properties.position.left || this.properties.left) {
          this.data.x = this.properties.position.left || this.properties.left;
        }
        if (this.properties.position.right || this.properties.right) {
          this.data.x = this.data.windowWidth - this.data.elementWidth - (this.properties.position.right ? this.properties.position.right : this.properties.right);
        }
        if (this.properties.position.top || this.properties.top) {
          this.data.y = this.properties.position.top || this.properties.top;
        }
        if (this.properties.position.bottom || this.properties.bottom) {
          this.data.y = this.data.windowHeight - this.data.elementHeight - (this.properties.position.bottom ? this.properties.position.bottom : this.properties.bottom);
        }

        this.setData({
          elementWidth: this.data.elementWidth,
          elementHeight: this.data.elementHeight,
          x: this.data.x,
          y: this.data.y
        });
      });
    }
  },

  /**
   * 组件的方法列表
   */
  methods: {
    onTouchend(e) {
      console.log(this.data.isMoved, this.data.x, e.changedTouches[0].clientX, this.data.elementWidth);
      if (!this.data.isMoved) return;
      const currentX = e.changedTouches[0].clientX;
      let currentY = e.changedTouches[0].clientY;
      if (currentY <= this.properties.vMargin) {
        currentY = this.properties.vMargin + this.data.elementHeight / 2;
      }
      if (currentY >= this.data.windowHeight - this.properties.vMargin) {
        currentY = this.data.windowHeight - this.properties.vMargin - this.data.elementHeight / 2;
      }
      if (currentX + this.data.elementWidth / 2 > this.data.windowWidth / 2) {
        this.setData({
          x: this.data.windowWidth - this.properties.hMargin - this.data.elementWidth,
          y: currentY - this.data.elementHeight / 2
        });
      }
      if (currentX + this.data.elementWidth / 2 <= this.data.windowWidth / 2) {
        this.setData({
          x: this.properties.hMargin,
          y: currentY - this.data.elementHeight / 2
        });
      }
    },
    addAnimation() {
      this.data.isMoved = false;
      if (!this.data.animation) {
        this.setData({
          animation: true
        });
      }
    },
    onTouchMove() {
      this.data.isMoved = true;
    }
  }
});

movable-area {
	position: fixed;
	top: 0;
	left: 0;
	width: 100vw;
	height: 100vh;
	pointer-events: none;
	z-index: 50;

	movable-view {
		pointer-events: auto; //可以点击
	}
	.float-box {
		display: inline-block;
	}
}

{
  "component": true,
  "usingComponents": {}
}


 6168
6168


 被折叠的 条评论
为什么被折叠?
被折叠的 条评论
为什么被折叠?
 到【灌水乐园】发言


