


一、一键安装MySQL
已经编写好了一个脚本,直接执行脚本,就可以将MySQL装好,你也可以照着脚本,自己一条条执行(操作略微不同,意思一样,不要盲目复制粘贴!),附上脚本,我会在每条做上注释讲解:
vim onekey_install_mysql_binary_v3.sh
#!/bin/bash

#解决软件的依赖关系
yum  install cmake ncurses-devel gcc  gcc-c++  vim  lsof bzip2 openssl-devel ncurses-compat-libs -y

#解压mysql二进制安装包
tar  xf  mysql-5.7.40-linux-glibc2.12-x86_64.tar.gz

#移动mysql解压后的文件到/usr/local下改名叫mysql
mv mysql-5.7.40-linux-glibc2.12-x86_64 /usr/local/mysql

#新建组和用户 mysql
groupadd mysql
#mysql这个用户的shell 是/bin/false 属于mysql组
useradd -r -g mysql -s /bin/false mysql

#关闭firewalld防火墙服务,并且设置开机不要启动
service firewalld stop
systemctl  disable  firewalld

#临时关闭selinux
setenforce 0
#永久关闭selinux
sed -i '/^SELINUX=/ s/enforcing/disabled/'  /etc/selinux/config

#新建存放数据的目录
mkdir  /data/mysql -p
#修改/data/mysql目录的权限归mysql用户和mysql组所有,这样mysql用户启动的mysql进程可以对这个文件夹进行读写了
chown mysql:mysql /data/mysql/
#只是允许mysql这个用户和mysql组可以访问,其他人都不能访问
chmod 750 /data/mysql/

#进入/usr/local/mysql/bin目录
cd /usr/local/mysql/bin/

#初始化mysql
./mysqld  --initialize --user=mysql --basedir=/usr/local/mysql/  --datadir=/data/mysql  &>passwd.txt

#让mysql支持ssl方式登录的设置
./mysql_ssl_rsa_setup --datadir=/data/mysql/

#获得临时密码
tem_passwd=$(cat passwd.txt |grep "temporary"|awk '{print $NF}')
  #$NF表示最后一个字段
  # abc=$(命令)  优先执行命令,然后将结果赋值给abc

# 修改PATH变量,加入mysql bin目录的路径
#临时修改PATH变量的值
export PATH=/usr/local/mysql/bin/:$PATH
#重新启动linux系统后也生效,永久修改
echo  'PATH=/usr/local/mysql/bin:$PATH' >>/root/.bashrc

#复制support-files里的mysql.server文件到/etc/init.d/目录下叫mysqld
cp  ../support-files/mysql.server   /etc/init.d/mysqld

#修改/etc/init.d/mysqld脚本文件里的datadir目录的值
sed  -i '70c  datadir=/data/mysql'  /etc/init.d/mysqld

#生成/etc/my.cnf配置文件
cat  >/etc/my.cnf  <<EOF
[mysqld_safe]

[client]
socket=/data/mysql/mysql.sock

[mysqld]
socket=/data/mysql/mysql.sock
port = 3306
open_files_limit = 8192
innodb_buffer_pool_size = 512M
character-set-server=utf8

[mysql]
auto-rehash
prompt=\\u@\\d \\R:\\m  mysql>
EOF

#修改内核的open file的数量
ulimit -n 1000000
#设置开机启动的时候也配置生效
echo "ulimit -n 1000000" >>/etc/rc.local
chmod +x /etc/rc.d/rc.local


#将mysqld添加到linux系统里服务管理名单里
/sbin/chkconfig --add mysqld
#设置mysqld服务开机启动
/sbin/chkconfig mysqld on

#启动mysqld进程
service mysqld start


#初次修改密码需要使用--connect-expired-password 选项
#-e 后面接的表示是在mysql里需要执行命令  execute 执行
#set password='Jiangda123#';  修改root用户的密码为Jiangda123#
mysql -uroot -p$tem_passwd --connect-expired-password   -e  "set password = 'Jiangda123#';"


#检验上一步修改密码是否成功,如果有输出能看到mysql里的数据库,说明成功。
mysql -uroot -p'Jiangda123#'  -e "show databases;"
二、执行脚本之前做的事情
在执行脚本前,在MySQL官方网站下载https://downloads.mysql.com/archives/community/
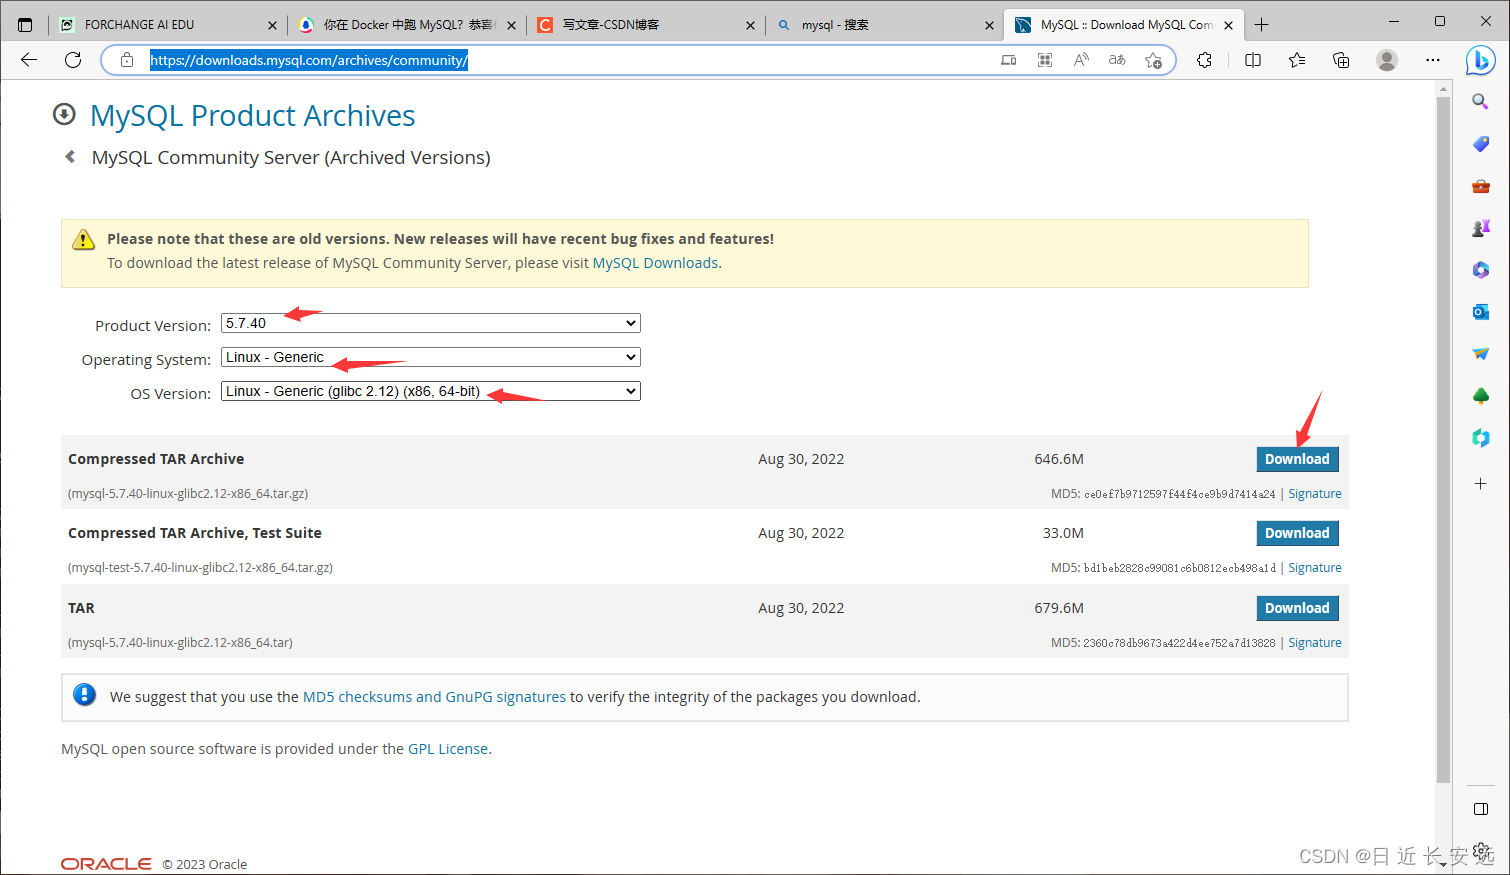
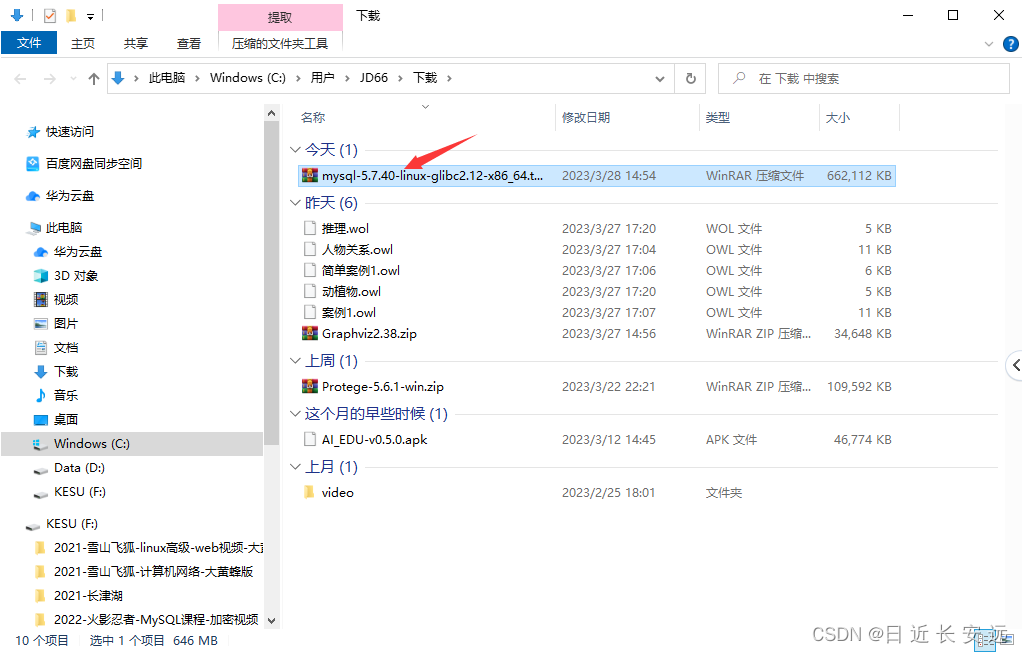
下好之后用Xftp传到你的linux服务器上,解压:
[root@jd-mysql ~]# tar xf mysql-5.7.40-linux-glibc2.12-x86_64.tar.gz
[root@jd-mysql ~]# ls
anaconda-ks.cfg                      mysql-5.7.40-linux-glibc2.12-x86_64.tar.gz
mysql-5.7.40-linux-glibc2.12-x86_64  onekey_install_mysql_binary_v3.sh
三、执行脚本
[root@jd-mysql-2 ~]# time bash onekey_install_mysql_binary_v3.sh
已加载插件:fastestmirror
Loading mirror speeds from cached hostfile
 * base: mirrors.aliyun.com
 * extras: mirrors.aliyun.com
 * updates: mirrors.aliyun.com
软件包 cmake-2.8.12.2-2.el7.x86_64 已安装并且是最新版本
软件包 ncurses-devel-5.9-14.20130511.el7_4.x86_64 已安装并且是最新版本
软件包 gcc-4.8.5-44.el7.x86_64 已安装并且是最新版本
软件包 gcc-c++-4.8.5-44.el7.x86_64 已安装并且是最新版本
软件包 2:vim-enhanced-7.4.629-8.el7_9.x86_64 已安装并且是最新版本
软件包 lsof-4.87-6.el7.x86_64 已安装并且是最新版本
软件包 bzip2-1.0.6-13.el7.x86_64 已安装并且是最新版本
软件包 1:openssl-devel-1.0.2k-26.el7_9.x86_64 已安装并且是最新版本
没有可用软件包 ncurses-compat-libs。
无须任何处理
Redirecting to /bin/systemctl stop firewalld.service
Removed symlink /etc/systemd/system/multi-user.target.wants/firewalld.service.
Removed symlink /etc/systemd/system/dbus-org.fedoraproject.FirewallD1.service.
Starting MySQL.Logging to '/data/mysql/jd-mysql-2.err'.
 SUCCESS!
mysql: [Warning] Using a password on the command line interface can be insecure.
mysql: [Warning] Using a password on the command line interface can be insecure.
+--------------------+
| Database           |
+--------------------+
| information_schema |
| mysql              |
| performance_schema |
| sys                |
+--------------------+

real	0m22.860s
user	0m4.434s
sys	0m20.862s
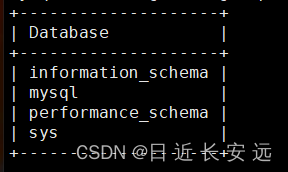
执行完成,显示出这个 表 说明安装成功,一切顺利。
这时候,你需要去明白脚本里的代码,去仔细看看和理解,比如你的密码是‘Jiangda123#’
三、使用
进入mysql:mysql -uroot -p’Jiangda123#’
[root@jd-mysql-2 ~]# mysql -uroot -p'Jiangda123#'
在mysql里查看shell进程:
root@(none) 15:57  mysql>system ps aux|grep mysqld
root       8882  0.0  0.0  11824  1616 pts/0    S    15:50   0:00 /bin/sh /usr/local/mysql/bin/mysqld_safe --datadir=/data/mysql --pid-file=/data/mysql/jd-mysql-2.pid
mysql      9036  0.1 11.0 1610256 205220 pts/0  Sl   15:50   0:00 /usr/local/mysql/bin/mysqld --basedir=/usr/local/mysql --datadir=/data/mysql --plugin-dir=/usr/local/mysql/lib/plugin --user=mysql --log-error=jd-mysql-2.err --open-files-limit=8192 --pid-file=/data/mysql/jd-mysql-2.pid --socket=/data/mysql/mysql.sock --port=3306
root       9137  0.0  0.0 113280  1216 pts/0    S+   15:57   0:00 sh -c  ps aux|grep mysqld
root       9139  0.0  0.0 112824   968 pts/0    S+   15:57   0:00 grep mysqld
建库:
root@(none) 16:01  mysql>create database jd;
Query OK, 1 row affected (0.00 sec)
看库:
root@(none) 16:03  mysql>show databases;
+--------------------+
| Database           |
+--------------------+
| information_schema |
| jd                 |
| jiangda            |
| mysql              |
| performance_schema |
| sys                |
+--------------------+
6 rows in set (0.00 sec)
在jd库里建表和查看表的详细字段等信息:
root@(none) 16:05  mysql>use jd
Database changed

root@jd 16:05  mysql>create table student_info(id int,name varchar(20),sex char(1));
Query OK, 0 rows affected (0.01 sec)

root@jd 16:05  mysql>desc student_info;

+-------+-------------+------+-----+---------+-------+
| Field | Type        | Null | Key | Default | Extra |
+-------+-------------+------+-----+---------+-------+
| id    | int(11)     | YES  |     | NULL    |       |
| name  | varchar(20) | YES  |     | NULL    |       |
| sex   | char(1)     | YES  |     | NULL    |       |
+-------+-------------+------+-----+---------+-------+
3 rows in set (0.00 sec)
以指定文件Socket方式登录:mysql -uroot -p'Jiangda123#' -S /data/mysql/mysql.sock
[root@jd-mysql-2 mysql]# mysql -uroot -p'Jiangda123#' -S /data/mysql/mysql.sock
mysql: [Warning] Using a password on the command line interface can be insecure.
Welcome to the MySQL monitor.  Commands end with ; or \g.
Your MySQL connection id is 2
Server version: 5.7.40 MySQL Community Server (GPL)

Copyright (c) 2000, 2022, Oracle and/or its affiliates.

Oracle is a registered trademark of Oracle Corporation and/or its
affiliates. Other names may be trademarks of their respective
owners.

Type 'help;' or '\h' for help. Type '\c' to clear the current input statement.

root@(none) 16:44  mysql>exit
Bye
四、连接(网络Socket)
用另一台ip为192.168.1.150的linux的机器,和本机Windows机器去访问数据库,其中windows用Navicat
首先,在mysql服务器上进入mysql创建用户并授权:
create user 'jd'@'%' identified by '123456';

grant all on *.* to 'jd'@'%';
*.* 第一个*代表所有的库,第2个*代表库里的所有的表。
然后,在第二天linux机器连接:(成功)
mysql -u'jd' -p'123456' -h 192.168.1.151 -P'3306'
mysql: [Warning] Using a password on the command line interface can be insecure.
Welcome to the MySQL monitor.  Commands end with ; or \g.
Your MySQL connection id is 5
Server version: 5.7.40 MySQL Community Server (GPL)

Copyright (c) 2000, 2022, Oracle and/or its affiliates.

Oracle is a registered trademark of Oracle Corporation and/or its
affiliates. Other names may be trademarks of their respective
owners.

Type 'help;' or '\h' for help. Type '\c' to clear the current input statement.

jd@(none) 16:56  mysql>show databases;
+--------------------+
| Database           |
+--------------------+
| information_schema |
| jd                 |
| jiangda            |
| mysql              |
| performance_schema |
| sys                |
+--------------------+
6 rows in set (0.00 sec)
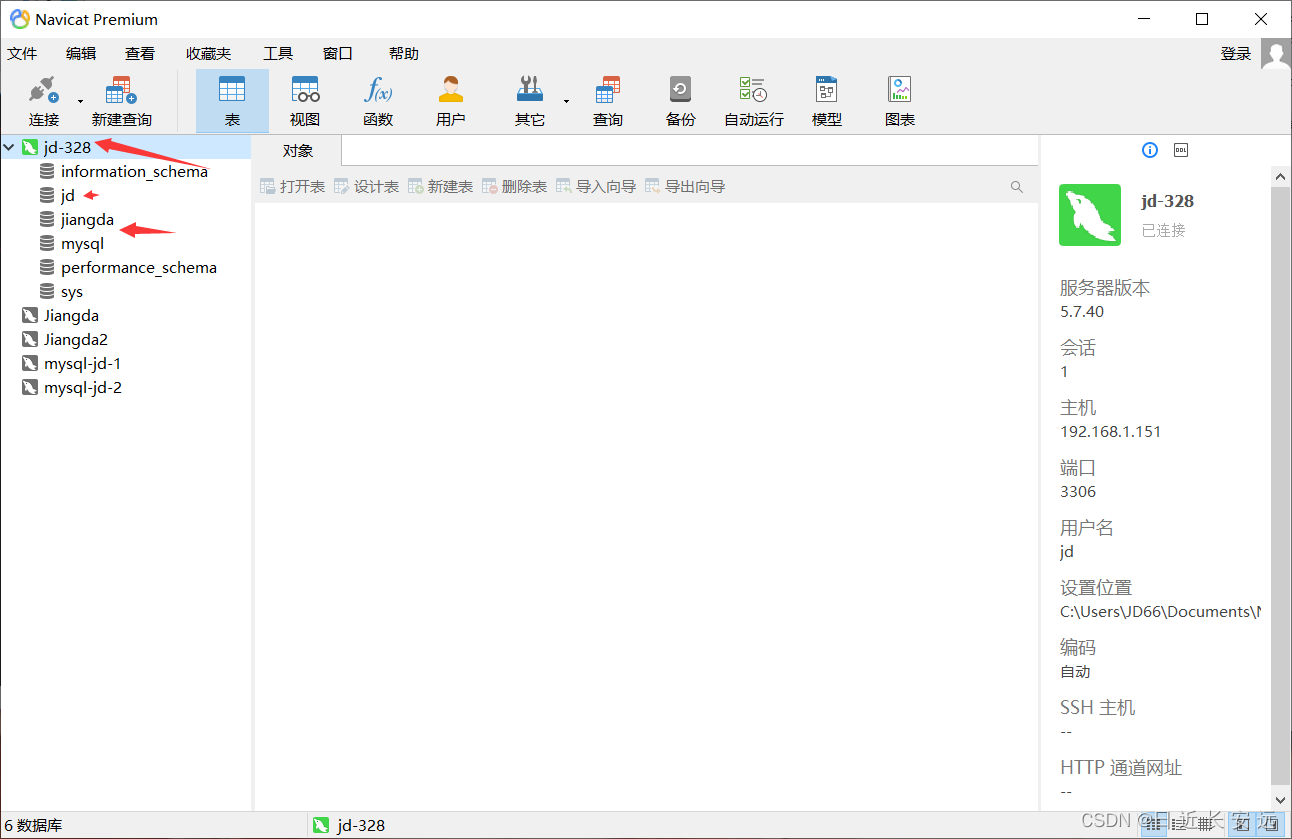
在windows,打开navicat:
新建连接: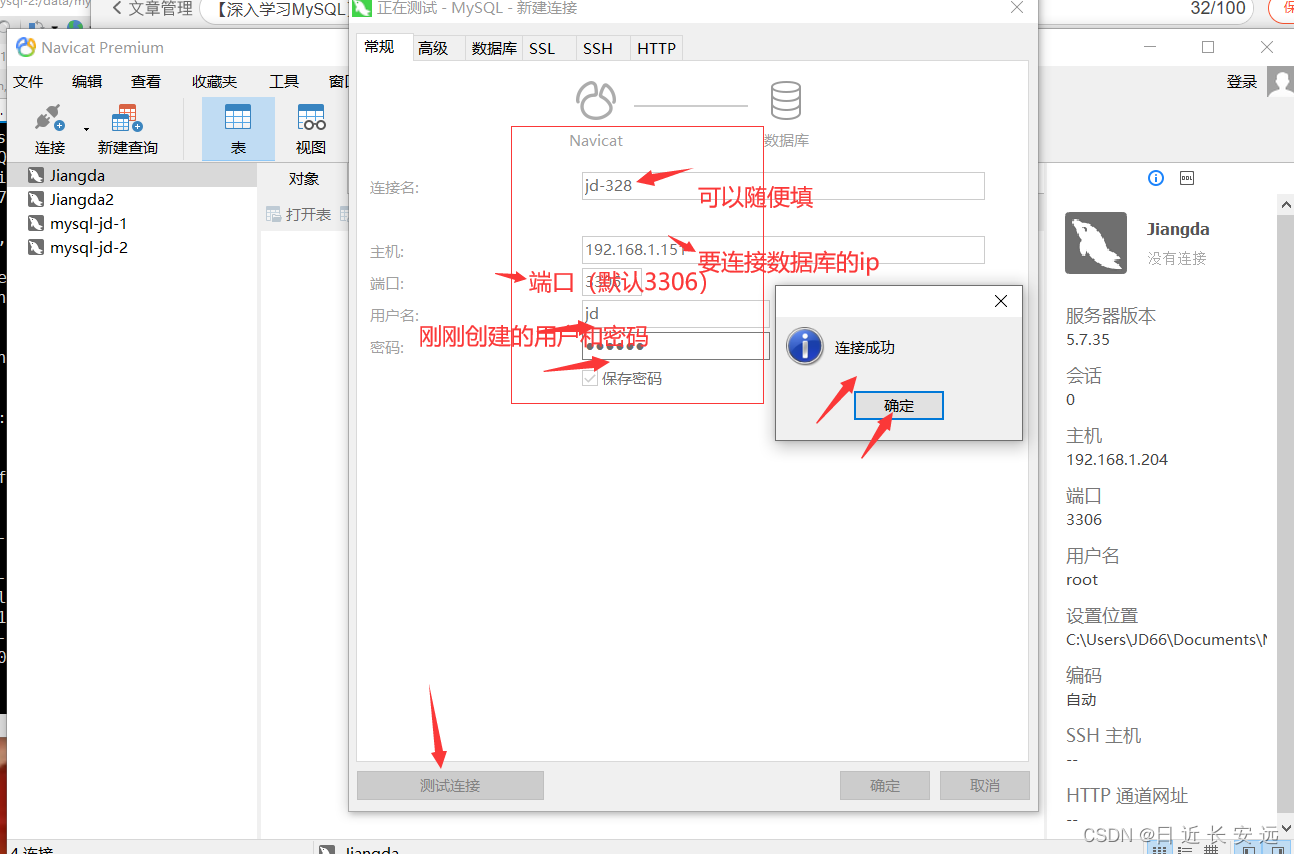
成功:
在linux里看被哪些机器连接可以用‘w’命令,在MySQL里可以用show processlist;看哪些机器连接了我的MySQL数据库:
root@(none) 16:59  mysql>show processlist;
+----+------+---------------------+------+---------+------+----------+------------------+
| Id | User | Host                | db   | Command | Time | State    | Info             |
+----+------+---------------------+------+---------+------+----------+------------------+
|  4 | root | localhost           | NULL | Query   |    0 | starting | show processlist |
|  5 | jd   | 192.168.1.150:35102 | NULL | Sleep   | 3145 |          | NULL             |
|  7 | jd   | 192.168.1.45:59522  | NULL | Sleep   | 2665 |          | NULL             |
+----+------+---------------------+------+---------+------+----------+------------------+
3 rows in set (0.01 sec)
等我学完这一系列(或者问题积累多了),我会出总结篇的!!!


 1009
1009


 被折叠的 条评论
为什么被折叠?
被折叠的 条评论
为什么被折叠?
 到【灌水乐园】发言


