


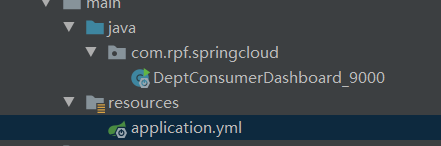
第一步 创建一个监控页面的module
第二部 导入所需要的依赖
  <dependencies>
        <!--hystrix依赖-->
        <!--导入hystrix依赖-->
        <dependency>
            <groupId>org.springframework.cloud</groupId>
            <artifactId>spring-cloud-starter-hystrix</artifactId>
            <version>1.4.6.RELEASE</version>
        </dependency>
        <!--hystrix监控页面依赖-->
        <dependency>
            <groupId>org.springframework.cloud</groupId>
            <artifactId>spring-cloud-starter-hystrix-dashboard</artifactId>
            <version>1.4.6.RELEASE</version>
        </dependency>
        <dependency>
            <groupId>com.rpf</groupId>
            <artifactId>springcloud-api</artifactId>
            <version>1.0-SNAPSHOT</version>
        </dependency>
        <dependency>
            <groupId>org.springframework.boot</groupId>
            <artifactId>spring-boot-starter-web</artifactId>
        </dependency>
        <!--热部署-->
        <dependency>
            <groupId>org.springframework.boot</groupId>
            <artifactId>spring-boot-devtools</artifactId>
        </dependency>
        <!--集成Ribbon-->
        <!-- https://mvnrepository.com/artifact/org.springframework.cloud/spring-cloud-starter-ribbon -->
        <dependency>
            <groupId>org.springframework.cloud</groupId>
            <artifactId>spring-cloud-starter-ribbon</artifactId>
            <version>1.4.6.RELEASE</version>
        </dependency>
        <!--需要Eureka发现服务-->
        <dependency>
            <groupId>org.springframework.cloud</groupId>
            <artifactId>spring-cloud-starter-eureka</artifactId>
            <version>1.4.6.RELEASE</version>
        </dependency>
    </dependencies>
第三步 配置yml文件
server:
  port: 9000
启动类上开启监控页面注解
@SpringBootApplication
@EnableHystrixDashboard//开启监控页面
public class DeptConsumerDashboard_9000 {
    public static void main(String[] args) {
        SpringApplication.run(DeptConsumerDashboard_9000.class,args);
    }
}
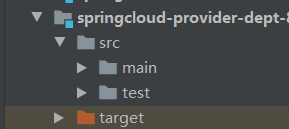
第四步 确保服务提供方pom依赖加入了监控信息的依赖
  <!--添加监控信息-->
        <dependency>
            <groupId>org.springframework.boot</groupId>
            <artifactId>spring-boot-starter-actuator</artifactId>
        </dependency>
开启启动类
访问地址http://localhost:9000/hystrix
即可得到以下界面


这个时候我们需要在服务提供方注册一些监控信息
服务提供方需要导入hystrix的依赖
 <!--hystrix-->
        <dependency>
            <groupId>org.springframework.cloud</groupId>
            <artifactId>spring-cloud-starter-hystrix</artifactId>
            <version>1.4.6.RELEASE</version>
        </dependency>
在服务提供者的启动类中注入一个bean
//启动类
@EnableEurekaClient//在服务启动后自动注册到Eureka服务端
@SpringBootApplication
@EnableDiscoveryClient//服务发现
public class DeptProvider_8001 {
    public static void main(String[] args) {
        SpringApplication.run(DeptProvider_8001.class,args);
    }

    //增加servlet
    @Bean
    public ServletRegistrationBean hystrixMetricsStreamServlet(){
        ServletRegistrationBean registrationBean= new ServletRegistrationBean(new HystrixMetricsStreamServlet());
        registrationBean.addUrlMappings("/actuator/hystrix.stream");//添加一个访问的路径
       return registrationBean;
    }
}
启动 注册中心 , 服务提供方 , 监控moudle
访问下方路径 看是否有数据

有数据监控成功 访问这个监控页面路径
http://localhost:9000/hystrix
输入配置刚才访问的路径

即可看到监控数据

这个圆圈代表健康程度
绿色 黄色 橙色 红色 依次代表健康程度递减
流量越大 圆也越大


 1141
1141


 被折叠的 条评论
为什么被折叠?
被折叠的 条评论
为什么被折叠?
 到【灌水乐园】发言


