


目录
1.设置tableView显示要素的个数
override func tableView(_ tableView: UITableView, numberOfRowsInSection section: Int) -> Int {
        // #warning Incomplete implementation, return the number of rows
       return lessons.count

    }
这里的lessons是一个数组,讲这个数组的数量作为tableView的个数。
2.设置tableView里cell的内容
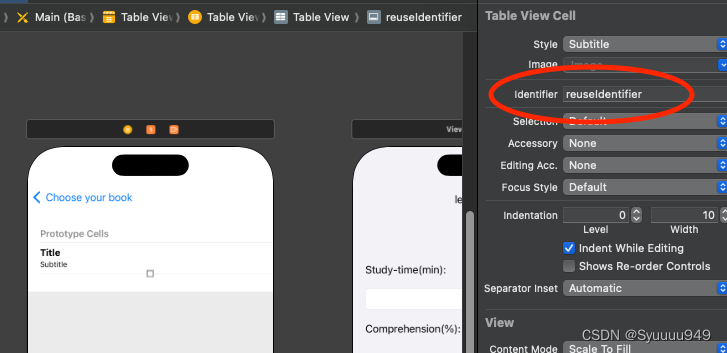
首先选中table View Cell ,在红圈内设置一个iD
 let cell = tableView.dequeueReusableCell(withIdentifier: "reuseIdentifier", for: indexPath)

        cell.textLabel?.text = ""


        cell.textLabel?.text = "Unit "+String(lessons[indexPath.row].Unit)

        cell.detailTextLabel?.text = lessons[indexPath.row].lessonName


        // Configure the cell...

        return cell
创建cell的时候,将刚才设置的id填入withIdentifier里
然后图中设置了每个cell的标题和副标题显示的内容(因为cell的类型是subtitle,有两个显示的要素)
3.设置点击时执行的动作(跳转页面)
override func tableView(_ table: UITableView, didSelectRowAt indexPath: IndexPath){
        tableView.deselectRow(at: indexPath, animated: true)
        let storyboard = UIStoryboard(name:"Main", bundle: nil)
        let vc = storyboard.instantiateViewController(withIdentifier: "lesson") as! ViewController
        vc.Num = indexPath.row

        navigationController?.pushViewController(vc, animated: true)

    }
这里的name:“Main”不用改,我也不知道是啥
tableView.deselectRow(at: indexPath, animated: true)是实现点击之后的选中效果逐渐消失。
这里创建了一个storyboard和vc 是为了跳转页面,并且传递参数。记得要把跳转的目标页面的id设置好。as! 后面是跳转的页面的名称
navigationController这一行是实现跳转页面。


 715
715

 被折叠的 条评论
为什么被折叠?
被折叠的 条评论
为什么被折叠?
 到【灌水乐园】发言


