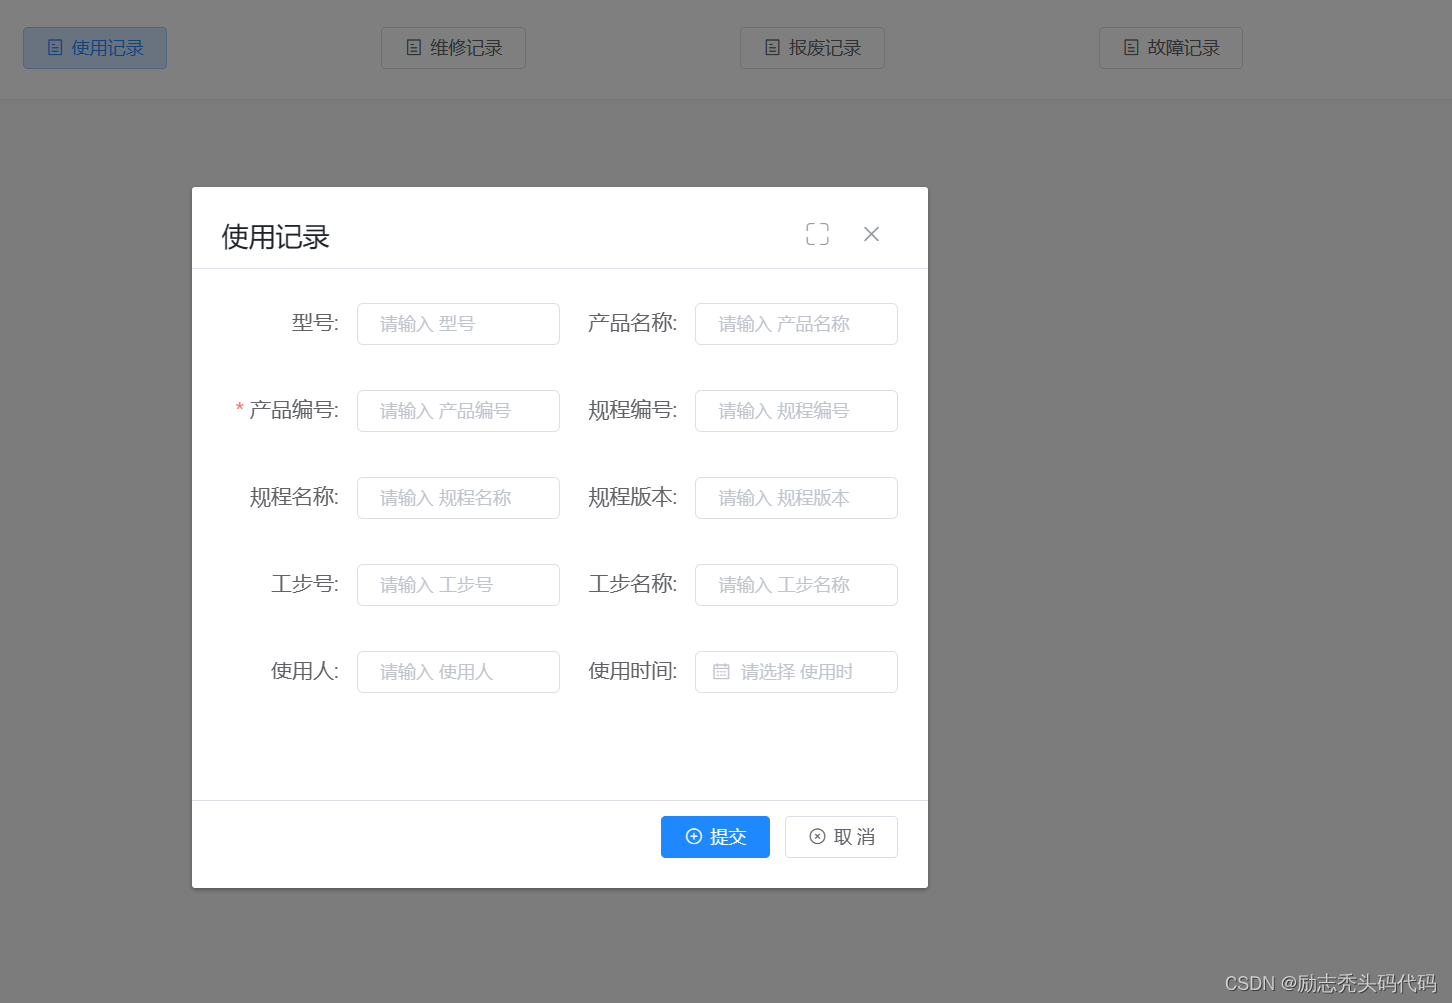
1.效果图
按钮效果 --父表

点击按钮之后的 -- 子表

2.代码部分
1.父表
<template>
  <basic-containers>
    <el-row :gutter="20">
      <el-col :span="6">
        <el-button icon="el-icon-tickets" @click="onOpenUseRecord" >使用记录</el-button>
      </el-col>
      <el-col :span="6">
        <el-button icon="el-icon-tickets" @click="onOpenmaintainRecord" >维修记录</el-button>
      </el-col>
      <el-col :span="6">
        <el-button icon="el-icon-tickets" @click="onOpenscrapRecord" >报废记录</el-button>
      </el-col>
      <el-col :span="6">
        <el-button icon="el-icon-tickets" @click="onOpenfaultRecord" >故障记录</el-button>
      </el-col>

    </el-row>
    <use-record ref="useRecordRefs"></use-record>
    <scrap-record ref="scrapRecordRefs"></scrap-record>
    <fault-record ref="faultRecordRefs"></fault-record>
    <maintain-record ref="maintainRecordRefs"></maintain-record>
  </basic-containers>
</template>
<script>
import useRecord from "@/views/test/dialog/useRecord";
import scrapRecord from "@/views/test/dialog/scrapRecord";
import maintainRecord from "@/views/test/dialog/maintainRecord";
import faultRecord from "@/views/test/dialog/faultRecord";
export default {
  name:'DemoIndex',
  components:{
    useRecord,
    scrapRecord,
    maintainRecord,
    faultRecord,
  },
  data() {
    return {};
  },
  methods:{
    onOpenUseRecord(){
      this.$refs.useRecordRefs.openDialog('add');
    },
    onOpenscrapRecord(){
      this.$refs.scrapRecordRefs.openDialog('add');
    },
    onOpenmaintainRecord(){
      this.$refs.maintainRecordRefs.openDialog();
    },
    onOpenfaultRecord(){
      this.$refs.faultRecordRefs.openDialog('add');
    }
  }
};
</script>
2.子表
<template>
  <basic-dialog
      :visible.sync="dialog.showDialog"
      :title="dialog.title"
      width="40%"
      :submit-txt="dialog.submitTxt"
      :loading="dialog.loading"
      append-to-body
      @cancel="cancleDialog"
      @submit="submitDialog"
  >
    <!-- 内容   -->
    <avue-form v-model="form" :option="option"></avue-form>
  </basic-dialog>
</template>
<script>
export default {
  name: "useRecord",
  data() {
    return {
      dialog:{
        showDialog:false,
        title:"使用记录",
        submitTxt:"提交",
        loading:false,
      },
      form:{},
      option:{
        emptyBtn:false,
        submitBtn:false,
        column:[
           {
          label: "型号",
          prop: "modelName",

  },
    {
          label: "产品名称",
          prop: "productName",

    },
    {
      label: "产品编号",
          prop: "productCode",
      rules: [{ required: true, message: "产品编号不能为空" }],

    },
    {
      label: "规程编号",
          prop: "specificationCode",
    },
    {
      label: "规程名称",
          prop: "specificationName",
    },
    {
      label: "规程版本",
          prop: "specificationRev",
    },  {
      label: "工步号",
          prop: "processCode",
    },  {
      label: "工步名称",
          prop: "processName",
    },  {
      label: "使用人",
          prop: "borrowUserName",
    },  {
      label: "使用时间",
          prop: "borrowDateTime",
            type: "date",

          }
        ]
      }
    };
  },
  methods:{
    //打开弹窗
    openDialog(event){
      console.log(event);
      this.dialog.showDialog   = true;
    },
    //关闭弹窗
    cancleDialog(){
      this.dialog.showDialog = false;
    },
    submitDialog(){
      //自定义逻辑
    }
  }
};

</script>

<style scoped>

</style>


 文章介绍了在Vue.js项目中如何通过点击按钮实现父组件向子组件传递事件,展示了一个包含按钮效果的父表和弹出使用记录、维修等子表的示例,以及如何在子表中进行表单验证和操作。


 7304
7304

 被折叠的 条评论
为什么被折叠?


