


重点标识
条件注解,顾名思义,满足条件的情况下,才会生效。
条件满足的时候,bean才会被注册到Spring容器中。
自定义条件注解案例。
开发,测试,生产多环境切换案例。
自定义多环境切换案例。
案例演示
这里以动物叫声来进行演示,简单点,分为猫和狗都实现了叫声的接口,也都想要注入Spring容器中,但是到底要注入哪一个呢,有条件来决定。
接口
public interface Animal {
    String call();
}
实现类
public class Dog implements Animal{
    @Override
    public String call() {
        return "汪汪汪!";
    }
}


public class CatCondition implements Condition {

    @Override
    public boolean matches(ConditionContext context, AnnotatedTypeMetadata metadata) {
        return true;
    }
}
进行条件判断,注意,这里简单点,只是为了表达条件注解的意思,实现了Condition接口后,实现它里面的matches方法,返回为true,则代表条件通过,反之就是不通过,大家可以自己发挥。
public class CatCondition implements Condition {

    @Override
    public boolean matches(ConditionContext context, AnnotatedTypeMetadata metadata) {
        return true;
    }
}
public class DogCondition implements Condition {

    @Override
    public boolean matches(ConditionContext context, AnnotatedTypeMetadata metadata) {
        return false;
    }
}
进行配置,注入Spring容器,注意,这里的@Conditional()注解,就是条件注解,而且,必须条件为true,他才会注入到Spring容器中,而不是都注入了,再根据条件去获取。
@Configuration
public class JavaConfig {

    @Bean
    @Conditional(DogCondition.class)
    Animal dog(){
        return new Dog();
    }

    @Bean
    @Conditional(CatCondition.class)
    Animal cat(){
        return new Cat();
    }
}

```测试类
```java

public class Test {
    public static void main(String[] args) {
        AnnotationConfigApplicationContext ant = new AnnotationConfigApplicationContext(JavaConfig.class);
        Animal bean = ant.getBean(Animal.class);
        System.out.println(bean.call());
    }
}
自然,这里输出的就是猫的叫声了。
在java日常开发中,我们常用的是多环境切换,实际上就是条件注解的plus版,这里可以写一个简单的例子,深入学习一下。
先准备一个DatsSource类,作为数据源
public class DataSource {

    private String url;
    private String username;
    private String password;


    @Override
    public String toString() {
        return "DataSource{" +
                "url='" + url + '\'' +
                ", username='" + username + '\'' +
                ", password='" + password + '\'' +
                '}';
    }

    public DataSource() {
    }

    public DataSource(String url, String username, String password) {
        this.url = url;
        this.username = username;
        this.password = password;
    }
}
进行注入,注意这次使用了环境切换注解,也就是@profile(),指定环境。
@Configuration
public class JavaConfig {
    @Bean
    @Profile("dev")
    DataSource dev(){
        return new DataSource("jdbc:///dev","dev","dev");
    }
    @Bean
    @Profile("prod")
    DataSource prod(){
        return new DataSource("jdbc:///prod","prod","prod");
    }
 }
进行测试,这里需要注意,不能像之前那样,直接加载配置文件了,因为加载配置文件,就会初始化容器注入,bean因为条件没有一个满足的,所以两个都不是注入容器。
这里进行指定环境,然后再加载配置文件,最后刷新容器,就能拿到对应的值了。
    public static void main(String[] args) {
        AnnotationConfigApplicationContext ant = new AnnotationConfigApplicationContext();
        ant.getEnvironment().addActiveProfile("dev");
        ant.register(JavaConfig.class);
        ant.refresh();

        DataSource bean = ant.getBean(DataSource.class);
        System.out.println(bean);
    }
可以进入到@Profile源码中看一下,我们可以发现,本质上还是@Conditional注解在起作用。
最后,我们可以模仿官方的profile自己写一个myprofile来验证一下猜想。
新建一个注解类。
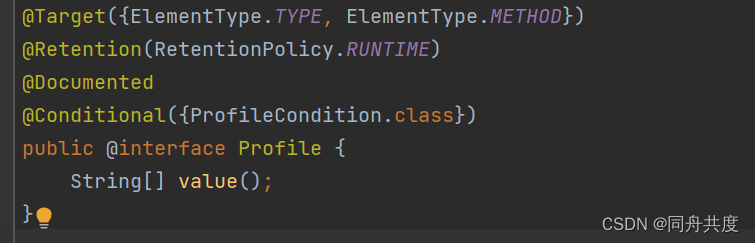
@Target({ElementType.TYPE, ElementType.METHOD})
@Retention(RetentionPolicy.RUNTIME)
@Documented
@Conditional({MyProfileCondition.class})
public @interface MyProfile {

    String[] en();
}
自定义MyProfileCondition,这里需要注意,matadata后面那部分,实际上就是找到JavaConfig配置中,使用了MyProfile注解的bean,后面则是迭代并把en属性提取出来。
public class MyProfileCondition implements Condition {
    @Override
    public boolean matches(ConditionContext context, AnnotatedTypeMetadata metadata) {
        MultiValueMap<String, Object> attrs = metadata.getAllAnnotationAttributes(MyProfile.class.getName());
        if (attrs != null) {
            Iterator var4 = ((List)attrs.get("en")).iterator();

            Object value;
            do {
                if (!var4.hasNext()) {
                    return false;
                }

                value = var4.next();
            } while(!context.getEnvironment().matchesProfiles((String[])value));

            return true;
        } else {
            return true;
        }
    }
}
完了之后,在JavaConfig中进行配置,实际上和profile没什么区别,如下:
@Configuration
public class JavaConfig {


    @Bean
    @MyProfile(en="dev")
    DataSource dev(){
        System.out.println("dev");
        return new DataSource("jdbc:///dev","dev","dev");
    }
    @Bean
    @MyProfile(en="prod")
    DataSource prod(){
        System.out.println("prod");
        return new DataSource("jdbc:///prod","prod","prod");
    }
进行测试,结果自然是ok的。
public static void main(String[] args) {
        AnnotationConfigApplicationContext ant = new AnnotationConfigApplicationContext();
        ant.getEnvironment().addActiveProfile("dev");
        ant.register(JavaConfig.class);
        ant.refresh();

        DataSource bean = ant.getBean(DataSource.class);
        System.out.println(bean);
    }


 680
680


 被折叠的 条评论
为什么被折叠?
被折叠的 条评论
为什么被折叠?
 到【灌水乐园】发言


