


重点标识
HttpFirewall是Spring Security提供的防火墙,主要作用就是拒绝潜在危险请求以及包装这些请求,进而控制的行为。
通过HttpFirewall可以对非法请求提前进行拦截,降低损失。
简单模式
严格模式
简介
我们知道,在Servlet容器规范中,为HttpServletRequest定义了一些属性,如ContextPath.ServletPath等,这些属性我们都可以通过get方法获得,但是,在不同的容器中,对这些属性的值处理方案也不同,有些容器会对属性的值进行预处理,有些则不会,这样就比较混乱了,不同容器的差异,有可能会造成不安全的隐患。
因此,Spring Security就提供了HttpFirewall来统一进行管理。
public interface HttpFirewall {

//对请求对象进行检验并封装
    FirewalledRequest getFirewalledRequest(HttpServletRequest request) throws RequestRejectedException;
//对返回对象进行封装
    HttpServletResponse getFirewalledResponse(HttpServletResponse response);
}
主要有两个实现类。
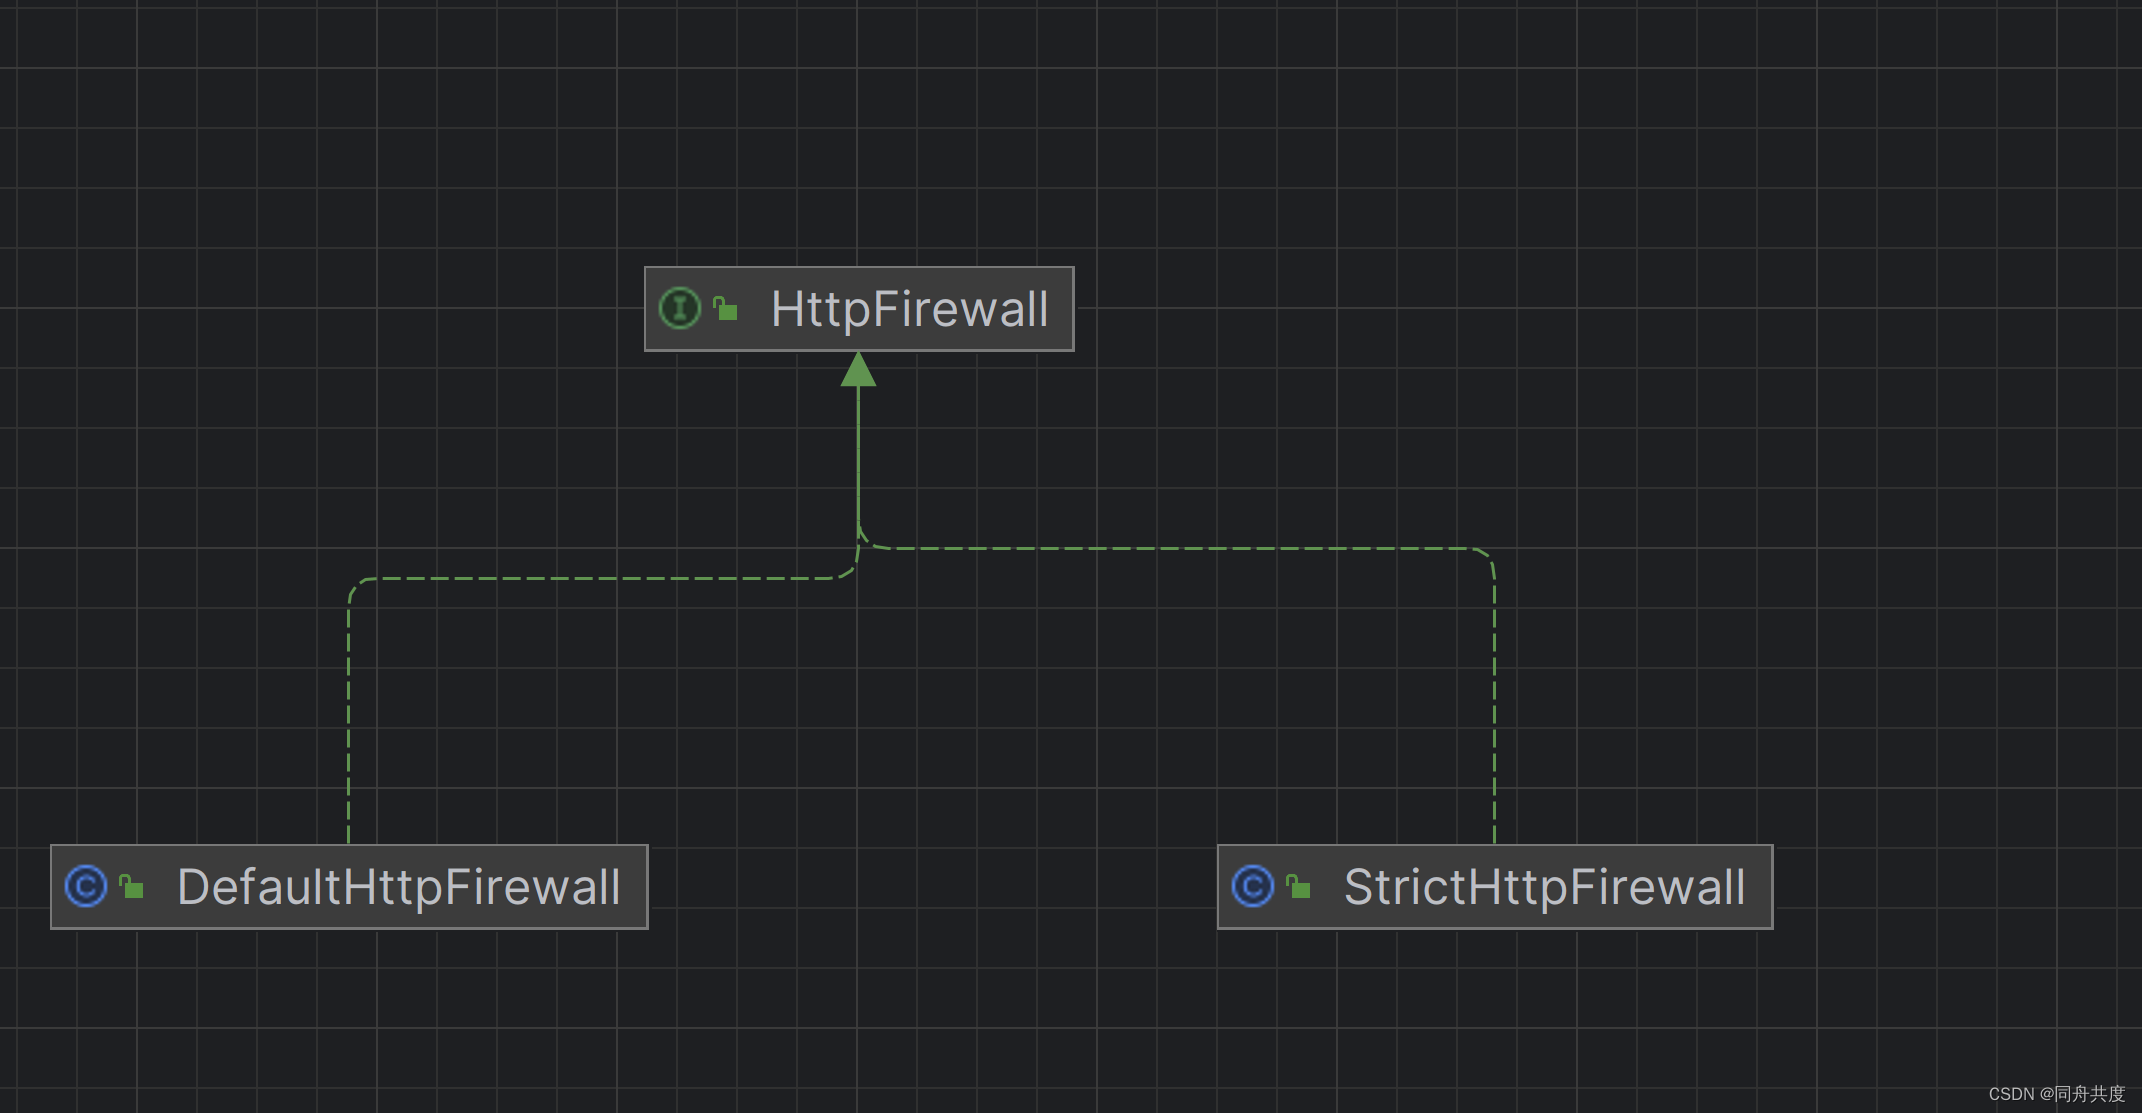
DefaultHttpFirewall是一个检查相对宽容的防火墙,虽然叫做default,但实际上Security默认使用的防火墙不是它。
StrictHttpFirewall 是一个检查比较严格的防火墙,也是Security默认使用的防火墙。
在FilterChainProxy中默认使用的就是StrictHttpFirewall 。会话固定攻击的防御就是在这里实现的。
在它的doFilter方法中,如下
 public void doFilter(ServletRequest request, ServletResponse response, FilterChain chain) throws IOException, ServletException {
        boolean clearContext = request.getAttribute(FILTER_APPLIED) == null;
        if (!clearContext) {
            this.doFilterInternal(request, response, chain);
        } else {
            try {
                request.setAttribute(FILTER_APPLIED, Boolean.TRUE);
                this.doFilterInternal(request, response, chain);
            } catch (Exception var11) {
                Throwable[] causeChain = this.throwableAnalyzer.determineCauseChain(var11);
                Throwable requestRejectedException = this.throwableAnalyzer.getFirstThrowableOfType(RequestRejectedException.class, causeChain);
                if (!(requestRejectedException instanceof RequestRejectedException)) {
                    throw var11;
                }

                this.requestRejectedHandler.handle((HttpServletRequest)request, (HttpServletResponse)response, (RequestRejectedException)requestRejectedException);
            } finally {
                this.securityContextHolderStrategy.clearContext();
                request.removeAttribute(FILTER_APPLIED);
            }

        }
    }
使用了doFilterInternal,这个里面:
 private void doFilterInternal(ServletRequest request, ServletResponse response, FilterChain chain) throws IOException, ServletException {
  //  firewall 就是StrictHttpFirewall
        FirewalledRequest firewallRequest = this.firewall.getFirewalledRequest((HttpServletRequest)request);
        HttpServletResponse firewallResponse = this.firewall.getFirewalledResponse((HttpServletResponse)response);

        List<Filter> filters = this.getFilters((HttpServletRequest)firewallRequest);
        if (filters != null && filters.size() != 0) {
            if (logger.isDebugEnabled()) {
                logger.debug(LogMessage.of(() -> {
                    return "Securing " + requestLine(firewallRequest);
                }));
            }

            FilterChain reset = (req, res) -> {
                if (logger.isDebugEnabled()) {
                    logger.debug(LogMessage.of(() -> {
                        return "Secured " + requestLine(firewallRequest);
                    }));
                }

                firewallRequest.reset();
                chain.doFilter(req, res);
            };
            this.filterChainDecorator.decorate(reset, filters).doFilter(firewallRequest, firewallResponse);
        } else {
            if (logger.isTraceEnabled()) {
                logger.trace(LogMessage.of(() -> {
                    return "No security for " + requestLine(firewallRequest);
                }));
            }

            firewallRequest.reset();
            this.filterChainDecorator.decorate(chain).doFilter(firewallRequest, firewallResponse);
        }
    }
从这里,我们可以看到firewall的判断时间比过滤器更早。
我们看看firewall做了什么什么事。
相关日志打印开关:
logging.level.org.springframework.security=debug
简单模式DefaultHttpFirewall
这个方法就比较简单了,把请求中的//转成/。同时将请求中分号间隔的提取出来,只保留路径。不建议使用。
public FirewalledRequest getFirewalledRequest(HttpServletRequest request) throws RequestRejectedException {
        FirewalledRequest firewalledRequest = new RequestWrapper(request);
        if (this.isNormalized(firewalledRequest.getServletPath()) && this.isNormalized(firewalledRequest.getPathInfo())) {
            String requestURI = firewalledRequest.getRequestURI();
            if (this.containsInvalidUrlEncodedSlash(requestURI)) {
                throw new RequestRejectedException("The requestURI cannot contain encoded slash. Got " + requestURI);
            } else {
                return firewalledRequest;
            }
        } else {
            String var10002 = firewalledRequest.getServletPath();
            throw new RequestRejectedException("Un-normalized paths are not supported: " + var10002 + (firewalledRequest.getPathInfo() != null ? firewalledRequest.getPathInfo() : ""));
        }
    }
严格模式StrictHttpFirewall
 private void rejectForbiddenHttpMethod(HttpServletRequest request) {
 //支持的请求方式
        if (this.allowedHttpMethods != ALLOW_ANY_HTTP_METHOD) {
            if (!this.allowedHttpMethods.contains(request.getMethod())) {
                String var10002 = request.getMethod();
                throw new RequestRejectedException("The request was rejected because the HTTP method \"" + var10002 + "\" was not included within the list of allowed HTTP methods " + this.allowedHttpMethods);
            }
        }
    }
默认支持如下的请求方式
private static Set<String> createDefaultAllowedHttpMethods() {
        Set<String> result = new HashSet();
        result.add(HttpMethod.DELETE.name());
        result.add(HttpMethod.GET.name());
        result.add(HttpMethod.HEAD.name());
        result.add(HttpMethod.OPTIONS.name());
        result.add(HttpMethod.PATCH.name());
        result.add(HttpMethod.POST.name());
        result.add(HttpMethod.PUT.name());
        return result;
    }
让他只能使用post或者get访问,只需要这样配置:
    @Bean
    HttpFirewall firewall(){
        StrictHttpFirewall strictHttpFirewall = new StrictHttpFirewall();
        strictHttpFirewall.setAllowedHttpMethods(Arrays.asList("POST","GET"));
        return strictHttpFirewall;
    }
允许所有请求方式,则如下
 @Bean
    HttpFirewall firewall(){
        StrictHttpFirewall strictHttpFirewall = new StrictHttpFirewall();
//        strictHttpFirewall.setAllowedHttpMethods(Arrays.asList("POST","GET"));
        //允许所有请求
        strictHttpFirewall.setUnsafeAllowAnyHttpMethod(true);
        return strictHttpFirewall;
    }
对地址中的非法字符进行校验
private void rejectedBlocklistedUrls(HttpServletRequest request) {
        Iterator var2 = this.encodedUrlBlocklist.iterator();

        String forbidden;
        do {
            if (!var2.hasNext()) {
                var2 = this.decodedUrlBlocklist.iterator();

                do {
                    if (!var2.hasNext()) {
                        return;
                    }

                    forbidden = (String)var2.next();
                } while(!decodedUrlContains(request, forbidden));

                throw new RequestRejectedException("The request was rejected because the URL contained a potentially malicious String \"" + forbidden + "\"");
            }

            forbidden = (String)var2.next();
        } while(!encodedUrlContains(request, forbidden));

        throw new RequestRejectedException("The request was rejected because the URL contained a potentially malicious String \"" + forbidden + "\"");
    }
常用的一些配置。
 @Bean
    HttpFirewall firewall(){
        StrictHttpFirewall strictHttpFirewall = new StrictHttpFirewall();
//        strictHttpFirewall.setAllowedHttpMethods(Arrays.asList("POST","GET"));
        //允许所有请求
        strictHttpFirewall.setUnsafeAllowAnyHttpMethod(true);
       //是否允许分号
        strictHttpFirewall.setAllowSemicolon(true);

        //允许访问的地址
        strictHttpFirewall.setAllowedHostnames(h -> h.equals("localhost"));
        return strictHttpFirewall;
    }
检查请求是否规范
  private static boolean isNormalized(HttpServletRequest request) {
        if (!isNormalized(request.getRequestURI())) {
            return false;
        } else if (!isNormalized(request.getContextPath())) {
            return false;
        } else if (!isNormalized(request.getServletPath())) {
            return false;
        } else {
            return isNormalized(request.getPathInfo());
        }
    }


 866
866


 被折叠的 条评论
为什么被折叠?
被折叠的 条评论
为什么被折叠?
 到【灌水乐园】发言


