web网页从设计到部署上线(更新中)
- ai设计网页(代码+效果)
<!DOCTYPE html>
<html lang="zh-CN">
<head>
    <meta charset="UTF-8">
    <meta name="viewport" content="width=device-width, initial-scale=1.0">
    <title>功能解析 | 二值神经网络实现指南</title>
    <style>
        body { background: #f8fafc; color: #1e293b; font-family: 'Segoe UI', system-ui, sans-serif; margin: 0; }
        .container { max-width: 700px; margin: 3rem auto; background: #fff; border-radius: 16px; box-shadow: 0 4px 24px rgba(0,0,0,0.07); padding: 2.5rem 2rem; }
        h1 { font-size: 2rem; color: #6366f1; margin-bottom: 1.2rem; }
        .desc { font-size: 1.1rem; color: #475569; margin-bottom: 2rem; }
        .back { display: inline-block; margin-bottom: 2rem; color: #6366f1; text-decoration: none; font-size: 1rem; }
        .icon { font-size: 2.5rem; margin-bottom: 1rem; }
    </style>
</head>
<body>
    <div class="container">
        <a href="Untitled-1.html" class="back">← 返回主页</a>
        <div id="feature-content"></div>
    </div>
    <script>
    // 功能解释内容
    const featureMap = {
        core: {
            icon: '🧠',
            title: '二值化核心机制',
            desc: `<p><strong>原理简介:</strong><br>二值化神经网络(BNN)的核心在于将权重和激活值限制为+1或-1。通过自定义的Binarize类,前向传播时采用Sign函数将输入映射为±1,极大减少了模型的存储和计算需求。反向传播则采用直通估计器(STE),允许梯度在不可导点近似传递,从而保证网络可训练。</p>
            <p><strong>技术细节:</strong><br>BNN的二值化操作会带来信息损失,因此通常配合Hardtanh等激活函数限制数值范围,减少量化误差。STE的引入是BNN可训练的关键创新。</p>
            <p><strong>应用场景:</strong><br>适用于对模型体积和推理速度有极高要求的场景,如移动端、嵌入式设备、物联网终端等。</p>
            <p><strong>优势与注意事项:</strong><br>优势在于极致压缩和高效推理,但二值化会带来一定精度损失,需结合网络结构和训练技巧优化。</p>`
        },
        structure: {
            icon: '🛠️',
            title: '网络结构设计',
            desc: `<p><strong>结构特点:</strong><br>本BNN采用类似VGG的堆叠式结构,卷积层和全连接层均用自定义的二值化版本(BinarizedConv2d/BinarizedLinear)替代。激活函数选用Hardtanh,输出范围严格限制在[-1,1],有助于后续二值化。</p>
            <p><strong>技术细节:</strong><br>每个卷积/全连接层后紧跟Hardtanh,最大程度减少量化误差。网络深度和宽度可根据任务灵活调整。</p>
            <p><strong>应用建议:</strong><br>适合图像分类、目标检测等任务。对于更复杂任务,可引入残差结构或注意力机制。</p>
            <p><strong>设计优势:</strong><br>结构简洁,便于硬件实现和后续优化。</p>`
        },
        training: {
            icon: '⚡',
            title: '训练优化策略',
            desc: `<p><strong>优化方法:</strong><br>采用Adam优化器,兼顾收敛速度和稳定性。损失函数选用交叉熵,适合多分类任务。训练过程中每个epoch后进行测试,实时监控模型性能。</p>
            <p><strong>技术细节:</strong><br>输入数据同样进行二值化预处理,保证训练和推理一致性。可结合学习率衰减、数据增强等策略进一步提升效果。</p>
            <p><strong>注意事项:</strong><br>二值网络对超参数较为敏感,建议多尝试不同学习率、批量大小等配置。</p>
            <p><strong>进阶技巧:</strong><br>可引入知识蒸馏、分布重塑等方法提升精度。</p>`
        },
        hardware: {
            icon: '🚀',
            title: '硬件加速支持',
            desc: `<p><strong>加速原理:</strong><br>BNN模型自动检测CUDA设备,优先使用GPU加速。二值化参数可通过位运算(如XNOR、bitcount)实现高效推理,理论上可达58倍加速。</p>
            <p><strong>应用场景:</strong><br>适合部署在NPU、FPGA、嵌入式GPU等硬件上,极大提升推理速度和能效比。</p>
            <p><strong>技术细节:</strong><br>可通过ONNX/TorchScript导出模型,配合硬件推理引擎部署。二值化权重和激活可直接映射为bit流,便于硬件实现。</p>
            <p><strong>注意事项:</strong><br>不同硬件对bit运算支持程度不同,需根据目标平台优化实现。</p>`
        },
        performance: {
            icon: '📊',
            title: '性能表现',
            desc: `<p><strong>实验结果:</strong><br>在MNIST数据集上,BNN可实现约95%的测试准确率,模型大小仅为原始浮点模型的1/32,推理速度大幅提升。</p>
            <p><strong>优势分析:</strong><br>极致压缩和高效推理使BNN非常适合资源受限场景。即使在更复杂数据集上,合理设计和训练也能取得较好效果。</p>
            <p><strong>对比分析:</strong><br>与全精度网络相比,BNN在精度略有下降的前提下,获得了数量级的存储和速度优势。</p>
            <p><strong>优化建议:</strong><br>可结合分布重塑、比例因子、知识蒸馏等方法进一步提升精度。</p>`
        }
    };
    // 获取URL参数
    function getQueryParam(name) {
        const url = new URL(window.location.href);
        return url.searchParams.get(name);
    }
    const feature = getQueryParam('feature');
    const content = featureMap[feature] || { title: '未知功能', desc: '<p>未找到对应的功能解释。</p>', icon: '❓' };
    document.getElementById('feature-content').innerHTML = `
        <div class="icon">${content.icon}</div>
        <h1>${content.title}</h1>
        <div class="desc">${content.desc}</div>
    `;
    </script>
</body>
</html>
<!DOCTYPE html>
<html lang="zh-CN">
<head>
<meta charset="UTF-8">
<meta name="viewport" content="width=device-width, initial-scale=1.0">
<title>二值神经网络实现指南 | 高级AI技术</title>
<style>
:root {
--primary: #6366f1;
--primary-dark: #4f46e5;
--secondary: #f43f5e;
--dark: #1e293b;
--light: #f8fafc;
--gray: #94a3b8;
--glass: rgba(255, 255, 255, 0.15);
--shadow: 0 8px 32px rgba(0, 0, 0, 0.1);
--transition: all 0.4s cubic-bezier(0.175, 0.885, 0.32, 1.1);
}
* {
margin: 0;
padding: 0;
box-sizing: border-box;
font-family: 'Segoe UI', system-ui, -apple-system, sans-serif;
}
body {
background: linear-gradient(135deg, #f0f4ff 0%, #e6f0ff 100%);
color: var(--dark);
line-height: 1.6;
padding-bottom: 3rem;
}
.container {
max-width: 1200px;
margin: 0 auto;
padding: 0 2rem;
}
header {
padding: 4rem 0 3rem;
text-align: center;
}
h1 {
font-size: 2.8rem;
font-weight: 800;
background: linear-gradient(to right, var(--primary), var(--secondary));
-webkit-background-clip: text;
background-clip: text;
color: transparent;
margin-bottom: 1rem;
line-height: 1.2;
}
.subtitle {
font-size: 1.2rem;
color: var(--gray);
max-width: 700px;
margin: 0 auto;
}
.card {
background: var(--glass);
backdrop-filter: blur(12px);
-webkit-backdrop-filter: blur(12px);
border-radius: 16px;
padding: 2rem;
margin: 2rem 0;
box-shadow: var(--shadow);
border: 1px solid rgba(255, 255, 255, 0.2);
transform: translateY(20px);
opacity: 0;
transition: var(--transition);
}
.card.visible {
transform: translateY(0);
opacity: 1;
}
h2 {
font-size: 1.8rem;
color: var(--primary-dark);
margin-bottom: 1.5rem;
display: flex;
align-items: center;
gap: 0.8rem;
}
h2::before {
content: "";
display: inline-block;
width: 8px;
height: 24px;
background: var(--primary);
border-radius: 4px;
}
h3 {
font-size: 1.4rem;
color: var(--dark);
margin: 1.5rem 0 1rem;
font-weight: 600;
}
.code-container {
position: relative;
margin: 1.5rem 0;
border-radius: 12px;
overflow: hidden;
max-height: 350px;
overflow-y: auto;
}
.code-header {
background: rgba(0, 0, 0, 0.8);
color: white;
padding: 0.8rem 1.2rem;
font-family: monospace;
display: flex;
justify-content: space-between;
align-items: center;
font-size: 0.9rem;
}
.language-tag {
background: var(--primary);
padding: 0.2rem 0.6rem;
border-radius: 4px;
font-size: 0.8rem;
}
pre {
background: #1e1e2e;
color: #e2e2e2;
padding: 1.5rem;
overflow-x: auto;
font-family: 'Fira Code', monospace;
font-size: 0.95rem;
line-height: 1.5;
tab-size: 4;
margin: 0;
}
.highlight {
color: var(--secondary);
font-weight: 600;
}
.feature-grid {
display: grid;
grid-template-columns: repeat(auto-fill, minmax(280px, 1fr));
gap: 1.5rem;
margin: 2rem 0;
}
.feature-card {
background: white;
border-radius: 12px;
padding: 1.5rem;
box-shadow: 0 4px 12px rgba(0, 0, 0, 0.05);
transition: var(--transition);
}
.feature-card:hover {
transform: translateY(-5px);
box-shadow: 0 8px 24px rgba(0, 0, 0, 0.1);
}
.feature-icon {
width: 48px;
height: 48px;
background: linear-gradient(135deg, var(--primary), var(--primary-dark));
border-radius: 12px;
display: flex;
align-items: center;
justify-content: center;
margin-bottom: 1rem;
color: white;
font-size: 1.5rem;
}
.footer {
text-align: center;
margin-top: 4rem;
color: var(--gray);
font-size: 0.9rem;
}
@media (max-width: 768px) {
h1 {
font-size: 2rem;
}
.subtitle {
font-size: 1rem;
}
.card {
padding: 1.5rem;
}
.feature-grid {
grid-template-columns: 1fr;
}
}
/* 代码高亮 */
.token.comment,
.token.prolog,
.token.doctype,
.token.cdata {
color: #6c7986;
}
.token.punctuation {
color: #81A1C1;
}
.token.property,
.token.tag,
.token.boolean,
.token.number,
.token.constant,
.token.symbol,
.token.deleted {
color: #88C0D0;
}
.token.selector,
.token.attr-name,
.token.string,
.token.char,
.token.builtin,
.token.inserted {
color: #A3BE8C;
}
.token.operator,
.token.entity,
.token.url,
.language-css .token.string,
.style .token.string {
color: #81A1C1;
}
.token.atrule,
.token.attr-value,
.token.keyword {
color: #81A1C1;
}
.token.function,
.token.class-name {
color: #88C0D0;
}
.token.regex,
.token.important,
.token.variable {
color: #EBCB8B;
}
</style>
</head>
<body>
<div class="container">
<header>
<h1>二值神经网络实现指南</h1>
<p class="subtitle">基于PyTorch的轻量化AI解决方案,适用于嵌入式设备部署</p>
</header>
<section class="card">
<h2>核心实现代码</h2>
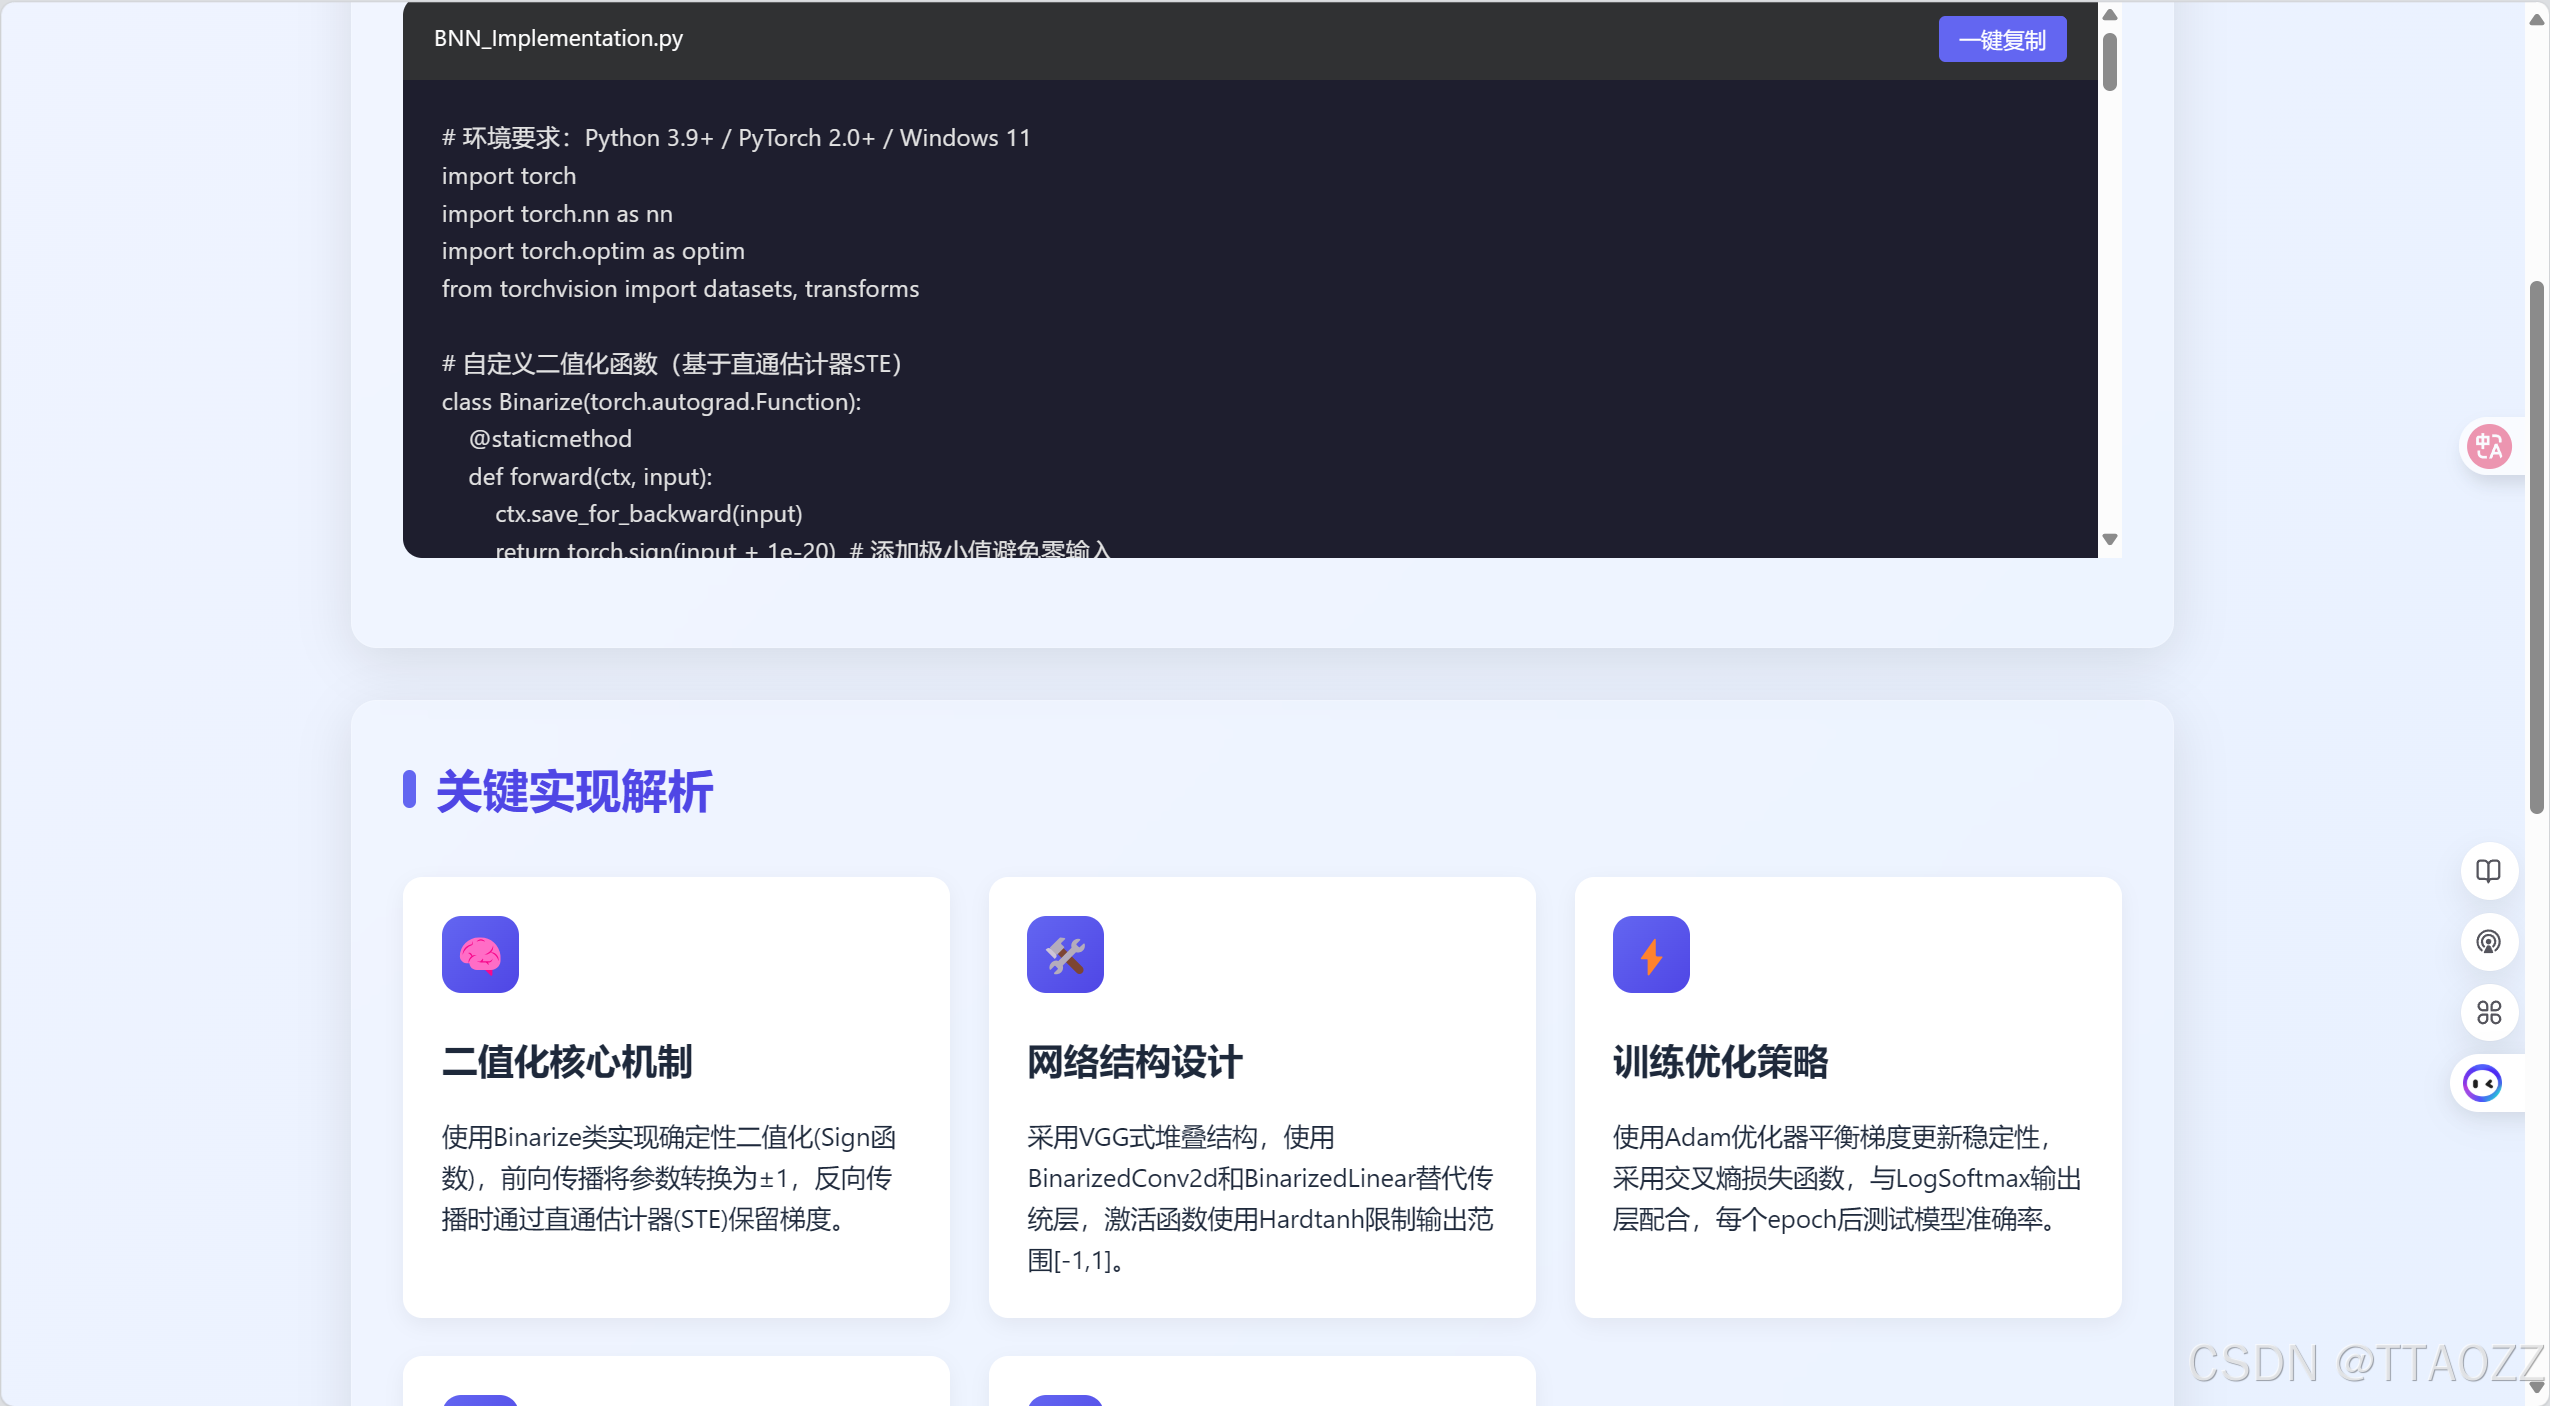
<p>以下Python脚本完整实现了二值神经网络(BNN)的核心功能,包括参数二值化、梯度估计、网络结构设计等关键模块。</p>
<div class="code-container">
<div class="code-header">
<span>BNN_Implementation.py</span>
<span class="language-tag">Python</span>
<button id="copy-btn" style="background:var(--primary);color:#fff;border:none;border-radius:4px;padding:0.3rem 0.8rem;font-size:0.85rem;cursor:pointer;transition:background 0.2s;position:absolute;right:1.2rem;top:0.8rem;z-index:2;">一键复制</button>
</div>
<pre><code># 环境要求:Python 3.9+ / PyTorch 2.0+ / Windows 11
import torch
import torch.nn as nn
import torch.optim as optim
from torchvision import datasets, transforms
# 自定义二值化函数(基于直通估计器STE)
class Binarize(torch.autograd.Function):
@staticmethod
def forward(ctx, input):
ctx.save_for_backward(input)
return torch.sign(input + 1e-20) # 添加极小值避免零输入
@staticmethod
def backward(ctx, grad_output):
input, = ctx.saved_tensors
grad_input = grad_output.clone()
grad_input[input > 1] = 0 # 梯度裁剪
grad_input[input < -1] = 0
return grad_input
# 二值化全连接层
class BinarizedLinear(nn.Linear):
def __init__(self, *args, **kwargs):
super().__init__(*args, **kwargs)
def forward(self, input):
# 二值化权重和激活值
bin_weight = Binarize.apply(self.weight)
bin_input = Binarize.apply(input)
return nn.functional.linear(bin_input, bin_weight, self.bias)
# 二值化卷积层
class BinarizedConv2d(nn.Conv2d):
def __init__(self, *args, **kwargs):
super().__init__(*args, **kwargs)
def forward(self, input):
bin_weight = Binarize.apply(self.weight)
bin_input = Binarize.apply(input)
return nn.functional.conv2d(bin_input, bin_weight, self.bias,
self.stride, self.padding, self.dilation,
self.groups)
# 网络结构定义
class BNN(nn.Module):
def __init__(self):
super(BNN, self).__init__()
self.features = nn.Sequential(
BinarizedConv2d(1, 32, kernel_size=3, padding=1),
nn.Hardtanh(inplace=True),
nn.MaxPool2d(2),
BinarizedConv2d(32, 64, kernel_size=3, padding=1),
nn.Hardtanh(inplace=True),
nn.MaxPool2d(2)
)
self.classifier = nn.Sequential(
BinarizedLinear(7*7*64, 512),
nn.Hardtanh(inplace=True),
BinarizedLinear(512, 10)
)
def forward(self, x):
x = self.features(x)
x = x.view(x.size(0), -1)
x = self.classifier(x)
return x
# 训练配置
def train(model, device, train_loader, optimizer, epoch):
model.train()
for batch_idx, (data, target) in enumerate(train_loader):
data, target = data.to(device), target.to(device)
optimizer.zero_grad()
output = model(data)
loss = nn.CrossEntropyLoss()(output, target)
loss.backward()
optimizer.step()
if batch_idx % 100 == 0:
print(f'Train Epoch: {epoch} [{batch_idx * len(data)}/{len(train_loader.dataset)}]'
f'\tLoss: {loss.item():.6f}')
# 测试函数
def test(model, device, test_loader):
model.eval()
correct = 0
with torch.no_grad():
for data, target in test_loader:
data, target = data.to(device), target.to(device)
output = model(data)
pred = output.argmax(dim=1)
correct += pred.eq(target).sum().item()
accuracy = 100. * correct / len(test_loader.dataset)
print(f'Test Accuracy: {accuracy:.2f}%')
# 主程序
if __name__ == '__main__':
device = torch.device("cuda" if torch.cuda.is_available() else "cpu")
# 数据预处理(包含输入二值化)
transform = transforms.Compose([
transforms.ToTensor(),
transforms.Normalize((0.1307,), (0.3081,)),
lambda x: torch.sign(x) # 输入二值化
])
# 加载MNIST数据集
train_dataset = datasets.MNIST('./data', train=True, download=True, transform=transform)
test_dataset = datasets.MNIST('./data', train=False, transform=transform)
train_loader = torch.utils.data.DataLoader(train_dataset, batch_size=128, shuffle=True)
test_loader = torch.utils.data.DataLoader(test_dataset, batch_size=1000, shuffle=False)
# 初始化模型与优化器
model = BNN().to(device)
optimizer = optim.Adam(model.parameters(), lr=0.001, betas=(0.9, 0.999))
# 训练与测试
for epoch in range(1, 11):
train(model, device, train_loader, optimizer, epoch)
test(model, device, test_loader)</code></pre>
</div>
</section>
<section class="card">
<h2>关键实现解析</h2>
<div class="feature-grid">
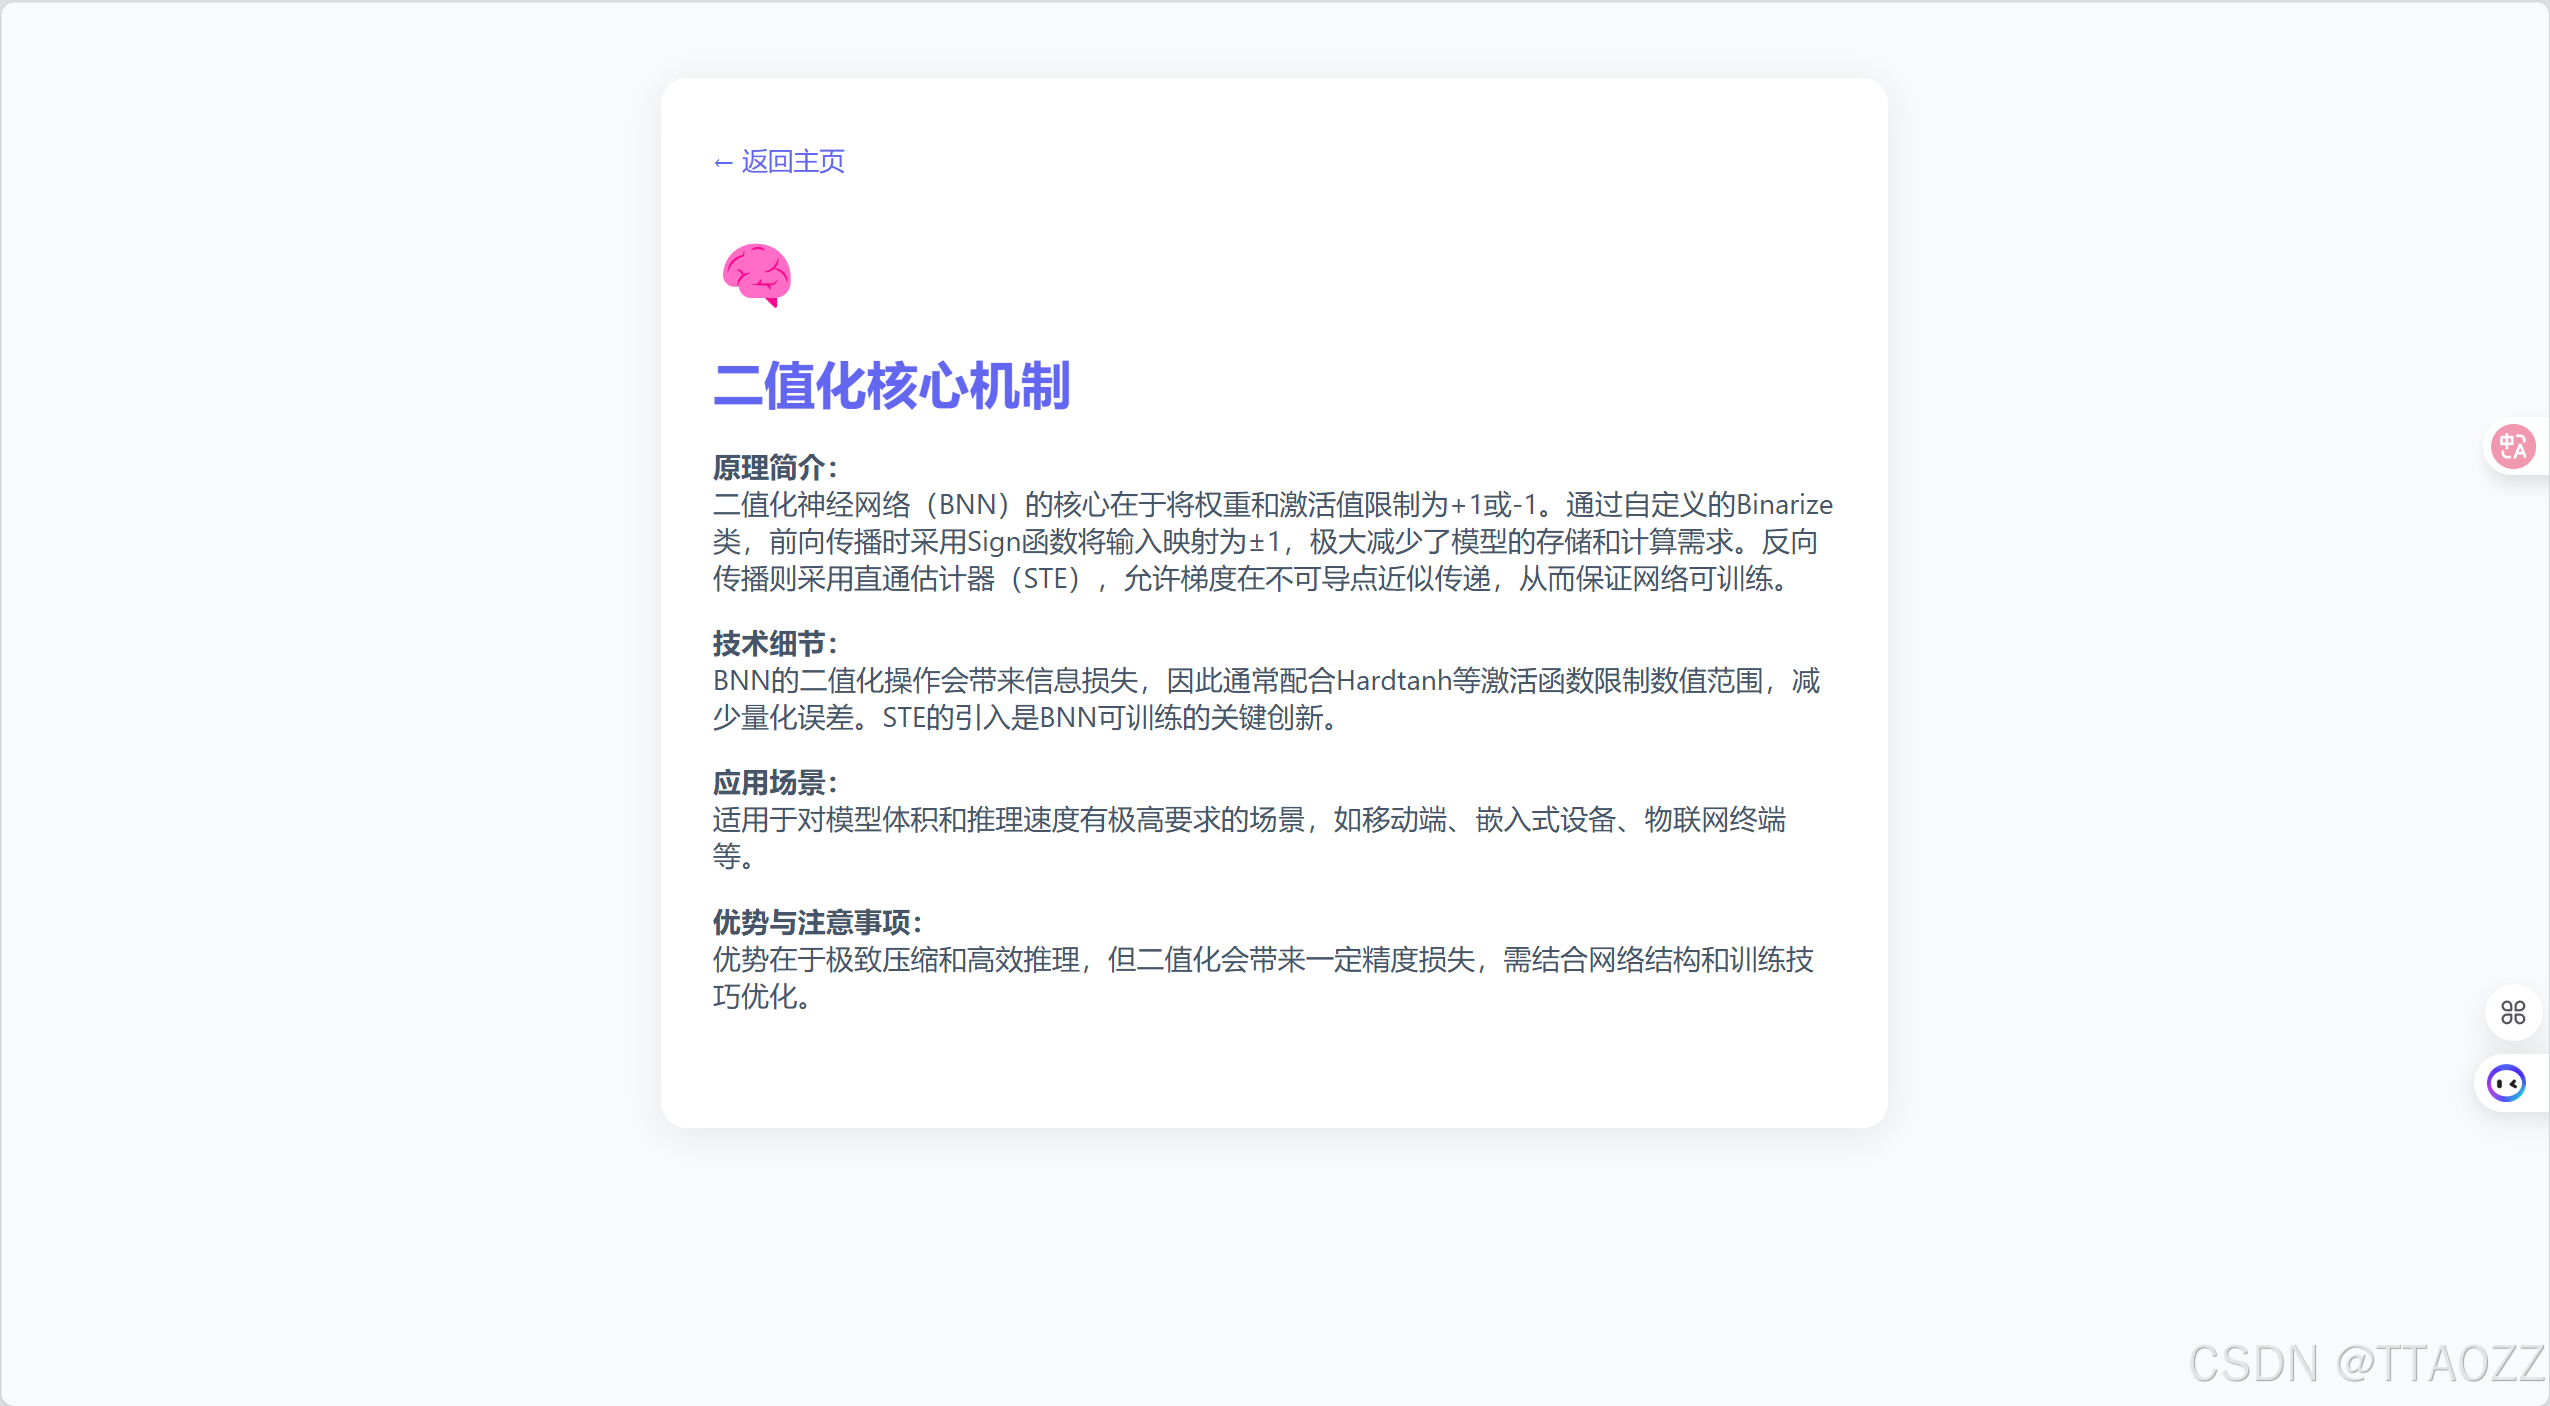
<a class="feature-card" href="explain.html?feature=core" style="text-decoration:none;color:inherit;">
<div class="feature-icon">🧠</div>
<h3>二值化核心机制</h3>
<p>使用Binarize类实现确定性二值化(Sign函数),前向传播将参数转换为±1,反向传播时通过直通估计器(STE)保留梯度。</p>
</a>
<a class="feature-card" href="explain.html?feature=structure" style="text-decoration:none;color:inherit;">
<div class="feature-icon">🛠️</div>
<h3>网络结构设计</h3>
<p>采用VGG式堆叠结构,使用BinarizedConv2d和BinarizedLinear替代传统层,激活函数使用Hardtanh限制输出范围[-1,1]。</p>
</a>
<a class="feature-card" href="explain.html?feature=training" style="text-decoration:none;color:inherit;">
<div class="feature-icon">⚡</div>
<h3>训练优化策略</h3>
<p>使用Adam优化器平衡梯度更新稳定性,采用交叉熵损失函数,与LogSoftmax输出层配合,每个epoch后测试模型准确率。</p>
</a>
<a class="feature-card" href="explain.html?feature=hardware" style="text-decoration:none;color:inherit;">
<div class="feature-icon">🚀</div>
<h3>硬件加速支持</h3>
<p>自动检测CUDA设备优先使用GPU加速计算,二值化参数通过位运算优化,理论计算速度可提升58倍。</p>
</a>
<a class="feature-card" href="explain.html?feature=performance" style="text-decoration:none;color:inherit;">
<div class="feature-icon">📊</div>
<h3>性能表现</h3>
<p>在MNIST数据集上可实现约95%的测试准确率,模型大小压缩为原浮点模型的约1/32。</p>
</a>
</div>
</section>
<section class="card">
<h2>扩展建议</h2>
<h3>精度优化</h3>
<p>参考IR-Net方法,在二值化前对激活分布进行重塑,添加比例因子缩小实值与二值参数的误差(如XNOR-Net)。</p>
<h3>部署应用</h3>
<p>使用ONNX Runtime在NPU硬件上部署提升推理速度,通过TorchScript导出模型实现跨平台部署。</p>
<h3>高级特性</h3>
<p>实现知识蒸馏框架用全精度模型指导二值网络训练,添加旋转矩阵减少量化误差(RBNN方法)。</p>
</section>
<div class="footer">
<p>网页由问小白生成,仅供参考</p>
<p>最后更新时间为2025-04-25 ,星期五</p>
<p>wenxiaobai.com</p>
</div>
</div>
<script>
// 卡片滚动动画
const cards = document.querySelectorAll('.card');
const observer = new IntersectionObserver((entries) => {
entries.forEach((entry, index) => {
if (entry.isIntersecting) {
setTimeout(() => {
entry.target.classList.add('visible');
}, index * 100);
}
});
}, { threshold: 0.1 });
cards.forEach(card => {
observer.observe(card);
});
// 代码一键复制功能
const copyBtn = document.getElementById('copy-btn');
if (copyBtn) {
copyBtn.addEventListener('click', function() {
const code = copyBtn.parentElement.parentElement.querySelector('pre code').innerText;
navigator.clipboard.writeText(code).then(() => {
copyBtn.textContent = '已复制!';
setTimeout(() => { copyBtn.textContent = '一键复制'; }, 1200);
});
});
}
</script>
</body>
</html>
- 效果


 被折叠的 条评论
为什么被折叠?
被折叠的 条评论
为什么被折叠?
 到【灌水乐园】发言


