


本文章以STM32G431RBT6为例。
先在STM32官网下载CubeIDE的安装包,选择Mac版本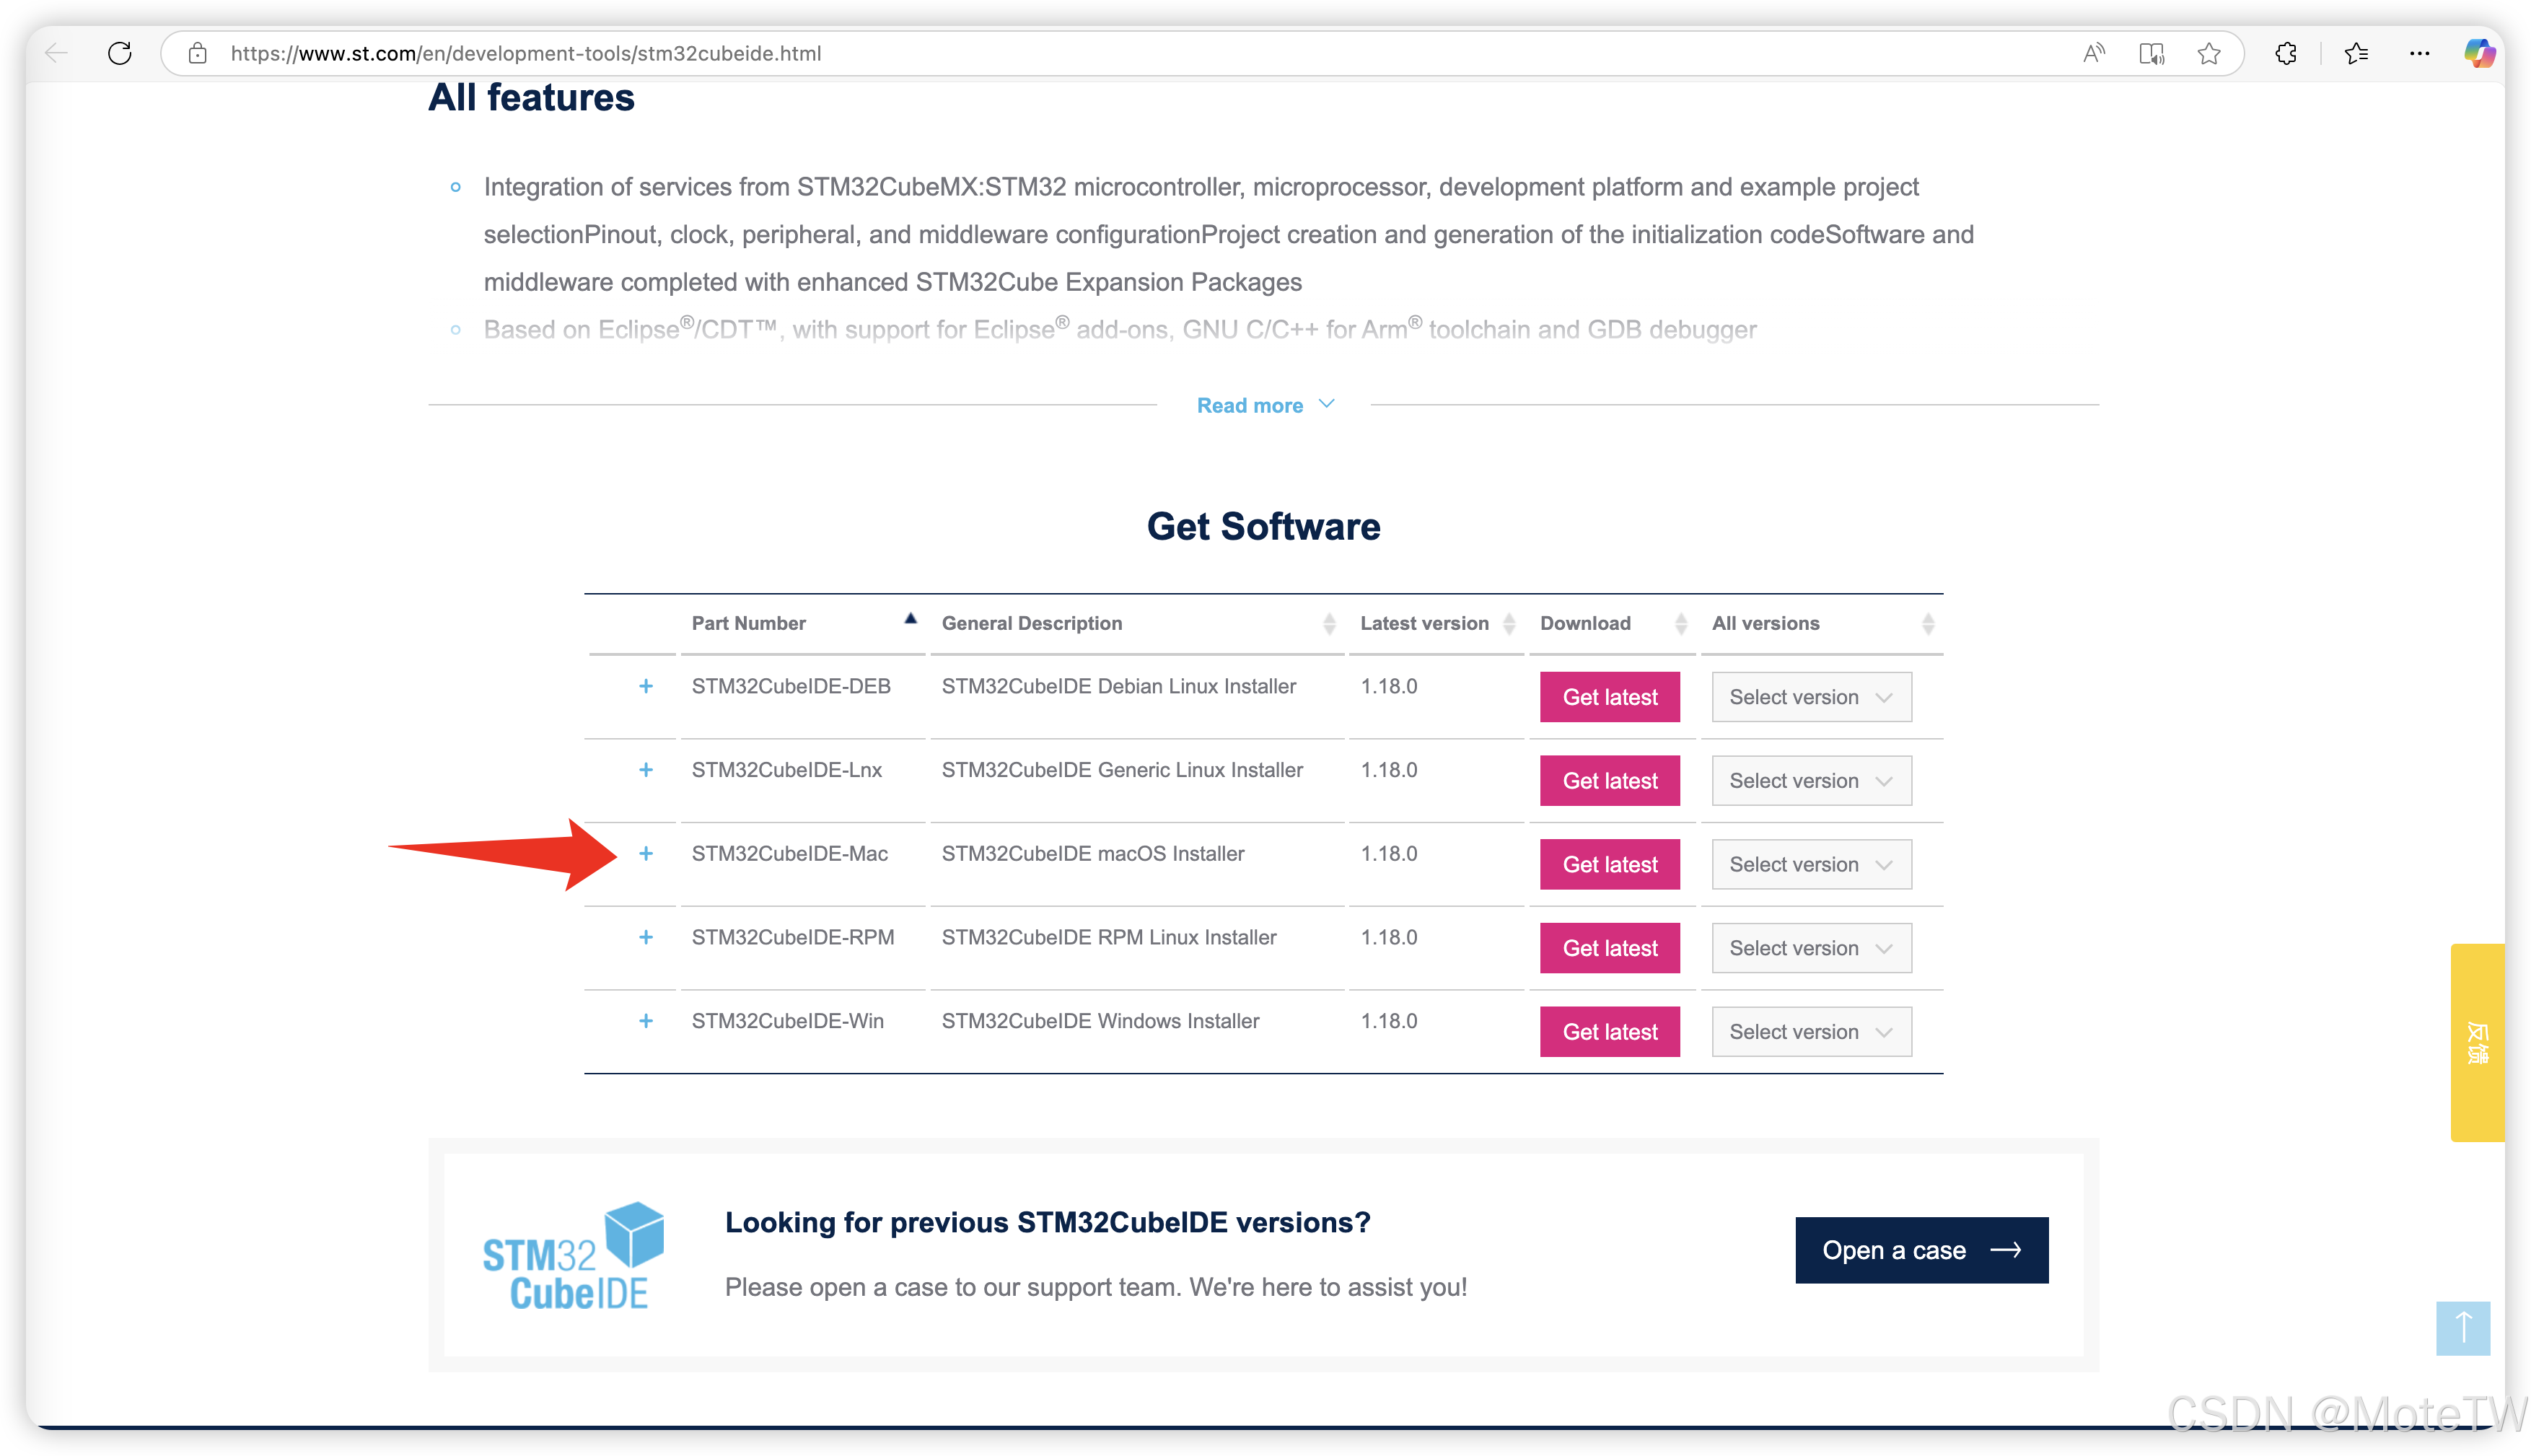
下载好之后安装打开点击File,STM32Project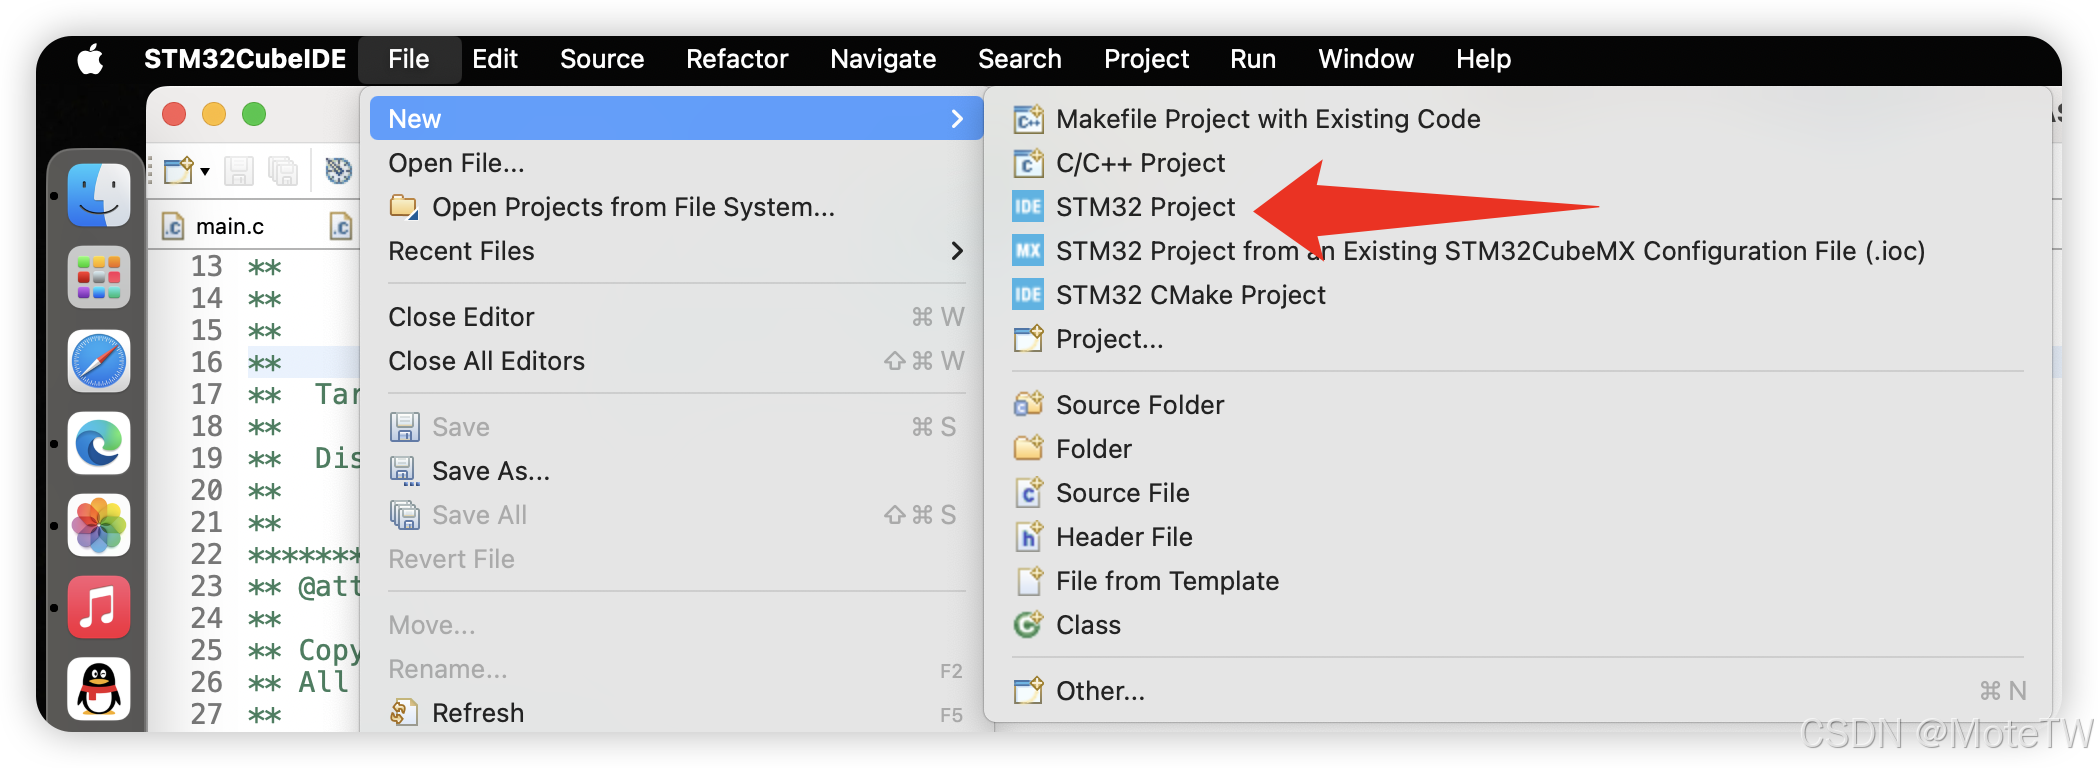
选择对应的单片机芯片型号,这里以STM32G431RBT6为例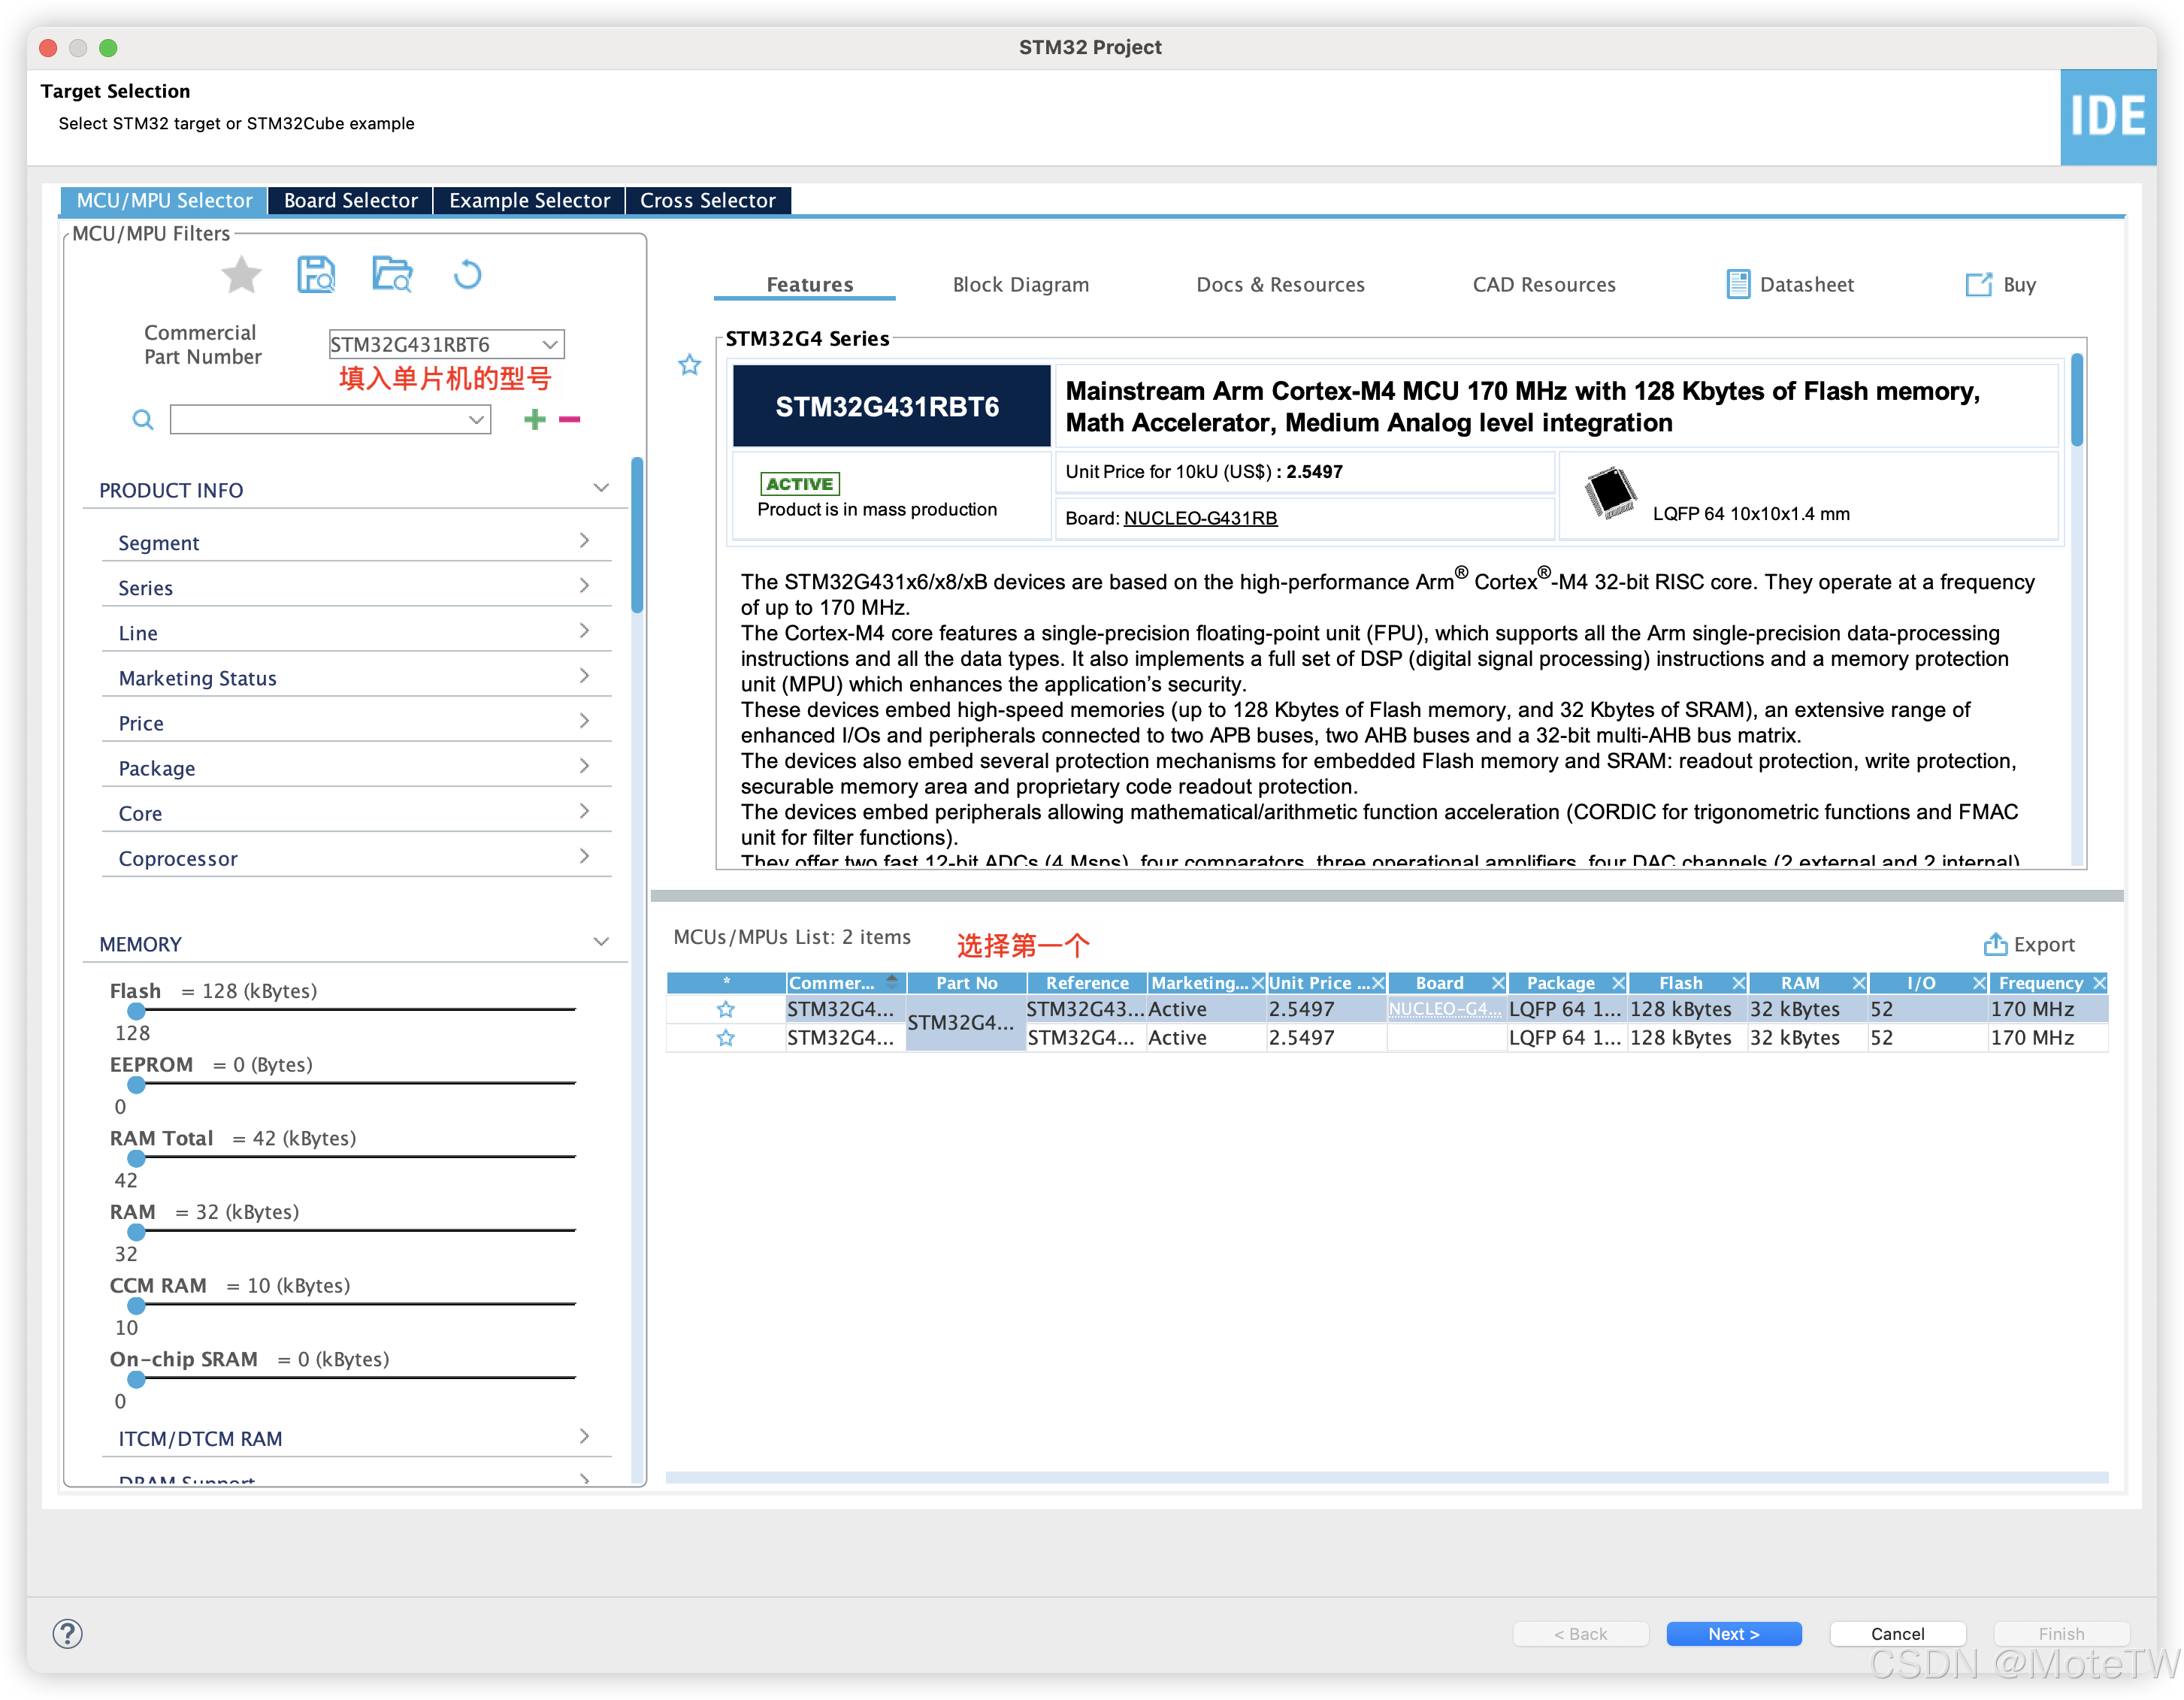
点击next,填写文件名和存放地址后点击finish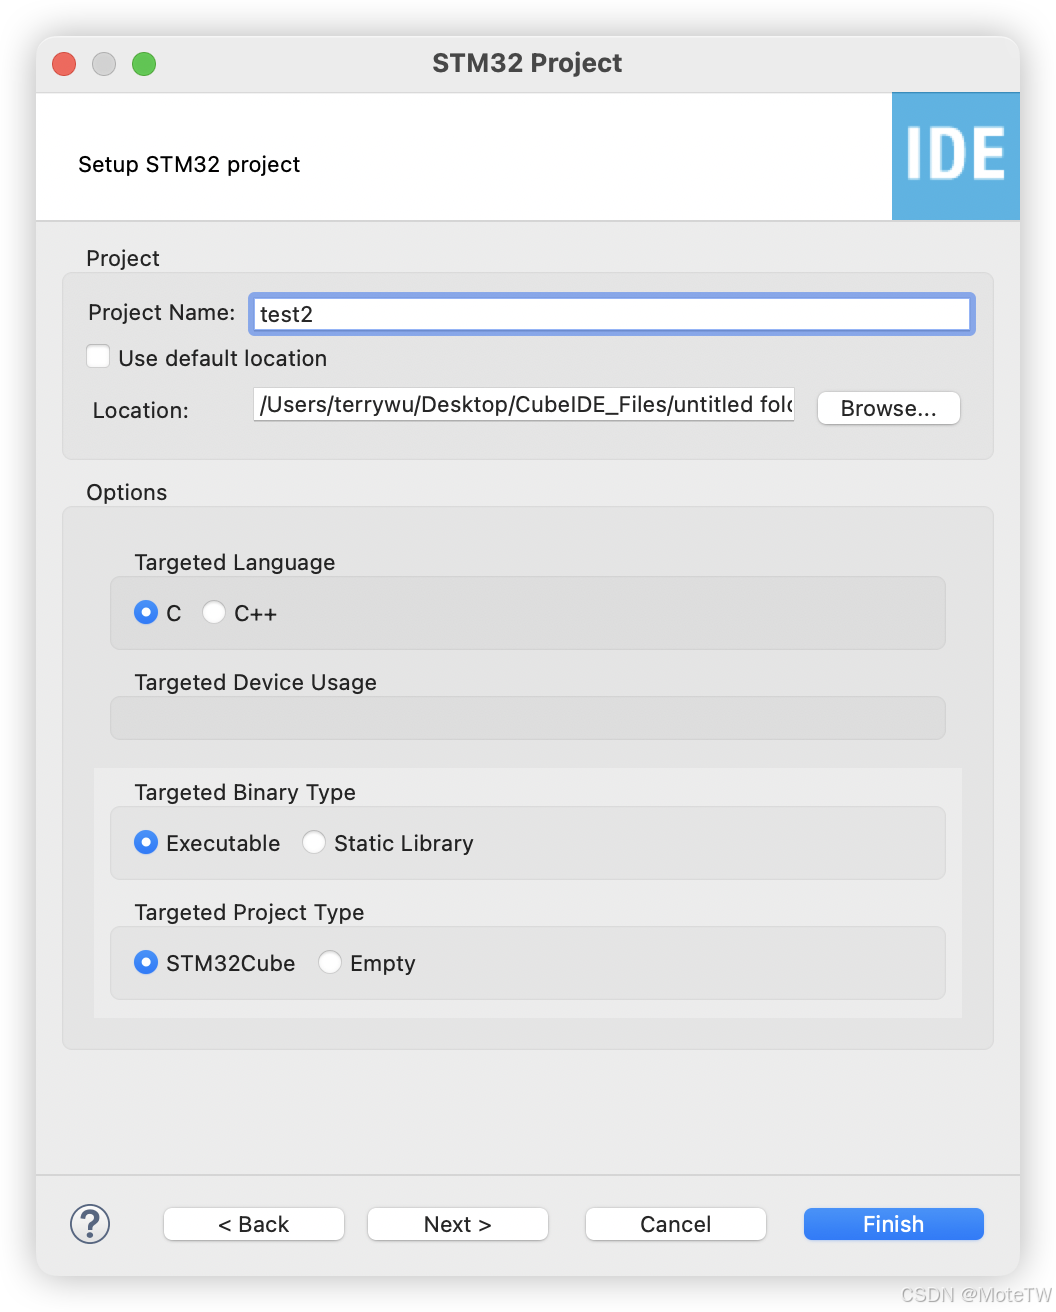
首先在RCC中选择开启高速时钟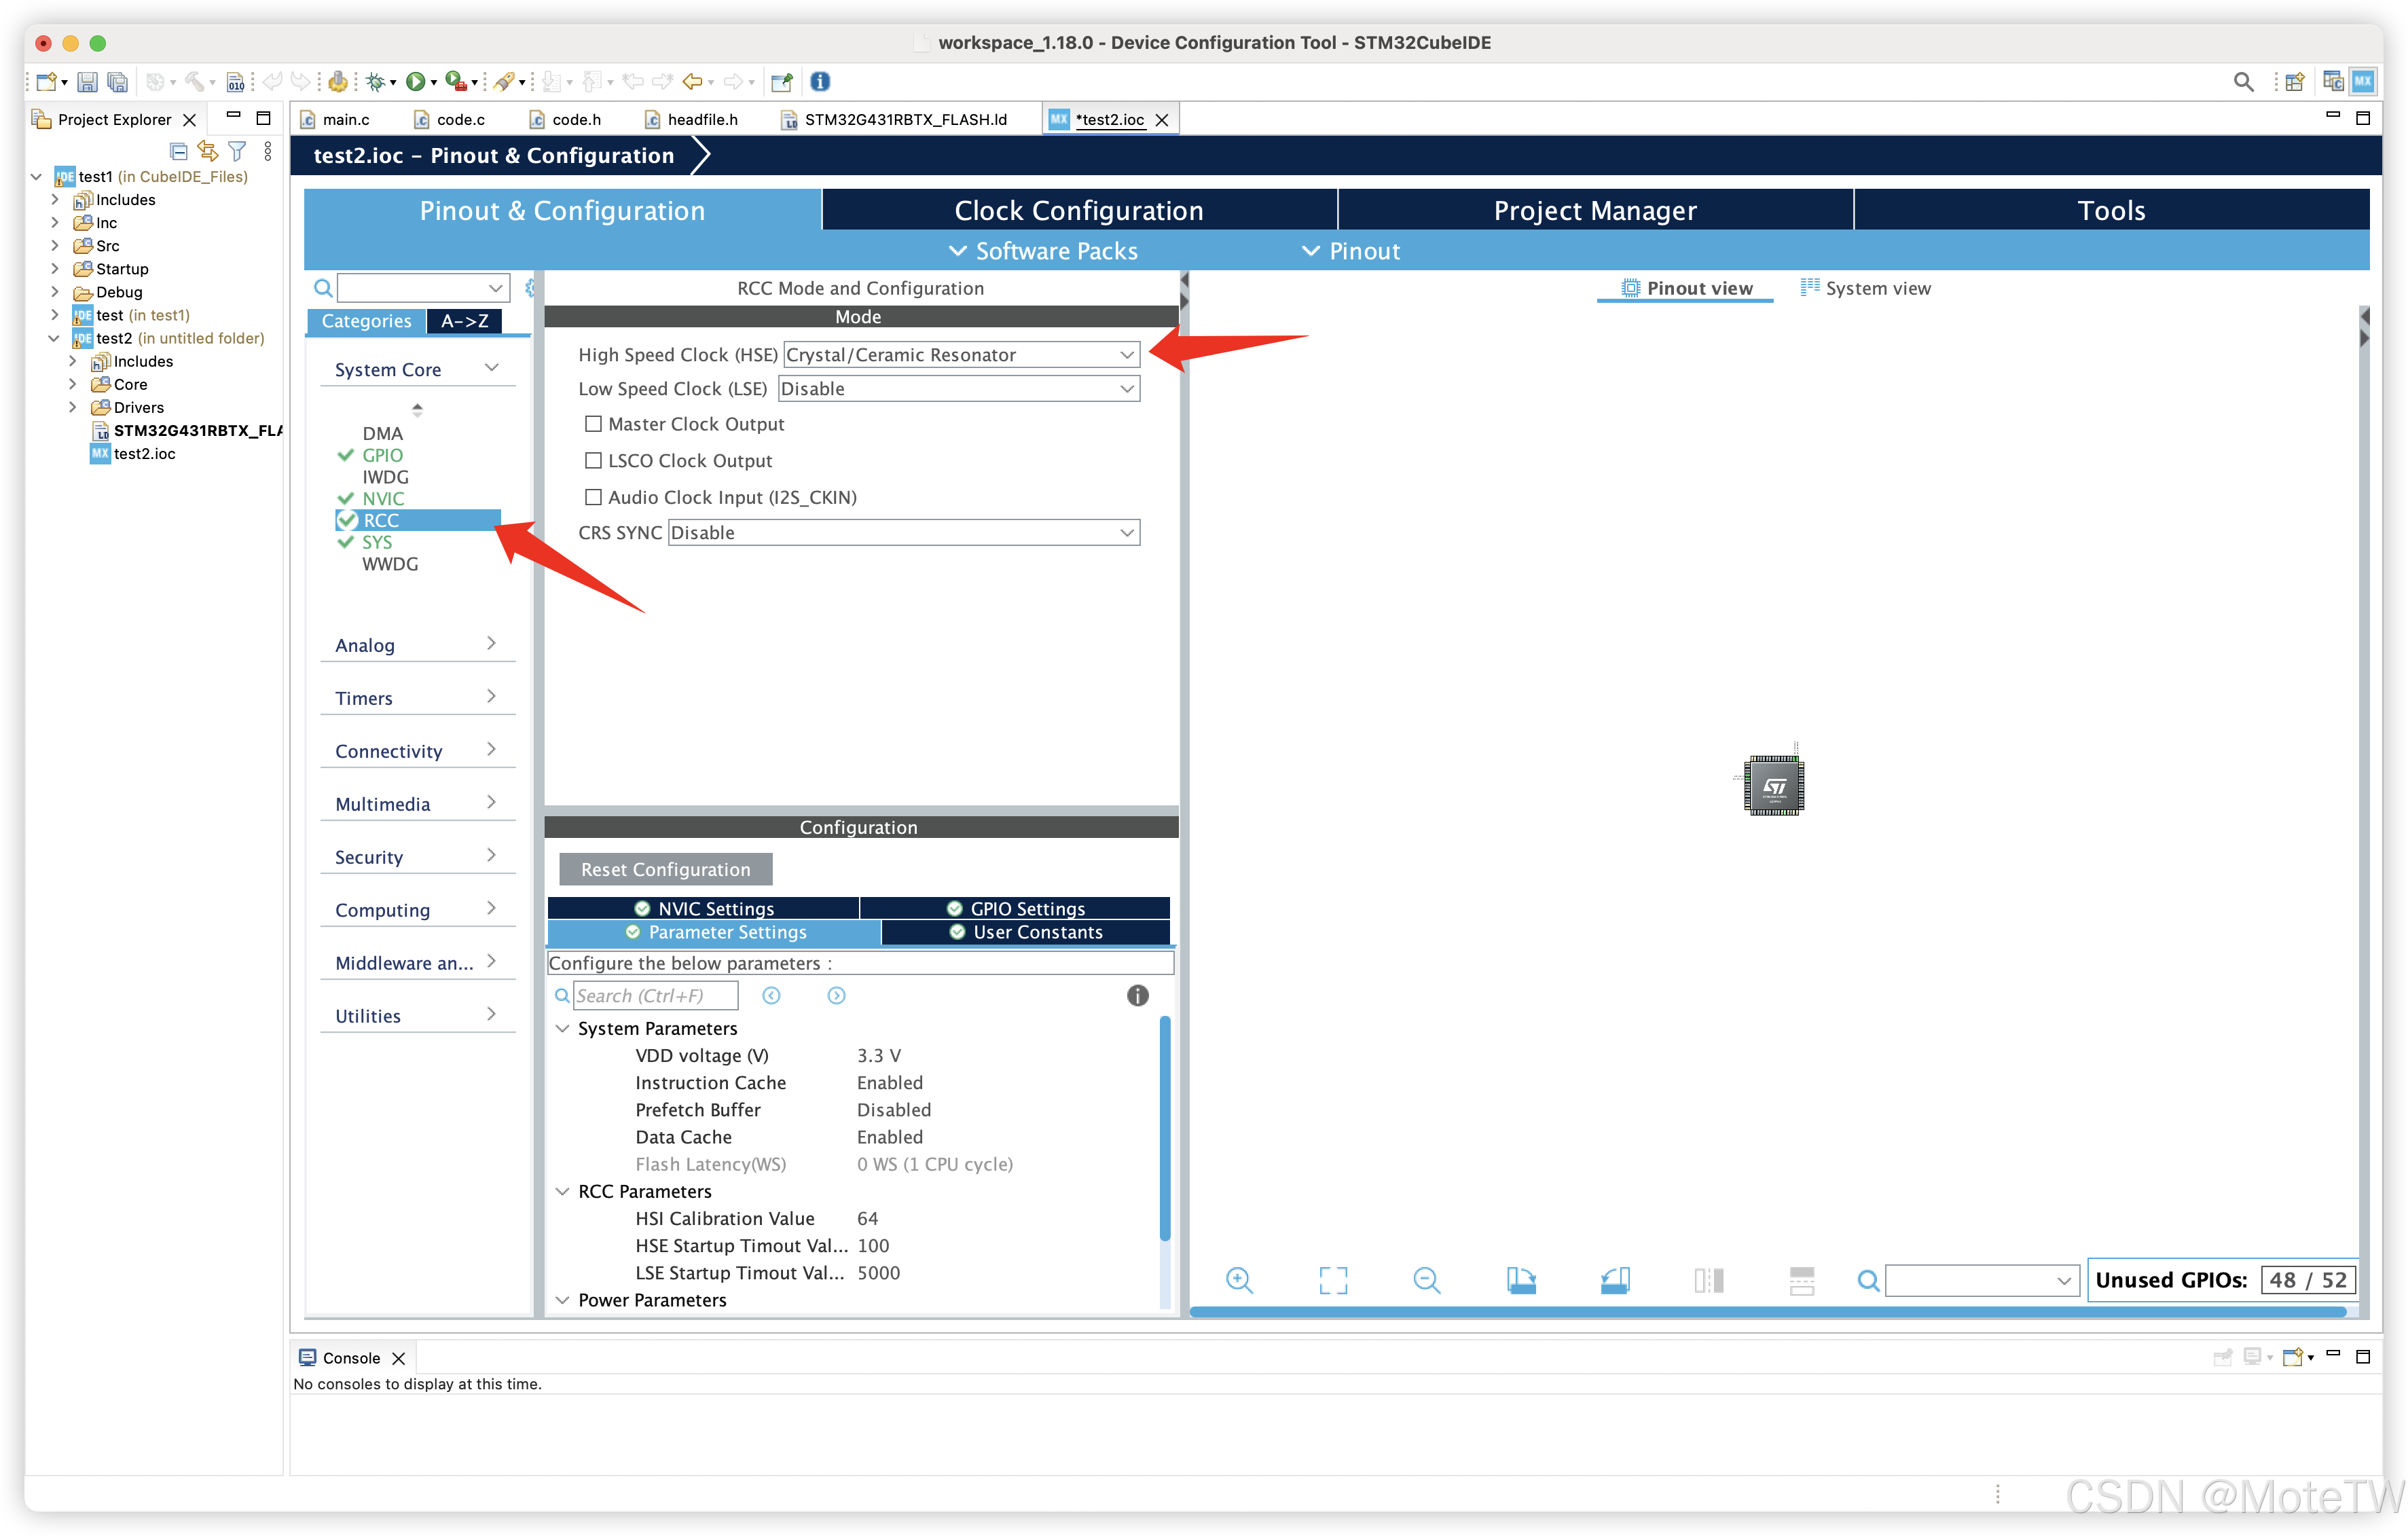
再在SYS中打开serial wire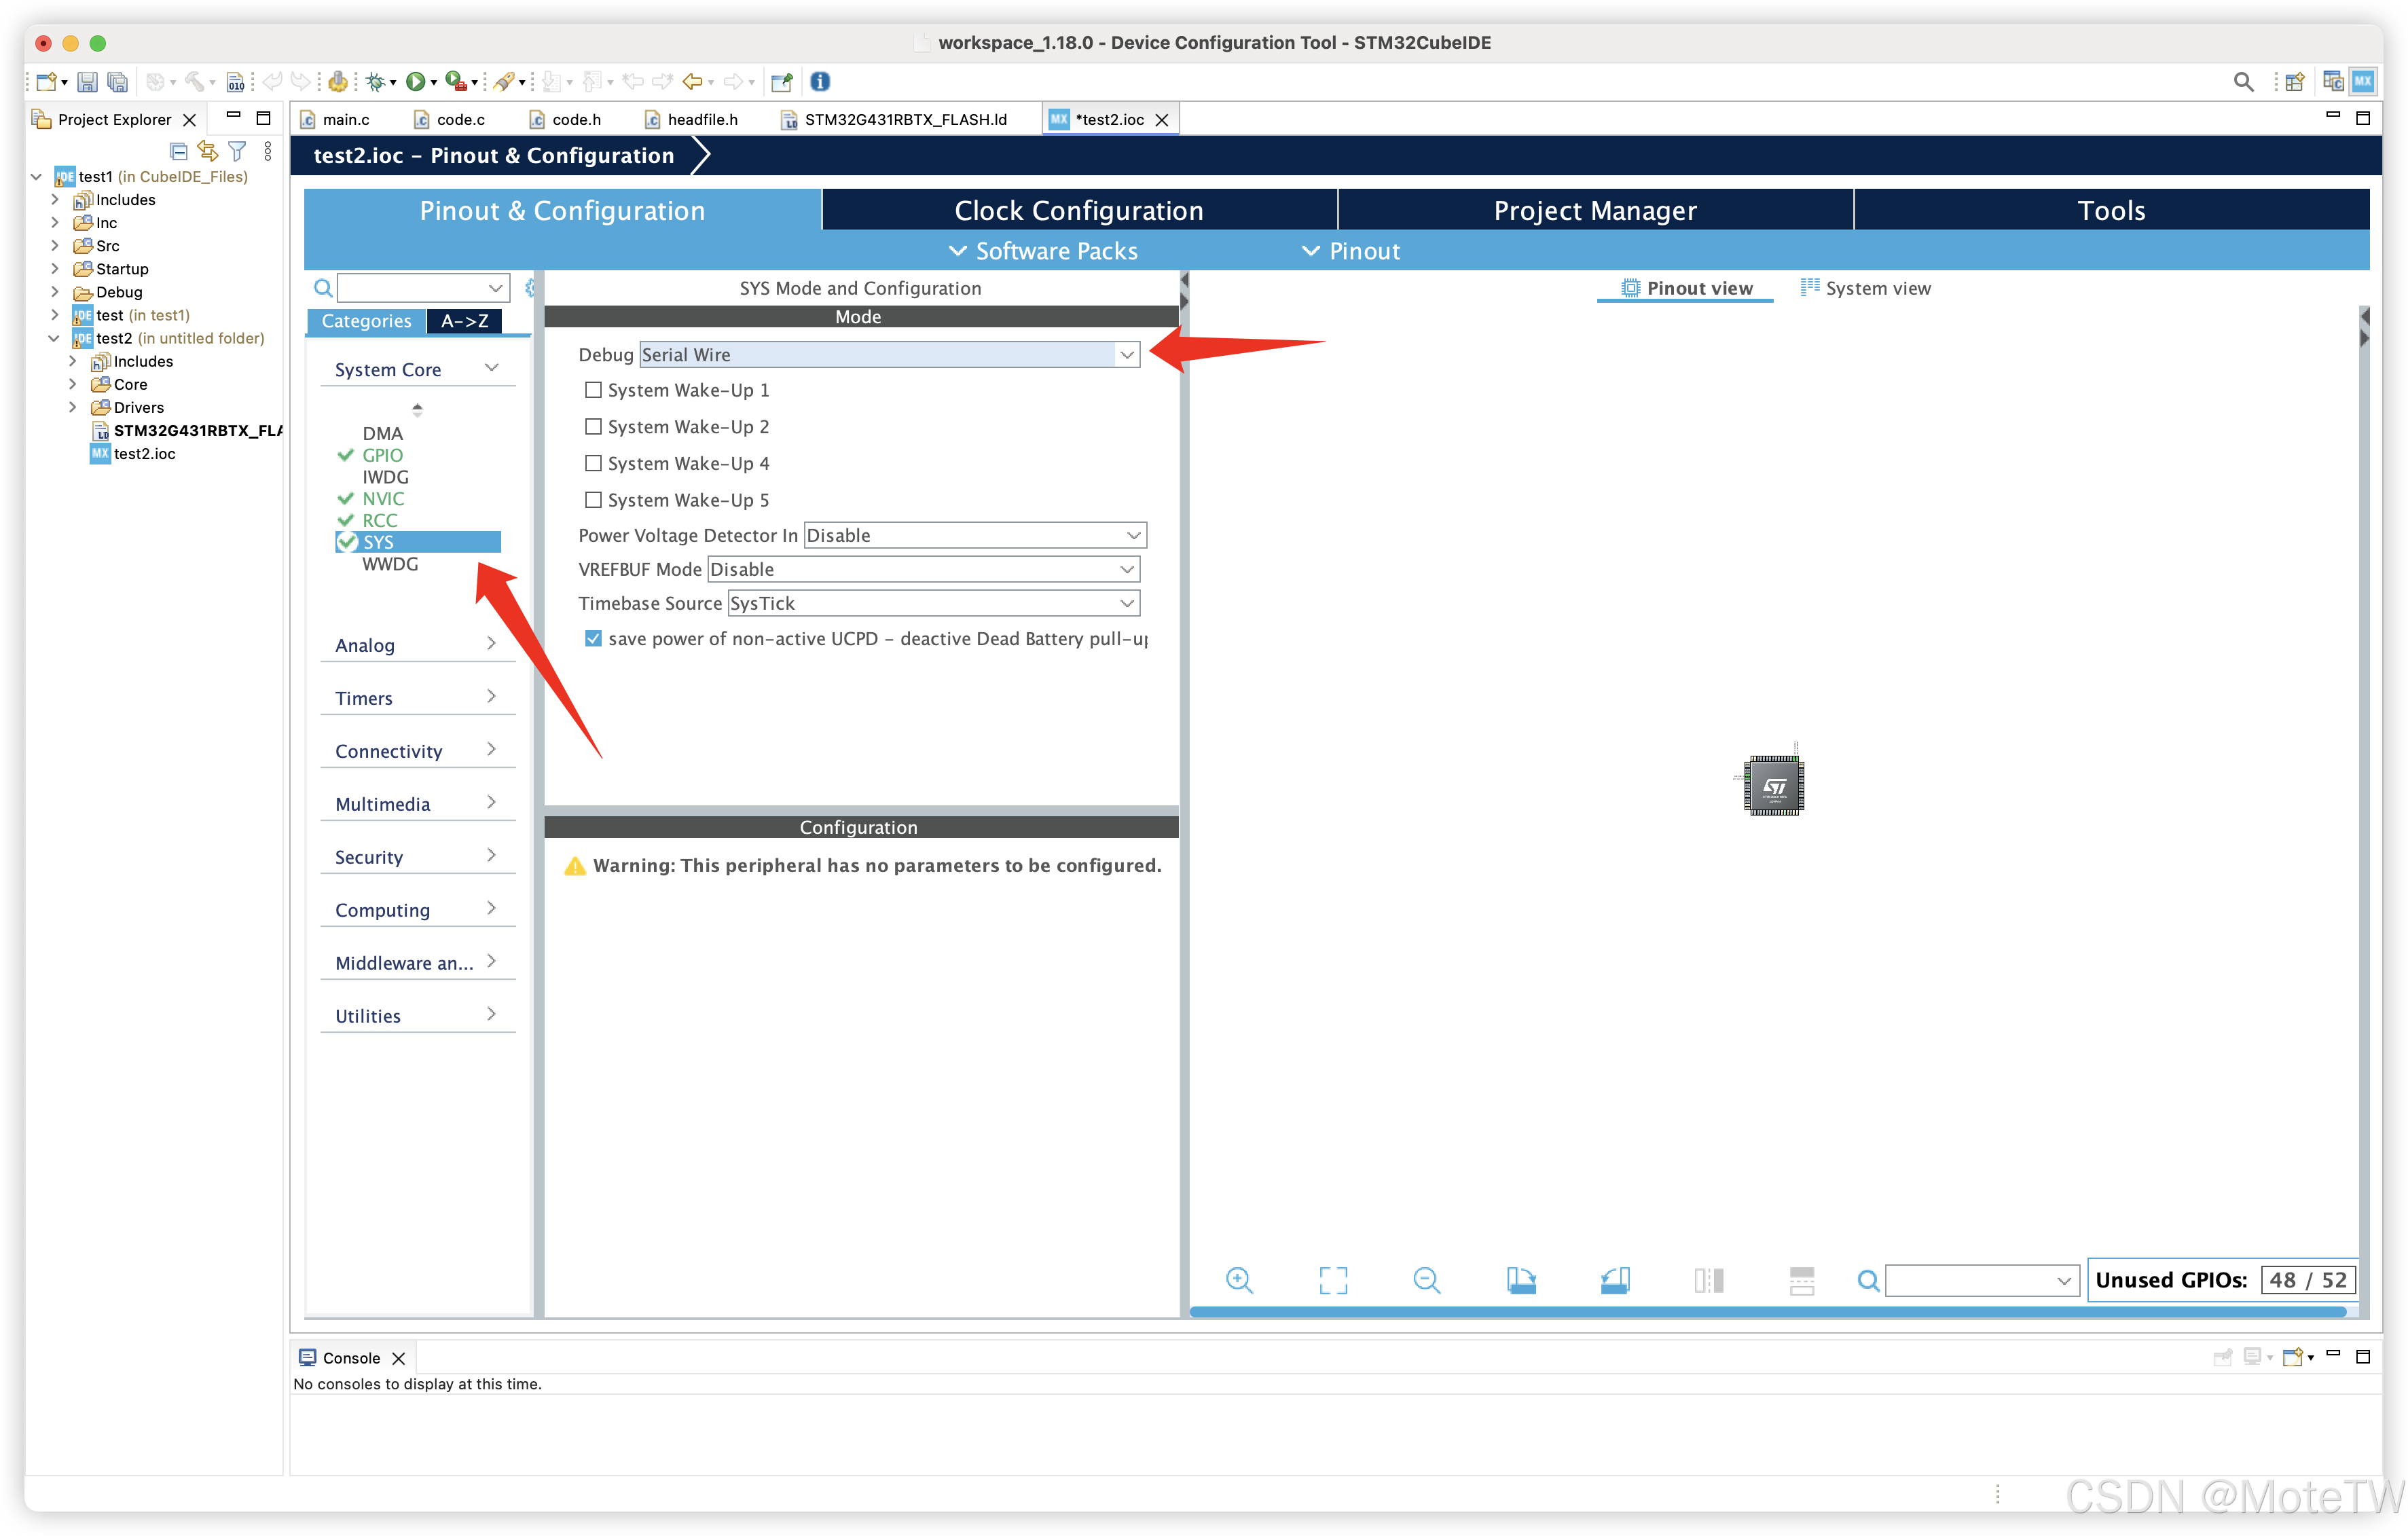 更改时钟频率
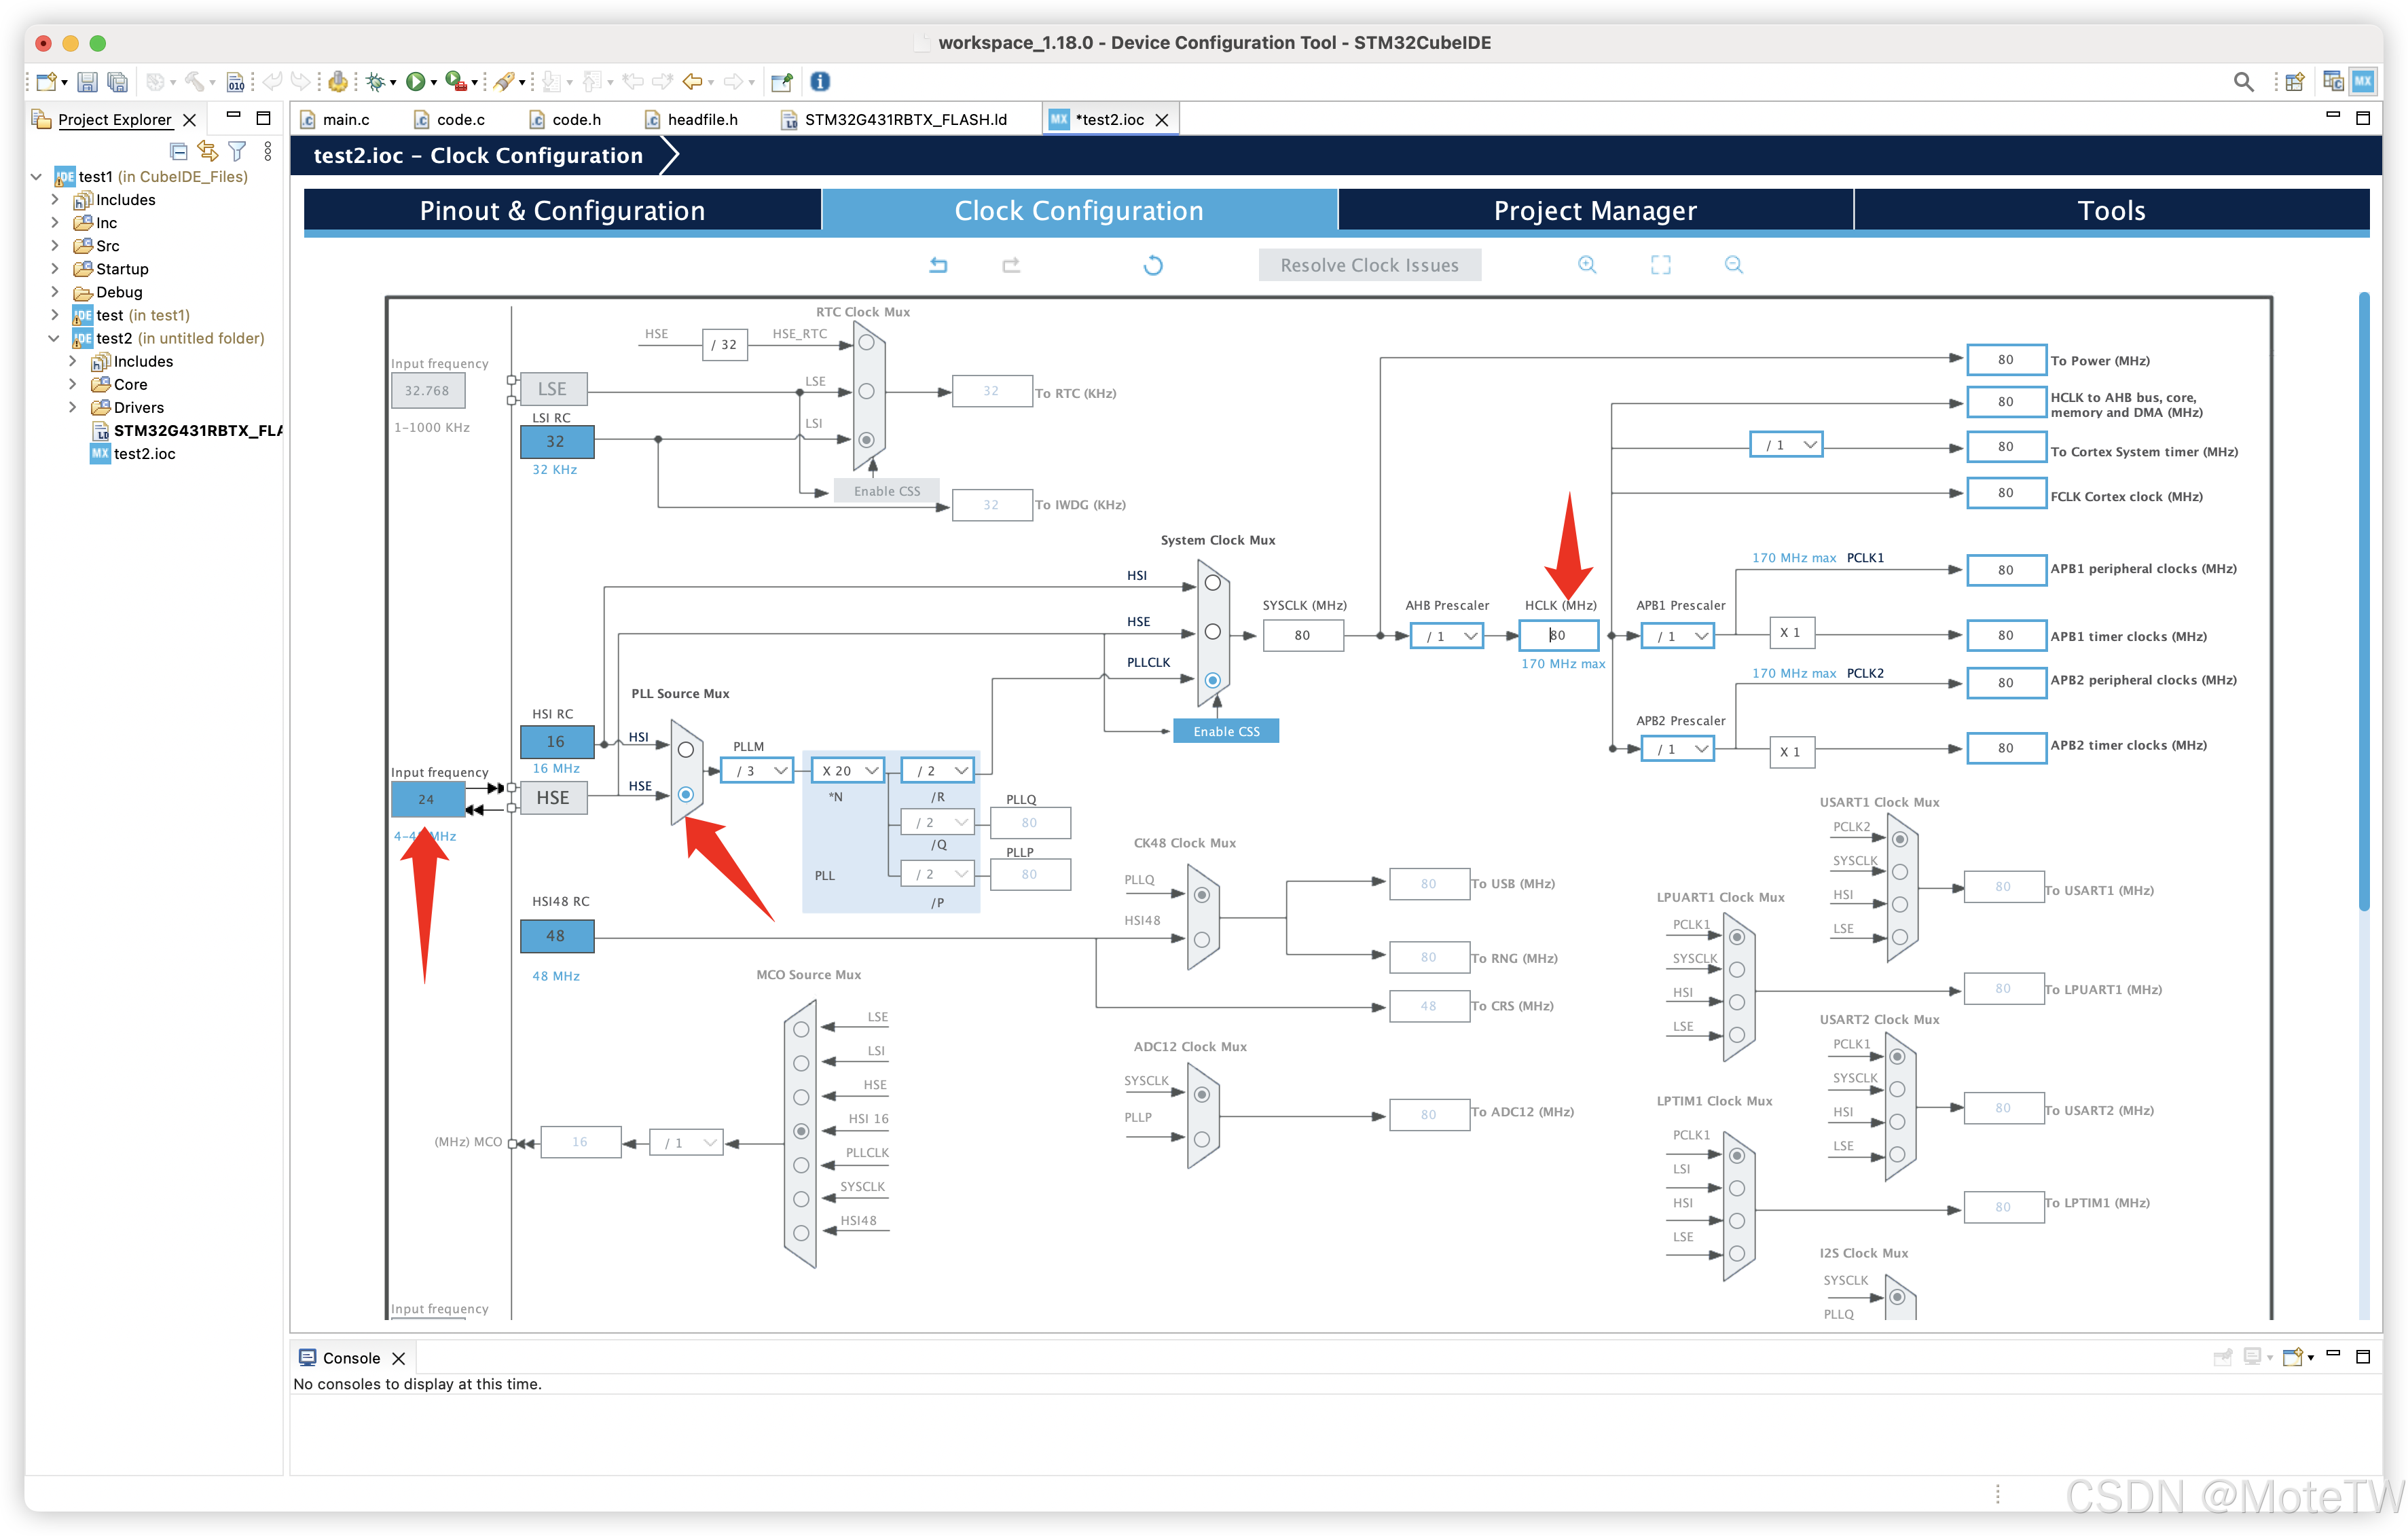 勾选生成.c和.h文件
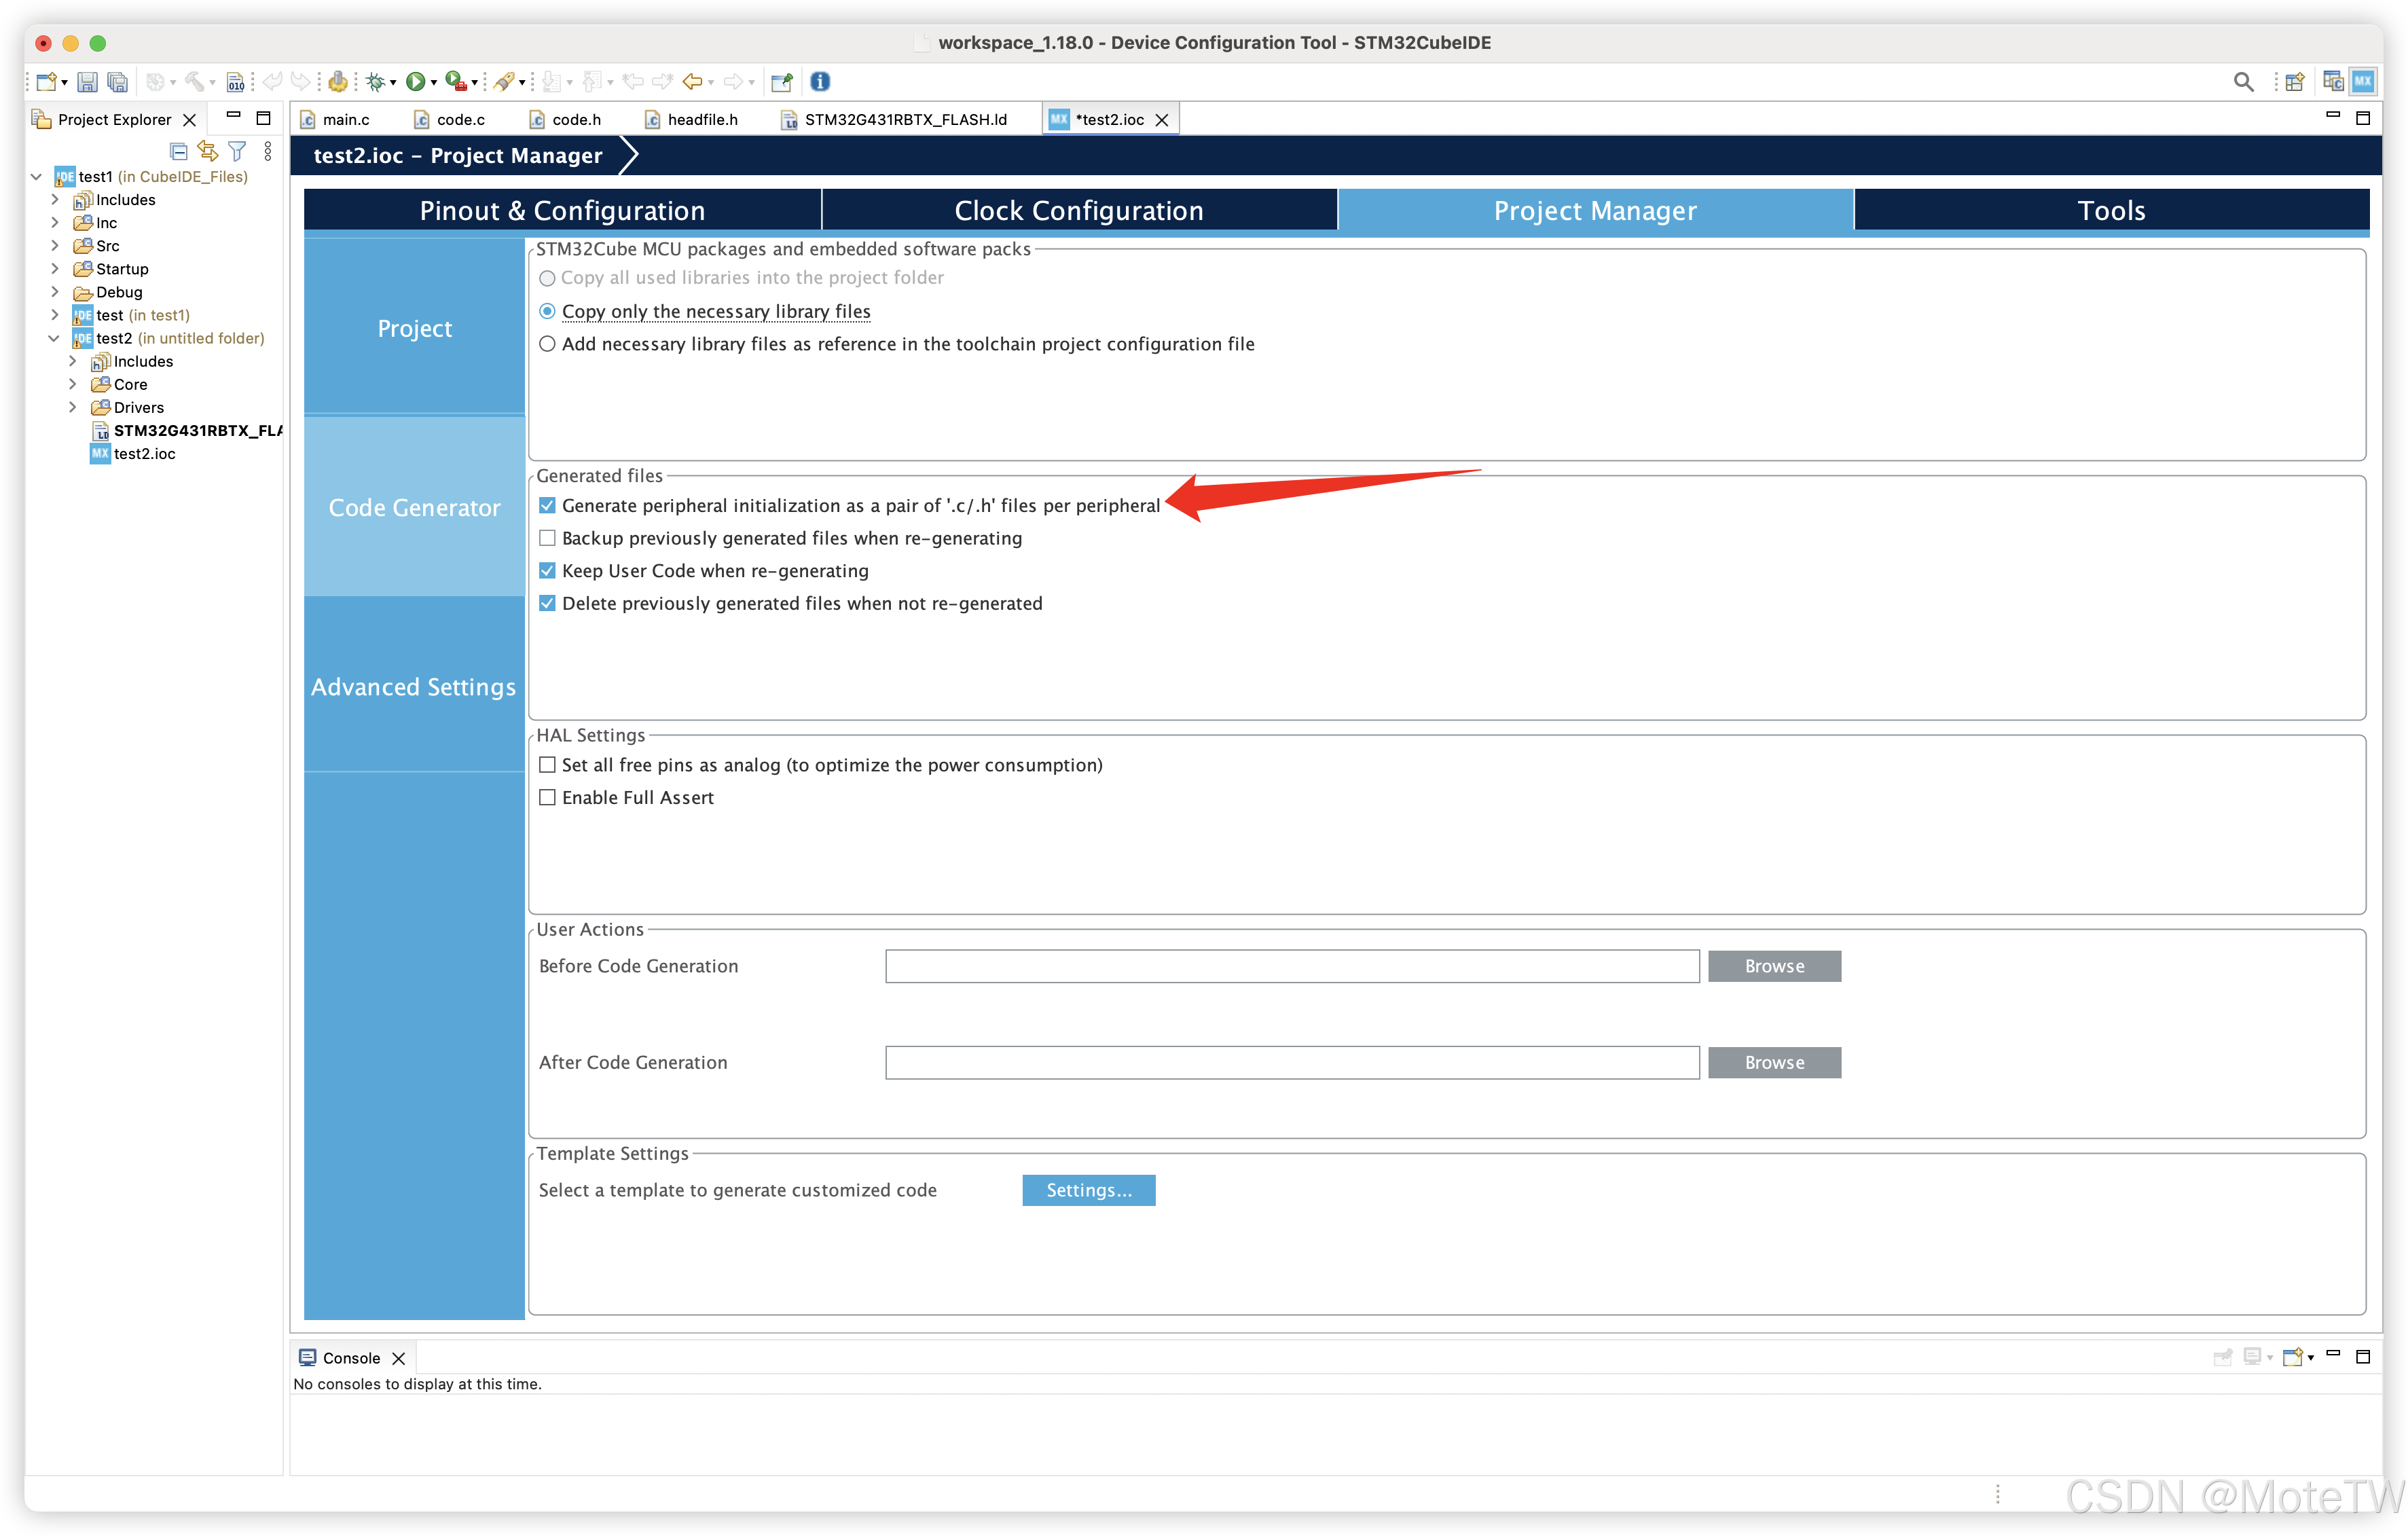 如图设置PC8和PD2的引脚
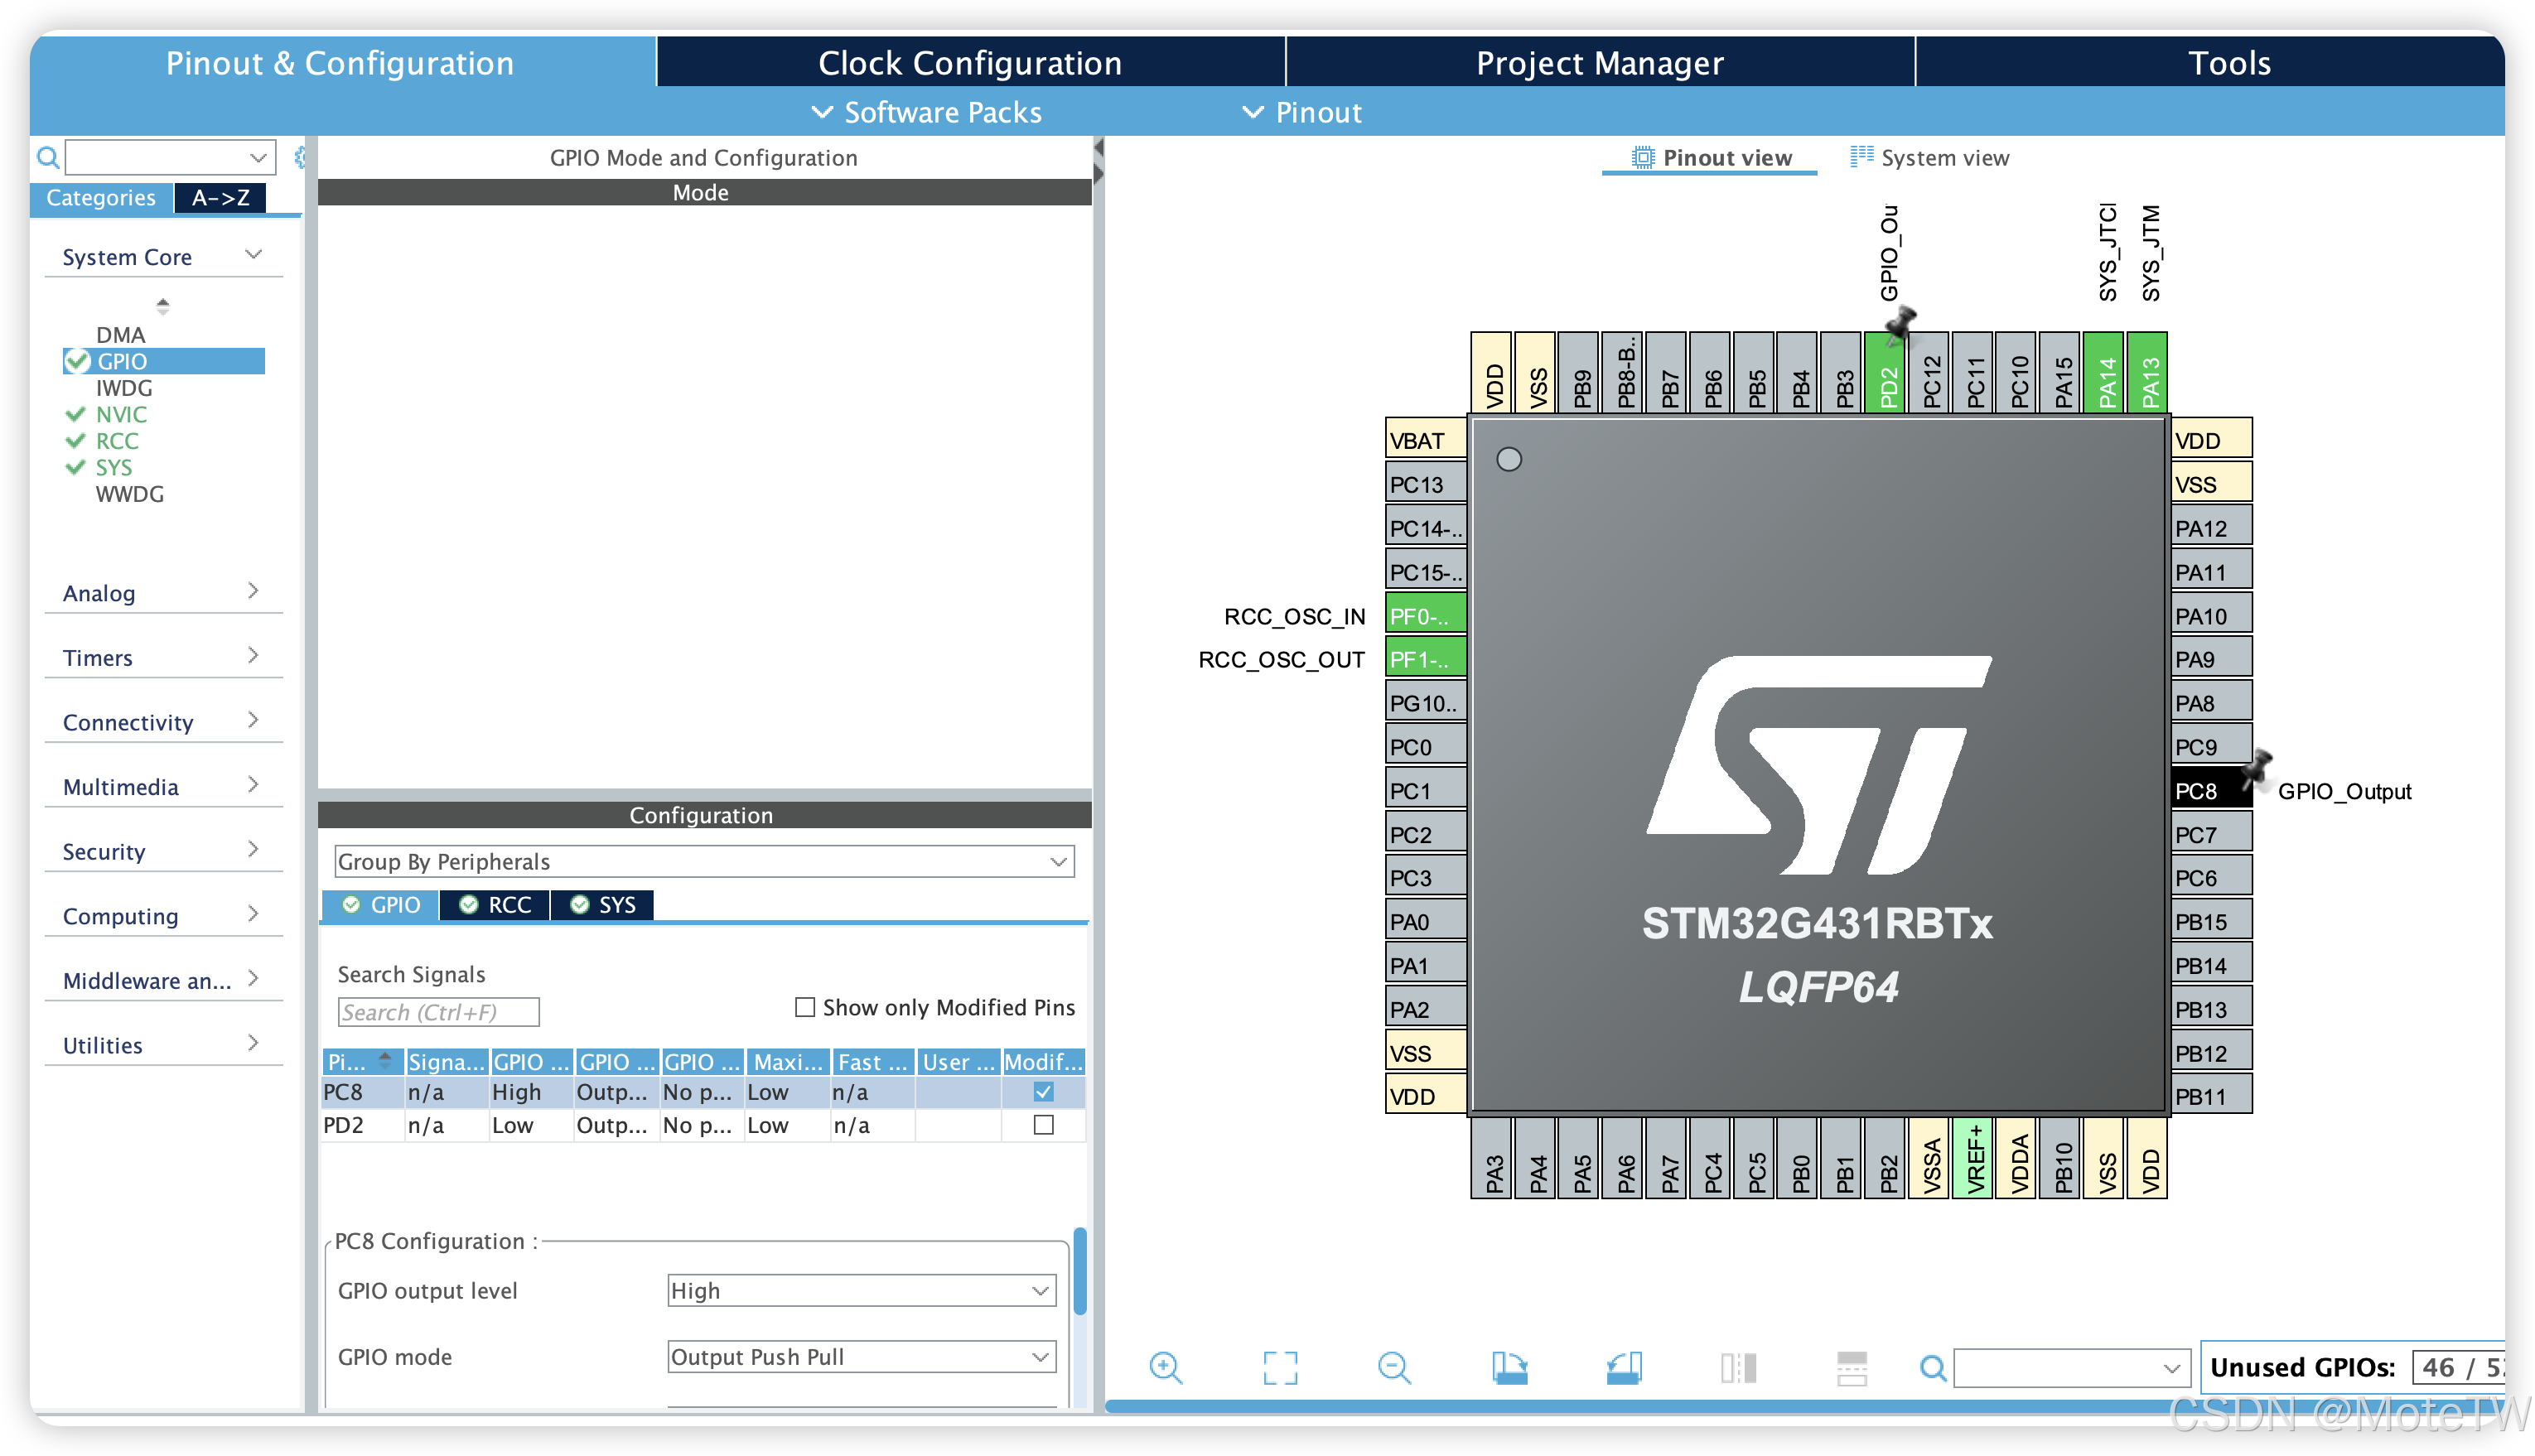 Command+S保存,会自动生成对应代码
如图在Inc中创建自己的头文件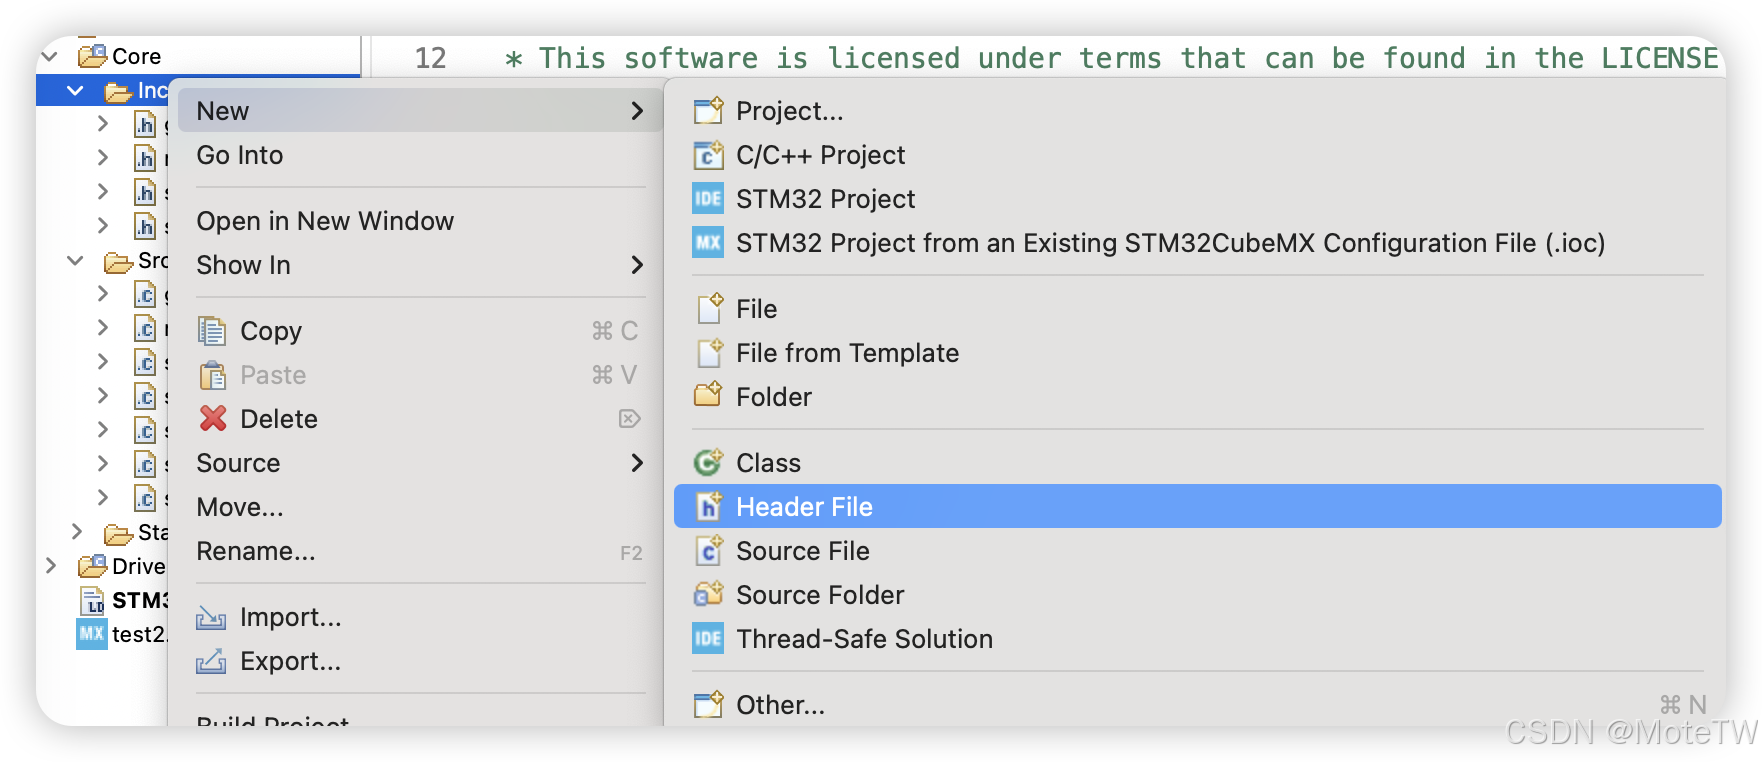
在其中写入
#include "stm32g4xx.h"

#include "stdio.h"
#include "string.h"
#include "stdint.h"

#include "main.h"
#include "gpio.h"

#include "led.h"
同理分别再在Src和Inc中建立led的.c和.h文件
在led.c中,写入
#include "headfile.h"

void led_show(uint8_t led,uint8_t mode)
{
	HAL_GPIO_WritePin(GPIOD,GPIO_PIN_2,GPIO_PIN_SET);

	if(mode)
		HAL_GPIO_WritePin(GPIOC,GPIO_PIN_8 << (led - 1),GPIO_PIN_RESET);
	else
		HAL_GPIO_WritePin(GPIOC,GPIO_PIN_8 << (led - 1),GPIO_PIN_SET);

	HAL_GPIO_WritePin(GPIOD,GPIO_PIN_2,GPIO_PIN_RESET);
}
led.h中,写入
void led_show(uint8_t led,uint8_t mode);在main中包含下头文件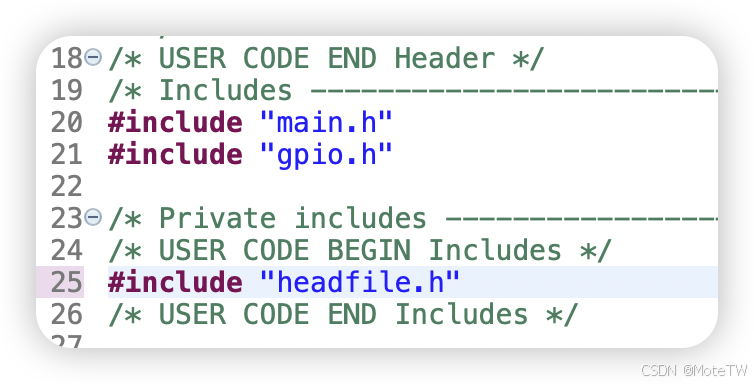 在while中写入led点亮指令
注意代码要写在begin和and之间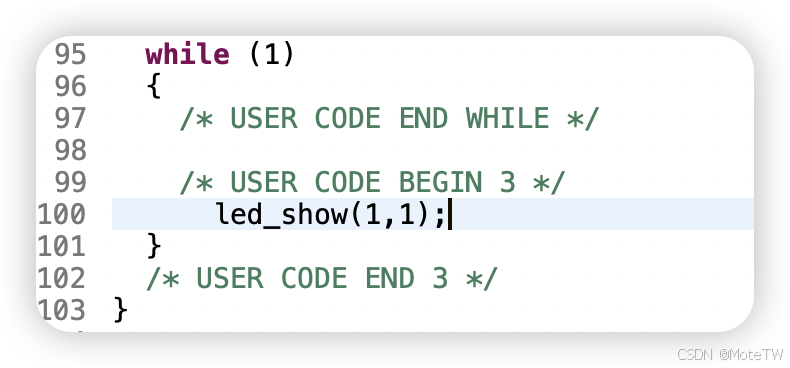
点击锤子按钮编译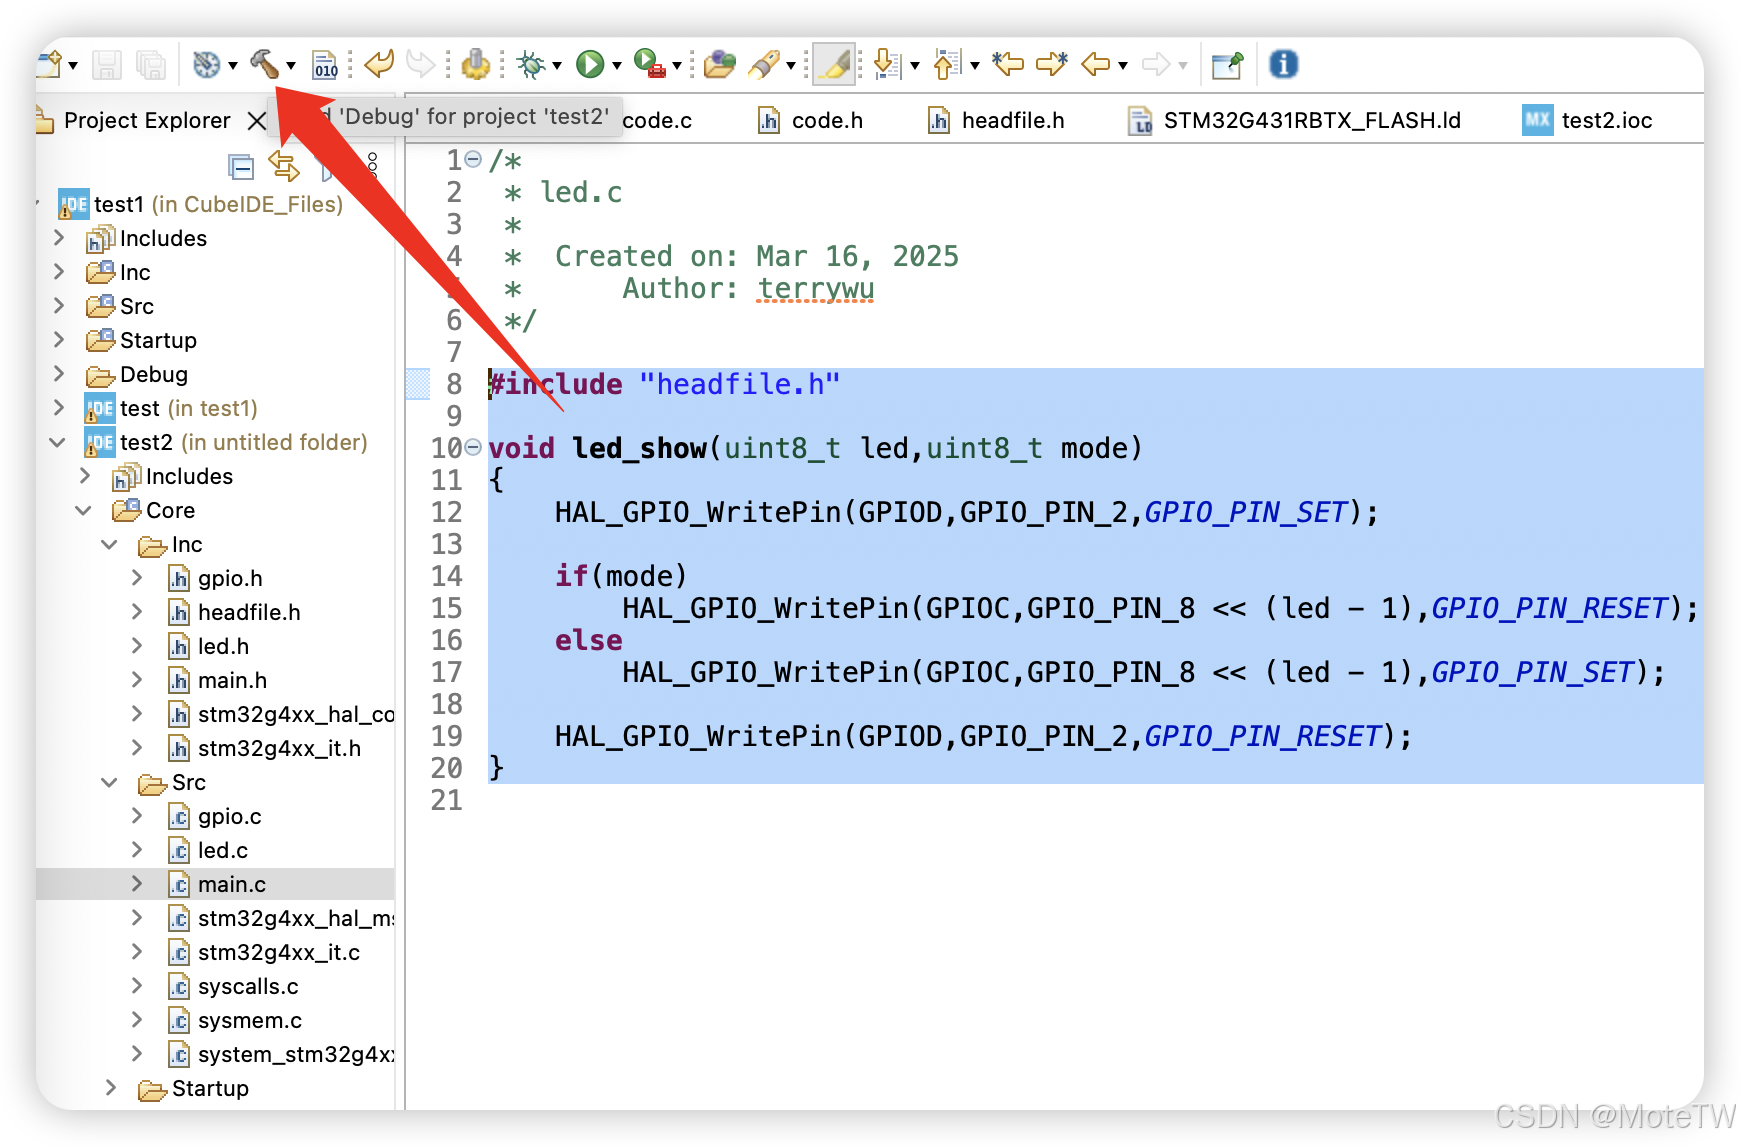 参看STM32 CubeIDE 使用 CMSIS-DAP烧录 (方法1--修改配置文件)_stm32cubeide怎么烧录程序-CSDN博客中把debug方式更改一下,就可以实现点亮led


 2792
2792

 被折叠的 条评论
为什么被折叠?
被折叠的 条评论
为什么被折叠?
 到【灌水乐园】发言


