


1、安装rethinkdb
下载地址:
https://github.com/srh/rethinkdb/releases/tag/v2.4.0-srh-win-1
rethinkdb的使用教程:
https://rethinkdb.com/docs/start-a-server/
启动rethinkdb服务可指定相关参数:
–port-offset --rethinkdb服务默认的管理页面http服务占用8080端口,但是很多时候我们的8080端口会被别的应用占用,则可以指定这个参数。端口号偏移量,指定为1时则会使用8081端口,但是这个参数会将所有默认的端口都进行偏移
info: Listening for intracluster connections on port 29015
info: Listening for client driver connections on port 28015
info: Listening for administrative HTTP connections on port 8080
初始的集群端口号是29015;客户端驱动端口号是28015;管理页面HTTP服务端口号是8080
atxserver2默认连28015,所以当设置了偏移量的时候,atxserver2也要相应修改
设置偏移量为3之后,这三个端口号都会偏移,见下图

启动rethinkdb
解压文件夹后,cmd进入文件夹下,输入命令启动
rethinkdb --port-offset 3 -d data/
-d 会在当前路径下有个data文件夹存放数据
2、安装atxserver2
git地址:
https://github.com/openatx/atxserver2
下载
git clone https://github.com/openatx/atxserver2.git
安装依赖
cmd cd到atxserver2的路径下,这个文件夹下有个requirements.txt
pip install -r requirements.txt
启动atxserver2
python main.py --port 4000 —监听4000端口
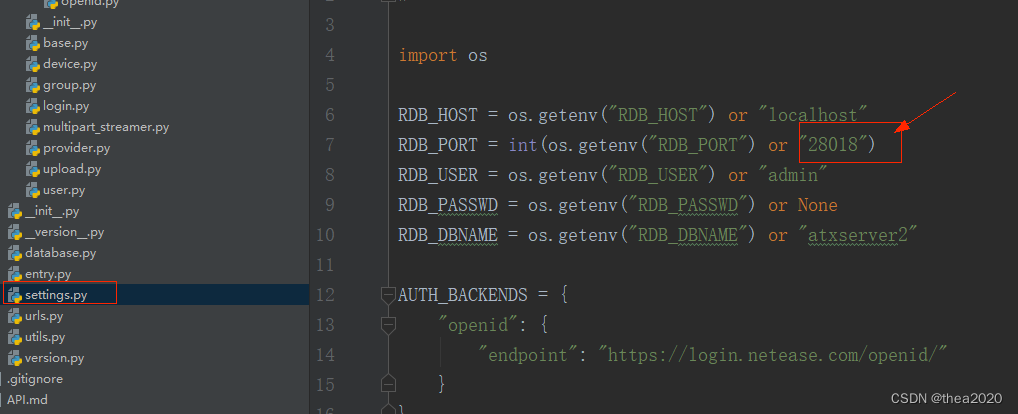
修改连接的rethinkdb地址端口号
修改\autotest\atxserver2\web\settings.py配置文件
3、安装atxserver2-android-provider
git地址
https://github.com/openatx/atxserver2-android-provider
安装
git clone https://github.com/openatx/atxserver2-android-provider
cd atxserver2-android-provider
安装依赖
npm install
准备Python虚拟环境(可选)
python3 -m venv venv
双击 venv/Scripts/activate.bat
安装依赖
pip install -r requirements.txt
启动
python main.py --server localhost:4000
4、效果
http://localhost:4000/devices --设备管理列表

可以调用接口占用设备、释放设备
api接口地址:https://github.com/openatx/atxserver2/blob/master/API.md
-
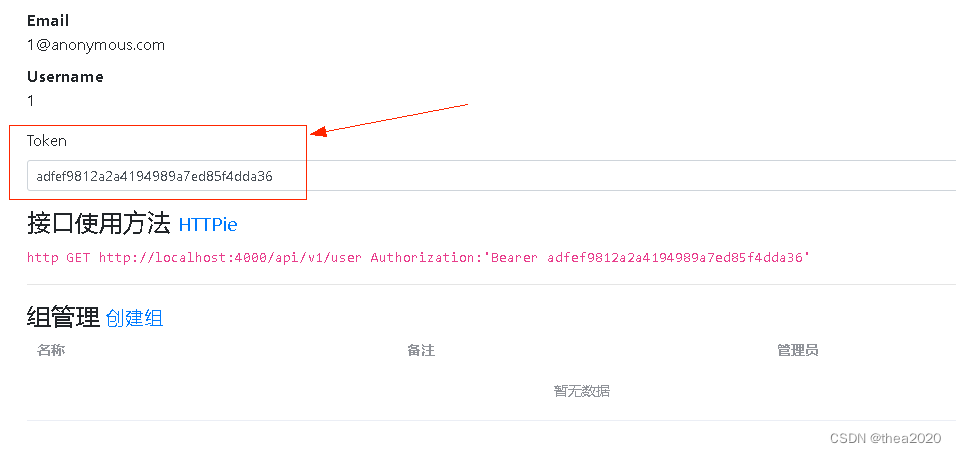
获取到token,在用户详情页面可见token
-
拿到udid
get请求接口http://localhost:4000/api/v1/devices
头中带参数Authorization 值为Bearer adfef9812a2a4194989a7ed85f4dda36
返回报文中有udid -
占用设备
post请求接口http://localhost.32:4000/api/v1/user/devices
头中带参数Authorization
设备列表显示设备被占用
请求报文:
{
“udid”: “YSE0221723000282”,
“idleTimeout”: 600
}
响应报文:
{
“success”: true,
“description”: “Device successfully added”
}
- 释放设备
delete请求接口http://localhost:4000/api/v1/user/devices/YSE0221723000282
头中带参数Authorization
设备列表显示设备未被占用
响应报文
{
“success”: true,
“description”: “Device successfully released”
}


 4608
4608


 被折叠的 条评论
为什么被折叠?
被折叠的 条评论
为什么被折叠?
 到【灌水乐园】发言


