


文章目录
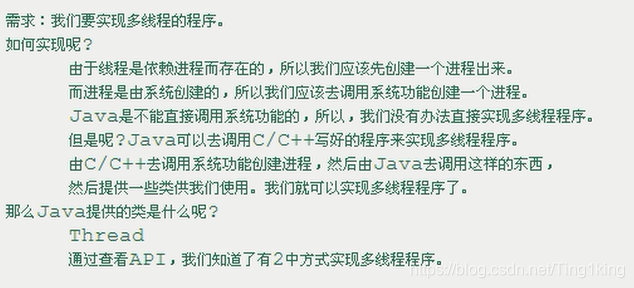
方式1:继承Thread类
步骤:
A:自定义一个类继承Thread类。
B:在自定义类中重写run()方法
C:创建对象
D:启动线程

public class MyThread extends Thread{
	//重写run方法
	public void run(){
		//一般来说,这是比较耗时的代码,比如循环
		for(int i=0;i<10000;i++){
			System.out.println(i);
		}
	}
}
//创建对象
//		MyThread mt=new MyThread();
//		//启动线程
//		mt.run();
//		mt.run();
		//调用run()方法为什么是单线程呢?
		//因为run()方法直接调用其实就相当于普通的方法调用,所以我们看到的是单线程的效果
		//如果想要看到多线程效果,就必须说说另外一个方法:start()方法
		//run()和start()区别:
		//run():仅仅是封装被线程执行的代码,直接调用是普通方法
		//start():首先启动了线程,然后再调用jvm去调用该线程的run()方法。
//		MyThread mt=new MyThread();
//		//java.lang.IllegalThreadStateException
		//相当于mt线程调用了两次,而不是两个线程启动
//		mt.start();
//		mt.start();
		//创建多线程不是这样调用两次start()方法就行的,需要创建多个线程对象来调用start()方法
		MyThread mt=new MyThread();
		MyThread mt1=new MyThread();
		mt.start();
		mt1.start();
获取和设置线程对象的名称:
public final String getName():获取线程的名称
public class MyThread extends Thread{
	//重写run方法
	public void run(){
		//一般来说,这是比较耗时的代码,比如循环
		for(int i=0;i<10;i++){
			System.out.println(getName()+":"+i);
		}
	}
}
public class MyThreadDemo {
	public static void main(String[] args) {
		MyThread mt=new MyThread();
		MyThread mt1=new MyThread();
		mt.start();
		mt1.start();
	}

}
自己设置线程对象的名称:
public final void setName(String name):设置线程的名称
方式1:无参方法
public class MyThreadDemo {
	public static void main(String[] args) {

		MyThread mt=new MyThread();
		MyThread mt1=new MyThread();

		//设置线程的名称
		mt.setName("hello");
		mt1.setName("world");

		mt.start();
		mt1.start();
	}

}
方式2:有参方法
public class MyThread extends Thread{
	//无参构造
	public MyThread() {
		// TODO Auto-generated constructor stub
	}
	//有参构造
	public MyThread(String name){
		super(name);
	}
	//重写run方法
	public void run(){
		//一般来说,这是比较耗时的代码,比如循环
		for(int i=0;i<10;i++){
			System.out.println(getName()+":"+i);
		}
	}
}
public class MyThreadDemo {
	public static void main(String[] args) {


		//第二种方式:有参构造
		MyThread mt=new MyThread("hello");
		MyThread mt1=new MyThread("world");
		mt.start();
		mt1.start();
	}

}
感觉无参方法更加简单
结果:
hello:0
hello:1
world:0
world:1
world:2
world:3
world:4
world:5
world:6
world:7
world:8
world:9
hello:2
hello:3
hello:4
hello:5
hello:6
hello:7
hello:8
hello:9
获取main方法所在的线程对象的名称:
public static Thread currentThread():返回当前正在执行的线程对象
public class MyThreadDemo {
	public static void main(String[] args) {
	//获取线程的名称
	System.out.println(Thread.currentThread().getName());
	}

}
线程调度
java使用的是抢占式模型

我们线程没有设置优先级,那么就肯定有默认优先级,默认为5
获取线程对象优先级方法
public final int getPriority():返回线程对象的优先级
public class MyThreadDemo {
	public static void main(String[] args) {
		MyThread m1=new MyThread();
		MyThread m2=new MyThread();
		MyThread m3=new MyThread();

		//设置线程对象名字
		m1.setName("牛顿");
		m2.setName("爱因斯坦");
		m3.setName("伽利略");

		//获取线程对象默认优先级
		System.out.println(m1.getPriority());//5
		System.out.println(m2.getPriority());//5
		System.out.println(m3.getPriority());//5
	}

}
设置线程对象优先级
public final void setPriority(int newPriority):更改线程优先级
注意:
线程默认优先级是5
线程优先级的范围是:[1-10]
线程优先级高仅仅表示线程获取CPU时间几率高。但是要在次数比较多,或者多次运行的时候才可以看到比较好的效果。
public class MyThreadDemo {
	public static void main(String[] args) {
		MyThread m1=new MyThread();
		MyThread m2=new MyThread();
		MyThread m3=new MyThread();

		//设置线程对象名字
		m1.setName("牛顿");
		m2.setName("爱因斯坦");
		m3.setName("伽利略");

		//获取线程对象默认优先级
//		System.out.println(m1.getPriority());//5
//		System.out.println(m2.getPriority());//5
//		System.out.println(m3.getPriority());//5

		//设置线程优先级
		m1.setPriority(10);
		m2.setPriority(1);

		m1.start();
		m2.start();
		m3.start();
	}

}
线程控制
线程休眠
public static void sleep(long millis):线程休眠
public class MyThread extends Thread{

	//重写run方法
	public void run(){
		//一般来说,这是比较耗时的代码,比如循环
		for(int i=0;i<10;i++){
			System.out.println(getName()+":"+i+",日期:"+new Date());
		}
		//睡眠
		try {
			Thread.sleep(1000);//单位毫秒
		} catch (InterruptedException e) {
			// TODO Auto-generated catch block
			e.printStackTrace();
		}
	}
}
public class MyThreadDemo {
	public static void main(String[] args) {
		MyThread m1=new MyThread();
		MyThread m2=new MyThread();
		MyThread m3=new MyThread();

		//设置线程对象名字
		m1.setName("牛顿");
		m2.setName("爱因斯坦");
		m3.setName("伽利略");

		m1.start();
		m2.start();
		m3.start();
	}

}
线程加入
public final void join():等待线程加入
public class MyThread extends Thread{

	//重写run方法
	public void run(){
		//一般来说,这是比较耗时的代码,比如循环
		for(int i=0;i<10;i++){
			System.out.println(getName()+":"+i+",日期:"+new Date());
		}

	}
}
public class MyThreadDemo {
	public static void main(String[] args) {
		MyThread m1=new MyThread();
		MyThread m2=new MyThread();
		MyThread m3=new MyThread();

		//设置线程对象名字
		m1.setName("牛顿");
		m2.setName("爱因斯坦");
		m3.setName("伽利略");

		m1.start();
		try {
			m1.join();//只有m1走完了,m2和m3才可以走
		} catch (InterruptedException e) {
			// TODO Auto-generated catch block
			e.printStackTrace();
		}
		m2.start();
		m3.start();
	}

}
礼让线程
public static void yield():暂停当前正在执行的线程对象,并执行其他线程
让线程执行更加和谐,但是不能保证一人一次
public class MyThread extends Thread{

	//重写run方法
	public void run(){
		//一般来说,这是比较耗时的代码,比如循环
		for(int i=0;i<10;i++){
			System.out.println(getName()+":"+i+",日期:"+new Date());
		}
		//礼让
		Thread.yield();
	}
}
public class MyThreadDemo {
	public static void main(String[] args) {
		MyThread m1=new MyThread();
		MyThread m2=new MyThread();
		MyThread m3=new MyThread();

		//设置线程对象名字
		m1.setName("牛顿");
		m2.setName("爱因斯坦");
		m3.setName("伽利略");

		m1.start();
		m2.start();
		m3.start();
	}

}
结果:
牛顿:0,日期:Thu Apr 02 15:30:04 CST 2020
爱因斯坦:0,日期:Thu Apr 02 15:30:04 CST 2020
伽利略:0,日期:Thu Apr 02 15:30:04 CST 2020
爱因斯坦:1,日期:Thu Apr 02 15:30:04 CST 2020
牛顿:1,日期:Thu Apr 02 15:30:04 CST 2020
牛顿:2,日期:Thu Apr 02 15:30:04 CST 2020
牛顿:3,日期:Thu Apr 02 15:30:04 CST 2020
爱因斯坦:2,日期:Thu Apr 02 15:30:04 CST 2020
爱因斯坦:3,日期:Thu Apr 02 15:30:04 CST 2020
伽利略:1,日期:Thu Apr 02 15:30:04 CST 2020
伽利略:2,日期:Thu Apr 02 15:30:04 CST 2020
爱因斯坦:4,日期:Thu Apr 02 15:30:04 CST 2020
牛顿:4,日期:Thu Apr 02 15:30:04 CST 2020
爱因斯坦:5,日期:Thu Apr 02 15:30:04 CST 2020
爱因斯坦:6,日期:Thu Apr 02 15:30:04 CST 2020
伽利略:3,日期:Thu Apr 02 15:30:04 CST 2020
爱因斯坦:7,日期:Thu Apr 02 15:30:04 CST 2020
牛顿:5,日期:Thu Apr 02 15:30:04 CST 2020
牛顿:6,日期:Thu Apr 02 15:30:04 CST 2020
爱因斯坦:8,日期:Thu Apr 02 15:30:04 CST 2020
伽利略:4,日期:Thu Apr 02 15:30:04 CST 2020
爱因斯坦:9,日期:Thu Apr 02 15:30:04 CST 2020
伽利略:5,日期:Thu Apr 02 15:30:04 CST 2020
牛顿:7,日期:Thu Apr 02 15:30:04 CST 2020
伽利略:6,日期:Thu Apr 02 15:30:04 CST 2020
伽利略:7,日期:Thu Apr 02 15:30:04 CST 2020
牛顿:8,日期:Thu Apr 02 15:30:04 CST 2020
伽利略:8,日期:Thu Apr 02 15:30:04 CST 2020
伽利略:9,日期:Thu Apr 02 15:30:04 CST 2020
牛顿:9,日期:Thu Apr 02 15:30:04 CST 2020
后台线程
public final void setDaemon(boolean on):将该线程标记为守护线程或用户线程。当正在运行的线程都是守护线程时,Java 虚拟机退出。
该方法必须在启动线程前调用。
public class MyThread extends Thread{

	//重写run方法
	public void run(){
		//一般来说,这是比较耗时的代码,比如循环
		for(int i=0;i<10;i++){
			System.out.println(getName()+":"+i);
		}

	}
}
public class MyThreadDemo {
	public static void main(String[] args) {
		MyThread m1=new MyThread();
		MyThread m2=new MyThread();

		//设置线程对象名字
		m1.setName("关羽");
		m2.setName("张飞");

		//设置守护线程,属于用户线程,需要设置在启动线程之前
		m1.setDaemon(true);
		m2.setDaemon(true);

		m1.start();
		m2.start();

		//关羽和张飞应该是死在刘备前面的
		Thread.currentThread().setName("刘备");
		for(int i=0;i<20;i++){
			System.out.println(Thread.currentThread().getName()+":"+i);
		}
	}

}
结果:
刘备:0
刘备:1
刘备:2
刘备:3
刘备:4
刘备:5
刘备:6
张飞:0
关羽:0
关羽:1
关羽:2
张飞:1
张飞:2
张飞:3
张飞:4
张飞:5
张飞:6
张飞:7
刘备:7
刘备:8
刘备:9
张飞:8
关羽:3
关羽:4
关羽:5
关羽:6
关羽:7
关羽:8
张飞:9
刘备:10
刘备:11
刘备:12
关羽:9
刘备:13
刘备:14
刘备:15
刘备:16
刘备:17
刘备:18
刘备:19
终断线程
public void interrupt():中断线程。把线程状态终止,并抛出一个异常
public class MyThread extends Thread{

	//重写run方法
	public void run(){
		System.out.println("开始执行:"+new Date());

		//休息10秒
		try {
			Thread.sleep(10000);
		} catch (InterruptedException e) {
			// TODO Auto-generated catch block
			System.out.println("线程终止了");
		}
		System.out.println("结束执行:"+new Date());
	}
}
public class MyThreadDemo {
	public static void main(String[] args) {
		MyThread m1=new MyThread();

		m1.setName("关羽");

		m1.start();

		//超过3秒不醒,就终止
		try {
			Thread.sleep(3000);
			m1.interrupt();//终止线程
		} catch (InterruptedException e) {
			// TODO Auto-generated catch block
			e.printStackTrace();
		}
	}

}
结果:
开始执行:Thu Apr 02 16:09:16 CST 2020
线程终止了
结束执行:Thu Apr 02 16:09:19 CST 2020
方式2:实现Runnable接口
步骤:
A:自定义类实现Runnable接口
B:重写run()方法
C:创建自定义类的对象
D:创建Thread类的对象,并把C步骤的对象作为构造参数传递
构造方法:
public Thread(Runnable target):这个参数其实是Runnable的子类对象
public Thread(Runnable target,String name):第一个是子类对象,第二种是设置名字
public class MyRunnable implements Runnable{

	@Override
	public void run() {
		// TODO Auto-generated method stub
		for(int i=0;i<100;i++){
			//由于实现接口的方式就不能直接使用Thread类的方法,但是可以间接的使用
			System.out.println(Thread.currentThread().getName()+":"+i);
		}
	}

}
public class MyRunnableDemo {
	public static void main(String[] args) {
		//创建自定义类的对象
		MyRunnable mr=new MyRunnable();

		//创建Thread类的对象,并把C步骤的对象作为构造参数传递
		//方式1:
		//public Thread(Runnable target):这个参数其实是Runnable的子类对象
//		Thread t1=new Thread(mr);
//		Thread t2=new Thread(mr);
//
//		//设置名字
//		t1.setName("张三");
//		t2.setName("李四");
		//方式2:
		//public Thread(Runnable target,String name):第一个是子类对象,第二种是设置名字
		Thread t1=new Thread(mr,"张三");
		Thread t2=new Thread(mr,"李四");

		t1.start();
		t2.start();
	}
}
两种方式对比:
后面这种方法的好处是:
A:避免了由于java单继承带来的局限性(假如有一个子类继承了一个父类,但是子类想要实现多线程,这时候这种方法就可以适用)
B:适合多个相同程序的代码去处理同一个资源的情况,把线程同程序的代码,数据有效分离,较好的体现了面向对象设计的思想。
大部分情况用方式2


 215
215


 被折叠的 条评论
为什么被折叠?
被折叠的 条评论
为什么被折叠?
 到【灌水乐园】发言


