


好不容易空了一段时间,终于可以写一下最近项目里遇到的问题和坑了。
最近有个项目需要用到扫描二维码功能,我便去搜索了一下,发现android平台上,Zxing是使用最为频繁的一个框架,于是就准备集成。然而我们有一个需求,就是在扫描界面要展示出扫描者所在的当前位置,因此,我也需要集成地图sdk,这里我用到了百度地图,当然这不是这篇文章的重点。这篇文章的重点是如何集成zxing,和如何进行简单的自定义扫描框体。
1.接入zxing以及基本布局
我是通过直接import module来实现接入的。
首先要下载zxing的lib包,然后通过import module使它作为一个module进入你的项目。
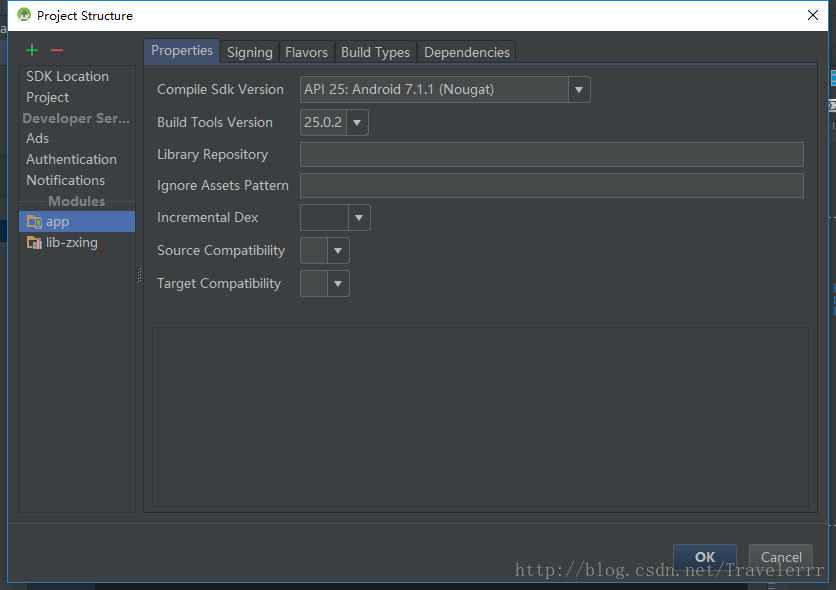
然后,要把这个zxing的module添加至主项目的依赖库。
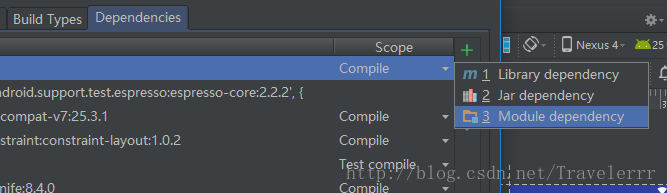
成功以后就可以看到gradle里面已经存在了zxing的配置。

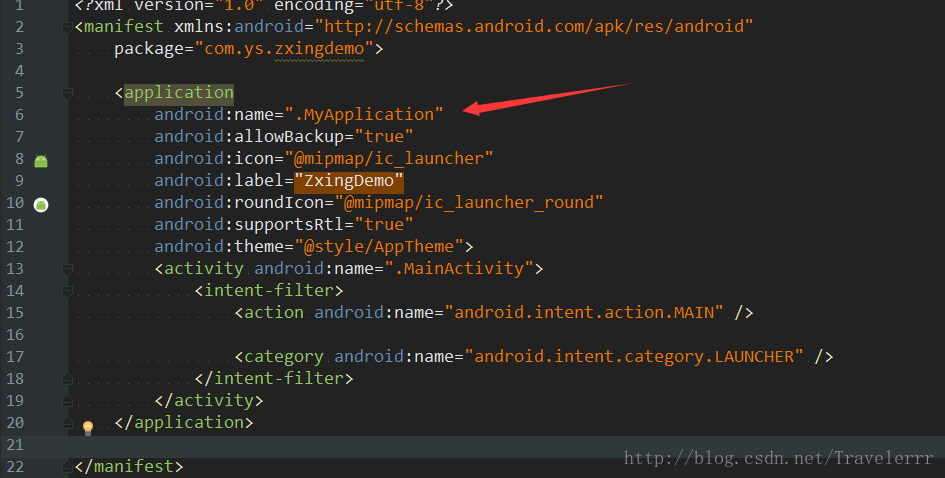
注意,还有一步,那就是在我们的application里初始化zxing,不然就会出现Both dimensions must be greater than 0 这个错误.

再贴一下基本布局 和 示意图。
<?xml version="1.0" encoding="utf-8"?>
<LinearLayout
    xmlns:android="http://schemas.android.com/apk/res/android"
    xmlns:tools="http://schemas.android.com/tools"
    android:layout_width="match_parent"
    android:layout_height="match_parent"
    android:orientation="vertical"
    tools:context="com.ys.zxingdemo.MainActivity">
    <LinearLayout
        android:layout_width="match_parent"
        android:layout_height="wrap_content">
        <TextView
            android:layout_width="wrap_content"
            android:layout_height="wrap_content"
            android:textColor="#000"
            android:textSize="20dp"
            android:text="想显示的文本"
            />
        <EditText
            android:layout_width="match_parent"
            android:layout_height="wrap_content"
            android:id="@+id/et_content"
            />
    </LinearLayout>
    <LinearLayout
        android:layout_width="match_parent"
        android:layout_height="wrap_content">
        <TextView
<
最低0.47元/天 解锁文章


 4万+
4万+


 被折叠的 条评论
为什么被折叠?
被折叠的 条评论
为什么被折叠?
 到【灌水乐园】发言


