


一、资料链接
1、github地址
https://github.com/qq1534774766/wx-push
2、教程地址
https://blog.csdn.net/qq15347747/article/details/126521774
3、易客云API(自动发送天气)
https://yikeapi.com/account/index
4、apispace-各种接口(名人名言)
https://www.apispace.com/console/api?orgId=6356
5、微信公众平台
https://mp.weixin.qq.com/debug/cgi-bin/sandboxinfo?action=showinfo&t=sandbox/index
二、准备工作
(一)进入接口测试页面
1、找到微信公众平台
2、进入开发者工具

3、进入公众平台测试帐号
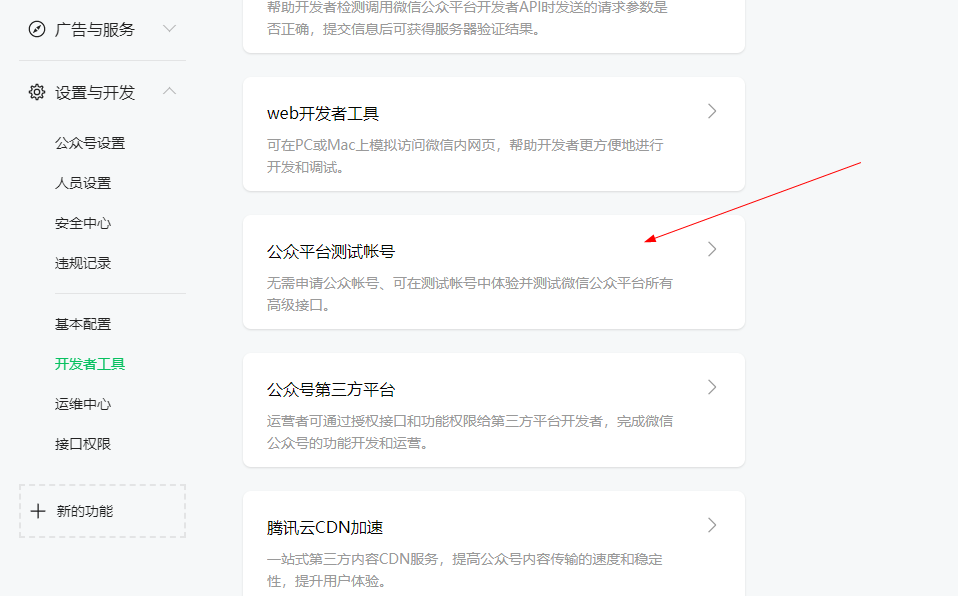
4、拉到最下面
微信扫码关注
5、记录下述信息
(二)获取天气预报接口地址
1、进入易客云API(自动发送天气)
https://yikeapi.com/account/index
2、注册登录
3、复制参数appid和appsecret的值

4、记录下述信息

(三)获取(名言警句)地址
1、进入apispace-各种接口
https://www.apispace.com/console/api?orgId=6356
2、注册登录
3、购买名言警句
4、进入我的api,点击测试
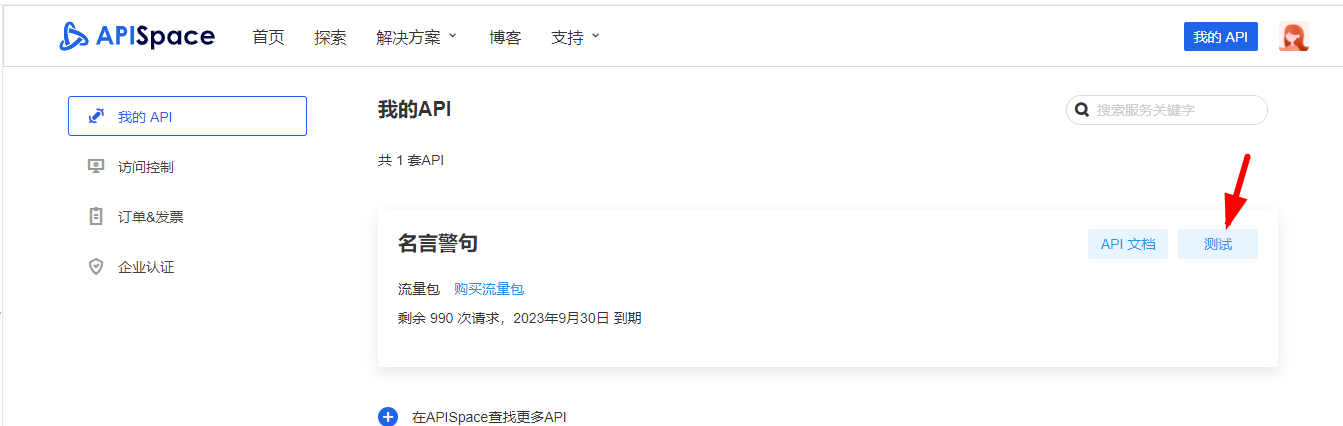
5、复制token地址
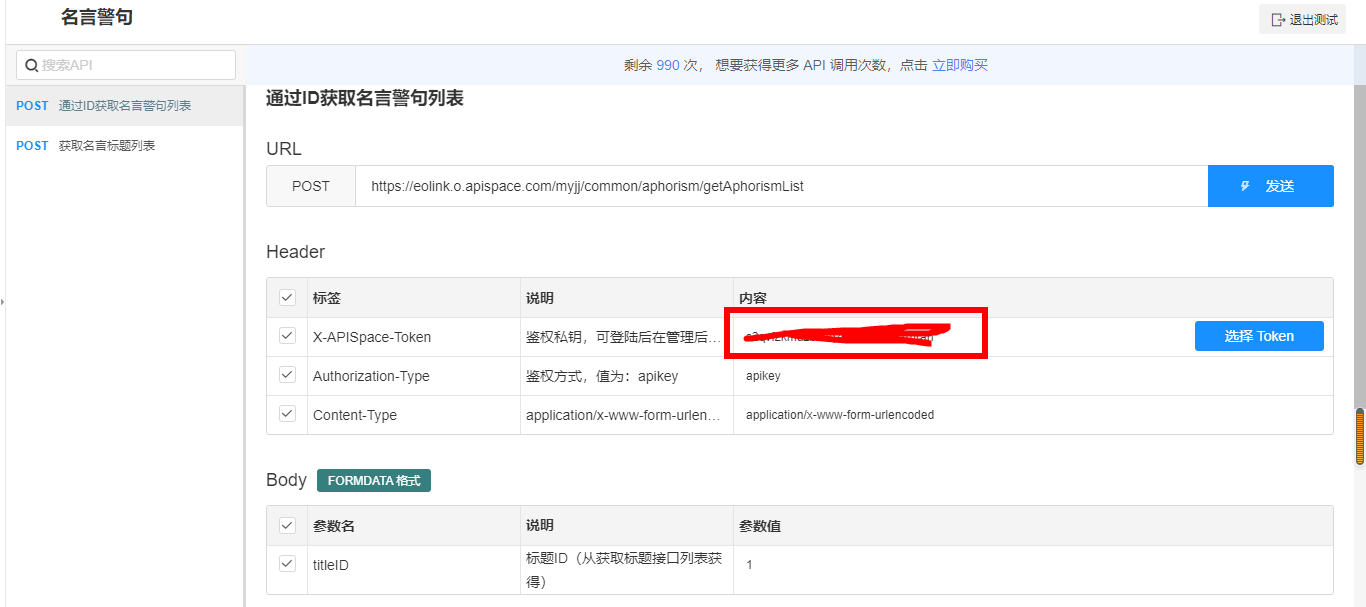
6、记录下述信息

三、开发部署
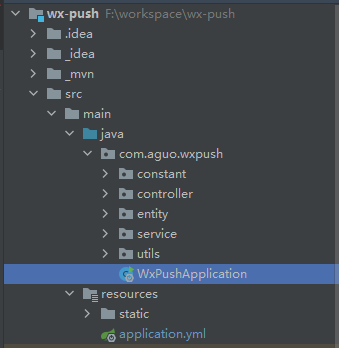
1、下载项目
git下载:https://github.com/qq1534774766/wx-push.git
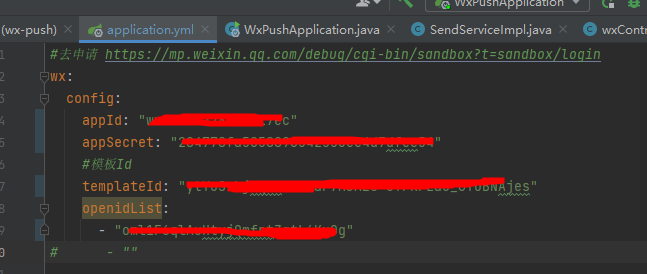
2、填写上述参数(application.yml)
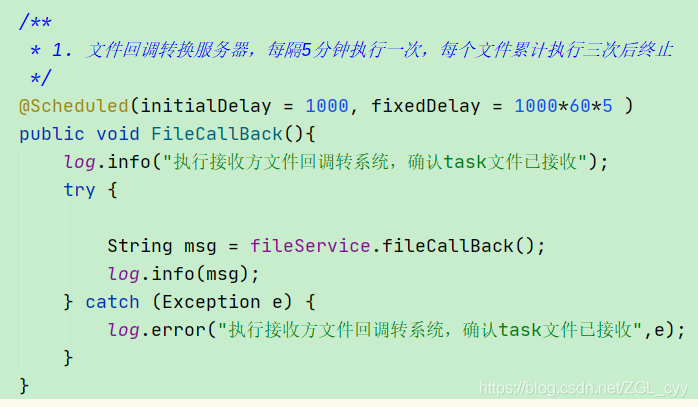
3、配置定时
填写cron表达式@Scheduled(cron = "0 30 7 ? * *")
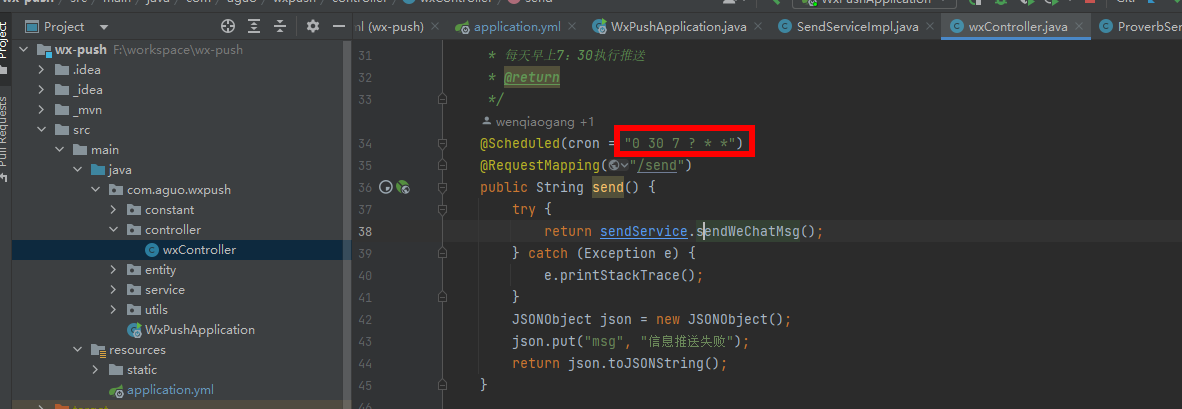
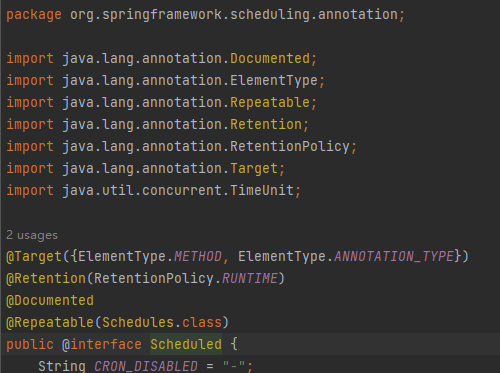
实现方式:import org.springframework.scheduling.annotation.Scheduled;
4、启动项目
5、测试
修改天气预报城市:localhost:8081
测试发送消息:localhost:8081/send
6、打包上传服务器
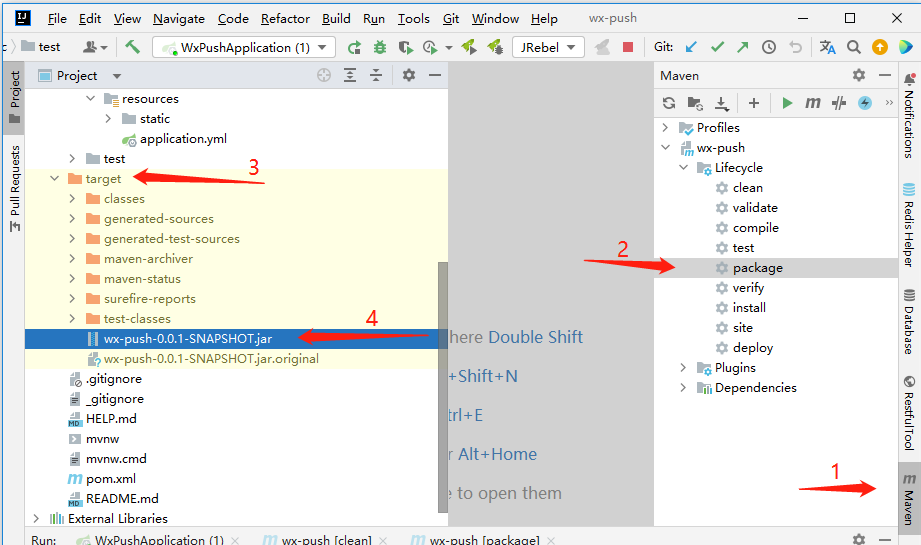
nohup java -jar wx.jar >wx.txt &
四、优化
(一)cron表达式配置及含义
1、启动类加注解
@EnableScheduling
2、几分钟执行一次
/**
     * 固定频率执行。fixedDelay的单位是ms
     */
    @Scheduled(fixedDelay = 1000)
    public void remindTask2() throws InterruptedException {
        log.info("每隔1s执行一次 当前线程名称{} 当前执行次数{}", Thread.currentThread().getName(), task1Number.incrementAndGet());
    }
3、cron表达式配置
5秒执行一次
@Scheduled(cron = "*/5 * * * * ? ")
    public void remindTask() throws InterruptedException {
        log.info("每隔5秒执行一次, 当前线程名称{} 当前执行次数{}", Thread.currentThread().getName(), taskNumber.incrementAndGet());
    }
ps:?的含义是
“?”字符仅被用于天(月)和天(星期)两个子表达式,表示不指定值 当2个子表达式其中之一被指定了值以后,为了避免冲突,需要将另一个子表达式的值设为“?”
项目使用
@Scheduled(cron = "0 30 7 ? * *")
@RequestMapping("/send")
public String send() {
try {
return sendService.sendWeChatMsg();
} catch (Exception e) {
e.printStackTrace();
}
JSONObject json = new JSONObject();
json.put("msg", "信息推送失败");
return json.toJSONString();
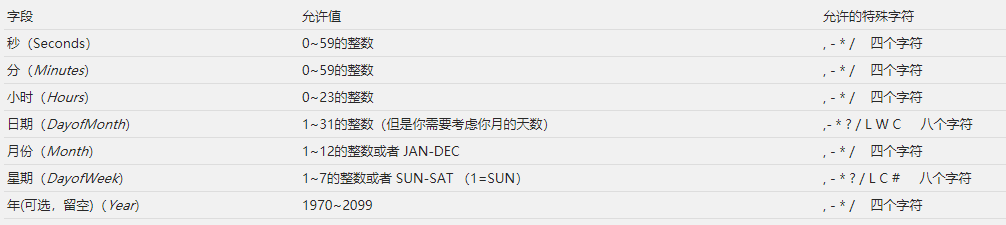
}corn从左到右(用空格隔开):秒 分 小时 月份中的日期 月份 星期中的日期 年份
DayofMonth和DayofWeek会相互影响
校验:https://www.bejson.com/othertools/cronvalidate/

日期和星期相互影响,必须配置一个?【?表示不指定周几或每月几号,因为二者相互影响】
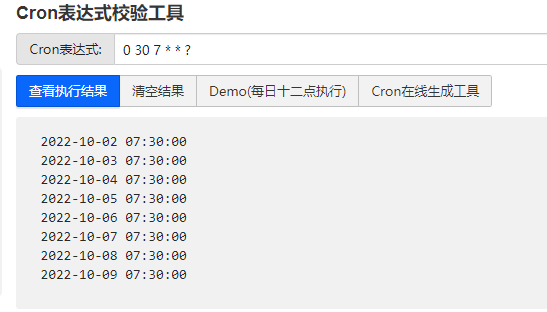
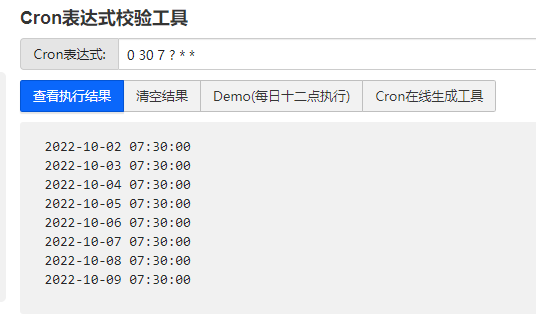
配置哪个含义相同
(二)配置名言外的其他api(apispace)
找到名言警句的配置地址
配置其他api
1、示例文档地址
https://www.apispace.com/console/api?orgId=6356
2、示例代码
OkHttpClient client = new OkHttpClient().newBuilder().build();
MediaType mediaType = MediaType.parse("application/x-www-form-urlencoded");
RequestBody body = RequestBody.create(mediaType, "titleID=1");
Request request = new Request.Builder()
  .url("https://eolink.o.apispace.com/myjj/common/aphorism/getAphorismList")
  .method("POST",body)
  .addHeader("X-APISpace-Token","s2qvfzkmuzb9vq7pvw8tnll882rhrarl")
  .addHeader("Authorization-Type","apikey")
  .addHeader("Content-Type","application/x-www-form-urlencoded")
  .build();

Response response = client.newCall(request).execute();
3、实际代码
ProverbServiceImpl
@Override
    public String getOneNormalProverb() {
        String proverb = null;
        try {
            OkHttpClient client = new OkHttpClient().newBuilder().build();
            MediaType mediaType = MediaType.parse("application/x-www-form-urlencoded");
            RequestBody body = RequestBody.create(mediaType, "titleID="+new Random().nextInt(9));
            Request request = new Request.Builder()
                    .url("https://eolink.o.apispace.com/myjj/common/aphorism/getAphorismList")
                    .method("POST", body)
                    .addHeader("X-APISpace-Token", configConstant.getToken())
                    .addHeader("Authorization-Type", "apikey")
                    .addHeader("Content-Type", "")
                    .build();Response response = client.newCall(request).execute();
        JSONObject jsonObject = JSONObject.parseObject(response.body().string());
        //取出全部句子
        JSONArray allProverb = JSONObject.parseArray((String) jsonObject.getJSONArray("result").getJSONObject(0).get("words"));
        //随机取出一条句子
        String s = (String) allProverb.get(new Random().nextInt(allProverb.size()));
        //去除无关元素
        proverb = s.replaceAll("^.*、", "");
    } catch (IOException e) {
        throw new RuntimeException(e);
    }
    return proverb;
}
通过有道翻译为英文
@Override
    public String translateToEnglish(String sentence) {
        String result = null;
        try {
            OkHttpClient client = new OkHttpClient().newBuilder().build();
            Request request = new Request.Builder()
                    .url("https://fanyi.youdao.com/translate?&doctype=json&type=AUTO&i="+sentence)
                    .get()
                    .addHeader("Content-Type","")
                    .build();
            Response response = client.newCall(request).execute();
            result = response.body().string();
            //解析
            JSONObject jsonObject = JSONObject.parseObject(result);
            result = jsonObject.getJSONArray("translateResult").getJSONArray(0).getJSONObject(0).getString("tgt");
        }catch (Exception e) {
            e.printStackTrace();
        }
        return result;
    }
(三)配置天气预报的原理(易客云)
1、得到当日天气
public JSONObject getWeatherByCity() {
        String result = null;
        try {
            OkHttpClient client = new OkHttpClient.Builder().build();
            HttpUrl url = new HttpUrl.Builder()
                    .scheme("https")
                    .host("www.yiketianqi.com")
                    .addPathSegments("free/day")
                    .addQueryParameter("appid", configConstant.getWeatherAppId())
                    .addQueryParameter("appsecret", configConstant.getWeatherAppSecret())
                    .addQueryParameter("city", configConstant.getCity())
                    .addQueryParameter("unescape", "1")
                    .build();
            Request request = new Request.Builder()
                    .url(url)
                    .get()
                    .build();
            Response re = client.newCall(request).execute();
            result = re.body().string();
        } catch (IOException e) {
            e.printStackTrace();
        }
        return JSONObject.parseObject(result);
		}
2、得到三日天气
public Map<String, String> getTheNextThreeDaysWeather() {
        Map<String, String> map =  null;
        try {
            OkHttpClient client = new OkHttpClient.Builder().build();
            HttpUrl url = new HttpUrl.Builder()
                    .scheme("https")
                    .host("yiketianqi.com")
                    .addPathSegments("free/week")
                    .addQueryParameter("appid", configConstant.getWeatherAppId())
                    .addQueryParameter("appsecret", configConstant.getWeatherAppSecret())
                    .addQueryParameter("city", configConstant.getCity())
                    .build();
            Request request = new Request.Builder()
                    .url(url)
                    .get()
                    .build();
            Response response = client.newCall(request).execute();
            String responseResult = response.body().string();
            if (!StringUtils.hasText(responseResult)) {
                logger.error("获取三天天气失败,检查配置文件");
                throw new RuntimeException("获取三天天气失败,检查配置文件");
            }
            logger.info(responseResult);
            ZoneId zoneId = ZoneId.of("Asia/Shanghai");
            LocalDate now = LocalDate.now(zoneId);
            //封装今天,明天,后天的时间
            /**
             * 原因分析:从天气api获取到未来的天气的日期是 01  02  03 的两位数。
             * 而Java中的LocalDate的日期,是一位数的 1  2  3 。
             * 因为一开始用是String类型比较,所以01≠1,最后导致异常。
             */
            Map<Integer, String> daySet = new HashMap<>();
            daySet.put(now.getDayOfMonth(), "今"); // 用now,就不会报错了,1 2 3
            daySet.put(now.plusDays(1L).getDayOfMonth(), "明");
            daySet.put(now.plusDays(2L).getDayOfMonth(), "后");
            //过滤,提取结果
            JSONObject jsonObject = JSONObject.parseObject(responseResult);
            if (jsonObject.containsKey("errmsg")) {
                logger.error(jsonObject.getString("errmsg"));
                throw new IllegalArgumentException(jsonObject.getString("errmsg"));
            }
            map = jsonObject.getJSONArray("data").stream()
                    .peek(o -> {
                        String date = getStringFromJson(o, "date").substring(8);
                        ((JSONObject) o).put("date", date);
                    })
                    .filter(o -> daySet.containsKey(getIntegerFromJson(o, "date")))
                    .collect(Collectors.toMap(
                            key -> daySet.get(getIntegerFromJson(key, "date")),
                            value -> getStringFromJson(value, "wea")));
        } catch (IOException e) {
            e.printStackTrace();
            throw new RuntimeException("获取失败");
        }
        return map;
    }
(四)发送消息
1、封装各项请求的内容
if (configConstant.isEnableDaily() && StringUtils.hasText(configConstant.getToken())) {
                //名言警句,中文
                String noteZh = null;
                try {
                    noteZh = proverbService.getOneNormalProverb();
                    JSONObject note_Zh = JsonObjectUtil.packJsonObject(noteZh, "#879191");
                    resultMap.put("note_Zh", note_Zh);
                    logger.info("note_Zh:{}", note_Zh);
                } catch (Exception e) {
                    logger.info("名言警句获取失败,检查ApiSpace的token是否正确?套餐是否过期?");
                }
                //名言警句,英文
                try {
                    JSONObject note_En = JsonObjectUtil.packJsonObject(proverbService.translateToEnglish(noteZh), "#879191");
                    resultMap.put("note_En", note_En);
                    logger.info("note_En:{}", note_En);
                } catch (Exception e) {
                    logger.info("名言警句翻译失败,网易云翻译接口无法使用");
                }
            }
            //封装数据并发送
            sendMessage(accessToken, errorList, resultMap, opedId);
2、发送到微信token
private void sendMessage(String accessToken, List<JSONObject> errorList, HashMap<String, Object> resultMap, String opedId) {
        JSONObject templateMsg = new JSONObject(new LinkedHashMap<>());
        templateMsg.put("touser", opedId);
        templateMsg.put("template_id", configConstant.getTemplateId());
        templateMsg.put("data", new JSONObject(resultMap));
        String url = "https://api.weixin.qq.com/cgi-bin/message/template/send?access_token=" + accessToken;

        String sendPost = HttpUtil.sendPost(url, templateMsg.toJSONString());
        JSONObject WeChatMsgResult = JSONObject.parseObject(sendPost);
        if (!"0".equals(WeChatMsgResult.getString("errcode"))) {
            JSONObject error = new JSONObject();
            error.put("openid", opedId);
            error.put("errorMessage", WeChatMsgResult.getString("errmsg"));
            errorList.add(error);
        }
    }
五、技术总结
1、Scheduleh注解定时调任务
2、微信token发送指定消息
3、调用接口得到数据(天气预报和各种api)
4、姓名如何在方法头上标注
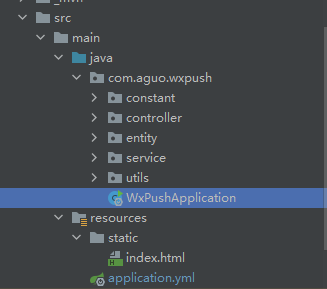
5、代码结构
6、配置参数调用-通过value和自动注入

configConstant.getWeatherAppId()


 1万+
1万+


 被折叠的 条评论
为什么被折叠?
被折叠的 条评论
为什么被折叠?
 到【灌水乐园】发言


