


Android UI 详解之Button
1、Button结构
Button 继承TextView
Imagebutton 继承 Imageview,比ImageView多了点击效果,就是用一个图标代表了一些文字,它比起Button没有Android:text属性。
它由Android:src指定图标的位置 ,
那大家又会问ImageButton的src和background有什么区别呢?
ImageButton 是带图标的Button控件,有src的属性,也就是设置他的图标,也有一个所有控件公有的属性background, 这个也可以设置它的“图标”。其实,src才是设置图标,而background只是设置背景。举个例子,如果控件的大小是100*100 图片资源是80*80的话,那么用src,图片就会居中显示,如果使用background那么图片就会被拉伸充满控件。
重要的是,background是底层的图片资源,src是覆盖在background上面的资源,他们可以叠加使用,实现选中的效果。在ActivityGroup用到。
android:src="@drawable/back"
Button 继承 Textview,所以TextView的一些属性也适用于Button控件。
Button把图片当作背景与放在ImageButton/ImageView中的效果是不一样的。
3、圆形Button,有两种,一种是通过Button设置背景图片,用xml配置点击前与点击后的图片,这种当点击边缘部分也会处发点击效果,对于小的按钮可以这样做。另一种是Button,设置背景图片,手动编写点击事件处理,通过设置
setOnTouchListener()这个方法,不用setOnClickListener,因为onTouchListener()可以获取我们的事件对象,方便我们计算
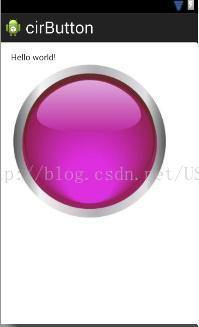
点击前、后效果图

(1)不限制点击范围的按钮,用xml实现比较方便
这个xml放在那里都可以主要能引用到,我放到了drawable目录下,并且这目录下放两个资源图片
<?xml version="1.0" encoding="utf-8"?>
<selector xmlns:android="http://schemas.android.com/apk/res/android">
    <!-- 制定按钮按下时的图片 -->
    <item
         android:state_pressed="true"
         android:drawable="@drawable/press"

        />
    <item android:state_pressed="false"
          android:drawable="@drawable/press2"
          />

</selector>
布局文件xml
<RelativeLayout xmlns:android="http://schemas.android.com/apk/res/android"
    xmlns:tools="http://schemas.android.com/tools"
    android:layout_width="match_parent"
    android:layout_height="match_parent"
    android:paddingBottom="@dimen/activity_vertical_margin"
    android:paddingLeft="@dimen/activity_horizontal_margin"
    android:paddingRight="@dimen/activity_horizontal_margin"
    android:paddingTop="@dimen/activity_vertical_margin"
    tools:context=".MainActivity"
    android:background="#FFFFFF">


    <Button
        android:id="@+id/bt"
        android:layout_height="wrap_content"
        android:layout_width="wrap_content"
        android:background="@drawable/button_selector"
        android:text="Click me"
        />
</RelativeLayout>
Activity中什么也不用写,只需要加载布局文件,并显示。
(2)限制点击范围的圆形按钮,需用java代码实现
package com.example.demo;

import android.app.Activity;
import android.content.Context;
import android.os.Bundle;
import android.support.v4.widget.DrawerLayout;
import android.util.Log;
import android.view.MotionEvent;
import android.view.View;
import android.widget.ImageButton;

/**
 * 这是一个圆形按钮,只有圆形的区域有效
 * @author qiyue
 *
 */
public class MainActivity extends Activity
{
        @Override
    protected void onCreate(Bundle savedInstanceState)
    {
        super.onCreate(savedInstanceState);
        setContentView(R.layout.sa);

        Button bt = (Button) findViewById(R.id.imageBt);
        bt.setOnTouchListener(new View.OnTouchListener() {
            @Override
            public boolean onTouch(View view, MotionEvent motionEvent) {
                //按下操作
            	float x1 = pxTodip(getApplication(),motionEvent.getX());
            	float y1 = pxTodip(getApplication(),motionEvent.getY());

            	if(((x1-121)*(x1-121)+(y1-121)*(y1-121))<(121*121)){
	                if(motionEvent.getAction()==MotionEvent.ACTION_DOWN){
	                	view.setBackgroundResource(R.drawable.press);
	                }
            	}
                //抬起操作
                if(motionEvent.getAction()==MotionEvent.ACTION_UP){
                	view.setBackgroundResource(R.drawable.press2);
                }
                //移动操作
                if(motionEvent.getAction()==MotionEvent.ACTION_MOVE){

                }
                return false;
            }
        });

    }
    public static int dipTopx(Context context,float dpValue){
    	final float scale = context.getResources().getDisplayMetrics().density;
    	return (int) (dpValue * scale + 0.5f);
    }


    public static int pxTodip(Context context, float pxValue) {
	final float scale = context.getResources().getDisplayMetrics().density;
	return (int) (pxValue / scale + 0.5f);
    }


}
xml
<RelativeLayout xmlns:android="http://schemas.android.com/apk/res/android"
    xmlns:tools="http://schemas.android.com/tools"
    android:layout_width="match_parent"
    android:layout_height="match_parent"
    android:paddingBottom="@dimen/activity_vertical_margin"
    android:paddingLeft="@dimen/activity_horizontal_margin"
    android:paddingRight="@dimen/activity_horizontal_margin"
    android:paddingTop="@dimen/activity_vertical_margin"
    android:background="#FFFFFF"
    tools:context=".MainActivity" >

    <TextView
        android:id="@+id/tv"
        android:layout_width="wrap_content"
        android:layout_height="wrap_content"
        android:text="@string/hello_world" />

    <Button
        android:id="@+id/imBt"
        android:layout_width="wrap_content"
        android:layout_height="wrap_content"
        android:layout_below="@id/tv"
        android:background="@drawable/press" />

</RelativeLayout>
其余图形的的判断也是通过此方法,希望这篇文章能帮到大家


 365
365

 被折叠的 条评论
为什么被折叠?
被折叠的 条评论
为什么被折叠?
 到【灌水乐园】发言


