


运行环境
Android Studio 2020.3.1

文章目录
1. 知识汇总
1.1 常见UI组件
| 组件名 | 作用 |
|---|---|
| TextView | 不可编辑文本框 |
| EditView | 可编辑的文本框 |
| Button | 按钮 |
| CheckBox | 多选框 |
| RadioGroup | 单选框组 |
| RadioButton | 单选按钮 |
- 同一个RadioGroup下的RadioButton是互斥的,即同组只能选一个,不同组则互不影响
1.2 显示提示信息
Toast.makeText(MainActivity.this, "提示信息", Toast.LENGTH_LONG).show();
1.3 监听事件
单击按钮 Demo1
Button.setOnclickListener(new View.OnclickListener(){

	@Override
	public void onClick(View view){

	}
});
选中多选框 Demo5
CheckBox.setOnCheckedChangeListener(new CompoundButton.OnCheckedChangeListener() {

	@Override
	public void onCheckedChanged(CompoundButton compoundButton, boolean b) {

    }
});
单选框组选中某个项 Demo6
RadioGroup.setOnCheckedChangeListener(new RadioGroup.OnCheckedChangeListener() {

	@Override
	public void onCheckedChanged(RadioGroup radioGroup, int i) {

                RadioButton rb = findViewById(i);
    }
});
1.4 常见属性
| 属性名 | 描述 |
|---|---|
| orientation | 可选horizontal水平 / vertical垂直两种方式,用于Layout布局,表示布局内所有组件的排列方式。 |
| layout_width | 表示当前组件的宽度,可填具体的数值+单位dp/sp等,也可填match_parent(上一级的宽度)或 wrap_content(组件内部所占宽度) |
| layout_weight | 表示组件的权重,默认为0,通常设置为1且与layout_width="0dp"联用 |
| text | 设置组件显示的文本 |
| textSize | 设置显示文本的字体大小 |
| gravity | 设置组件内部的对其方式可选Left/Right/Center等等 |
| layout_gravity | 设置组件相对于父级组件的对齐方式 |
RelativeLayout相对布局 Demo2
| 属性名 | 描述 |
|---|---|
| layout_centerInParent | 设置为true时,组件会处于父级组件的中心 ,默认为false |
| layout_below | 值为@id/组件id,表示将该组件放置在某个组件的下方 |
| layout_alignParentRight | 设置为true时,组件会移至父级组件的右侧 ,默认为false |
| layout_alignParentBottom | 设置为true时,组件会移至父级组件的下方,默认为false |
EditText组件 Demo4
| 属性名 | 描述 |
|---|---|
| ems | 限制长度 |
| hint | 设置输入框为空时提示的文本 |
| inputType | 输入的类型,有textPassword / Phone 等等 |
1.5 分析
App运行框架
public class MainActivity extends AppCompatActivity {

    @Override
    protected void onCreate(Bundle savedInstanceState) {

    	super.onCreate(savedInstanceState);
    	// 设置布局的配置文件
        setContentView(R.layout.layout_main);
    	// 运行内容...
    }
| 方法名 | 描述 |
|---|---|
| View findViewById (int id) | 根据ID名查找xml配置的组件, 一般为R.id.xx 或R.color.xx等,返回的是View的子类,比如TextView / Buton 等 |
2. Demo
2.1 实现单击按钮后显示文本
实现效果:
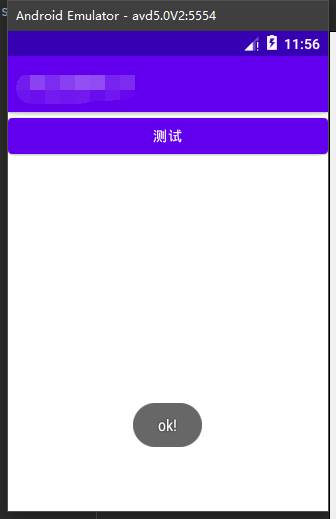
layout_main.xml
<?xml version="1.0" encoding="utf-8"?>
<LinearLayout xmlns:android="http://schemas.android.com/apk/res/android"
    android:layout_width="match_parent"
    android:layout_height="match_parent"
    android:orientation="vertical"
    >

    <Button
        android:id="@+id/button"
        android:layout_width="match_parent"
        android:layout_height="wrap_content"
        android:text="测试"
        />
</LinearLayout>
MainActivity.java
import androidx.appcompat.app.AppCompatActivity;

import android.os.Bundle;
import android.view.View;
import android.widget.Button;
import android.widget.Toast;

public class MainActivity extends AppCompatActivity {


    @Override
    protected void onCreate(Bundle savedInstanceState) {

        super.onCreate(savedInstanceState);
        setContentView(R.layout.layout_main);

        Button bt = (Button)findViewById(R.id.button);

        bt.setOnClickListener(new View.OnClickListener() {

            @Override
            public void onClick(View view) {

                Toast.makeText(MainActivity.this, "ok!", Toast.LENGTH_LONG).show();
            }
        });
    }
}
2.2 实现RelativeLayout相对布局
实现效果:
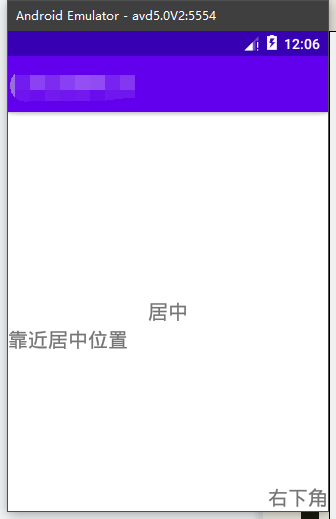
activity_main.xml
<?xml version="1.0" encoding="utf-8"?>
<RelativeLayout xmlns:android="http://schemas.android.com/apk/res/android"
    android:layout_width="match_parent"
    android:layout_height="match_parent">

    <TextView
        android:id="@+id/textView"
        android:layout_width="wrap_content"
        android:layout_height="wrap_content"
        android:layout_centerInParent="true"
        android:textSize="20dp"
        android:text="居中" />

    <TextView
        android:id="@+id/textView2"
        android:layout_width="wrap_content"
        android:layout_height="wrap_content"
        android:layout_below="@id/textView"
        android:textSize="20dp"
        android:text="靠近居中位置" />

    <TextView
        android:id="@+id/textView3"
        android:layout_width="wrap_content"
        android:layout_height="wrap_content"
        android:layout_alignParentRight="true"
        android:layout_alignParentBottom="true"
        android:textSize=
最低0.47元/天 解锁文章


 729
729


 被折叠的 条评论
为什么被折叠?
被折叠的 条评论
为什么被折叠?
 到【灌水乐园】发言


