


前言:因为我比较懒,就简单的用我之前的代码演示一下吧,如果有问题可以,进行代码的比对,仔细找找应该问题不大.
效果图:
 (一个简单的移动端商城页面)
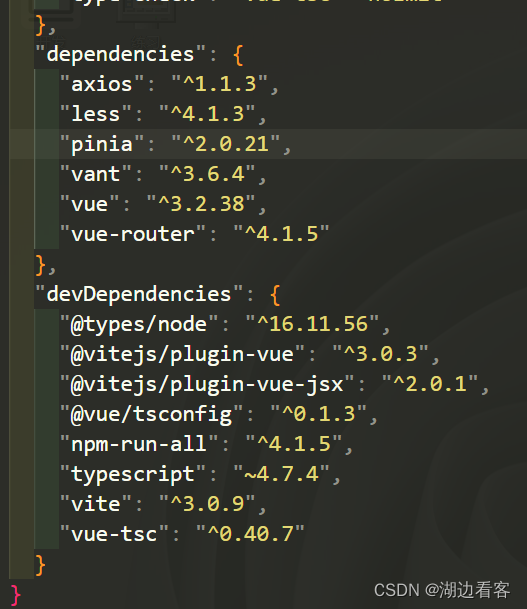 (所需要的依赖也不是很多)
欧克,面来说一下流程:
首先的话,要初始化vite,官方也推荐使用这个,不会安装的话参考官网.(附带:官网截图)
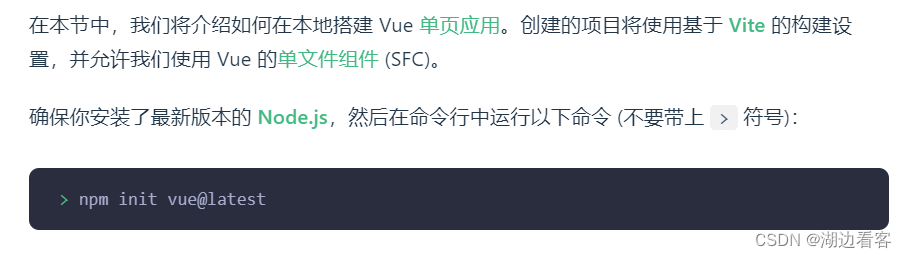
然后,进行配置的选择就行/

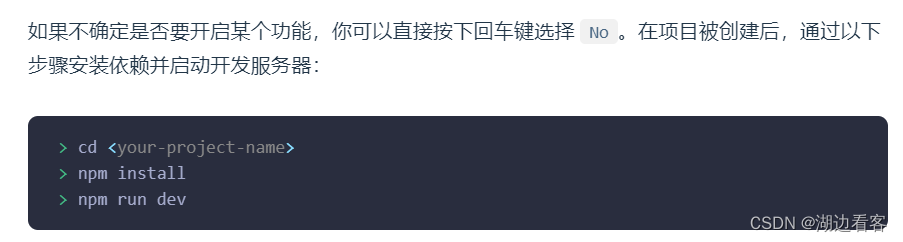
最终,运行
然后,配置main.ts文件
import { createApp } from 'vue'
import { createPinia } from 'pinia'

import App from './App.vue'
import router from './router'

import axios from 'axios'


// 1. 引入你需要的组件
import vant from 'vant';
// 2. 引入组件样式
import 'vant/lib/index.css';


const app = createApp(App)


axios.defaults.baseURL = 'http://localhost:3000'


app.config.globalProperties.$http = axios


app.use(createPinia())
app.use(router)
app.use(vant)

app.mount('#app')
如果你想使用全局的axios的话 ,就像我上面那样引入axios,并且,配置全局根路径以及全局属性
如果你想自己封装的话
 创建一个这样的文件夹和文件
// axios的配置文件 配置好之后 项目中都用这个axios 不再用原生的了
import axios from "axios";

// 创建新的实例 修改他
const http = axios.create({
    // 向新的实例中传参 来修改这个实例
    baseURL: '/api',
    timeout: 1000
});

// 添加请求拦截器 在发请求之前处理一下
http.interceptors.request.use((config: any) => {
    // config 就是请求
    // token是用来校验当前用户是否登录的 token中包含用户信息以及过期时间等
    let info = JSON.parse(localStorage.getItem('userInfo') || '0') || {};    //这里加上0是为了防止ts报错
    if (config.url != "/userlogin") { // 有些接口不需要token 比如登录、注册、首页广告等
        config.headers.authorization = info.token; // 在请求头添加token
    }
    return config;
}, (error: any) => {
    return Promise.reject(error);
})

// 添加响应拦截器 在得到数据之后处理一下
http.interceptors.response.use((data: any) => {
    // console.log(data);
    // 返回的数据就是组件接受的数据 所以过滤一下
    // 在这里判断,接口是否返回登录过期,如果过期需要调转到登录页(先引入router,再router.push())
    return data.data;
}, (error: any) => {
    return Promise.reject(error);
})


export default http;
这样自己就封装了一个axios,我这里简单的用any类型定义了
引入vant组件库中的tabbar组件 在vue中这样配置
<template>
    <router-view></router-view>
    <van-tabbar v-model="active" Route>
        <van-tabbar-item replace to="/home" name="home" icon="home-o">首页</van-tabbar-item>
        <van-tabbar-item replace to="/category" name="category" icon="qr">分类</van-tabbar-item>
        <van-tabbar-item replace to="/shopping" name="shopping" icon="shopping-cart-o">购物车</van-tabbar-item>
        <van-tabbar-item replace to="/my" name="my" icon="friends-o">我的</van-tabbar-item>
    </van-tabbar>
</template>

<script lang="ts" setup>
import { ref } from 'vue';
const active = ref('home');


</script>

<style lang="less" scoped>
.van-tabbar--fixed {
    bottom: -3px;
}
</style>
配置router
import { createRouter, createWebHistory } from 'vue-router';//上面导入使用模块
import type { RouteRecordRaw } from 'vue-router';//这个是导入类型模块

import Tabbar from '@/views/Tabbar.vue'
const Home = () => import('@/components/HomeShow.vue')
const Category = () => import('@/components/CategoryShow.vue')
const Shopping = () => import('@/components/ShoppingShow.vue')
const My = () => import('@/components/MyShow.vue')


const routes: Array<RouteRecordRaw> = [
  {
    path: '/',
    redirect: '/home'
  },
  {
    path: '/',
    component: Tabbar,
    children: [
      {
        path: 'home',
        component: Home
      },
      {
        path: 'category',
        component: Category
      },
      {
        path: 'my',
        component: My
      },
      {
        path: 'shopping',
        component: Shopping
      }
    ]
  }
]

const router = createRouter({
  history: createWebHistory(),
  routes
})

export default router
配置home首页
首页中,在setup语法糖环境下,有 上面咱们做的全局axios和自己封装的axios 的用法,
另外还有,对象,数组的类型声明
以及 vant 组件的引用
父子传参
等这些.
<script lang="ts"  setup>
import { ref, reactive, onServerPrefetch, getCurrentInstance, nextTick } from 'vue'
// ref声明响应式数据,用于声明基本数据类型
// reactive声明响应式数据,用于声明引用数据类型
import http from '../utils/request'   //导入我们封装的axios   进行获取数据

//导入GoodsItem模块
import GoodsItem from "@/components/GoodsItem.vue"


const images: string[] = reactive([]);//轮播图数据

//第一种数据获取的写法
// onServerPrefetch(async () => {
//     const res = await http.get("/catelist");
//     // console.log(res);

//     let newList = res.list
//     newList.forEach((item: any) => {
//         images.push(`http://localhost:3000${item.img}`)
//     })
//     // console.log(images);
// });
//第二种数据获取的写法
const { proxy } = getCurrentInstance() as any
// console.log(images);
proxy.$http({
    url: '/api/bannerlist',
    method: 'get',
}).then((res: any) => {
    // console.log(res.data.list);
    let newList: Object[] = res.data.list
    newList.forEach((item: any) => {
        images.push(`http://localhost:3000${item.img}`)
    })
    // console.log(images);
})
//以上是  轮播图的渲染业务逻辑
interface workLinkArrType {
    title: string
    img: string
    path?: string
}

const navImg: workLinkArrType[] = reactive([
    {
        img: 'https://fastly.jsdelivr.net/npm/@vant/assets/apple-1.jpeg',
        title: ' 限时抢购',
    },
    {
        img: 'https://fastly.jsdelivr.net/npm/@vant/assets/apple-2.jpeg',
        title: ' 积分商城',
    },
    {
        img: 'https://fastly.jsdelivr.net/npm/@vant/assets/apple-3.jpeg',
        title: ' 联系我们',
    },
    {
        img: 'https://fastly.jsdelivr.net/npm/@vant/assets/apple-4.jpeg',
        title: '商品分类',
    }
])

interface IpropTwo {
    id: number,
    img: string,
    catename: string,
    [propName: string]: any
}

interface IpropOne {
    children: IpropTwo[],
    img: string,
    [propName: string]: any   //这个  的话  是 如果我们这个对象中   实在有很多东西  我们剩下的也不关心  但是 需要声明  就可以这样写
}


//这个是 子组件 GoodsItem的数据
let PropsList: IpropOne[] = reactive([])
let PropsListTwo: IpropTwo[] = reactive([])


proxy.$http({
    url: '/api/catelist?istree=1',
    method: 'get',
}).then((res: any) => {
    PropsList = res.data.list

    PropsList.forEach(item => {
        // console.log(item.children);
        if (item.children) {
            item.children.forEach(item => {
                let str = `http://127.0.0.1:3000${item.img}`
                // console.log(str);
                // console.log(item.img);
                item.img = str
                // console.log(item);
            })
            PropsListTwo.push(...(item as IpropOne).children)
        }
    })
    // console.log(PropsListTwo);
    // console.log(images);
})


</script>


<template class="HomeContainer">
    <div class="topBox">
        <van-nav-bar title="首页" fixed>
            <template #right>
                <van-icon name="search" size="18" />
            </template>
        </van-nav-bar>
        <van-swipe class="my-swipe" :autoplay="3000" indicator-color="#39a9ed">
            <van-swipe-item v-for="image in images" :key="image">
                <img :src="image" />
            </van-swipe-item>
        </van-swipe>
    </div>
    <div class="middleBox">
        <div class="navBoxOne">
            <div v-for="(item, index) in navImg " :key="index">
                <img :src="item.img" alt="">
                <span>{{ item.title }} </span>
            </div>
        </div>
        <div class="navBoxTwo">
            <span class="active">热门推荐</span>
            <span>发现新品</span>
            <span>所有商品</span>
        </div>
    </div>
    <!-- 商品购物页面 -->
    <div class="lastBox">
        <GoodsItem v-for=" item in PropsListTwo " :key="(item as IpropTwo).id" :imgSrc="(item as IpropTwo).img"
            :title="(item as IpropTwo).catename" />
    </div>
</template>


<style lang="less" scoped>
.topBox {
    margin-top: 58px;
}

.my-swipe .van-swipe-item {
    color: #fff;
    font-size: 20px;
    width: 100%;
    height: 150px;
    line-height: 0;
    text-align: center;
    background-color: #39a9ed;

    img {
        width: 100%;
        height: 100%;
    }
}

.middleBox {
    .navBoxOne {
        width: 100vw;
        height: 100px;
        display: flex;

        div {
            flex: 1;
            padding: 10px 10px;
            display: flex;
            flex-direction: column;

            img {
                width: 100%;
                height: 70%;
                flex: 9;
            }

            span {
                flex: 1;
                font-size: 16px;
            }
        }
    }

    .navBoxTwo {
        width: 100%;
        height: 50px;
        display: flex;
        align-items: center;
        justify-content: center;


        .active {
            background-color: red !important;
            color: #fff !important;
        }

        span {
            width: 30%;
            height: 60%;
            text-align: center;
            line-height: 30px;
            border: 1px solid red;
        }

        .navBoxTwo:nth-child(2),
        .navBoxTwo:nth-child(3) {
            border-left: 0 !important;
        }
    }

}

.lastBox {
    margin-bottom: 52px;
}
</style>
上面home页面的子组件
<script lang="ts" setup>
defineProps({
    imgSrc: {
        type: String,
        required: true
    },
    title: {
        type: String,
        required: true
    }
})

</script>
<template class="GoodsItemBox">
    <van-card price="3999.00" desc="描述信息" v-bind:title="title" v-bind:thumb="imgSrc" style="{backgroundColor:#fff}">
        <template #footer>
            <van-button size="small" color="green" type="primary" icon="cart-o"></van-button>
        </template>
    </van-card>
</template>


<style>

</style>
基本上,看完上面的就入门了vite(setup语法糖)+ts+vant+axios
时间内有限,先这样写吧.


 367
367


 被折叠的 条评论
为什么被折叠?
被折叠的 条评论
为什么被折叠?
 到【灌水乐园】发言


