


 本文介绍了如何在Spring Boot项目中使用Swagger来自动化接口文档的生成。通过添加依赖,配置Gradle,以及运行项目,可以访问Swagger UI查看详细的API文档,提高开发协作效率。
在日常开发过程中,我们往往改了源代码忘了更新文档,或者说没有及时更新wiki,导致我们下游的开发人员不知道接口发生改动,swagger就是为了解决这些问题而产生的。
首先上图一张,这是我用gradle构建的一个项目。
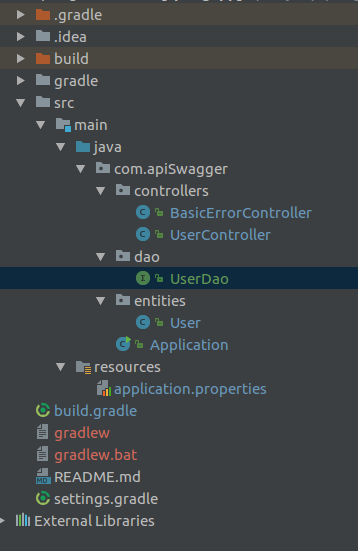
加入一些依赖,gradle配置文件如下:
group 'org.test'
version '1.0-SNAPSHOT'


buildscript {
    repositories {
        mavenCentral()
    }

    dependencies {
        classpath("org.springframework.boot:spring-boot-gradle-plugin:1.5.3.RELEASE")
    }
}

apply plugin: 'java'
apply plugin: 'idea'
apply plugin: 'org.springframework.boot'


repositories {
    mavenCentral()
}

sourceCompatibility = 1.8
targetCompatibility = 1.8

dependencies {
    compile("org.springframework.boot:spring-boot-starter-thymeleaf:1.5.3.RELEASE")
    compile("org.springframework.boot:spring-boot-devtools:1.5.3.RELEASE")
    compile("org.springframework.boot:spring-boot-starter-data-jpa")
    compile("mysql:mysql-connector-java:5.1.13")
    compile("io.springfox:springfox-swagger-ui:2.4.0")
    compile("io.springfox:springfox-swagger2:2.4.0")
    testCompile("junit:junit:4.12")
}

task wrapper(type: Wrapper) {
    gradleVersion = '3.5'
}

jar {
    baseName = 'gs-serving-web-content'
    version =  '0.1.0'
}import javax.persistence.Entity;
import javax.persistence.GeneratedValue;
import javax.persistence.GenerationType;
import javax.persistence.Id;
import javax.persistence.Table;
import javax.validation.constraints.NotNull;
@Entity
@Table(name = "user")
public class User {
@Id
@GeneratedValue(strategy = GenerationType.AUTO)
private long id;
@NotNull
private String email;
public String getMobile() {
return mobile;
}
public void setMobile(String mobile) {
this.mobile = mobile;
}
private String mobile;
@NotNull
private String username;
public User() {
}
public User(long id) {
this.id = id;
}
public User(String email, String username) {
this.email = email;
this.username = username;
}
public long getId() {
return id;
}
public void setId(long value) {
this.id = value;
}
public String getEmail() {
return email;
}
public void setEmail(String value) {
this.email = value;
}
public String getUsername() {
return username;
}
public void setUsername(String value) {
this.username = value;
}
}数据库操作类,继承了CrudRepository,默认实现了这些方法save, delete, deleteAll, findOne and findAll:
import javax.transaction.Transactional;

import com.apiSwagger.entities.User;
import org.springframework.data.repository.CrudRepository;

@Transactional
public interface UserDao extends CrudRepository<User, Long> {

    public User findByEmail(String email);

    public User findByMobile(String mobile);

}默认情况下Spring Boot会从以下位置寻找application.properties文件,并把属性加入到Spring Environment中。
1、当前目录下的一个/config子目录
2、当前目录
3、一个classpath下的/config包
4、classpath根路径(root)
上述列表中的位置优先级自上而下递减,同样的属性配置,高位置的会覆盖低位置的!
spring.datasource.url = jdbc:mysql://localhost:3306/denghb

# Username and password
spring.datasource.username = root
spring.datasource.password = 123456

# Keep the connection alive if idle for a long time (needed in production)
spring.datasource.testWhileIdle = true
spring.datasource.validationQuery = SELECT 1

# ===============================
# = JPA / HIBERNATE
# ===============================

# Show or not log for each sql query
spring.jpa.show-sql = true

# Hibernate ddl auto (create, create-drop, update): with "update" the database
# schema will be automatically updated accordingly to java entities found in
# the project
spring.jpa.hibernate.ddl-auto = update

# Naming strategy
spring.jpa.hibernate.naming-strategy = org.hibernate.cfg.ImprovedNamingStrategy

# Allows Hibernate to generate SQL optimized for a particular DBMS
spring.jpa.properties.hibernate.dialect = org.hibernate.dialect.MySQL5Dialect
import org.slf4j.Logger;
import org.slf4j.LoggerFactory;
import org.springframework.boot.SpringApplication;
import org.springframework.boot.autoconfigure.SpringBootApplication;
import org.springframework.context.annotation.Bean;
import springfox.documentation.builders.ApiInfoBuilder;
import springfox.documentation.builders.PathSelectors;
import springfox.documentation.service.ApiInfo;
import springfox.documentation.spi.DocumentationType;
import springfox.documentation.spring.web.plugins.Docket;
import springfox.documentation.swagger2.annotations.EnableSwagger2;

@SpringBootApplication
@EnableSwagger2
public class Application {

  private static final Logger log = LoggerFactory.getLogger(Application.class);

  public static void main(String[] args) {
    SpringApplication.run(Application.class);
  }

  @Bean
  public Docket newsApi() {
    return new Docket(DocumentationType.SWAGGER_2)
        .groupName("RestfulApi")
        .apiInfo(apiInfo())
        .select()
        .paths(PathSelectors.any())
        .build();
  }

  private ApiInfo apiInfo() {
    return new ApiInfoBuilder()
        .title("Spring REST Sample with Swagger")
        .description("My First Spring REST Sample with Swagger")
        .termsOfServiceUrl("服务条款")
        .license("Apache License Version 2.0")
        .licenseUrl("http://www.dianrong.com")
        .version("2.0")
        .build();
  }
}| 注解 | 属性 | 值 | 备注 |
|---|---|---|---|
@Api | value | 字符串 | 可用在class头上,class描述 |
| description | 字符串 | ||
@Api(value = "xxx", description = "xxx") | |||
@ApiOperation | value | 字符串 | 可用在方法头上.参数的描述容器 |
| notes | 字符串 | ||
@ApiOperation(value = "xxx", notes = "xxx") | |||
@ApiImplicitParams | {} | @ApiImplicitParam数组 | 可用在方法头上.参数的描述容器 |
@ApiImplicitParams({@ApiImplicitParam1,@ApiImplicitParam2,...}) | |||
@ApiImplicitParam | name | 字符串 与参数命名对应 | 可用在@ApiImplicitParams里 |
| value | 字符串 | 参数中文描述 | |
| required | 布尔值 | true/false | |
| dataType | 字符串 | 参数类型 | |
| paramType | 字符串 | 参数请求方式:query/path | |
query:对应@RequestParam?传递 | |||
path: 对应@PathVariable{}path传递 | |||
| defaultValue | 字符串 | 在api测试中默认值 | |
| 用例参见项目中的设置 | |||
@ApiResponses | {} | @ApiResponse数组 | 可用在方法头上.参数的描述容器 |
@ApiResponses({@ApiResponse1,@ApiResponse2,...}) | |||
@ApiResponse | code | 整形 | 可用在@ApiResponses里 |
| message | 字符串 | 错误描述 | |
@ApiResponse(code = 200, message = "Successful") |
import com.apiSwagger.entities.User;
import com.apiSwagger.dao.UserDao;
import io.swagger.annotations.*;
import org.springframework.beans.factory.annotation.Autowired;
import org.springframework.web.bind.annotation.RequestMapping;
import org.springframework.web.bind.annotation.RequestMethod;
import org.springframework.web.bind.annotation.ResponseBody;
import org.springframework.web.bind.annotation.RestController;

@Api(value = "API - UserController", description = "用户模块接口详情")
@RestController
public class UserController {

  @Autowired
  private UserDao userDao;

  @ResponseBody
  @ApiOperation(value = "create a user", nickname = "增加用户")
  @RequestMapping(method = RequestMethod.POST, path = "/v1/users", produces = "application/json")
  @ApiImplicitParams({
      @ApiImplicitParam(name = "email", value = "User's email", required = true, dataType = "string", paramType = "query", defaultValue = ""),
      @ApiImplicitParam(name = "name", value = "User's name", required = true, dataType = "string", paramType = "query", defaultValue = "")
  })
  @ApiResponses(value = {
      @ApiResponse(code = 200, message = "Success", response = User.class),
      @ApiResponse(code = 401, message = "Unauthorized"),
      @ApiResponse(code = 403, message = "Forbidden"),
      @ApiResponse(code = 404, message = "Not Found"),
      @ApiResponse(code = 500, message = "Failure")})
  public User create(String email, String name) {
    try {
      User user = new User(email, name);
      userDao.save(user);
      return user;
    } catch (Exception ex) {
      return null;
    }
  }

  @ResponseBody
  @ApiOperation(value = "delete a user", nickname = "删除用户")
  @RequestMapping(method = RequestMethod.DELETE, path = "/v1/users", produces = "application/json")
  @ApiImplicitParams({
      @ApiImplicitParam(name = "id", value = "User's ID", required = true, dataType = "integer", paramType = "query", defaultValue = "")
  })
  @ApiResponses(value = {
      @ApiResponse(code = 200, message = "Success", response = User.class),
      @ApiResponse(code = 401, message = "Unauthorized"),
      @ApiResponse(code = 403, message = "Forbidden"),
      @ApiResponse(code = 404, message = "Not Found"),
      @ApiResponse(code = 500, message = "Failure")})
  public User delete(long id) {
    try {
      User user = new User(id);
      userDao.delete(user);
      return user;
    } catch (Exception ex) {
      return null;
    }
  }

  @ResponseBody
  @ApiOperation(value = "Get a user by email", nickname = "根据邮箱查询用户")
  @RequestMapping(method = RequestMethod.GET, path = "/v1/users", produces = "application/json")
  @ApiImplicitParams({
      @ApiImplicitParam(name = "id", value = "User's ID", required = false, dataType = "integer", paramType = "query", defaultValue = ""),
      @ApiImplicitParam(name = "email", value = "User's email", required = false, dataType = "string", paramType = "query", defaultValue = ""),
      @ApiImplicitParam(name = "mobile", value = "User's mobile", required = false, dataType = "string", paramType = "query", defaultValue = "")
  })
  @ApiResponses(value = {
      @ApiResponse(code = 200, message = "Success", response = User.class),
      @ApiResponse(code = 401, message = "Unauthorized"),
      @ApiResponse(code = 403, message = "Forbidden"),
      @ApiResponse(code = 404, message = "Not Found"),
      @ApiResponse(code = 500, message = "Failure")})
  public User getUser(Integer id, String email, String mobile) {
    try {
      if (id != null && id > 0) {
        return userDao.findByEmail(email);
      }

      if (email != null && !email.isEmpty()) {
        return userDao.findByEmail(email);
      }

      if (mobile != null && !mobile.isEmpty()) {
        return userDao.findByEmail(email);
      }
    } catch (Exception ex) {
      return null;
    }
    return null;
  }

  @ResponseBody
  @ApiOperation(value = "Update a user", nickname = "更新用户")
  @RequestMapping(method = RequestMethod.PUT, path = "/v1/users", produces = "application/json")
  @ApiImplicitParams({
      @ApiImplicitParam(name = "id", value = "User's ID", required = true, dataType = "integer", paramType = "query", defaultValue = "")
  })
  @ApiResponses(value = {
      @ApiResponse(code = 200, message = "Success", response = User.class),
      @ApiResponse(code = 401, message = "Unauthorized"),
      @ApiResponse(code = 403, message = "Forbidden"),
      @ApiResponse(code = 404, message = "Not Found"),
      @ApiResponse(code = 500, message = "Failure")})
  public User updateUser(long id, String email, String name) {
    try {
      User user = userDao.findOne(id);
      user.setEmail(email);
      user.setUsername(name);
      userDao.save(user);
      return user;
    } catch (Exception ex) {
      return null;
    }
  }
}gradlew (Unix Shell 脚本)
gradlew.bat (Windows批处理文件)
gradle/wrapper/gradle-wrapper.jar (Wrapper JAR文件)
gradle/wrapper/gradle-wrapper.properties (Wrapper属性文件)
2、再通过 ./gradlew build
java -jar build/libs/{your-jar-name}.jar项目就运行起来了,如下图:
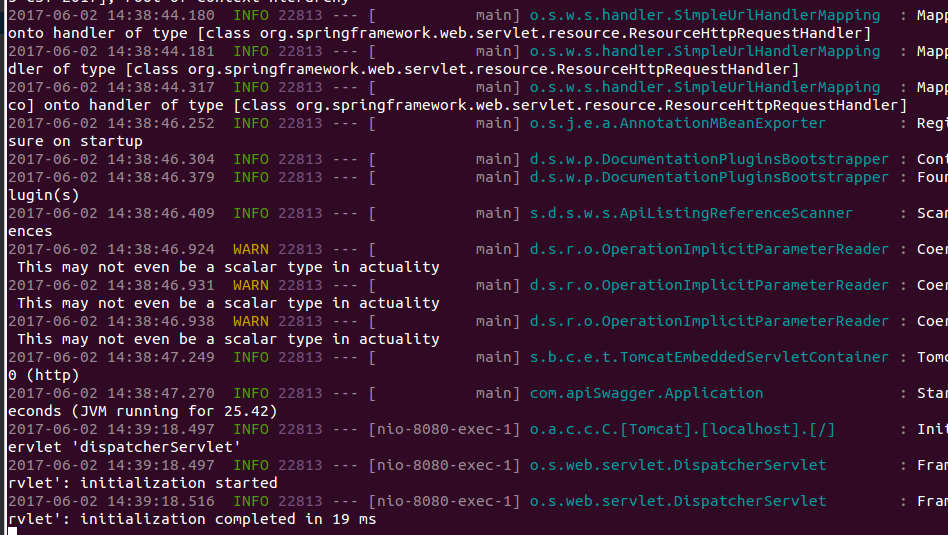
3、访问http://localhost:8080/swagger-ui.html查看API文档,如图所示:
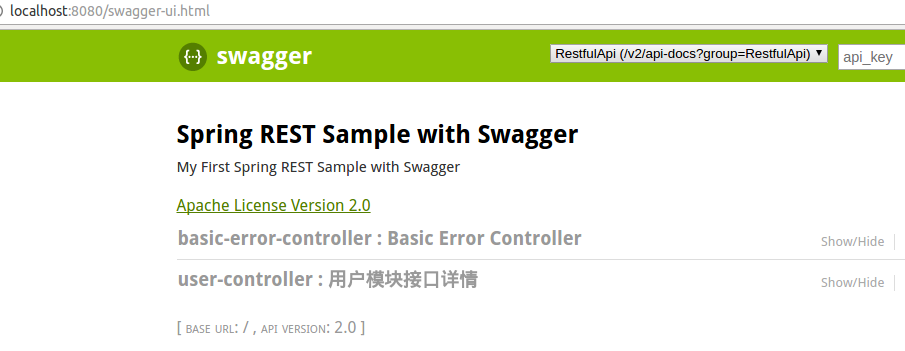
4、点击user-controller展开所有接口,如下图:
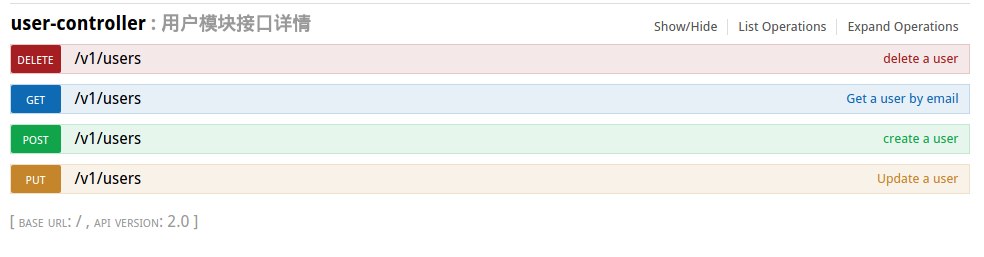
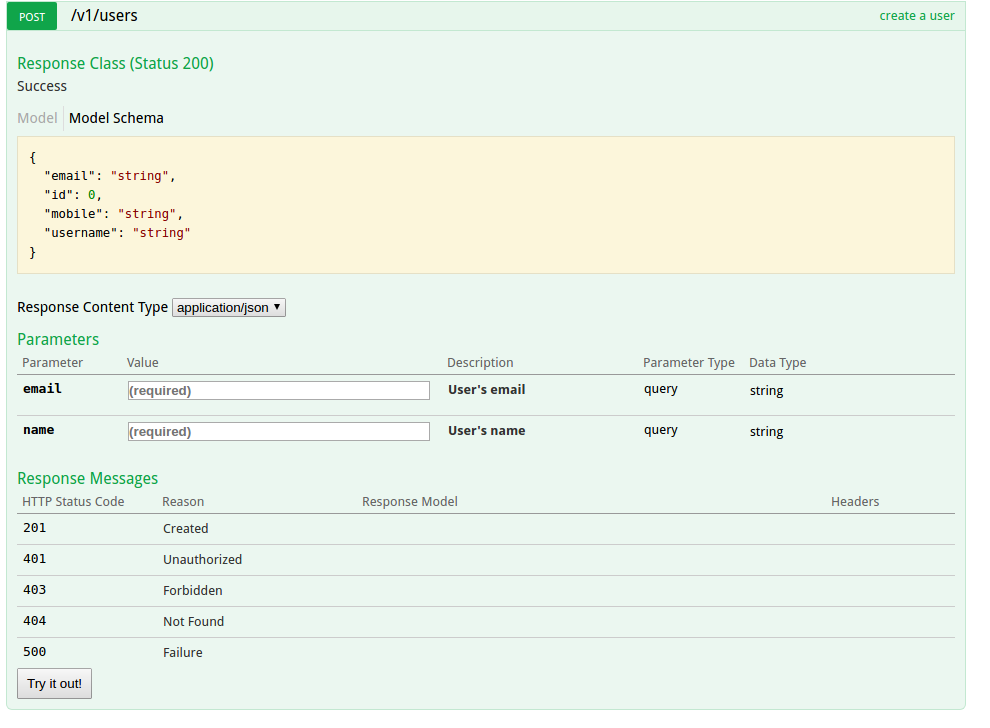
5、再点击增加用户接口,可以看到详细信息,在我们的UserController都有声明


 916
916

 被折叠的 条评论
为什么被折叠?
被折叠的 条评论
为什么被折叠?
 到【灌水乐园】发言


