


1 变量
1.1 概述
可以改变的数,称为变量。在Java语言中,所有的变量在使用前必须声明。
一般通过“变量类型 变量名 = 变量值 ;”这三部分来描述一个变量。如:int a = 3 ;
变量的使用原则:就近原则,即尽量控制变量的使用范围到最小
1.2 局部变量
位置:定义在方法里或者局部代码块中
注意:必须手动初始化来分配内存.如:int i = 5;或者int i; i = 5;
作用域:也就是方法里或者局部代码块中,方法运行完内存就释放了
1.3 成员变量
位置:定义在类里方法外
注意:不用初始化,也会自动被初始化成默认值
作用域:整个类中,类消失了,变量才会释放

1.3.1 练习:变量的默认值测试
public class TestVariable {
    // 1、定义9种变量
    static String name;
    static byte a;
    static short b;
    static int c;
    static long d;
    static float e;
    static double f;
    static boolean g;
    static char h;

    public static void main(String[] args) {
        /**
         * 引用类型的默认值是:null
         * 整型的默认值是:0
         * 浮点型的默认值是:0.0
         * 布尔型的默认值是:false
         * 字符型的默认值是:/u0000,表现形式为一个空格
         */
        System.out.println(name);
        System.out.println(a);
        System.out.println(b);
        System.out.println(c);
        System.out.println(d);
        System.out.println(e);
        System.out.println(f);
        System.out.println(g);
        System.out.println(h);
    }
}
1.3.2 局部变量与成员变量测试
 /**
     * 2、成员变量
     * 1)位置:类里方法外
     * 2)使用范围:在整个类中都生效,类消失,变量才会释放
     * 3)注意事项:无需手动初始化,会自动赋予对应类型的默认值
     *
     */
    public static void main(String[] args) {
        /**
         * 1、局部变量
         * 1)位置:
         *      在方法里或者局部代码块中
         * 2)使用范围:
         *      在哪里定义就在哪里使用用,当对应的方法/局部代码块结束以后,对应的局部变量会被释放
         * 3)注意事项:局部变量必须手动初始化--自己赋值
         *  initialized -- 初始化
         */
        int sum = 100;
        System.out.println(sum);/* 变量有一个就近原则 */
    }
}
2 方法
2.1 概述
被命名的代码块,方法可以含参数可以不含参数,可以提高代码的复用性。
2.2 方法定义的格式

2.3 方法调用顺序图

2.3.1 练习:测试方法的调用顺序/参数/返回值
public class TestMethod {
    /**
     * public方法的修饰符,表示公共的,也就是说谁都可以使用这个方法
     * private方法修饰符,表示私有的,私有资源只能在本类中使用
     *
     */
    public static void main(String[] args) {
        /**
         * 调用方法的格式:方法名(参数列表)
         */
        method1();
        method2(5,9);
        method3("章鱼哥",9);
    }

    /**
     * 方法定义的格式:
     * 方法的修饰符 返回值 方法名(参数列表){方法体}
     */
    private static void method1() {
        System.out.println(1);
        System.out.println(1);
        System.out.println(1);
        System.out.println(1);
    }

    // 本方法用于测试方法的参数

    /**
     * 方法的定义相当于方法的”说明书“,定义的时候怎么定义,调用的时候就需要按照定义来调用
     * 也就是说,如果方法设置了参数调用方法时必须按照定义的类型来传参,否则报错
     * 如果有多可参数,可以使用逗号隔开
     *
     */
    private static void method2(int age,int b) {
        System.out.println("海绵宝宝今年:" + age + "岁啦!");
    }

    private static void method3(String name,int num) {
        System.out.println(name + "大声扬言到,今天中午要干它" + num + "碗大米饭");
    }
}
3 嵌套for循环
3.1 概述
存在至少2层for循环,根据外层的条件,判断里层能否执行
如果能执行,就把里层代码都循环完毕后,再继续判断是否执行外层循环的下一次循环
3.2 嵌套for形式

3.2.1 嵌套for循环入门案例
/**
 * 嵌套for循环:for里有for,规律:
 * 1、外层循环执行一次,内层循环执行多次
 * 2、外层循环控制行数,内层循环控制每一列的列数
 */
public class TestForDemo {
    public static void main(String[] args) {
        //method1(); // for循环打印1-3
        //method2(); // for循环打印正方形
        //method3();
        method4();
    }

    private static void method1() {
        for (int i = 1; i <= 3 ; i++) { // 外循环执行三次循环操作
            System.out.println("外循环:" + i);
            for (int j = 1; j <= 5; j++) { // 内循环执行五次循环操作
                System.out.println(j);
            }
        }
    }

    // 打印长方形
    private static void method2() {
        for (int i = 1; i <= 3; i++) {
            for (int j = 1; j <= 5; j++) {
                System.out.print("*");
            }
            System.out.println();
        }
    }

    // 打印左直角三角形
    private static void method3() {
        for (int i = 1; i <= 6; i++) {
            for (int j = 1; j <= i; j++) {
                System.out.print("*");
            }
            System.out.println();
        }
    }
    // 打印99陈法表
    private static void method4() {
        // 1*1=1
        // 1*2=2	2*2=4
        // 1*3=3	2*3=6	3*3=9
        // 1*4=4	2*4=8	3*4=12	4*4=16
        // 1*5=5	2*5=10	3*5=15	4*5=20	5*5=25
        // 1*6=6	2*6=12	3*6=18	4*6=24	5*6=30	6*6=36
        // 1*7=7	2*7=14	3*7=21	4*7=28	5*7=35	6*7=42	7*7=49
        // 1*8=8	2*8=16	3*8=24	4*8=32	5*8=40	6*8=48	7*8=56	8*8=64
        // 1*9=9	2*9=18	3*9=27	4*9=36	5*9=45	6*9=54	7*9=63	8*9=72	9*9=81

        for (int i = 1; i <= 9; i++) {
            for (int j = 1; j <= i; j++) {
                System.out.print(j + "*" + i + "=" + (i * j) + "\t");
            }
            System.out.println();
        }
    }
}
4 break与continue
4.1 概述
- break: 直接结束当前循环,跳出循环体,简单粗暴
break以后的循环体中的语句不会继续执行,循环体外的会执行
注意如果是嵌套for循环,在内层循环遇到了break,只会跳出当前这一层内循环哦 - continue: 跳出本轮循环,继续下一轮循环
continue后本轮循环体中的语句不会继续执行,但是会继续执行下轮循环,循环体外的也会执行

4.1.2 测试Break与Continue
public class TestBreakAndContinue {
    public static void main(String[] args) {
        method1();
    }

    private static void method1() {
        for (int i = 1; i <= 100; i++) {
            System.out.println("请输入你要猜的数字");
            int input = new Scanner(System.in).nextInt();
            if (input != 88) {
                /**
                 * continue的作用是用来跳过本轮循环中后面的语句来提高效率的
                 * ,并不是用来控制继续输入的
                 * 能够输入几次取决于循环的次数与continue无关
                 */
                continue;
            }else {
                System.out.println("恭喜你!猜对了");
                /**
                 * break用于直接跳出循环,结束后面所有轮
                 * 注意:break、continue,后面不允许继续编写代码,因为都是不可到达的代码
                 */
                break;
            }
        }
    }
}
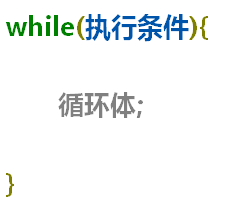
4.2 循环结构2 : while
4.2.1 形式(先判断,再执行)
4.2.2 猜数字之while练习
public class TestWhile {
    public static void main(String[] args) {
        int random = createNum();
        guessNum(random);
    }

    private static int createNum() {
        int random = new Random().nextInt(100);
        //System.out.println(random);
        return random;
    }

    private static void guessNum(int random) {
        /**
         * 注意:死循环必须设置出口
         */
        while (true) {
            System.out.println("请输入你要猜的数字:");
            int input = new Scanner(System.in).nextInt();
            if (input > random) {
                System.out.println("好像大了,继续努力!");
            }else if (input < random) {
                System.out.println("好像小了,继续努力!");
            }else if (input == random) {
                System.out.println("恭喜你,猜对了");
                break; // 出口
            }
        }
    }
}
4.2.3 do-while练习
private static void f2() {
		int n;
		do {
			System.out.println("我是循环体");
			n = new Random().nextInt(300);//生成随机数的范围[0,300)
			System.out.println(n);
		}while(n>100);
	}
5 拓展
5.1 三种循环的区别
- for:知道循环次数
- while/do while:当循环次数不确定时
- while:先判断,不符合规则,不执行代码
- do while:代码最少被执行一次,再去判断,符合规则,再次执行代码
- 循环之间都可以互相替代,但是一般最好选择合适的循环结构来完成代码哦~


 1462
1462


 被折叠的 条评论
为什么被折叠?
被折叠的 条评论
为什么被折叠?
 到【灌水乐园】发言


