


整合Thymeleaf和Freemarker模板引擎
一、方式一(新):Thymeleaf
1、添加依赖,在pom.xml中添加以下代码
<dependency>
   <groupId>org.springframework.boot</groupId>
    <artifactId>spring-boot-starter-thymeleaf</artifactId>
</dependency>
2、在application.properties中配置Thymeleaf
#启用模板缓存
spring.thymeleaf.cache = true
#在呈现模板之前检查模板是否存在
spring.thymeleaf.check-template = true
#检查模板位置是否存在
spring.thymeleaf.check-template-location = true
#Content-Type值
spring.thymeleaf.servlet.content-type=text/html
#启用MVC Thymeleaf视图分辨率
spring.thymeleaf.enabled = true
#模板编码
spring.thymeleaf.encoding = UTF-8
#应用于模板的模板模式另请参见StandardTemplateModeHandlers
spring.thymeleaf.mode = HTML5
#在构建URL时预先查看名称的前缀
spring.thymeleaf.prefix = classpath:/templates/
#构建URL时附加到查看名称的后缀
spring.thymeleaf.suffix = .html
3、配置实体和控制器示例
package com.xiye.mycode.domain;

public class Book {
    private Integer id;
    private String name;
    private String author;

    public Integer getId() {
        return id;
    }
    public void setId(Integer id) {
        this.id = id;
    }
    public String getName() {
        return name;
    }
    public void setName(String name) {
        this.name = name;
    }
    public String getAuthor() {
        return author;
    }
    public void setAuthor(String author) {
        this.author = author;
    }

    @Override
    public String toString() {
        return "Book{" +
                "id=" + id +
                ", name='" + name + '\'' +
                ", author='" + author + '\'' +
                '}';
    }
}
package com.xiye.mycode.controller;
import com.xiye.mycode.domain.Book;
import org.springframework.stereotype.Controller;
import org.springframework.web.bind.annotation.GetMapping;
import org.springframework.web.servlet.ModelAndView;
import java.util.ArrayList;
import java.util.List;
@Controller
public class BookController {
@GetMapping("/books")
public ModelAndView books(){
List<Book> books = new ArrayList<>();
Book b1 = new Book();
b1.setId(1);
b1.setName("三国演义");
b1.setAuthor("罗贯中");
Book b2 = new Book();
b2.setId(2);
b2.setName("西游记");
b2.setAuthor("吴承恩");
Book b3 = new Book();
b3.setId(3);
b3.setName("红楼梦");
b3.setAuthor("曹雪芹");
books.add(b1);
books.add(b2);
books.add(b3);
ModelAndView mv = new ModelAndView();
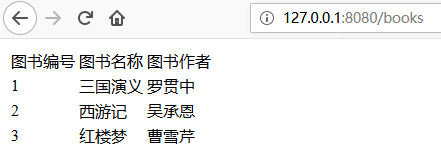
mv.addObject("books", books); //前端利用${books}可以获取到数据
mv.setViewName("books"); //视图名称,即映射到/templates/books.html,这个根据thymeleaf配置的前后缀映射
return mv;
}
}
二、方式二(传统):Freemarker
1、添加依赖,在pom.xml中添加以下代码
<dependency>
   <groupId>org.springframework.boot</groupId>
    <artifactId>spring-boot-starter-freemarker</artifactId>
</dependency>
2、在application.properties中配置Freemarker
#启用模板缓存
spring.freemarker.cache=false
#模板编码
spring.freemarker.charset=UTF-8
#检查模板是否存在
spring.freemarker.check-template-location=true
#Content-Type值
spring.freemarker.content-type=text/html
#是否将HttpServletRequest中的属性添加到model中
spring.freemarker.expose-request-attributes=false
#是否将HttpSession中的属性添加到model中
spring.freemarker.expose-session-attributes=false
#HttpServletRequest中的属性是否可以覆盖controller中的model的同名项
spring.freemarker.allow-request-override=false
#HttpSession中的属性是否可以覆盖controller中的model的同名项
spring.freemarker.allow-session-override=false
#构建URL时附加到查看名称的后缀
spring.freemarker.suffix=.ftl
## 文件配置路径
spring.freemarker.template-loader-path=classpath:/templates/
3、配置实体和控制器示例。同方法一中
三、测试
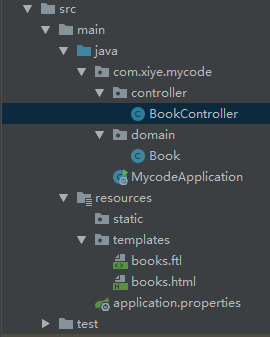
四、目录结构
注:以上配置其中选用一个即可


 1142
1142


 被折叠的 条评论
为什么被折叠?
被折叠的 条评论
为什么被折叠?
 到【灌水乐园】发言


