自定义view对我来说一直是比较恐惧的,但是万事开头难,今天总结一下自己实现圆形TextView的三种方式。
首先来说一下自定义view的三种方式:
一,自绘控件:
自绘控件就是说界面展示的内容就是我们在ondraw()方法中绘制出来的,继承View.
二,组合控件:
顾名思义,由多个控件组合在一起的控件,这里面组合的控件并不需要我们自己去绘制,用Android原生的即可。最常见的就是标题栏,将图标,文字组合到一个布局中,自定义组合控件时继承Framelayout,通过 LayoutInflater.from(context).inflate(R.layout.title, this); 来引用布局即可。
三,继承控件:
顾名思义,继承android原生的已有控件,在此基础上进行绘制,那么我们就可以在原有的功能上增加新的功能。
自定义view的步骤:
1:自定义属性,在values中创建attrs文件
2:在构造方法中获取自定义属性,
public View (Context context)是在Java代码创建视图的时候被调用,如果是从xml填充的视图,就不会调用这个
public View (Context context, AttributeSet attrs)这个是在xml创建但是没有指定style的时候被调用
public View (Context context, AttributeSet attrs, int defStyle)这个是在xml创建,引用默认style的时候被调用
3:重写onMesure(),测量控件高度;
4:重写onDraw(),绘制控件;
Demo
圆形TextView的实现:
方式一(自绘控件):
1.1自定义属性
<?xml version="1.0" encoding="utf-8"?>
<resources>
    <declare-styleable name="CustomTextView">
        <attr name="mTextSize" format="dimension"/>
        <attr name="mTextColor" format="color"/>
        <attr name="mBackgroudColor" format="color"/>
        <attr name="mRound" format="dimension"/>
        <attr name="mText" format="string"/>
    </declare-styleable>
</resources>
1.2获取属性
public CustomTextView(Context context, AttributeSet attrs) {
super(context, attrs)
TypedArray array = null
try {
array = context.getTheme().obtainStyledAttributes(attrs, R.styleable.CustomTextView, 0, 0)
mTextSize = array.getDimension(R.styleable.CustomTextView_mTextSize, 14)
mTextColor = array.getColor(R.styleable.CustomTextView_mTextColor, Color.BLACK)
mBackgroudColor = array.getColor(R.styleable.CustomTextView_mBackgroudColor, Color.YELLOW)
mRound = array.getColor(R.styleable.CustomTextView_mRound, 5)
mText = array.getString(R.styleable.CustomTextView_mText)
} finally {
array.recycle()
}
init()
}
1.3重写onMesure();
    @Override
    protected void onMeasure(int widthMeasureSpec, int heightMeasureSpec) {
        int widthMode = MeasureSpec.getMode(widthMeasureSpec);
        int widthSize = MeasureSpec.getSize(widthMeasureSpec);
        int heightMode = MeasureSpec.getMode(heightMeasureSpec);
        int heightSize = MeasureSpec.getSize(heightMeasureSpec);
        int width = 48;
        int height = 48;
        if (widthMode == MeasureSpec.EXACTLY) {
            width = widthSize;
        } else {
            width = Math.min(width, widthSize);
        }

        if (heightMode == MeasureSpec.EXACTLY) {
            height = heightSize;
        } else {
            height = Math.min(height, heightSize);
        }
        setMeasuredDimension(width, height);
    }
- 1
- 2
- 3
- 4
- 5
- 6
- 7
- 8
- 9
- 10
- 11
- 12
- 13
- 14
- 15
- 16
- 17
- 18
- 19
- 20
- 21
- 1
- 2
- 3
- 4
- 5
- 6
- 7
- 8
- 9
- 10
- 11
- 12
- 13
- 14
- 15
- 16
- 17
- 18
- 19
- 20
- 21
1.4重写onDraw();
@Override
protected void onDraw(Canvas canvas) {
super.onDraw(canvas)
paint.setColor(mBackgroudColor)
canvas.drawCircle(getWidth() / 2, getHeight() / 2, getWidth() / 2, paint)
paint.setColor(mTextColor)
canvas.drawText(mText, getWidth() / 2 - rect.width() / 2, getHeight() / 2 + rect.height() / 2, paint)
}
添加布局
 <com.example.com.customview.CustomTextView
        android:layout_width="100dp"
        android:layout_height="100dp"
        app:mText="你好"
        android:layout_margin="8dp"
        app:mTextColor="@color/colorPrimary"
        app:mTextSize="16sp"
        app:mBackgroudColor="#F00"/>
方式二(继承控件):
package com.example.com.customview;
import android.content.Context;
import android.graphics.Canvas;
import android.graphics.Color;
import android.graphics.Paint;
import android.graphics.Rect;
import android.util.AttributeSet;
import android.widget.TextView;
/**
* Created by Administrator on 2016/9/5.
*/
public class CustomView extends TextView{
private Rect rect;
private Paint paint;
public CustomView(Context context) {
super(context);
}
public CustomView(Context context, AttributeSet attrs) {
super(context, attrs);
rect=new Rect();
paint=new Paint();
paint.setColor(Color.RED);
paint.setStyle(Paint.Style.FILL);
paint.setAntiAlias(true);
paint.setDither(true);
}
public CustomView(Context context, AttributeSet attrs, int defStyleAttr) {
super(context, attrs, defStyleAttr);
}
@Override
protected void onMeasure(int widthMeasureSpec, int heightMeasureSpec) {
int widthMode = MeasureSpec.getMode(widthMeasureSpec);
int widthSize = MeasureSpec.getSize(widthMeasureSpec);
int heightMode = MeasureSpec.getMode(heightMeasureSpec);
int heightSize = MeasureSpec.getSize(heightMeasureSpec);
int width = 48;
int height = 48;
if(widthMode==MeasureSpec.EXACTLY||heightMode==MeasureSpec.EXACTLY){
width=widthSize;
height=heightSize;
width=Math.max(width,height);
}
setMeasuredDimension(width,width);
}
@Override
protected void onDraw(Canvas canvas) {
canvas.drawCircle(getWidth()/2,getHeight()/2,Math.max(getWidth(), getHeight())/2,paint);
super.onDraw(canvas);
}
}
- 1
- 2
- 3
- 4
- 5
- 6
- 7
- 8
- 9
- 10
- 11
- 12
- 13
- 14
- 15
- 16
- 17
- 18
- 19
- 20
- 21
- 22
- 23
- 24
- 25
- 26
- 27
- 28
- 29
- 30
- 31
- 32
- 33
- 34
- 35
- 36
- 37
- 38
- 39
- 40
- 41
- 42
- 43
- 44
- 45
- 46
- 47
- 48
- 49
- 50
- 51
- 52
- 53
- 54
- 55
- 56
- 57
- 58
- 59
- 1
- 2
- 3
- 4
- 5
- 6
- 7
- 8
- 9
- 10
- 11
- 12
- 13
- 14
- 15
- 16
- 17
- 18
- 19
- 20
- 21
- 22
- 23
- 24
- 25
- 26
- 27
- 28
- 29
- 30
- 31
- 32
- 33
- 34
- 35
- 36
- 37
- 38
- 39
- 40
- 41
- 42
- 43
- 44
- 45
- 46
- 47
- 48
- 49
- 50
- 51
- 52
- 53
- 54
- 55
- 56
- 57
- 58
- 59
在drawCircle放在 super.onDraw(canvas);前面,因为如果父类先画text的话,画圆的时候会被遮盖,所以先画圆,在调用父类的ondraw();
方式三(shape):
<?xml version="1.0" encoding="utf-8"?>
<shape xmlns:android="http://schemas.android.com/apk/res/android"
    android:shape="oval"
    android:useLevel="false">

    <solid android:color="#F00"/>
    <size android:height="48dp" android:width="48dp"/>

</shape>
在布局中添加背景
   <TextView
        android:layout_width="100dp"
        android:layout_height="100dp"
        android:text="shape"
        android:gravity="center"
        android:layout_margin="8dp"
        android:background="@drawable/bg_circle"/>
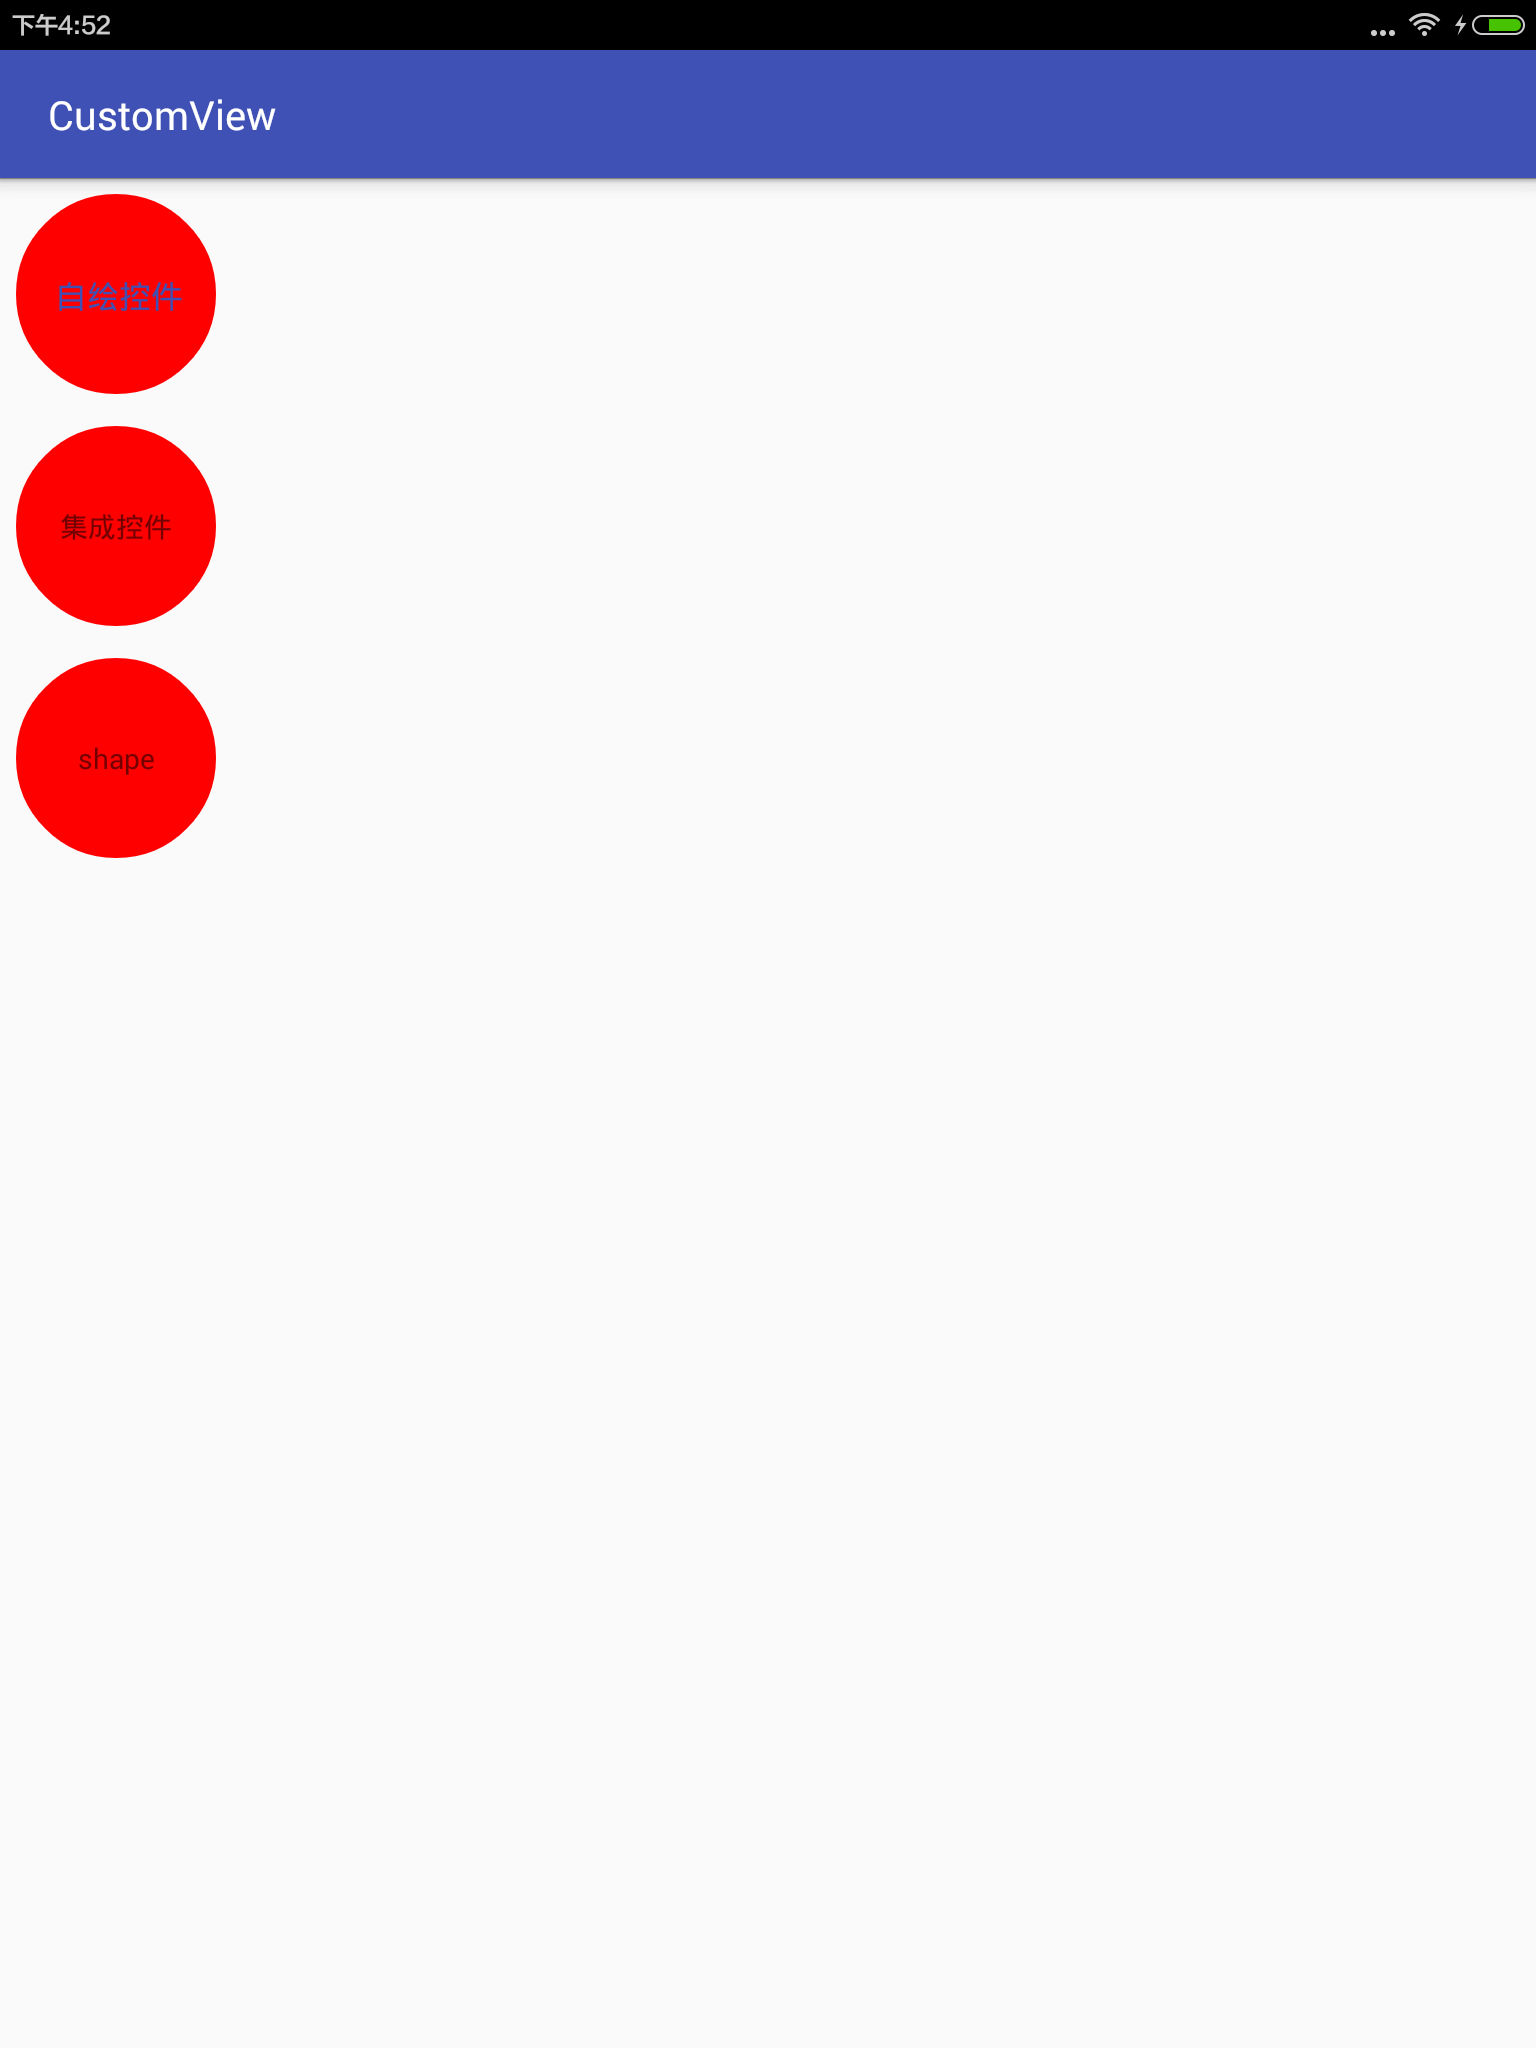
看看三种方式的实现效果:

就这些了,讲的不是很详细,因为一些概念基础我也不是很理解,只能先实现看看咯!


 243
243

 被折叠的 条评论
为什么被折叠?


