react-native-better-banner
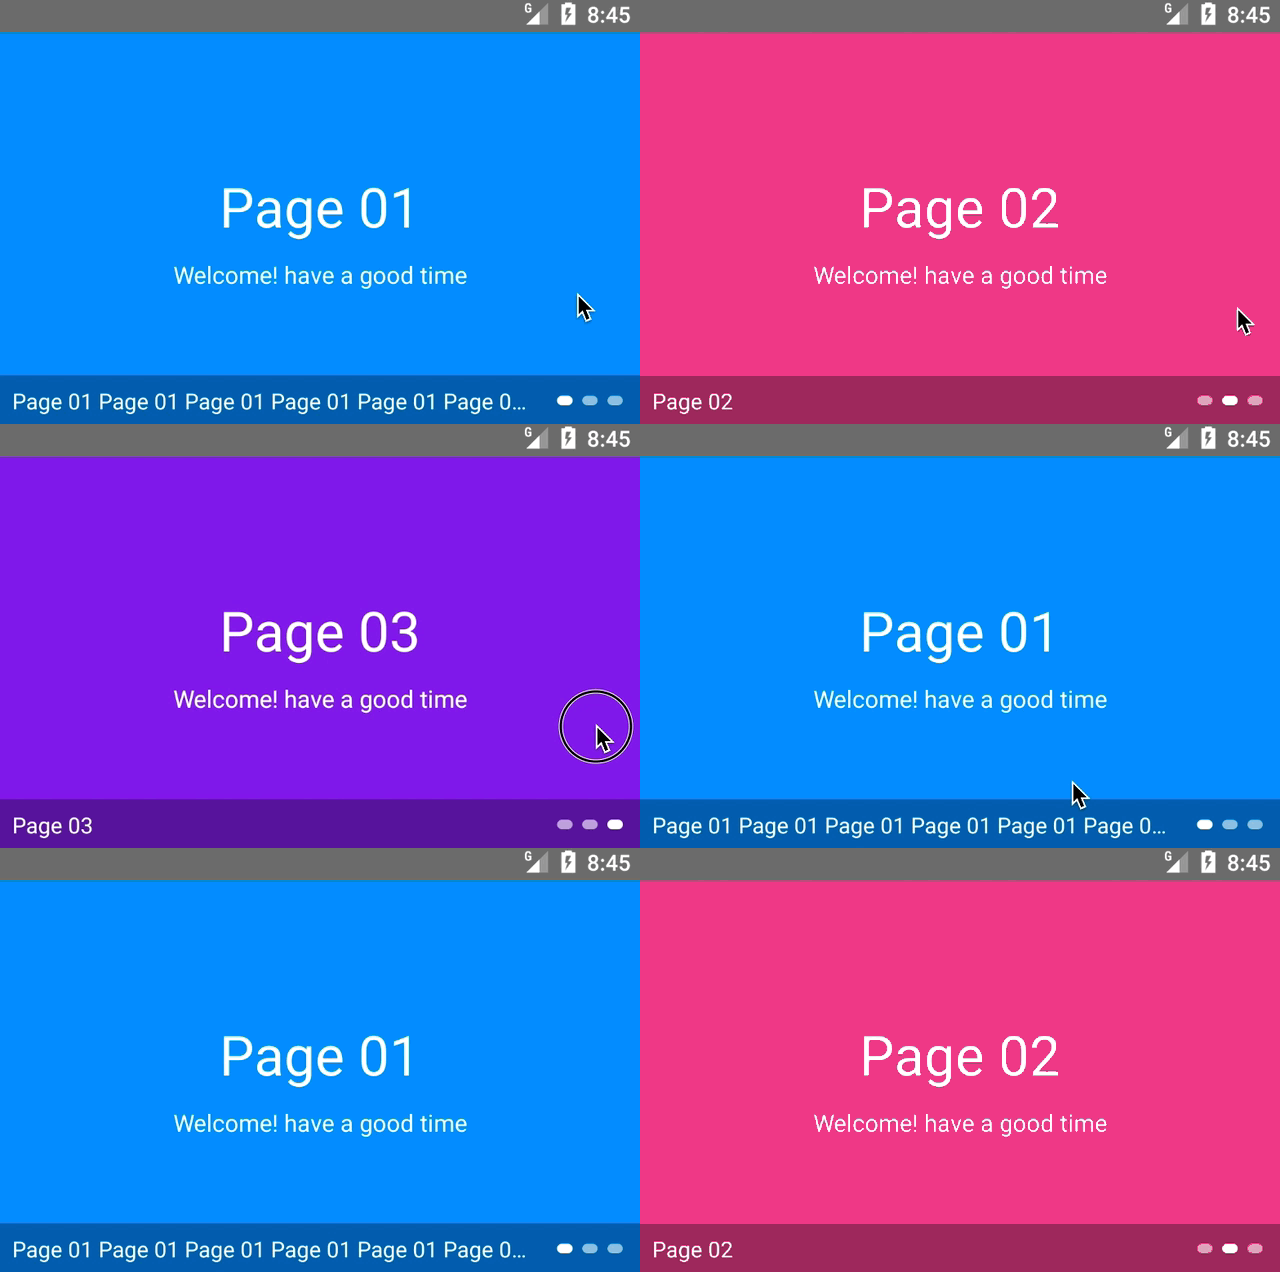
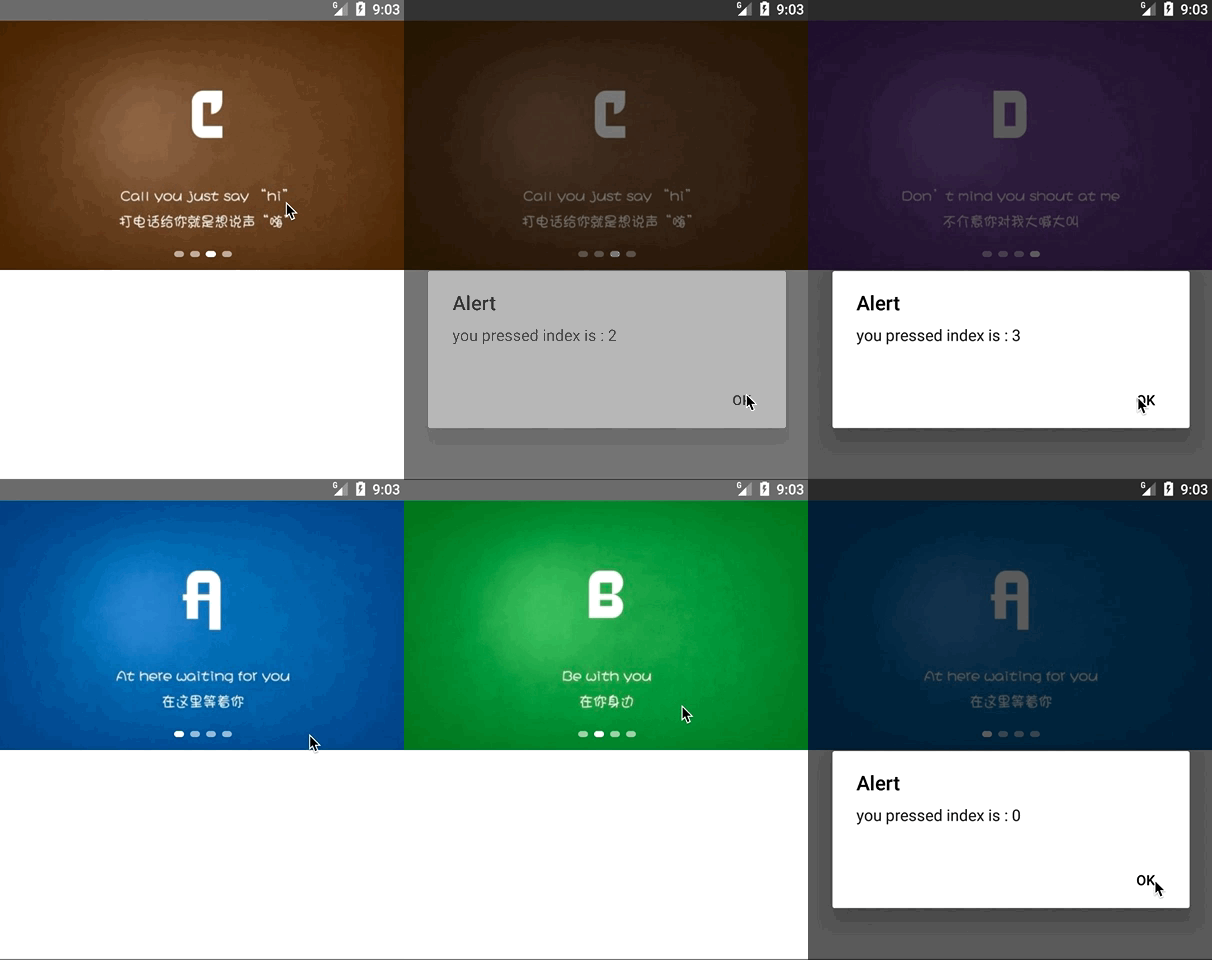
一款用于react native的轮播图组件,支持无缝滚动、定时滚动、指示器显示、标题显示,可轮播图片或自定义组件。欢迎star,项目地址与Demo:https://github.com/tmxiong/better-banner
Installation
npm install --save react-native-better-banner
Usage
import BetterBanner from 'react-native-better-banner'
功能列表
- 图片轮播
- 自定义组件轮播
- 定时轮播
- 同步显示轮播标题
- 无缝轮播
- 指示器定制
- 点击事件回调
- 滚动事件回调
- 支持android与iOS
 [外链图片转存失败(img-hFbCWDlk-1569150029367)(https://raw.githubusercontent.com/tmxiong/better-banner/master/src/screenshot/screenshot02.png)]
涉及主要知识点
- 父子组件传值与回调
-
ref -
setNativeProps -
onLayout
Props
| props | type | default | note |
|---|---|---|---|
bannerImages | Array | [] | 用于展示轮播图片, 与bannerComponents二选一 |
bannerComponents | Array | [] | 用于展示轮播自定义组件,与bannerImages二选一 |
bannerHeight | Number | 250 | banner的默认高度 |
bannerTitles | Array | [] | 每张图片或组件对应的标题 |
bannerTitleTextColor | String | #fff | 每张图片或组件对应的标题的文字颜色 |
bannerTitleTextSize | Number | 14 | 每张图片或组件对应的标题的文字大小 |
scrollInterval | Number | 2000 | 自动轮播的时间间隔,单位ms |
isAutoScroll | Boolean | true | 是否开启自动轮播 |
isSeamlessScroll | Boolean | false | 是否开启无缝滚动(iOS下正常,安卓某些机型可能出现滚动异常) |
adaptSeamlessScrollValue | Boolean | false | 如果开启无缝滚动在某些机型滚动异常,可针对这些机型设置true 或 false, 此值实际上是设置是否显示ScrollView的scrollTo的滚动动画 |
indicatorWidth | Number | 10 | 指示器宽度 |
indicatorHeight | Number | 6 | 指示器高度 |
indicatorColor | String | rgba(255,255,255,0.6) | 指示器颜色 |
indicatorStyle | Object | {} | 指示器样式,您也可以直接使用此属性一次性设置指示器宽、高、颜色和圆角等,它会覆盖以上indicatorWidth,indicatorHeight,indicatorColor属性 |
indicatorGap | Number | 6 | 指示器之间的间隔 |
activeIndicatorColor | String | #fff | 活动指示器颜色 |
indicatorGroupPosition | String | right | 指示器组的位置,可设置left,center,right。如果您设置了bannerTitles,则此属性只能是right |
indicatorGroupSideOffset | Number | 10 | 指示器组的左右边距 |
indicatorContainerHeight | Number | 32 | 指示器容器高度 |
indicatorContainerBackgroundColor | String | transparent | 指示器容器背景色 |
onPress() | Function | ()=>{} | 点击轮播图后的回调函数,会传回banner的index |
onScrollEnd() | Function | ()=>{} | 滚动完每张轮播图的回调函数,等同于ScrollView的onMomentumScrollEnd |
Example01
Use Custom Components

import React from 'react';
import {
    StyleSheet,
    View,
    Text,
} from 'react-native';

import BetterBanner from 'react-native-better-banner';

const App = () => {
    return (
        <View style={styles.container}>
            <BetterBanner
                bannerComponents={[
                    <View style={{
                        width: '100%',
                        height: '100%',
                        backgroundColor: '#1997fc',
                        alignItems: 'center',
                        justifyContent: 'center'
                    }}>
                        <Text style={{fontSize: 35, color: '#fff', marginBottom: 10}}>Page 01</Text>
                        <Text style={{fontSize: 15, color: '#fff'}}>Welcome! have a good time</Text>
                    </View>,
                    <View style={{
                        width: '100%',
                        height: '100%',
                        backgroundColor: '#da578f',
                        alignItems: 'center',
                        justifyContent: 'center'
                    }}>
                        <Text style={{fontSize: 35, color: '#fff', marginBottom: 10}}>Page 02</Text>
                        <Text style={{fontSize: 15, color: '#fff'}}>Welcome! have a good time</Text>
                    </View>,
                    <View style={{
                        width: '100%',
                        height: '100%',
                        backgroundColor: '#7c3fe4',
                        alignItems: 'center',
                        justifyContent: 'center'
                    }}>
                        <Text style={{fontSize: 35, color: '#fff', marginBottom: 10}}>Page 03</Text>
                        <Text style={{fontSize: 15, color: '#fff'}}>Welcome! have a good time</Text>
                    </View>,
                ]}
                bannerTitles={["Page 01 Page 01 Page 01 Page 01 Page 01 Page 01 Page 01 ", "Page 02", "Page 03"]}
                onPress={(index) => alert('you pressed index is : ' + index)}
                indicatorContainerBackgroundColor={'rgba(0,0,0,0.3)'}
                isSeamlessScroll={true}
            />
        </View>
    );
};

const styles = StyleSheet.create({
   container: {
       flex: 1
   }

});

export default App;
Example 02
Use images

import React from 'react';
import {
    StyleSheet,
    View,
    Text,
} from 'react-native';

import BetterBanner from 'react-native-better-banner';

const App = () => {
    return (
        <View style={styles.container}>
            <BetterBanner
                bannerImages={[
                    {uri: "http://attachments.gfan.net.cn/forum/attachments2/201402/05/211339r5eizavo2g5efuar.jpg.thumb.jpg"},
                    {uri: "http://attachments.gfan.net.cn/forum/attachments2/201402/05/211342pkd8axiibj5axizi.jpg.thumb.jpg"},
                    {uri: "http://attachments.gfan.net.cn/forum/attachments2/201402/05/2113441e4dw5zvv49jkdow.jpg.thumb.jpg"},
                    {uri: "http://attachments.gfan.net.cn/forum/attachments2/201402/05/2113472s3y3y1w62n2io6y.jpg.thumb.jpg"},
                ]}
                onPress={(index) => alert('you pressed index is : ' + index)}
                isSeamlessScroll={true}
                indicatorGroupPosition={'center'}
            />
        </View>
    );
};

const styles = StyleSheet.create({
   container: {
       flex: 1
   }

});

export default App;


 496
496


 被折叠的 条评论
为什么被折叠?


