这篇博客准备讲解一下pytest测试框架,这个框架是当前最流行的python语言最流行的单测框架,不掌握可不行,首先这个框架属于第三方模块,需要通过pip安装即可
下面我们进入正题
一、介绍pytest的运行规则
1、测试文件的名称必须要以test_*.py的格式,或者*_test.py的格式
2、测试类的名称必须要以Test开头,且这个类还不能有构造方法(__init__)
3、测试函数的名称必须要以test开头
pytest默认的就按照上面的三条规则来执行案例,当然我们可以自定义运行规则,这个我们后面在讲,这个不重要,看一个最简单的例子
| 1 2 3 4 5 6 7 8 9 10 11 12 13 14 15 16 17 18 19 | import os
import pytest
# pytest是python的单元测试框架
def func(x):
return x + 1
def test_a():
print("____test_a____")
assert func(2) == 5
def test_b():
print("____test_b____")
assert func(2) == 3
if __name__ == '__main__':
pytest.main(["-s","pytest1.py"])
|
二、介绍pytest的前置条件和后置条件,类似unittest的testfixture(测试固件)
如果同学们之前用过unittest测试框架,对测试固件这个这个名词就不会陌生了,如果不清楚,可以看下之前我写的unittest测试框架的博客(python自动化测试三部曲之unittest框架的实现_python_脚本之家)
pytest框架的测试固件有两种,一种函数级别的,一种是类级别,执行的顺序如下
a、执行类的前置条件
b、执行函数的前置条件
c、执行函数的后置条件
d、执行类的后置条件
使用也非常简单,当时函数的命名一定要和我下面的备注保持完全一致
| 1 2 3 4 5 6 7 8 9 | # pytest的前置和后置条件
# 1、函数级别 setup teardown
# 运行于测试方法的开始和结束
# 运行一个测试用例,会运行一次setup和teardown
# 2、类级 setup_class teardown_class
# 运行于测试类的开始和结束
# 一个测试类只运行一次setup_class teardown_class
|
1、函数式的案例--函数级别的前置条件&后置条件
| 1 2 3 4 5 6 7 8 9 10 11 12 13 14 15 16 17 18 19 20 21 | import os
import pytest
def func(x):
return x + 1
def test_a():
print("____test_a____")
assert func(2) == 5
def test_b():
print("____test_b____")
assert func(2) == 3
def setup():
print("函数级别的前置")
def teardown():
print("函数级别的后置")
|
执行结果如下
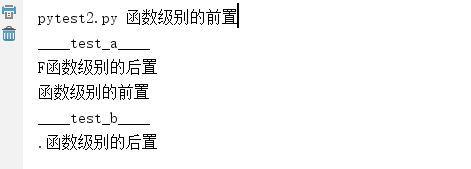
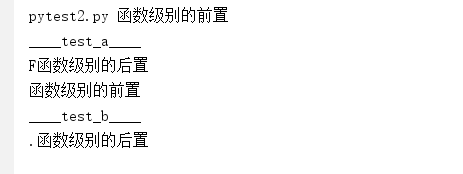
2、类式的案例--函数级别的前置条件&后置条件
| 1 2 3 4 5 6 7 8 9 10 11 12 13 14 15 16 | class Testclass:
def test_a(self):
print("____test_a____")
assert func(2) == 5
def test_b(self):
print("____test_b____")
assert func(2) == 3
def setup(self):
print("函数级别的前置")
def teardown(self):
print("函数级别的后置")
if __name__ == '__main__':
pytest.main(["-s","pytest2.py"])
|
执行结果如下
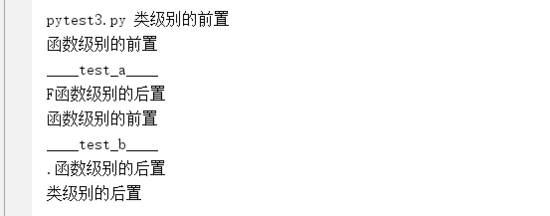
3、类级别的前置条件&后台置条件
| 1 2 3 4 5 6 7 8 9 10 11 12 13 14 15 16 17 18 19 20 21 22 23 24 25 26 27 28 | import pytest
def func(x):
return x + 1
class Testclass:
def test_a(self):
print("____test_a____")
assert func(2) == 5
def test_b(self):
print("____test_b____")
assert func(2) == 3
def setup(self):
print("函数级别的前置")
def teardown(self):
print("函数级别的后置")
def setup_class(self):
print("类级别的前置")
def teardown_class(self):
print("类级别的后置")
if __name__ == '__main__':
pytest.main(["-s","pytest3.py"])
|
结果如下
三、介绍如何修改pytest的配置文件
我们在博客的第一部分介绍了pytest框架的运行规则,这里我们可以修改pytest的配置文件,改变框架运行规则
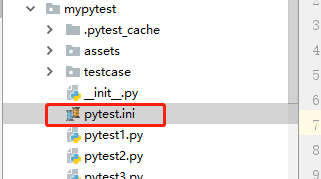
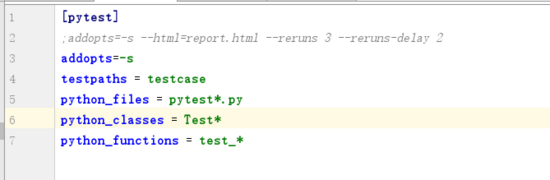
首先我们要在案例的目录下创建一个pytest.ini的配置文件
内容如下
| 1 2 3 4 5 6 7 8 9 10 11 12 13 14 15 16 17 18 | # 创建pytest.ini文件
# [pytest]
# addopts=-s
#这个先这样写,这个主要是执行参数
# testpaths = testcase
# 只执行这个目录下的文件
#
# python_files = test_*.py
#执行的文件的名字
# python_classes = Test_*
#执行类的名字
# python_functions = test_*
# 执行函数的名字
|
配置文件截图
通过上面的步骤,我们就可以改变pytest的运行规则
四、介绍pytest的断言
pytest的断言是用python的断言,他不像unittest框架,他自己实现了断言
| 1 2 3 4 5 6 7 8 9 10 11 12 13 14 15 16 17 18 19 20 21 22 23 24 25 26 27 28 29 | # -*- coding:utf-8 -*-
# pytest是使用python自带的断言
import pytest
def func(x):
return x + 1
def test_a():
print("____test_a____")
assert func(2) == 5
def test_b():
print("____test_b____")
assert not func(2) == 3
def test_c():
print("____test_b____")
assert func(2) in ["a","b","c"]
def test_d():
print("____test_b____")
assert func(2) not in ["a","b","c"]
if __name__ == '__main__':
pytest.main(["-s","pytest5.py"])
|
五、介绍pytest的标记(mark)
1、可以实现给函数打标记,实现哪些标记执行,哪些标记不执行
一个函数可以打多个标记,一个标记同时可以给多个函数打标记。只需要让这个标记的装饰器函数装饰我们的测试类或者测试函数
| 1 2 3 4 5 6 7 8 9 10 11 12 | class Test_mark():
@pytest.mark.test01
def test_a(self):
print("mark test a")
@pytest.mark.test02
def test_b(self):
print("mark test b")
if __name__ == '__main__':
pytest.main(['-s',"pytest6.py"])
|
还有其它的执行方式
| 1 2 3 4 5 | # pytest -m test01
# pytest -n "test01 or test02"
# pytest -m "not test01"
|
2、标记可以实现不跳过某个、某些案例的作用
| 1 2 3 4 5 6 7 8 9 10 11 12 13 14 15 16 17 18 19 20 21 22 23 24 25 26 27 28 29 30 31 32 | # -*- coding:utf-8 -*-
import pytest
# skip跳过执行某个案例
@pytest.mark.skip(reson="只是这个函数用例不执行")
def test_a():
print("testa")
def test_b():
print("testb")
@pytest.mark.skip(reson="整个类下的案例都不会执行")
class Test_skip():
def test_a(self):
print("testa")
def test_b(self):
print("testb")
# 可以根据条件判断,为真,则不执行
@pytest.mark.skipif(1 > 2,reson="整个类下的案例满足条件都不会执行")
class Test_skipif():
def test_a(self):
print("testa")
def test_b(self):
print("testb")
|
六、介绍pytest的数据参数化
1、传入单个参数
| 1 2 3 4 5 6 7 8 9 10 11 12 13 14 15 16 17 18 19 20 21 | # pytest的数据参数化
# 1、传入单个参数
#
# pytest.mark.parametrize(argnames,argvalues)
# argnames 参数的名称
#
# argvalues 参数对应的值,类型必须是可迭代的类型,一般使用list
@pytest.mark.skip(reson="只是这个函数用例不执行")
def test_a():
print("testa")
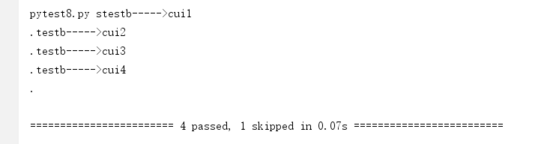
@pytest.mark.parametrize("name",["cui1","cui2","cui3","cui4"])
def test_b(name):
print("testb----->{name}".format(name = name))
if __name__ == '__main__':
pytest.main(["-s", "pytest8.py"])
|
实现的效果name作为参数的名称,这个案例会执行4次,参数分别是name=“cui1”\name="cui2"\....
2、传入多个参数
| 1 2 3 4 5 6 7 8 9 10 11 12 13 14 15 16 17 18 19 20 21 | import pytest
# pytest的数据参数化
# 1、传入多个参数
#
# pytest.mark.parametrize((argnames1,argnames2),[(argvalues1,argvalues1),(argvalues1,argvalues1)],(argvalues1,argvalues1)]])
@pytest.mark.skip(reson="只是这个函数用例不执行")
def test_a():
print("testa")
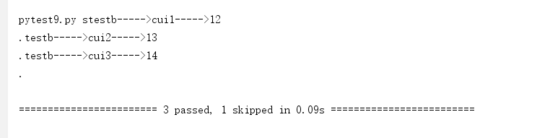
@pytest.mark.parametrize(("name","age"),[("cui1",12),("cui2",13),("cui3",14)])
def test_b(name,age):
print("testb----->{name}----->{age}".format(name = name,age = age))
if __name__ == '__main__':
pytest.main(["-s", "pytest9.py"])
|
实现的效果如下
七、介绍pyest的常用第三方插件
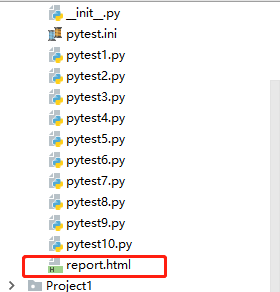
1、美化pytest的输出报告插件
| 1 2 3 4 5 6 | # pip install pytest-html
# 用来美化输出报告的插件
# 只需要在配置文件中加这个配置即可
#
# addopts=-s --html=report.html
|
效果
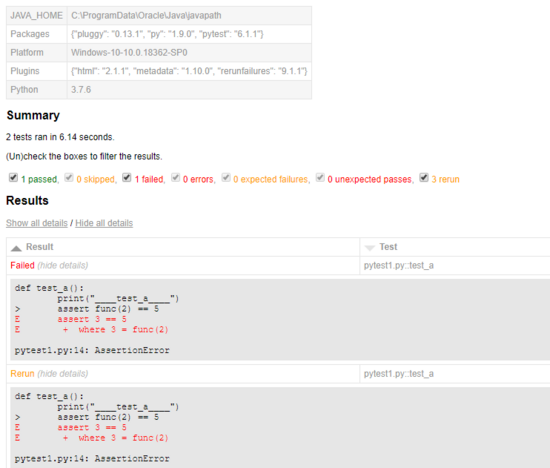
2、失败案例重试插件,下面的示例实现的就是失败重启3,失败后间隔2s在进行重试
| 1 2 3 4 | # pip install pytest-rerunfailures
# 失败重试的第三方插件
# 只需要在配置文件中加这个配置即
# --reruns 3 --reruns-delay 2
|
至此,pytest的框架基本使用已经讲解清楚,小伙伴们还有不清楚的吗?欢迎大家来沟通!!!
最后感谢每一个认真阅读我文章的人,看着粉丝一路的上涨和关注,礼尚往来总是要有的,虽然不是什么很值钱的东西,如果你用得到的话可以直接拿走! 希望能帮助到你!【100%无套路免费领取】


 3709
3709


 被折叠的 条评论
为什么被折叠?
被折叠的 条评论
为什么被折叠?
 到【灌水乐园】发言


