


开发环境:IDEA,
SprngBoot 2.0.4,
Maven 2.19.1
工程结构:
父工程father
子模块 dao (用于持久化数据跟数据库交互)
子模块 entity (实体类)
子模块 service (处理业务逻辑)
子模块 web (页面交互接收、传递数据,唯一有启动类的模块)
关系: web依赖 service、dao、entity
service依赖 dao、entity
dao依赖 entity
entity谁都不依赖,独立的
这里我用比较常见的工程结构举例说明,有些公司的项目可能会把模块分的很细,或者会有两个程序入口,也就是两个可以启动的模块!这个我在文章最后会做说明!缕清了思路其实没那么复杂!
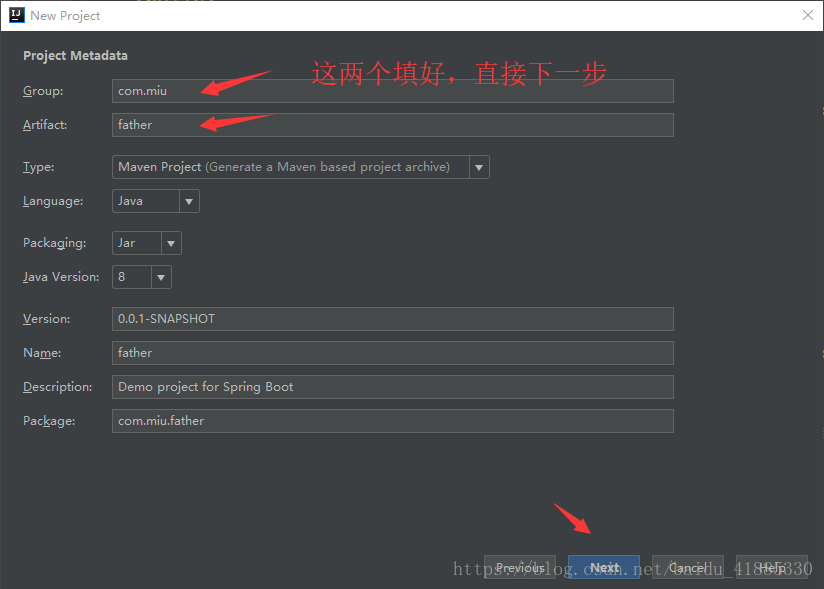
一,创建Maven多模块项目
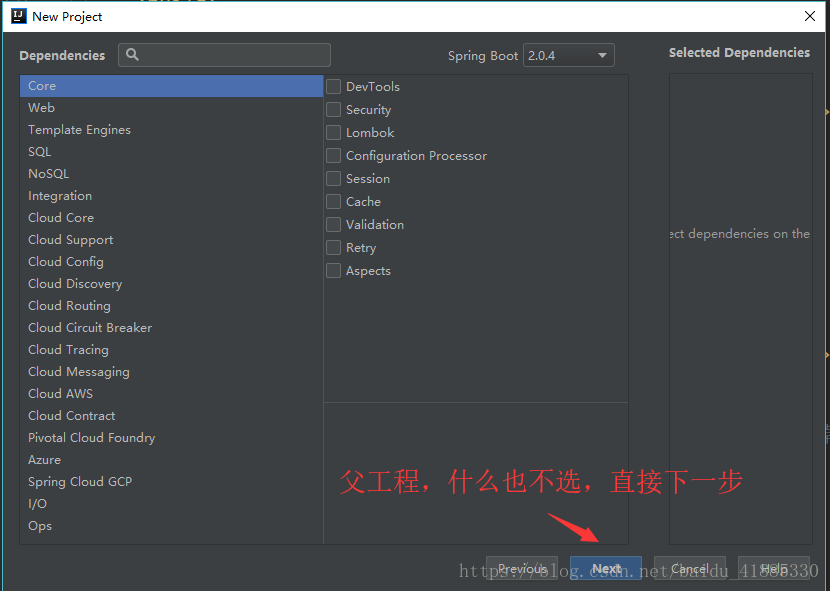
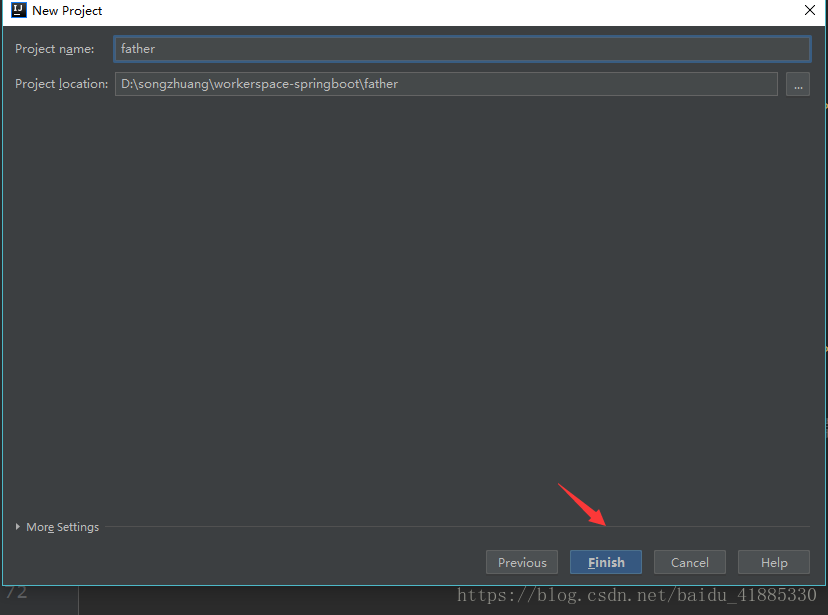
先建立外层父工程 File →new →project 选择Spring Initializr Next下一步到以下页面
工程结构如下
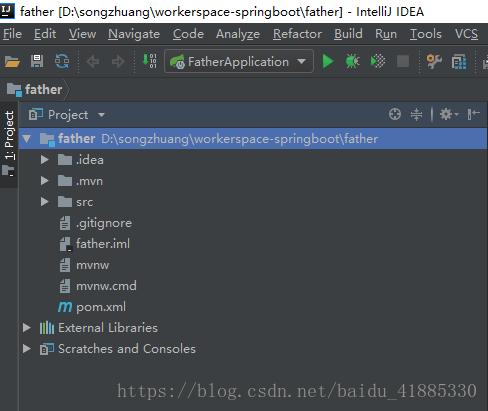
接下来,把src整个删掉,父工程不需要,因为父工程你就当它只有一个外壳就完了
接下来创建子模块 工程上右键 → new → Module 选择Spring Initaializr 下一步

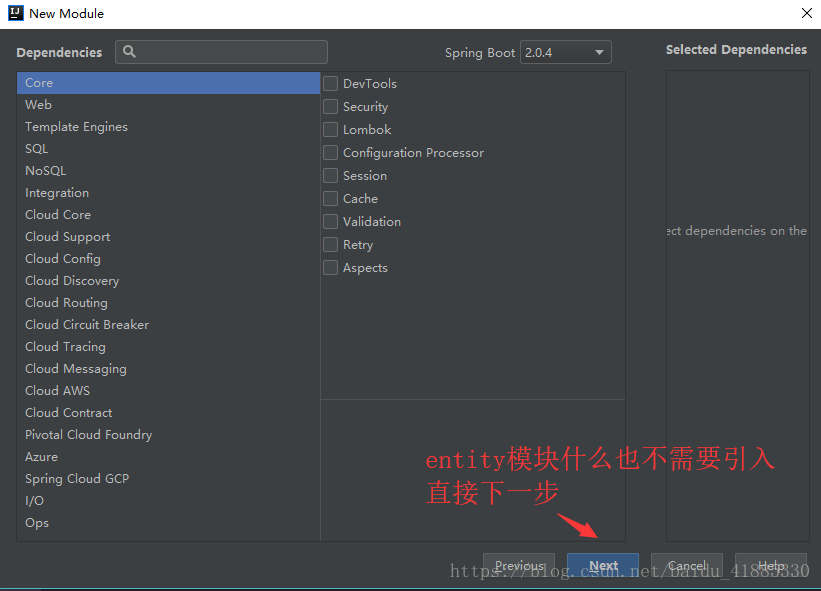
重复以上动作,创建dao模块,service模块,web模块
service模块和entity模块一样什么都不需要引入
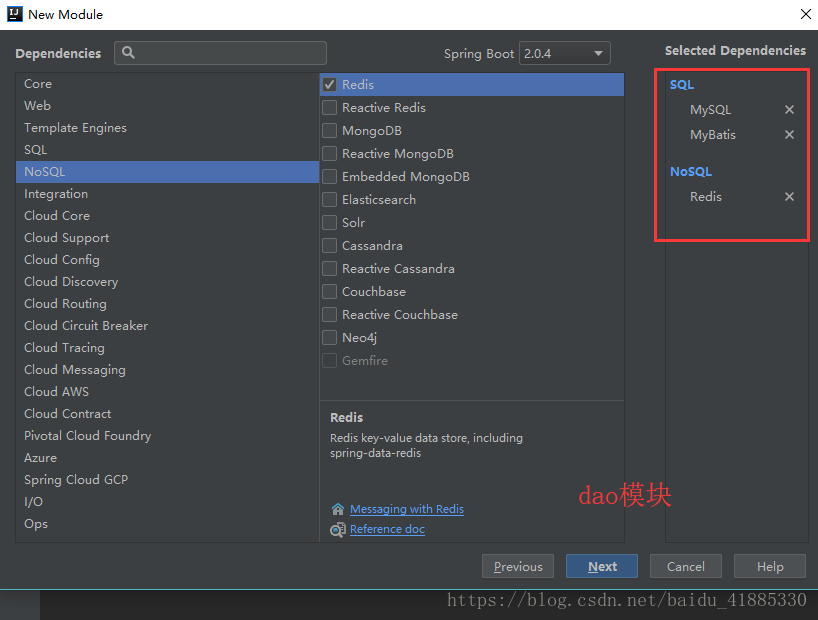
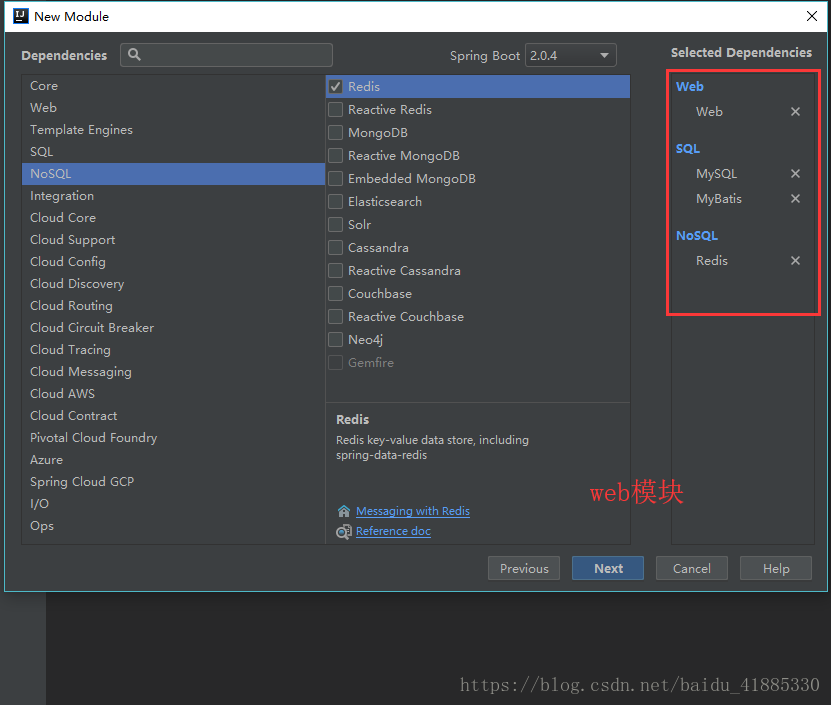
dao模块和web模块可以根据实际需求选择引入mysql,mybatis,redis,web这些,我把我的贴出来
删除每个子模块中没用的文件,.mvn、.gitignore、daoiml、mvnw、mvnw.cmd文件只留下pom.xml
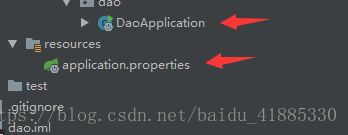
删除除了web模块以外其它模块中的Applicatin启动项,和resources目录下的application.properties配置文件
以上动作操作完成以后如果你发现你的子模块变成了文件夹,没关系,找到Maven Projects刷新一下就好了

整理过后的项目结构是这样的
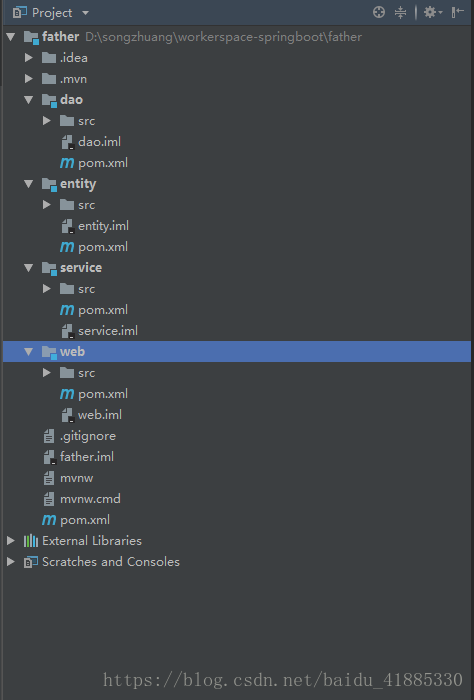
以上项目的基本结构就完成了,接下来建立各自依赖
二、依赖关系
打开父pom.xml修改打包方式jar为pom,注意:build内容也需要做替换,因为默认的spring-boot-maven-plugin这种方式,等到后期打包的时候他会一直提示你,你引入的依赖不存在!代码如下
-
<?xml version=
"1.0" encoding=
"UTF-8"?>
-
<project xmlns=
"http://maven.apache.org/POM/4.0.0" xmlns:xsi=
"http://www.w3.org/2001/XMLSchema-instance"
-
xsi:schemaLocation=
"http://maven.apache.org/POM/4.0.0 http://maven.apache.org/xsd/maven-4.0.0.xsd">
-
<modelVersion>
4.0.0</modelVersion>
-
<!--父pom.xml-->
-
<groupId>com.miu</groupId>
-
<artifactId>father</artifactId>
-
<version>
0.0.1-SNAPSHOT</version>
-
<packaging>pom</packaging>
-
-
<name>father</name>
-
<description>Demo project
for Spring Boot</description>
-
-
<parent>
-
<groupId>org.springframework.boot</groupId>
-
<artifactId>spring-boot-starter-parent</artifactId>
-
<version>
2.0.4.RELEASE</version>
-
<relativePath/> <!-- lookup parent from repository -->
-
</parent>
-
-
<properties>
-
<project.build.sourceEncoding>UTF-
8</project.build.sourceEncoding>
-
<project.reporting.outputEncoding>UTF-
8</project.reporting.outputEncoding>
-
<java.version>
1.8</java.version>
-
</properties>
-
-
<!--声明你有四个儿子 -->
-
<modules>
-
<
module>entity</
module>
-
<
module>dao</
module>
-
<
module>service</
module>
-
<
module>web</
module>
-
</modules>
-
-
<dependencies>
-
<dependency>
-
<groupId>org.springframework.boot</groupId>
-
<artifactId>spring-boot-starter</artifactId>
-
</dependency>
-
-
<dependency>
-
<groupId>org.springframework.boot</groupId>
-
<artifactId>spring-boot-starter-test</artifactId>
-
<scope>test</scope>
-
</dependency>
-
</dependencies>
-
-
<build>
-
<plugins>
-
<plugin>
-
<groupId>org.apache.maven.plugins</groupId>
-
<artifactId>maven-compiler-plugin</artifactId>
-
<version>
3.1</version>
-
<configuration>
-
<source>${java.version}</source>
-
<target>${java.version}</target>
-
</configuration>
-
</plugin>
-
<plugin>
-
<groupId>org.apache.maven.plugins</groupId>
-
<artifactId>maven-surefire-plugin</artifactId>
-
<version>
2.19.1</version>
-
<configuration>
-
<skipTests>
true</skipTests> <!--默认关掉单元测试 -->
-
</configuration>
-
</plugin>
-
</plugins>
-
</build>
-
-
</project>
这里有个坑需要注意,dao、service、entity这三个模块的pom.xml文件中不需要build 内容,直接干掉
entity 的 pom.xml 内容
-
<?xml version=
"1.0" encoding=
"UTF-8"?>
-
<project xmlns=
"http://maven.apache.org/POM/4.0.0" xmlns:xsi=
"http://www.w3.org/2001/XMLSchema-instance"
-
xsi:schemaLocation=
"http://maven.apache.org/POM/4.0.0 http://maven.apache.org/xsd/maven-4.0.0.xsd">
-
<modelVersion>
4.0.0</modelVersion>
-
<groupId>com.miu</groupId>
-
<artifactId>entity</artifactId>
-
<version>
0.0.1-SNAPSHOT</version>
-
<packaging>jar</packaging>
-
<name>entity</name>
-
<description>Demo project
for Spring Boot</description>
-
<!--声明父模块-->
-
<parent>
-
<groupId>com.miu</groupId>
-
<artifactId>father</artifactId>
-
<version>
0.0.1-SNAPSHOT</version>
-
<relativePath>../pom.xml</relativePath>
-
</parent>
-
<properties>
-
<project.build.sourceEncoding>UTF-
8</project.build.sourceEncoding>
-
<project.reporting.outputEncoding>UTF-
8</project.reporting.outputEncoding>
-
<java.version>
1.8</java.version>
-
</properties>
-
<dependencies>
-
<dependency>
-
<groupId>org.springframework.boot</groupId>
-
<artifactId>spring-boot-starter</artifactId>
-
</dependency>
-
<dependency>
-
<groupId>org.springframework.boot</groupId>
-
<artifactId>spring-boot-starter-test</artifactId>
-
<scope>test</scope>
-
</dependency>
-
</dependencies>
-
</project>
dao 的 pom.xml 内容
-
<?xml version=
"1.0" encoding=
"UTF-8"?>
-
<project xmlns=
"http://maven.apache.org/POM/4.0.0" xmlns:xsi=
"http://www.w3.org/2001/XMLSchema-instance"
-
xsi:schemaLocation=
"http://maven.apache.org/POM/4.0.0 http://maven.apache.org/xsd/maven-4.0.0.xsd">
-
<modelVersion>
4.0.0</modelVersion>
-
<!--dao 模块 pom.xml-->
-
<groupId>com.miu</groupId>
-
<artifactId>dao</artifactId>
-
<version>
0.0.1-SNAPSHOT</version>
-
<packaging>jar</packaging>
-
<name>dao</name>
-
<description>Demo project
for Spring Boot</description>
-
<!--声明父模块-->
-
<parent>
-
<groupId>com.miu</groupId>
-
<artifactId>father</artifactId>
-
<version>
0.0.1-SNAPSHOT</version>
-
<relativePath>../pom.xml</relativePath>
-
</parent>
-
<properties>
-
<project.build.sourceEncoding>UTF-
8</project.build.sourceEncoding>
-
<project.reporting.outputEncoding>UTF-
8</project.reporting.outputEncoding>
-
<java.version>
1.8</java.version>
-
</properties>
-
<dependencies>
-
<dependency>
-
<groupId>org.springframework.boot</groupId>
-
<artifactId>spring-boot-starter-data-redis</artifactId>
-
</dependency>
-
<dependency>
-
<groupId>org.mybatis.spring.boot</groupId>
-
<artifactId>mybatis-spring-boot-starter</artifactId>
-
<version>
1.3.2</version>
-
</dependency>
-
<dependency>
-
<groupId>mysql</groupId>
-
<artifactId>mysql-connector-java</artifactId>
-
<scope>runtime</scope>
-
</dependency>
-
<dependency>
-
<groupId>org.springframework.boot</groupId>
-
<artifactId>spring-boot-starter-test</artifactId>
-
<scope>test</scope>
-
</dependency>
-
<!--dao 模块 引入entity模块-->
-
<dependency>
-
<groupId>com.miu</groupId>
-
<artifactId>entity</artifactId>
-
<version>
0.0.1-SNAPSHOT</version>
-
</dependency>
-
</dependencies>
-
</project>
service 模块的 pom.xml 内容
-
<?xml version=
"1.0" encoding=
"UTF-8"?>
-
<project xmlns=
"http://maven.apache.org/POM/4.0.0" xmlns:xsi=
"http://www.w3.org/2001/XMLSchema-instance"
-
xsi:schemaLocation=
"http://maven.apache.org/POM/4.0.0 http://maven.apache.org/xsd/maven-4.0.0.xsd">
-
<modelVersion>
4.0.0</modelVersion>
-
-
<groupId>com.miu</groupId>
-
<artifactId>service</artifactId>
-
<version>
0.0.1-SNAPSHOT</version>
-
<packaging>jar</packaging>
-
-
<name>service</name>
-
<description>Demo project
for Spring Boot</description>
-
<!--声明父模块-->
-
<parent>
-
<groupId>com.miu</groupId>
-
<artifactId>father</artifactId>
-
<version>
0.0.1-SNAPSHOT</version>
-
<relativePath>../pom.xml</relativePath>
-
</parent>
-
<properties>
-
<project.build.sourceEncoding>UTF-
8</project.build.sourceEncoding>
-
<project.reporting.outputEncoding>UTF-
8</project.reporting.outputEncoding>
-
<java.version>
1.8</java.version>
-
</properties>
-
<dependencies>
-
<dependency>
-
<groupId>org.springframework.boot</groupId>
-
<artifactId>spring-boot-starter</artifactId>
-
</dependency>
-
<dependency>
-
<groupId>org.springframework.boot</groupId>
-
<artifactId>spring-boot-starter-test</artifactId>
-
<scope>test</scope>
-
</dependency>
-
<!--service模块 引入entity模块-->
-
<dependency>
-
<groupId>com.miu</groupId>
-
<artifactId>entity</artifactId>
-
<version>
0.0.1-SNAPSHOT</version>
-
</dependency>
-
<!--service模块 引入dao模块-->
-
<dependency>
-
<groupId>com.miu</groupId>
-
<artifactId>dao</artifactId>
-
<version>
0.0.1-SNAPSHOT</version>
-
</dependency>
-
</dependencies>
-
</project>
web模块的 pom.xml 内容
注意build部分,因为web模块作为程序的入口启动,所以它需要打包,并且要指定Main Class
-
<?xml version=
"1.0" encoding=
"UTF-8"?>
-
<project xmlns=
"http://maven.apache.org/POM/4.0.0" xmlns:xsi=
"http://www.w3.org/2001/XMLSchema-instance"
-
xsi:schemaLocation=
"http://maven.apache.org/POM/4.0.0 http://maven.apache.org/xsd/maven-4.0.0.xsd">
-
<modelVersion>
4.0.0</modelVersion>
-
<groupId>com.miu</groupId>
-
<artifactId>web</artifactId>
-
<version>
0.0.1-SNAPSHOT</version>
-
<packaging>jar</packaging>
-
<name>web</name>
-
<description>Demo project
for Spring Boot</description>
-
<!--声明父模块-->
-
<parent>
-
<groupId>com.miu</groupId>
-
<artifactId>father</artifactId>
-
<version>
0.0.1-SNAPSHOT</version>
-
<relativePath>../pom.xml</relativePath>
-
</parent>
-
<properties>
-
<project.build.sourceEncoding>UTF-
8</project.build.sourceEncoding>
-
<project.reporting.outputEncoding>UTF-
8</project.reporting.outputEncoding>
-
<java.version>
1.8</java.version>
-
</properties>
-
<dependencies>
-
<dependency>
-
<groupId>org.springframework.boot</groupId>
-
<artifactId>spring-boot-starter-data-redis</artifactId>
-
</dependency>
-
<dependency>
-
<groupId>org.springframework.boot</groupId>
-
<artifactId>spring-boot-starter-web</artifactId>
-
</dependency>
-
<dependency>
-
<groupId>org.mybatis.spring.boot</groupId>
-
<artifactId>mybatis-spring-boot-starter</artifactId>
-
<version>
1.3.2</version>
-
</dependency>
-
<dependency>
-
<groupId>mysql</groupId>
-
<artifactId>mysql-connector-java</artifactId>
-
<scope>runtime</scope>
-
</dependency>
-
<dependency>
-
<groupId>org.springframework.boot</groupId>
-
<artifactId>spring-boot-starter-test</artifactId>
-
<scope>test</scope>
-
</dependency>
-
<!--web模块 引入entity模块-->
-
<dependency>
-
<groupId>com.miu</groupId>
-
<artifactId>entity</artifactId>
-
<version>
0.0.1-SNAPSHOT</version>
-
</dependency>
-
<!--web模块 引入service模块-->
-
<dependency>
-
<groupId>com.miu</groupId>
-
<artifactId>service</artifactId>
-
<version>
0.0.1-SNAPSHOT</version>
-
</dependency>
-
<!--web模块 引入dao模块-->
-
<dependency>
-
<groupId>com.miu</groupId>
-
<artifactId>dao</artifactId>
-
<version>
0.0.1-SNAPSHOT</version>
-
</dependency>
-
</dependencies>
-
<build>
-
<plugins>
-
<plugin>
-
<groupId>org.springframework.boot</groupId>
-
<artifactId>spring-boot-maven-plugin</artifactId>
-
<configuration>
-
<!-- 指定该Main Class为全局的唯一入口 -->
-
<mainClass>com.miu.web.WebApplication</mainClass>
-
<layout>ZIP</layout>
-
</configuration>
-
<executions>
-
<execution>
-
<goals>
-
<goal>repackage</goal><!--可以把依赖的包都打包到生成的Jar包中-->
-
</goals>
-
</execution>
-
</executions>
-
</plugin>
-
</plugins>
-
</build>
-
</project>
到此为止所有的依赖全部完成!接下来就是测试!这里只用简单的测试来实验!
三、代码测试
entity模块中创建 EntiyTest类

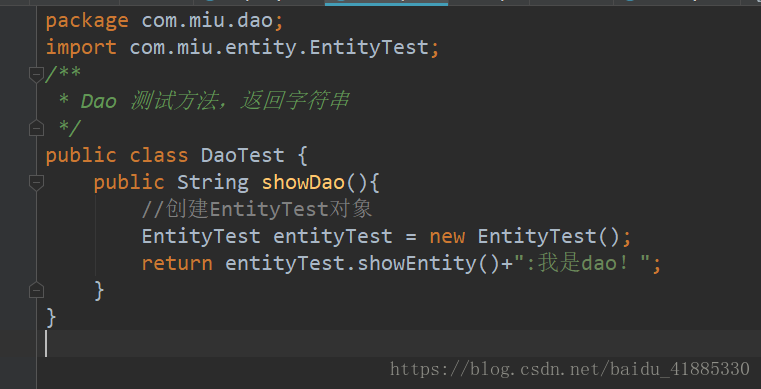
dao模块中创建 DaoTest类
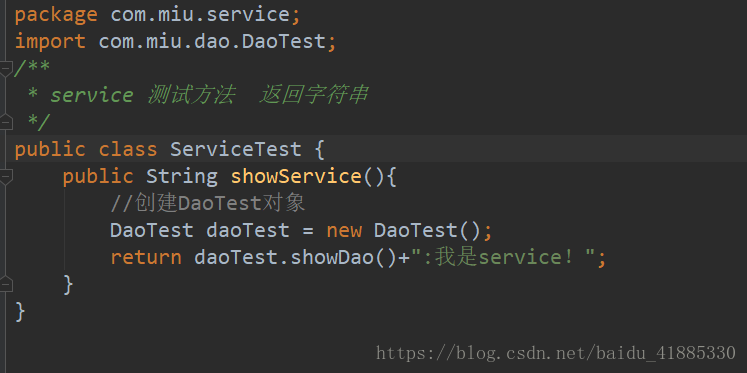
service模块中创建ServiceTest类
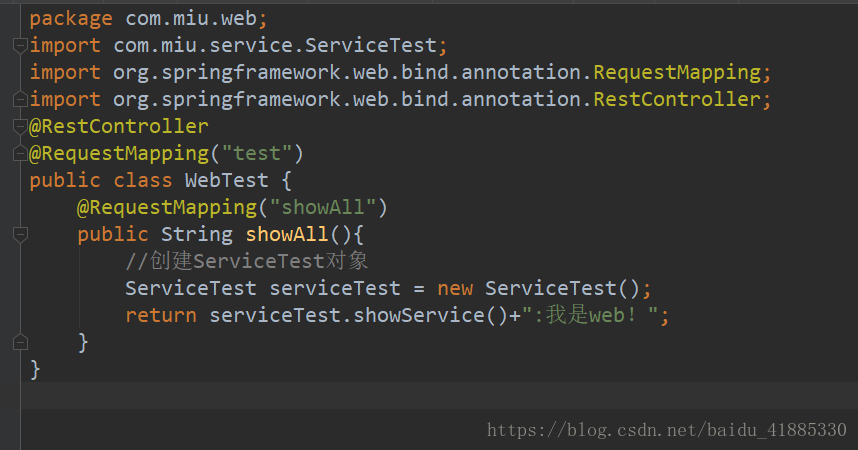
Web模块中创建WebTest类
最后把web模块中的application.properties文件补充一下就OK了,因为引入了mysql,redis等配置,所以数据源是要配的,不然运行起来会报错找不到数据源!
-
server.port=
8080
-
#-----------------------------------数据库配置----------------------------------------
-
spring.datasource.driver-
class-name=com.mysql.jdbc.Driver
-
spring.datasource.url=jdbc:mysql:
//127.0.0.1:3306/test?characterEncoding=utf8
-
spring.datasource.username=root
-
spring.datasource.password=
123
-
#------------------------------------redis配置---------------------------------------
-
spring.redis.database=
0
-
spring.redis.host=
127.0.0.1
-
spring.redis.port=
6379
-
spring.redis.password=
-
spring.redis.jedis.pool.max-active=
8
-
spring.redis.jedis.pool.max-idle=
8
-
spring.redis.jedis.pool.max-wait=-
1ms
-
spring.redis.jedis.pool.min-idle=
0
-
spring.redis.timeout=
10000ms
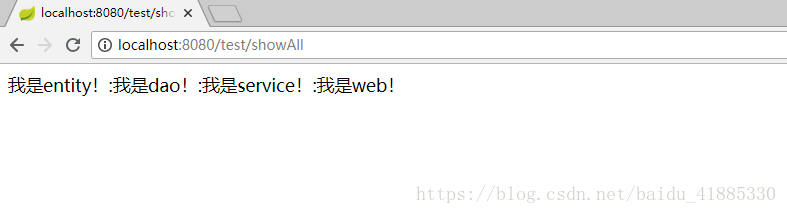
一切准备就绪,开始运行web模块下的启动类进行测试
四、打包可执行jar
看到上面的页面就证明模块之间的依赖没有问题,调用正常,我这里是用简单的创建对象的这种方式来操作的,实际开发并不是这种操作,大部分都是通过 @Autowired 注解 来实现的注入,这里我就不做演示了,只要模块之间调用没问题,剩下的就是铺代码的事了,接下来还有最后一个打包问题,为什么要啰嗦那么多还要说打包问题呢,因为我建议在项目架构之初,除了搭框架以外,最好是在最开始的时候就测试一下打包,尤其是这种多模块项目之间各种依赖的这种工程的打包,如果等你代码写的铺天盖地的时候你在去想怎么打包,到时候有你头疼的!如果你是按照我本章的流程一步步下来的话,那么你完全不用担心打包问题,因为所有的pom.xml有已经配置好了,只需要动手运行 package打包动作就行了,第一次打包不需要clean,记住以后每次打包之前clean一下,关于为什么打jar包,不打war包这个问题,还有其它会遇到的问题,在文章最后会做说明!
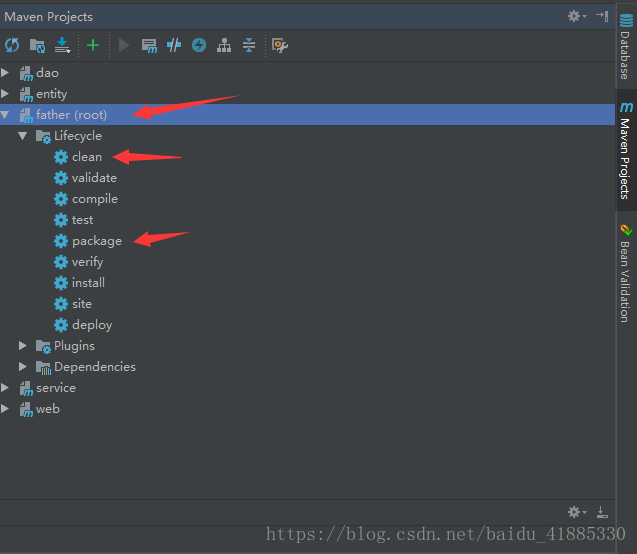
双击运行package,看到BUILD SUCCESS 就证明打包成功了,如此简单?告诉你就是这么简单,前提是你的每一个模块下的pom.xml要配置好,谁需要打包,谁不需要打包,谁依赖谁,父工程是否声明了子模块,子模块是否声明了父工程是谁,这些是重点!

接下来去找你工程目录,web文件夹下的target文件夹,刚才打包好的jar文件,就放在这里了
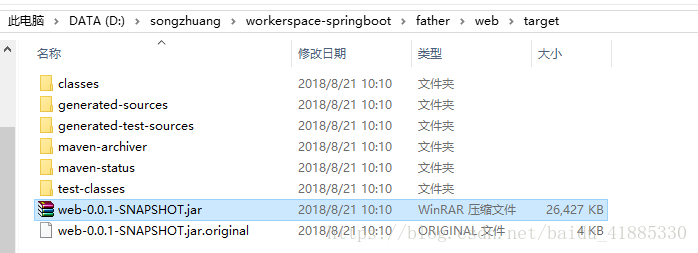
然后我把这个jar文件上传到我的测试服务器,使用 java -jar web-0.0.1-SNAPSHOT.jar 命令来测试运行打包的可执行jar文件到底行不行!

运行成功,输入我测试服务器地址测试也没问题,到此为止全部搞定

聚合工程举一个简单的例子,
整个工程你就当作一个公司,父工程(退休了什么也不干)只需要声明有几个儿子(子模块)就完事了,
子模块web声明父工程是谁,就当他是大儿子,公司他管事,pom.xml文件需要打包,需要build配置,需要其它三个兄弟帮助
其它子模块声明父工程是谁,之间关系都是兄弟,不需要打包,哪里需要去哪里!
在此我说一下重点和需要注意的地方!
1.父pom.xml 打包方式,jar要更改为pom,build 需要更改
2.不需要打包的模块pom.xml文件中不要写<build>,全删掉,例如有些工程中的common模块,utils模块,entity模块,service模 块都不需要打包
3.声明父工程时,填写父工程位置<relativePath>../pom.xml</relativePath>
4.关于applicatin.properties配置文件,只需要在启动的模块中配置就可以了,
5.关于打包为什么打包jar包,不打war包,打war包目的是war包可以运行在tomcat下,但是SpringBoot是内置tomcat,如果你打war包,前提是干掉内置的tomcat,然后才能打包,各种麻烦,直接打包可执行jar包,使用java -jar 命令就可以完美的运行起来很方便!
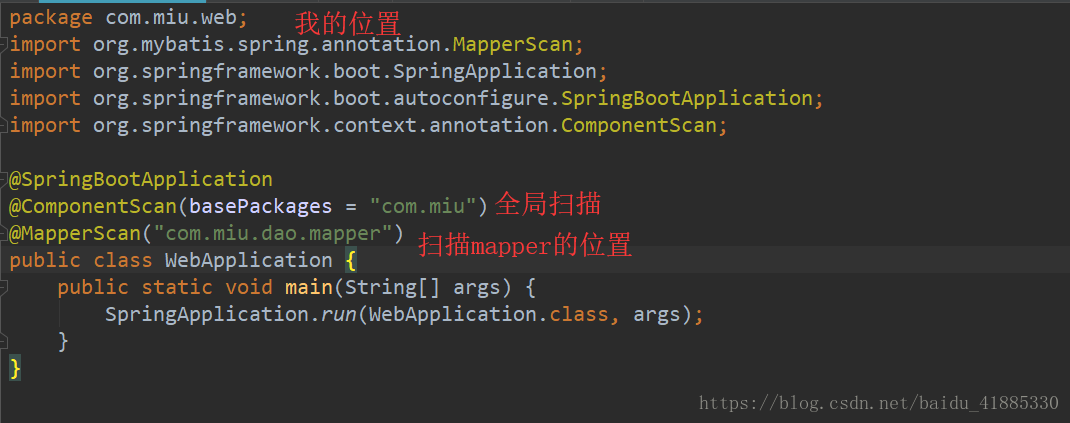
6.真实开发中使用@Autowired 注解 来实现注入,而不是new对象这种方式,所以可能会产生注入以后报错,是因为你的启动类上没有配置扫描,使用
@ComponentScan(basePackages = "你的路径")注解来解决,如果你使用的持久层是Mybatis,那么你的mapper也需要扫描,在启动类上使用
@MapperScan("你的mapper文件地址")注解来解决,算了还是贴个图片吧
不罗嗦了,就到这里吧,一个文章写了两个小时可见我的良苦用心,(关键是我被这个多模块打包问题困扰了好长时间,网上各种找解决办法,说的天花乱坠,狗屁不通,服的五体投地)


 966
966


 被折叠的 条评论
为什么被折叠?
被折叠的 条评论
为什么被折叠?
 到【灌水乐园】发言


