


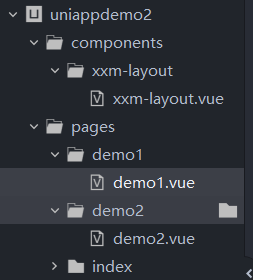
1.在项目里面创建components文件夹,在该文件夹下创建组件,uniapp会自动识别为组件
<template>
	<view class="layout">
		<view class="header">
			<slot name="header"></slot>
		</view>
		<view class="main">
			<!-- 这里命名必须用这种 -->
			<slot name="main"></slot>
		</view>
		<view class="footer">底部区域</view>
	</view>
</template>
<script setup>
</script>
<style lang="scss" scoped>
	.header {
		height: 100px;
		background: #cfcfcf;
	}

	.main {
		min-height: 200px;
	}

	.footer {
		height: 120px;
		background: orange;
	}
</style>
说明,这里使用具名插槽,分别命名为header和main
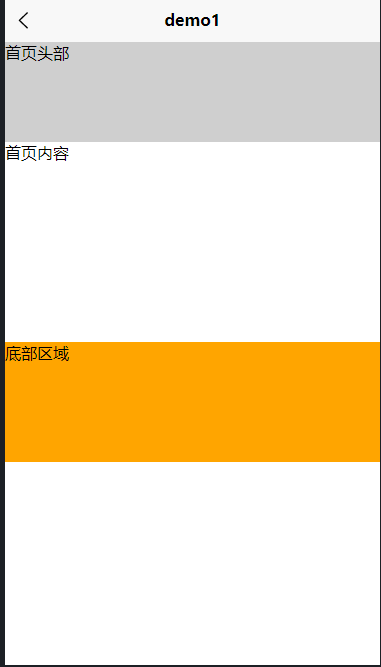
2.创建demo1
<template>
	<view class="">
		<xxm-layout>
			<template #header>
				首页头部
			</template>
			<template #main>
				首页内容
			</template>
		</xxm-layout>
	</view>
</template>
<script setup>
</script>
<style lang="scss" scoped>
</style>
插槽要用到template,用#代替v-slot,#+插槽名。
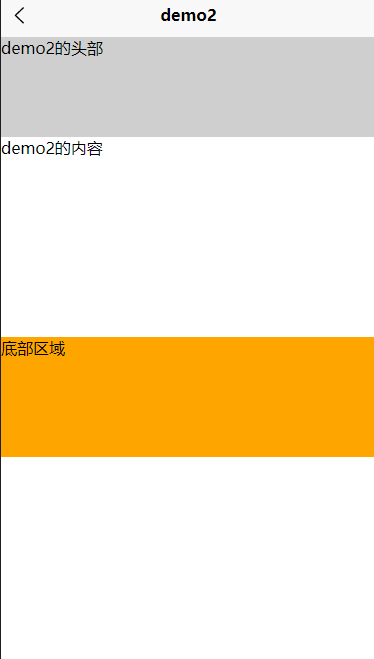
3.创建demo2
<template>
	<view class="">
		<xxm-layout>
			<template #header>
				demo2的头部
			</template>
			<template #main>
				demo2的内容
			</template>
		</xxm-layout>
	</view>
</template>
<script setup>
</script>
<style lang="scss" scoped>
	.box1 {
		width: 100px;
		height: 100px;
		background: pink;
	}

	.box2 {
		width: 130px;
		height: 130px;
		background: green;
	}
</style>
插槽的使用同上。
4.效果
实现demo1和demo2显得内容不同
demo1
demo2
项目框架


 被折叠的 条评论
为什么被折叠?
被折叠的 条评论
为什么被折叠?
 到【灌水乐园】发言


