


引言
微服务项目中网关是一个常见的模块,通过网关的分发可以实现负载均衡、鉴权等操作;但是搭建好网关可以发现,虽然可以通过网关端口请求后端,如果有其他服务的地址依然可以使用其他服务地址绕过网关请求,这里我提供一种思路来实现发送的请求只能通过网关到达对应服务。
思路
首先可以在网关处加一个过滤器,所有经过网关的请求会经过该过滤器在header上加一个参数;;
然后当请求到达某个服务时只需要校验该请求header上有没有对应参数即可。
实现方法也很简单,就是网关一个过滤器,各个微服务一个拦截器即可,但是各个微服务都写个相同的拦截器代码就有些冗余了,这里可以选择使用aop实现,或者可以自定义一个starter来实现。
下面我自定义一个请求校验的starter来实现以上功能;
代码实现
首先在网关模块编写过滤器:
/**
* 网关请求过滤器
*/
@Component
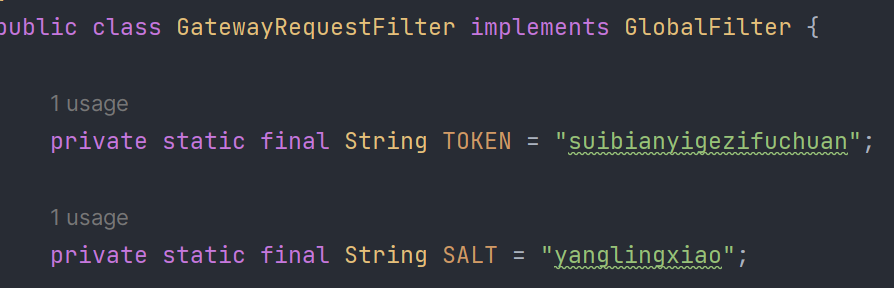
public class GatewayRequestFilter implements GlobalFilter {
private static final String TOKEN = "suibianyigezifuchuan";
private static final String SALT = "yanglingxiao";
@Override
public Mono<Void> filter(ServerWebExchange exchange, GatewayFilterChain chain) {
String token = DigestUtils.md5DigestAsHex((SALT + TOKEN).getBytes());
ServerHttpRequest build = exchange.getRequest()
.mutate()
.header(GatewayConstant.GATEWAY_TOKEN_HEADER, token)
.build();
ServerWebExchange newExchange = exchange.mutate().request(build).build();
return chain.filter(newExchange);
}
}
创建starter的步骤可以看这个文章:实现自定义springboot的starter
引入依赖:
<dependency>
    <groupId>org.springframework.boot</groupId>
    <artifactId>spring-boot-starter</artifactId>
</dependency>
<dependency>
    <groupId>org.projectlombok</groupId>
    <artifactId>lombok</artifactId>
    <optional>true</optional>
</dependency>
<dependency>
    <groupId>org.springframework.boot</groupId>
    <artifactId>spring-boot-configuration-processor</artifactId>
    <optional>true</optional>
</dependency>
<dependency>
    <groupId>org.springframework.boot</groupId>
    <artifactId>spring-boot-autoconfigure</artifactId>
</dependency>
<dependency>
    <groupId>org.springframework.boot</groupId>
    <artifactId>spring-boot-starter-web</artifactId>
</dependency>
<dependency>
    <groupId>org.apache.commons</groupId>
    <artifactId>commons-lang3</artifactId>
</dependency>
<dependency>
    <groupId>com.alibaba</groupId>
    <artifactId>fastjson</artifactId>
    <version>1.2.33</version>
</dependency>
创建properties.java文件用于参数的获取
@Data
@ConfigurationProperties(prefix = "cloud.request")
public class CloudRequestAuthProperties {

    /**
     * 请求是否只能通过网关
     */
    private Boolean onlyFetchByGateway = Boolean.FALSE;

    /**
     * 网关添加header的key
     */
    private String gatewayTokenHeader = "";

    /**
     * 鉴权token
     */
    private String gatewayToken = "";

    /**
     * 加密盐值
     */
    private String salt = "";

}
这里我没有想到比较优雅的设计方法,其中的参数其实可以写死在starter中,但是对应的网关过滤器的salt和token等值就必须和这里的一样,为了能灵活定义我想到这个方法,但是这样通样要求网关过滤器的对应参数值和这里的相同,只是可以自己修改参数值了而已。
创建请求拦截器:
/**
* 请求拦截器
*/
public class CloudRequestAuthInterceptor implements HandlerInterceptor {
private CloudRequestAuthProperties properties;
@Override
public boolean preHandle(@NonNull HttpServletRequest request, @NonNull HttpServletResponse response, @NonNull Object handler){
if (!properties.getOnlyFetchByGateway()) {
return true;
}
// 获取请求头中的token
String token = request.getHeader(properties.getGatewayTokenHeader());
// 获取网关中设置的token
String gatewayToken = DigestUtils.md5DigestAsHex((properties.getSalt() + properties.getGatewayToken()).getBytes());
// 比较请求头中的token和网关中的中的是否相同
if (StringUtils.equals(gatewayToken, token)) {
return true; // 放行
} else {
try {
response.setCharacterEncoding("utf-8");
response.setContentType("application/json; charset=utf-8");
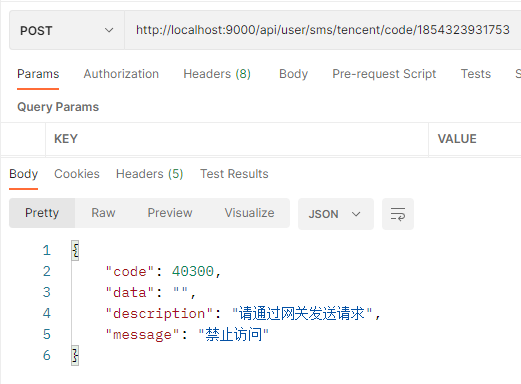
Map<String, Object> resultMap = new HashMap<>();
resultMap.put("code", 40300);
resultMap.put("data", "");
resultMap.put("message", "禁止访问");
resultMap.put("description", "请通过网关发送请求");
String jsonMap = JSON.toJSONString(resultMap);
PrintWriter writer = response.getWriter();
writer.write(jsonMap);
} catch (IOException e) {
throw new RuntimeException(e);
}
return false;
}
}
public void setProperties(CloudRequestAuthProperties properties) {
this.properties = properties;
}
}
创建了请求拦截器后还需要把该拦截器注册到拦截器集合中,所以需要一个拦截器配置类:
/**
 * 配置拦截器CloudRequestAuthInterceptor
 */
public class CloudRequestAuthInterceptorConfigure implements WebMvcConfigurer {

    private CloudRequestAuthProperties properties;

    // 这里把CloudRequestAuthProperties注入spring管理
    @Autowired
    public void setProperties(CloudRequestAuthProperties properties) {
        this.properties = properties;
    }

    public HandlerInterceptor serverProtectInterceptor() {
        CloudRequestAuthInterceptor interceptor = new CloudRequestAuthInterceptor();
        interceptor.setProperties(properties);
        return interceptor;
    }

    @Override
    public void addInterceptors(InterceptorRegistry registry) {
        registry.addInterceptor(serverProtectInterceptor());
    }
}
最后是将该配置交给spring管理并启用starter的配置:
@EnableConfigurationProperties(CloudRequestAuthProperties.class)
public class CloudRequestAuthAutoConfigure {

    // 这里将拦截器配置类交给spring管理
    @Bean
    public CloudRequestAuthInterceptorConfigure cloudRequestInterceptorConfigure() {
        return new CloudRequestAuthInterceptorConfigure();
    }

}
这一块的代码要注意spring的注入,不要乱加注解结果导致重复注入,这里我踩坑在拦截器配置类中加了@Configuration注解导致重复注册bean,看了半天才看出来。
然后在spring.factories文件夹中加入配置:
org.springframework.boot.autoconfigure.EnableAutoConfiguration=com.yang.request.auth.configure.CloudRequestAuthAutoConfigure
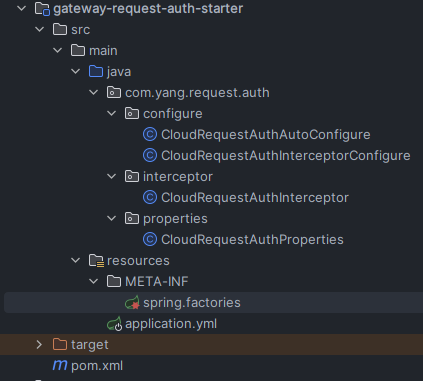
其实这样就完成了,项目大致这个样子:
然后用maven工具install下来,在微服务模块中使用测试一下:
引入依赖
<dependency>
    <groupId>com.yang.request.auth</groupId>
    <artifactId>gateway-request-auth-starter</artifactId>
    <version>0.0.1-SNAPSHOT</version>
</dependency
application.yml中配置参数:
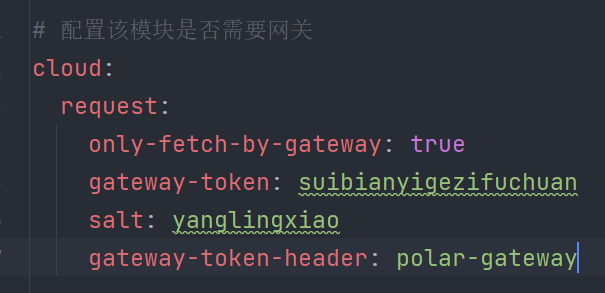
这里参数要和gateway参数对应一致才行:
然后启动网关模块和该服务模块,这里网关端口为8080,该微服务模块端口为9000:
经过网关模块的请求可以正常执行逻辑代码:
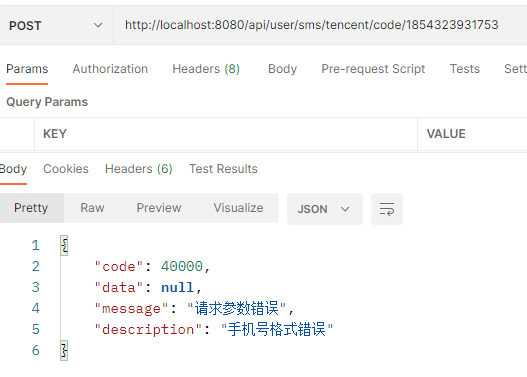
直接访问微服务的请求被拦截:
至此所有功能完成;


 3434
3434


 被折叠的 条评论
为什么被折叠?
被折叠的 条评论
为什么被折叠?
 到【灌水乐园】发言


