


说明
OAuth 2.0 规定了四种获得令牌的流程。你可以选择最适合自己的那一种,向第三方应用颁发令牌。下面就是这四种授权方式。
- 授权码(authorization-code)
- 隐藏式(implicit)
- 密码式(password):
- 客户端凭证(client credentials)
本文着重介绍授权码模式。
方法/步骤
一,maven 版本依赖
    <dependency>
      <groupId>org.springframework.boot</groupId>
      <artifactId>spring-boot-starter-security</artifactId>
      <version>2.3.3.RELEASE</version>
    </dependency>

    <!-- 认证引用相关 -->
    <dependency>
      <groupId>org.springframework.cloud</groupId>
      <artifactId>spring-cloud-security</artifactId>
      <version>2.2.4.RELEASE</version>
    </dependency>
    <dependency>
      <groupId>org.springframework.security.oauth</groupId>
      <artifactId>spring-security-oauth2</artifactId>
      <version>2.3.4.RELEASE</version>
    </dependency>
二,Security 授权配置
import org.springframework.context.annotation.Bean;
import org.springframework.context.annotation.Configuration;
import org.springframework.security.config.annotation.authentication.builders.AuthenticationManagerBuilder;
import org.springframework.security.config.annotation.method.configuration.EnableGlobalMethodSecurity;
import org.springframework.security.config.annotation.web.builders.HttpSecurity;
import org.springframework.security.config.annotation.web.configuration.EnableWebSecurity;
import org.springframework.security.config.annotation.web.configuration.WebSecurityConfigurerAdapter;
import org.springframework.security.crypto.bcrypt.BCryptPasswordEncoder;
import org.springframework.security.crypto.password.PasswordEncoder;

import javax.annotation.Resource;

@Configuration
@EnableWebSecurity
@EnableGlobalMethodSecurity(prePostEnabled = true,jsr250Enabled = true)
public class WebSecurityConfig extends WebSecurityConfigurerAdapter {

    @Resource
    private UserDetailsServiceImpl userDatailService;

    @Override
    public void configure(HttpSecurity http) throws Exception {
//        http.csrf().disable().cors().disable().sessionManagement().sessionCreationPolicy(SessionCreationPolicy.STATELESS);
        http.csrf().disable().cors().disable();
        http.authorizeRequests()
                .antMatchers( "/oauth/**","/logout/**","/login/**").permitAll()
                .anyRequest().authenticated()// 所有请求都需要验证
                .and()
                .formLogin().permitAll();
    }

    @Override
    protected void configure(AuthenticationManagerBuilder auth) throws Exception {
        auth
                // 从数据库读取的用户进行身份认证
                .userDetailsService(userDatailService)
                .passwordEncoder(passwordEncoder());
    }

    /**
     * 指定加密方式
     */
    @Bean
    public PasswordEncoder passwordEncoder(){
//        String s = DigestUtils.md5DigestAsHex();
        // 使用BCrypt加密密码
        return new BCryptPasswordEncoder();
    }
}
三,Oauth 授权配置
@Configuration
@EnableAuthorizationServer
public class AuthorizationServerConfig extends AuthorizationServerConfigurerAdapter {

    @Autowired
    PasswordEncoder passwordEncoder;

    /**
     * 授权码模式配置
     * @param clients
     * @throws Exception
     */
    @Override
    public void configure(ClientDetailsServiceConfigurer clients) throws Exception {
        clients.inMemory()
                .withClient("appc")
                //token 失效时间
                .accessTokenValiditySeconds(1200)
                .refreshTokenValiditySeconds(50000)
                .secret(passwordEncoder.encode("123456"))
                .redirectUris("https://www.baidu.com/")
                .scopes("all")
                .authorizedGrantTypes("authorization_code", "refresh_token",
                        "password", "implicit");
    }

}
- Oauth 资源配置
@EnableResourceServer
@Configuration
public class ResourceConfig  extends ResourceServerConfigurerAdapter {

    @Override
    public void configure(HttpSecurity http) throws Exception {
        http.authorizeRequests()
                .anyRequest().authenticated()
                .and()
                .requestMatchers().antMatchers( "/demo/**");
    }

}
四,测试
4.1,向Oauth 授权服务器获取Token令牌
http://127.0.0.1:7000/oauth/authorize?client_id=appc&client_secret=123456&grant_type=authorization_code&user_type=appc&response_type=code&scope=all

点击允许授权,会得到一个令牌 (实际项目中会直接打到自己的服务器接口)

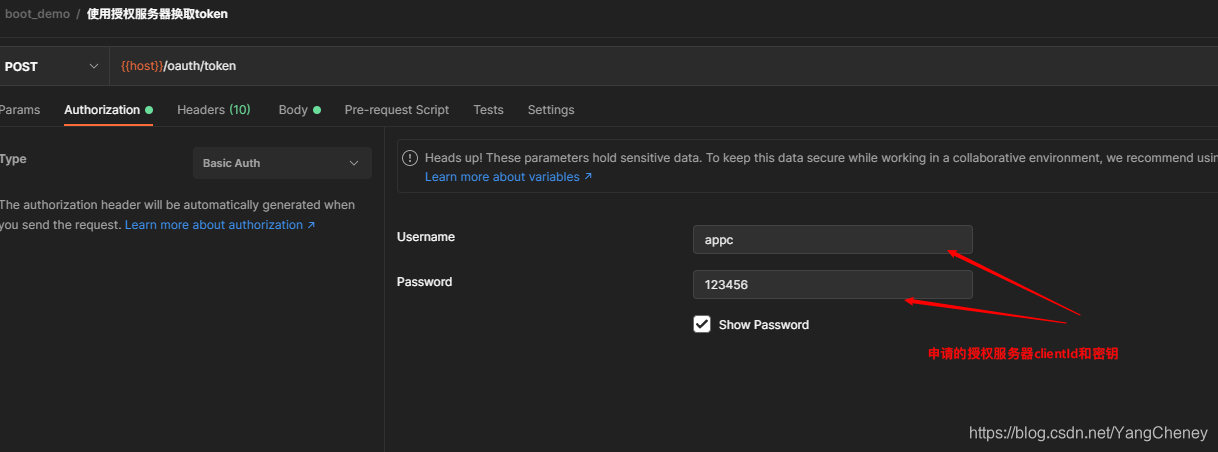
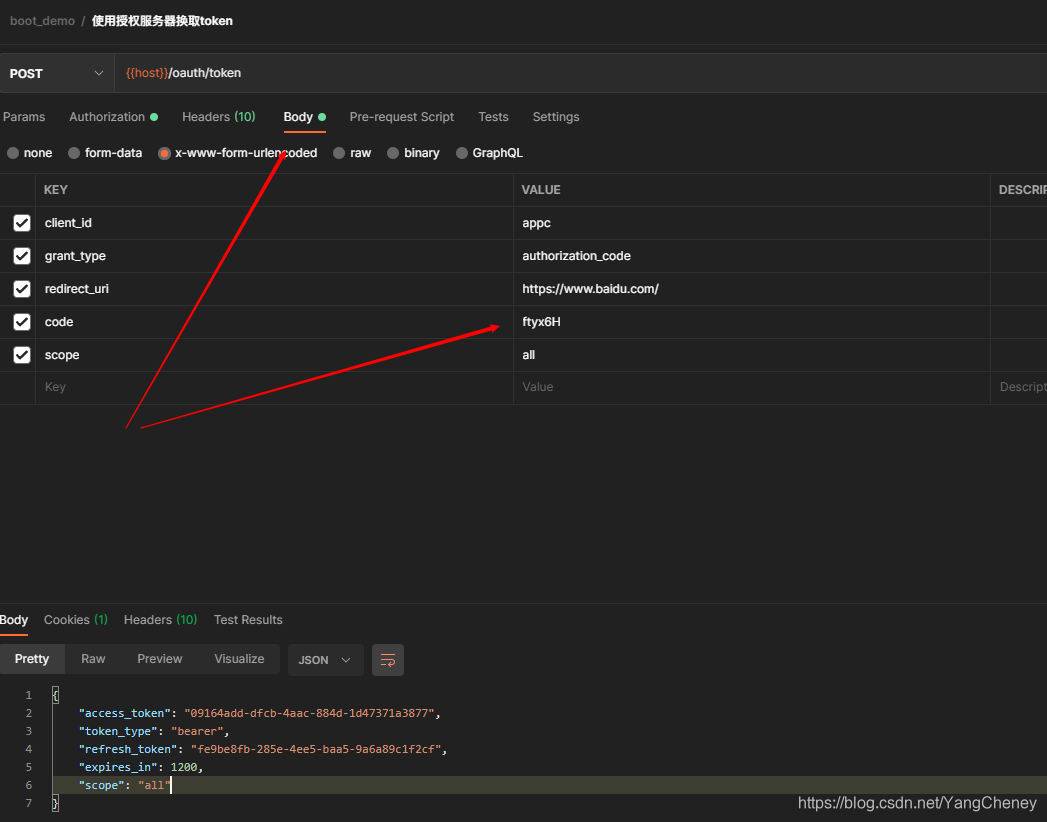
4.2,拿着响应的令牌换取访问的token
127.0.0.1:7000/oauth/token 这一步的操作除了授权服务器的令牌code,其余是已经固定好的
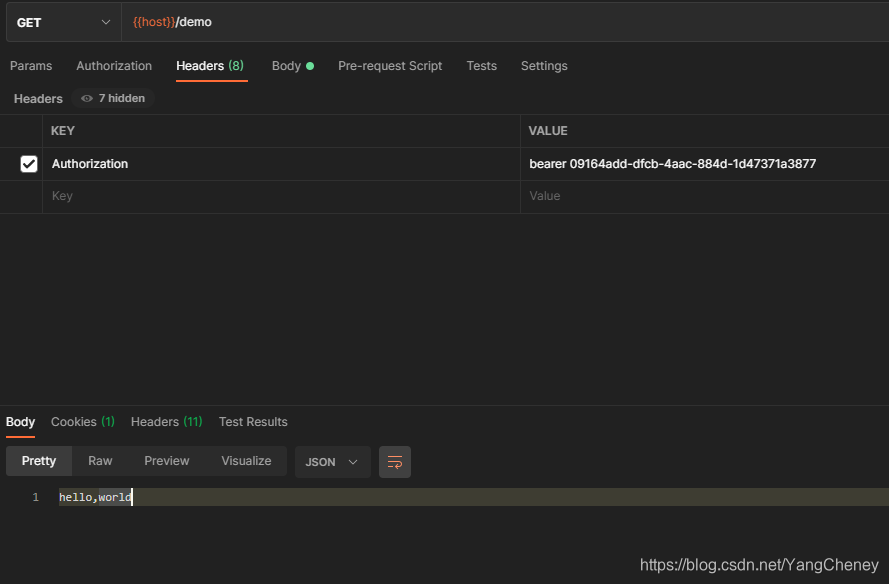
4.3,获取到访问的token后使用在head里面加上token就可以直接访问接口了
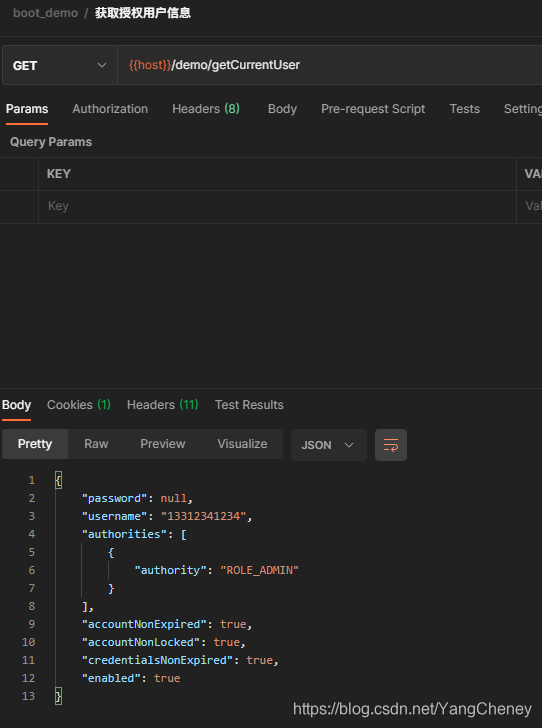
- 获取授权用户信息
参考资料 & 致谢
[1] OAuth 2.0 的四种方式


 1524
1524

 被折叠的 条评论
为什么被折叠?
被折叠的 条评论
为什么被折叠?
 到【灌水乐园】发言


