


在React脚手架中使用react-router-dom
使用create-react-app创建项目
npm
npm init react-app my-app //my-app为文件名
Yarn
yarn create react-app my-app
输出
my-app
├── README.md
├── node_modules
├── package.json
├── .gitignore
├── public
│   ├── favicon.ico
│   ├── index.html
│   └── manifest.json
└── src
    ├── App.css
    ├── App.js
    ├── App.test.js
    ├── index.css
    ├── index.js
    ├── logo.svg
    └── serviceWorker.js
安装react-router-dom
yarn add react-router-dom
or
npm install react-router-dom --save-dev
基本操作
在src目录下创建components目录,然后我们新建两个页面,分别命名为“home”和"detail"。
import React, { Component } from 'react'

export default class Home extends Component {
    render() {
        return (
            <div>
                Home
            </div>
        )
    }
}
Home.js
import React, { Component } from 'react'

export default class Detail extends Component {
    render() {
        return (
            <div>
                Detail
            </div>
        )
    }
}
Detail .js
在App.js下引入组件,并且从react-router-dom中引入Route
import React from 'react';
import Home from './components/home'
import Detail from './components/detail '
import {Route} from 'react-router-dom'

function App() {
  return (
    <div className="App">
        <Route path='/home' component={List} />
        <Route path='/detail' component={Shop} />
    </div>
  );
}

export default App;
在index.js中
import React from 'react';
import ReactDOM from 'react-dom';
import App from './App';
import {BrowserRouter as Router} from 'react-router-dom'

ReactDOM.render(<Router><App /></Router>, document.getElementById('root'));
运行项目
yarn start
or
npm run start
如果不能运行,请按步骤一步一步检查代码是否有误。
路由模式
- 历史记录模式 BrowserRouter
- hash模式 HashRouter
简单来说就是


子路由使用
import {Route,NavLink,Redirect,Switch} from 'react-router-dom'
- Route 显示路由组件
<Route path='xxx' conponent={组件} />
- NavLink&Link 跳转链接
<Link to='path'>字符</Link>
// 显示在页面上都是a链接
// NavLink默认有一个选中样式名字acitve  activeCalssName更改默认名字
<NavLink to='path'>字符</NavLink>
- Redirect 路由重定向
<Redirect from='/' to='/list' exact />
 // from 从哪里来  // to 到哪里去  exact 精确匹配
- exact 精确匹配
<Route component={NotFound} />
// 404页面  以上路由Route都匹配不上会匹配没有path的Route
- Switch 多个组件匹配之渲染一个
<Switch>
    <Route path='xxx' component={组件} />
</Switch>
// switch 包裹起来多组件匹配之渲染一个
// 注意子路由需要用Switch包裹起来,避免路径BUG
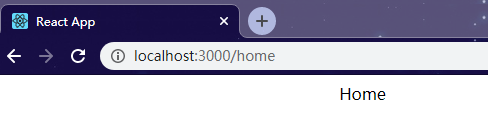
我们来看一下运行效果,
地址栏输入:
http://localhost:3000/home
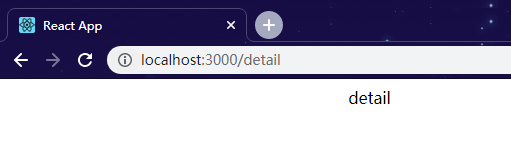
输入:
http://localhost:3000/detail
通过Link或者NavLink跳转
可以看到其实路由已经开始工作了,接下来在App.js中修改如下代码:
import React from 'react';
import './App.css';
import List from './components/list'
import Shop from './components/shop'
import {Route,Redirect,Switch,Link} from 'react-router-dom'

function App() {
  return (
    <div className="App">
        <Link to='/home'>Home</Link>
        <Link to='/detail'>detail</Link>
        <Switch>
          <Route path='/home' component={List} />
          <Route path='/detail' component={Shop} />
          <Redirect from='/' to='/home' exact />
        </Switch>

    </div>
  );
}

export default App;
在浏览器地址栏输入:
http://localhost:3000
试试看页面能否正常跳转。如果不能,请按步骤一步一步检查代码是否有误。
路由props三个重要参数
// home组件render函数中
console.log(this.props)
可以看到
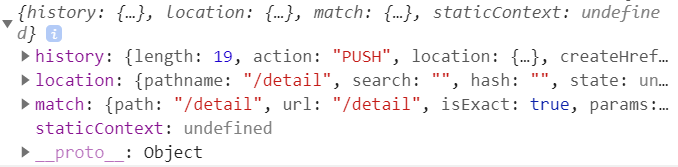
- history 适合做编程式导航和监听路由的变化
- match 适合取路由的参数
- location 路径信息
补充
withRouter 作用是让不是路由切换的组件也具有路由切换组件的三个属性(location match history)
import {withRouter} from 'react-router-dom';
console.log(props) //location mathch history
export default withRouter(App);
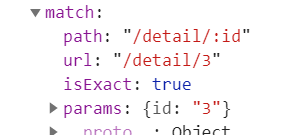
路由传参
<Route path='xxx/:xxx' component={组件} /> //会默认这个路由组件后面带有属性
<Route path="/home/:id" component={Home}/>
<Link to='xxx/xxx'> // 会传递这个参数
<Link to='/home/3'>
然后修改home.js,使用 this.props.match.params 获取url传递过来的参数
...
componentDidMount() {
    console.log(this.props.match.params);
}
...
跳转后打开控制台可以看到参数被打印:
编程式导航
this.props.history.push('/home/'+数据)
监听路由变化
history.listen方法
 this.props.history.listen((location)=>{
	console.log(location.pathname)  // 会根据路由的变化而变化
})
其他函数
replace
有些场景下,重复使用push或a标签跳转会产生死循环,为了避免这种情况出现,react-router-dom提供了replace。在可能会出现死循环的地方使用replace来跳转:
this.props.history.replace('/detail');
goBack
场景中需要返回上级页面的时候使用:
this.props.history.goBack();
补充
- NavLink 改变选中样式名使用 activeCalssName
- location.state 默认值是undefined
params 默认值是空对象 - NavLink to={{pathname:‘xxx’}} 可以写对象
- Route 的 render 属性
<Route path='xxx' render={(props)=>{return <组件 {...props} />}} />
- Redirect to属性可以传值
<Redirect to={{pathname:'xxx',state:{xxx}}}
总结
这篇文章基本上涵盖了部分react-router-dom的用法,此后再发现有什么遗漏我会再继续补充。


 5398
5398


 被折叠的 条评论
为什么被折叠?
被折叠的 条评论
为什么被折叠?
 到【灌水乐园】发言


