


1.前言
1.在Springboot中 , application.properties我们怎么知道是怎么看的? 比如说是要引入数据库, 或者引入redis.
如果引入的是数据库, 在SSM中的要配置那些信息, 比如数据库连接信息
Redis在SSM中怎么使用? SpringDataRedis, 要有一个连接工厂, 配置Redis的域名端口, RedisTemplate, StringRedisTemplate等等
如果我们要知道配置什么信息? 有三种解决方案:
- 靠提示
- 查官网
- 自动配置原理
2.自动配置原理:
项目启动时候, 会加载一些xxxAutoConfiguration, xxxAutoConfiguration就表示的是自动配置, 会帮我自动配置一些我们开发中配置的内容, 并且在每个xxxAutoConfiguration都会有一个xxxProperties, 这个properties中的属性, 就是我们可以配置的内容.
编写代码中, 需要的内容, 也要去查看xxxAutoConfiguration, 在这个类中, 会有一些你编码是需要的自动配置, 如果你不配置, 机会使用默认配置, 如果你配置了, 就使用你的配置.你的配置会替代SpringBoot默认配置.
3.SpringBoot是怎么判断你有没有配置呢?
@Conditional, 这个注解是Spring中的一个条件注解, 这个注解会有很多延伸注解,
比如@ConditionalOnClass( xxx.class): 这个注解表示如果有xxx这个类, 这个注解所标注的类才生效. ConditionalOnMissingBean, 当你的容器中没有这个Bean的时候才生效
2.开发三层架构的使用持久层的三种方式:
2.1.SpringJdbc中->JDBCTemplate
以前的步骤:
- 需要依赖Spring的环境
- Spring-Jdbc, Spring-tx
- 驱动
SpringBoot:
- 直接引入起步依赖
- 配置连接信息
- 和数据库对应的实体类
2.2.Mybatis
以前的步骤:
- 核心4+1导包
- mybatis-spring包
- 启动包, 数据源
- 配置SqlSessionFactoryBean
- 配置包扫描
SpingBoot:
- 导包:导入起步依赖
- 直接编写接口和映射文件
- 在接口上添加@Mapper加入到容器中
- 可以直接在主配置类上使用@MapperScan(basePackage = "com.sm.cn.mapper")包扫描,就不用写这个了@Mapper
2.3.MybatisPlus
3.开发方式
3.0.Mysql数据
/*
 Navicat Premium Data Transfer

 Source Server         : JsHy
 Source Server Type    : MySQL
 Source Server Version : 50727
 Source Host           : localhost:3306
 Source Schema         : boot

 Target Server Type    : MySQL
 Target Server Version : 50727
 File Encoding         : 65001

*/

SET NAMES utf8mb4;
SET FOREIGN_KEY_CHECKS = 0;

-- ----------------------------
-- Table structure for employee
-- ----------------------------
DROP TABLE IF EXISTS `employee`;
CREATE TABLE `employee`  (
  `id` bigint(11) NOT NULL AUTO_INCREMENT COMMENT '员工id',
  `employee_name` varchar(255) CHARACTER SET utf8 COLLATE utf8_general_ci NULL DEFAULT NULL COMMENT '员工名字',
  `employee_img` mediumtext CHARACTER SET utf8 COLLATE utf8_general_ci NULL COMMENT '员工头像',
  `employee_email` varchar(255) CHARACTER SET utf8 COLLATE utf8_general_ci NULL DEFAULT NULL COMMENT '员工邮箱',
  `employee_dept` varchar(255) CHARACTER SET utf8 COLLATE utf8_general_ci NULL DEFAULT NULL COMMENT '员工所在部门',
  `employee_time` date NULL DEFAULT NULL COMMENT '入职时间',
  PRIMARY KEY (`id`) USING BTREE
) ENGINE = InnoDB AUTO_INCREMENT = 3 CHARACTER SET = utf8 COLLATE = utf8_general_ci ROW_FORMAT = Compact;

-- ----------------------------
-- Records of employee
-- ----------------------------
INSERT INTO `employee` VALUES (1, '张三', 'http://localhost:8080', 'xxxxx@qq.com', '技术部', '2020-05-18');
INSERT INTO `employee` VALUES (2, '李四', 'http://localhost:8080', 'xxxxx@qq.com', '信息部', '2020-05-30');

SET FOREIGN_KEY_CHECKS = 1;
3.1.SpringBoot和传统JDBC
3.1.1.起步依赖
        <!--Spring-jdbc包含jdbc功能和连接池功能-->
        <!--<dependency>
            <groupId>org.springframework.boot</groupId>
            <artifactId>spring-boot-starter-jdbc</artifactId>
        </dependency>-->
        <!--这个包含上面一个-->
        <dependency>
            <groupId>org.springframework.boot</groupId>
            <artifactId>spring-boot-starter-data-jdbc</artifactId>
        </dependency>
        <!--配置数据库-->
        <dependency>
            <groupId>mysql</groupId>
            <artifactId>mysql-connector-java</artifactId>
        </dependency>
3.1.2.配置数据源信息:application.yml
#配置数据源信息
spring:
  datasource:
    driver-class-name: com.mysql.cj.jdbc.Driver  #使用cj版 老板在mysql8中过时不建议
    url: jdbc:mysql://localhost:3306/boot?characterEncoding=utf8&serverTimezone=Asia/Shanghai
    username: root
    password: root
3.1.3.创建数据库实体类
@Data
public class Employee {

    private Long id;
    private String employeeName;
    private String employeeImg;
    private String employeeEmail;
    private String employeeDept;
    private Date employeeTime;

}
3.1.4.创建Dao,DaoImpl
@Repository
public class EmployeeDaoImpl implements EmployeeDao {
    @Autowired
    private JdbcTemplate jdbcTemplate;

    @Override
    public List<Employee> findAll() {
        return jdbcTemplate.query("select * from employee",new BeanPropertyRowMapper<>(Employee.class));
    }

    @Override
    public Employee findById(Long id) {
        return jdbcTemplate.queryForObject("select * from employee where id=?",new BeanPropertyRowMapper<>(Employee.class),id);
    }

    @Override
    public void addEmployee(Employee employee) {
        jdbcTemplate.update("insert into employee values(?,?,?,?,?)",
                employee.getEmployeeName(),
                employee.getEmployeeImg(),
                employee.getEmployeeEmail(),
                employee.getEmployeeDept(),
                employee.getEmployeeTime()
                );
    }

    @Override
    public void updateEmployee(Employee employee) {
        jdbcTemplate.update("update employee set employeeName=?,employeeImg=?,employeeEmail=?,employeeDept=?,employeeTime=?",
                employee.getEmployeeName(),
                employee.getEmployeeImg(),
                employee.getEmployeeEmail(),
                employee.getEmployeeDept(),
                employee.getEmployeeTime()
        );
    }

    @Override
    public void deleteEmployee(Long id) {
        jdbcTemplate.update("delete from employee where id=?",id);
    }
}
3.1.5.创建Service,ServiceImpl
@Service
public class EmployeeServiceImpl implements EmployeeService {
    @Autowired
    private EmployeeDao employeeDao;

    @Override
    public List<Employee> findAll() {
        return employeeDao.findAll();
    }
}
3.1.6.集成测试
SSM集成测试
ssm的时候是通过spring-test+junit包编写测试类
@RunWith( SpringRunner.class ), @ContextConfiguration(), 直接写@Test
SpringBoot集成测试
从官网上, 拿到test起步依赖, 在test文件夹编写测试功能
第一种:随便写, 在类上指定@SpringBootTest(class = MySpringBootController.class)主配置类
第二种:测试类的包要和主配置类的包一致, 测试类的类名是主配置类类名+Tests, MySpringBootController配置同名MySpringBootControllerTests
@SpringBootTest
public class MySpringBootControllerTests {
    @Autowired
    private EmployeeDao employeeDao;

    @Test
    public void fun(){
        System.out.println(employeeDao.findById(1L));
    }
}
3.1.7.Controller
@RestController
@RequestMapping("employee")
public class EmployeeController {
    @Autowired
    private EmployeeService employeeService;

    @GetMapping
    public List<Employee> findAll(){
        return employeeService.findAll();
    }
}
3.1.8.配置Druid数据源连接池
pom.xml

<!--配置Druid数据源-->
<dependency>
    <groupId>com.alibaba</groupId>
    <artifactId>druid-spring-boot-starter</artifactId>
    <version>1.1.22</version>
</dependency>


application.yml

#    配置Druid数据源连接池
    type: com.alibaba.druid.pool.DruidDataSource
3.2.SpringBoot和MyBatis配置文件整合
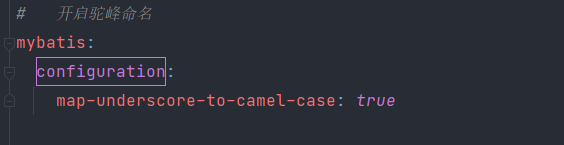
3.2.0.开启驼峰命名
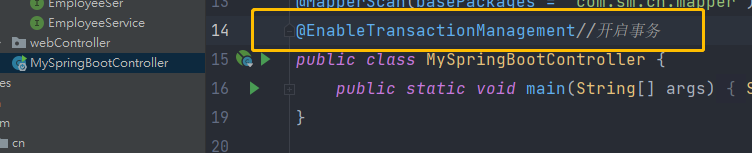
1.主配置文件中添加
package com.sm.cn;

@SpringBootApplication
@MapperScan(basePackages = "com.sm.cn.mapper")
@EnableTransactionManagement//开启事务
public class MySpringBootController {
    public static void main(String[] args) {
        SpringApplication.run(MySpringBootController.class);
    }


    /*开启驼峰命名*//*
    public ConfigurationCustomizer configurationCustomizer(){
        return new ConfigurationCustomizer() {
            @Override
            public void customize(Configuration configuration) {
                configuration.setMapUnderscoreToCamelCase(true);
            }
        };
    }*/
}
2. application.yml配置
3.2.1.起步依赖
<!--mybatis起步依赖-->
        <dependency>
            <groupId>org.mybatis.spring.boot</groupId>
            <artifactId>mybatis-spring-boot-starter</artifactId>
            <version>2.1.1</version>
        </dependency>
3.2.1.Mapper
@Mapper//可以直接在主配置类上使用@MapperScan(basePackage = "com.sm.cn.mapper")扫描,就不用写这个了
@Mapper//可以直接使用@MapperScan()扫描,就不用写这个了
public interface EmployeeMapper {

    List<Employee> findAll();

}


#   开启驼峰命名
mybatis:
  configuration:
map-underscore-to-camel-case: true3.2.2.EmployeeMapper.xml
3.2.2.1.同包同目录加载配置文件
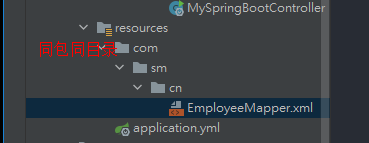
3.2.2.2.不同包同目录加载配置文件

3.2.2.3.使用config加载配置文件


<?xml version="1.0" encoding="UTF-8" ?>
<!DOCTYPE mapper
        PUBLIC "-//mybatis.org//DTD Mapper 3.0//EN"
        "http://mybatis.org/dtd/mybatis-3-mapper.dtd">
<mapper namespace="com.sm.cn.mapper.EmployeeMapper">

    <select id="findAll" resultType="com.sm.cn.entity.Employee">
        select * from employee
    </select>
</mapper>
@Autowired
EmployeeMapper employeeMapper;
@Test
public void fun2(){
List<Employee> all = employeeMapper.findAll();
System.out.println(all);
}3.3.SpringBoot和MyBatis注解方式整合
3.3.1.Mapper
//@Mapper
public interface EmployeeMapper {

    @Select("select * from employee")
    List<Employee> findAll();

    @Select("select * from employee where id = #{id}")
    Employee findById(Long id);

    @Insert("insert into employee(employee_name,employee_img,employee_email,employee_dept,employee_time) values(#{employeeName},#{employeeImg},#{employeeEmail},#{employeeDept},#{employeeTime})")
    void add(Employee employee);

    @Update("update employee set employee_name=#{employeeName},employee_img=#{employeeImg},employee_email=#{employeeEmail},employee_dept=#{employeeDept},employee_time=#{employeeTime} where id=#{id}")
    void update(Employee employee);

    @Delete("delete from employee where id = #{id}")
    public void deleteById(Long id);
}
3.3.2.Service&ServiceImpl
//Service
public interface EmployeeService {
List<Employee> findAll();
Employee findById(Long id);
void add(Employee employee);
void update(Employee employee);
public void deleteById(Long id);
}
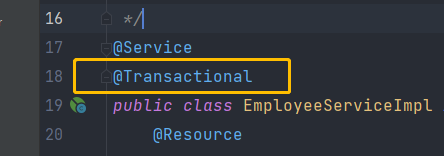
//ServiceImpl
@Service
public class EmployeeServiceImpl implements EmployeeService {
@Override
public List<Employee> findAll() {
return null;
}
@Override
public Employee findById(Long id) {
return null;
}
@Override
public void add(Employee employee) {
}
@Override
public void update(Employee employee) {
}
@Override
public void deleteById(Long id) {
}
}
3.3.3.日志


3.3.4.SpringBoot静态资源
- classpath 下的META-INF的resources
- classpath 下的resources
- classpath 下的static( 常用 )
- classpath 下的public
注: 优先级依次降低
3.3.5.SpringBoot中的使用Servlet

默认是到达不了, 得在主配置类上加@ServletComponentScan


 被折叠的 条评论
为什么被折叠?
被折叠的 条评论
为什么被折叠?
 到【灌水乐园】发言


