


文章目录
前言
HTTP协议(Hyper Text Transfer Protocol,超文本传输协议),是用于从万维网(WWW:World Wide Web)服务器传输超文本到本地浏览器的传送协议,是一种应用层的协议。其定义了客户端与服务器端之间文本传输的规范。HTTP默认使用80端口,这个端口指的是服务端的端口,而客户端使用的端口是动态分配的。当我们没有指定端口访问时,浏览器会默认帮我们添加80端口。在Idea上创建基于Spring Boot的web 项目,当客户端浏览器分别用get、put、post等访问该web服务资源时,服务器能做出正确的结果。
一、HTTP协议是什么?
HTTP协议(Hyper Text Transfer Protocol,超文本传输协议),是用于从万维网(WWW:World Wide Web)服务器传输超文本到本地浏览器的传送协议,是一种应用层的协议。
1.HTTP工作原理
HTTP协议定义Web客户端如何从Web服务器请求Web页面,以及服务器如何把Web页面传送给客户端。 HTTP协议采用了** 请求/响应**模型。客户端向服务器发送一个请求报文,请求报文包含请求的方法、URL、协议版本、请求头部和请求数据。服务器以一个状态行作为响应,响应的内容包括协议的版本、成功或者错误代码、服务器信息、响应头部和响应数据。
2.HTTP请求过程
1)首先通过DNS对域名进行解析
2)通过TCP三次握手,浏览器与服务器端建立连接。
3)浏览器发起HTTP请求。
4) 服务器 响应HTTP请求。
5)浏览器解析HTML代码,并请求HTML代码中的资源(CSS/JS/Image)。
6)浏览器对页面内容进行渲染并展示。
7)TCP四次挥手关闭连接。
3.HTTP请求的方法
| 请求方法 | 备注 |
|---|---|
| GET | 当客户端要从服务器中读取某个资源时,使用GET 方法。GET 方法要求服务器将URL 定位的资源放在响应报文的数据部分,回送给客户端,即向服务器请求某个资源。使用GET 方法时,请求参数和对应的值附加在 URL 后面,利用一个问号(“?”)代表URL 的结尾与请求参数的开始,传递参数长度受限制 |
| POST | 当客户端给服务器提供信息较多时可以使用POST 方法,POST 方法向服务器提交数据,比如完成表单数据的提交,将数据提交给服务器处理。GET 一般用于获取/查询资源信息,POST 会附带用户数据,一般用于更新资源信息。POST 方法将请求参数封装在HTTP 请求数据中,以名称/值的形式出现,可以传输大量数据; |
| HEAD | 获取响应头 |
| PUT | 替换资源 |
| DELETE | 删除资源 |
| OPTIONS | 允许客户端查看服务器性能 |
| TRACE | 回显服务器收到的请求,用于测试或诊断 |
二、SpringBoot项目RESTful 接口的 Web服务
1.创建项目
1)新建SpringBoot项目

2)填写项目信息

3)选择Web–>Spring Web,点击next

接着点finish即可
2.编写源码
1)文件结构如下:

2)各类源码
代码如下:
Count:
package com.springboot.restful.demo.bean;

public class Count {
     private int count;

     public int getCount() {
         return count;
           }
           public void setCount(int count) {
                this.count = count;
           }
}
ResourceController:
package com.springboot.restful.demo.controller;

import com.springboot.restful.demo.bean.Count;
import com.springboot.restful.demo.service.ResourceService;
import org.springframework.beans.factory.annotation.Autowired;
import org.springframework.web.bind.annotation.*;

@RestController
public class ResourceController {

    @Autowired
    ResourceService resourceService;

    @RequestMapping(value = "/me/count", method = RequestMethod.PUT)
    @ResponseBody
    public void initCount(@RequestBody Count count){
        resourceService.initCount(count);
    }

    @RequestMapping(value = "/me/count", method = RequestMethod.POST)
    @ResponseBody
    public void modifyCount(@RequestBody Count count){
        resourceService.addCount(count);
    }

    @RequestMapping(value = "/me/count", method = RequestMethod.GET)
    @ResponseBody
    public  Count getCount()
    {
        return resourceService.getCount();
    }
}
ResourceManager:
package com.springboot.restful.demo.manager;

public class ResourceManager {
    private int count = 0;

    private static ResourceManager instance = new ResourceManager();

    private ResourceManager(){}

    public static ResourceManager getInstance(){
        return instance;
    }

    public synchronized void addCount(int i){
        count = count + i;
    }

    public synchronized  void minusCount(int i){
        count = count -i;
    }

    public int getCount(){
        return count;
    }

    public void initCount(int i){
        count = i;
    }
}
ResourceService:
package com.springboot.restful.demo.service;

import com.springboot.restful.demo.bean.Count;
import com.springboot.restful.demo.manager.ResourceManager;
import org.springframework.stereotype.Service;

@Service
public class ResourceService {
    public void addCount(Count count){
        if (count != null){
            ResourceManager.getInstance().addCount(count.getCount());
        }
    }

    public void minusCount(Count count){
        if (count != null) {
            ResourceManager.getInstance().minusCount(count.getCount());
        }
    }

    public Count getCount()
    {
        Count count = new Count();
        count.setCount(ResourceManager.getInstance().getCount());
        return count;
    }

    public void initCount(Count count){
        if (count != null) {
            ResourceManager.getInstance().initCount(count.getCount());
        }
    }
}
DemoApplication:
package com.springboot.restful.demo;

import org.springframework.boot.SpringApplication;
import org.springframework.boot.autoconfigure.SpringBootApplication;

@SpringBootApplication
public class DemoApplication {

    public static void main(String[] args) {
        SpringApplication.run(DemoApplication.class, args);
    }

}
2.测试
1)启动程序
2)使用Postman测试
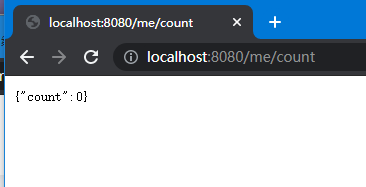
查询如下:

初始化:

再次查询:

修改接口:

修改后查询:

测试成功
总结
RESTful是基于http方法的API设计风格,而不是一种新的技术.其优点在于看Url就知道要什么资源,看http method就知道针对资源干什么,看http status code就知道结果如何。对接口开发提供了一种可以广泛适用的规范,为前端后端交互减少了接口交流的口舌成本,是约定大于配置的体现。
参考资料
1.https://www.kancloud.cn/hanxt/springboot2/1177584
2.https://www.jianshu.com/p/9b8b9672b8e6
3.https://www.cnblogs.com/wuyizuokan/p/11117294.html


 1万+
1万+


 被折叠的 条评论
为什么被折叠?
被折叠的 条评论
为什么被折叠?
 到【灌水乐园】发言


