


内容概括:
- 利用基于对话框的MFC项目
- 实现鼠标点击绘制多边形
- 实现扫描线算法填充多边形
源码见Yushan-Ji/ComputerGraphics: ECNU2023秋 计算机图形学课程实验代码 (github.com)
实验内容
- 通过鼠标交互输入多边形
- 对各种多边形进行填充,包括边界自交的情况
算法描述
多边形绘制
- 利用
OnLButtonDown和OnRButtonDown函数,实现:- 左键点击:开始绘制多边形,并连接上一个顶点和当前点击的顶点
- 右键点击:结束绘制多边形,并连接上一个顶点和第一个顶点
其中,绘制顶点间的连线利用了MoveTo和LineTo函数
- 另外,为了避免多边形绘制完毕后,程序仍然对鼠标点击事件进行响应,因此需要添加布尔变量
IsCompleted,用来监测当前多边形是否绘制完毕
因此在OnLButtonDown和OnRButtonDown函数的最开始,需要添加一个条件判断语句,若IsCompleted为TRUE,则表明多边形已绘制完毕,函数直接返回 - 将所有顶点信息保存在
vector<CPoint> points中,便于后续计算边信息
扫描线填充
- 首先需要根据
points中存储的多边形顶点信息,计算出多边形的边信息,得到ET表- 新建
Edge类,存储每条边的信息// 边信息 class Edge { public: float x_lower; // 扫描线与边的交点x值(初始值为线段下端点x值) float dx; // 斜率倒数 float y_upper; // 线段上端点y值 // 构造函数 Edge() : x_lower(0.0), dx(0.0), y_upper(0.0) {} Edge(float x_val, float dx_val, float y_val); }; - 新建
ET表:map<int, vector<Edge>> ET- 建立从线段下端点y值
y_lower到多边形所有边vector<Edge>的映射,这样有相同下端点的不同边就能够存储在相同键值的map中,便于后续向AET中添加活性边
- 建立从线段下端点y值
- 获取
ET表:通过getET()函数实现- 需要判断当前边是否为首尾顶点连成的边
- 计算当前边斜率的倒数
dx- 若当前边平行于x轴,
continue不执行任何操作 - 若当前边平行于y轴,则
dx=0 - 不是上述两种情况则正常计算
- 若当前边平行于x轴,
- 计算
x_lower和y_upper
- 新建
- 初始化、更新
AET表- 扫描线
y初始化为ymin,并将ET表中ymin对应的所有边都添加到AET中 - 对于每一条扫描线,都需要检查
AET中是否有非活性边的存在,还要及时添加新的活性边- 当
y >= y_upper时,说明该边需要移除 - 当
y >= y_lower时,说明该边需要添加到AET中
- 当
- 扫描线
- 获取每条扫描线与活性边的交点,存入
scanPoints中- 对于不同边相交的顶点,不存入
- 对于其他交点,易知交点数量必为偶数,因此成对存入交点
- 根据
scanPoints中交点的x值升序排列所有交点,并进行填充
核心代码
CPolygonFillDlg类中新添加的public成员:
class CPolygonFillDlg : public CDialogEx
{
  public:
	std::vector<CPoint> points; // 存储多边形的顶点
	std::vector<CPoint> scanPoints; // 存储扫描线与活动边的交点

	BOOL IsCompleted; // 标志多边形是否绘制完毕

	std::map<int, std::vector<Edge>> ET; // ET表:从线段下端点y值到边信息链表的映射
	std::vector<Edge> AET; // 活动边表
	float YMAX; // 存储多边形最高点

	void getET();
	void PolygonFill();
	static bool compareCPoint(const CPoint& a, const CPoint& b);
}
消息函数
在PolygonFillDlg.cpp中需要添加按钮点击、鼠标点击的消息关联函数
// 消息关联
BEGIN_MESSAGE_MAP(CPolygonFillDlg, CDialogEx)
	...
	ON_WM_LBUTTONDOWN() // 关联鼠标左键点击事件
	ON_WM_RBUTTONDOWN() // 关联鼠标右键点击事件
	ON_BN_CLICKED(IDC_BUTTON_FILL, &PolygonFill) // 关联按钮点击事件
END_MESSAGE_MAP()
在PolygonFillDlg.h中需要添加鼠标点击函数的声明
class CPolygonFillDlg : public CDialogEx
{
    ...
  protected:
    ...
    afx_msg void OnLButtonDown(UINT nFlags, CPoint point);
    afx_msg void OnRButtonDown(UINT nFlags, CPoint point);
    ...
}
多边形绘制
// 鼠标左键点击事件(绘制多边形)
void CPolygonFillDlg::OnLButtonDown(UINT nFlags, CPoint point)
{
	// 若多边形绘制完毕,忽略该函数,不执行操作
	if (IsCompleted == TRUE)
	{
		return;
	}
	else
	{
		// 如果是第一个点,存入points数组中
		if (points.empty())
		{
			points.push_back(point);
		}
		// 若不是第一个点,则连接当前点和上一个点
		else
		{
			CStatic* CANVAS = (CStatic*)GetDlgItem(IDC_STATIC_CANVAS);
			CDC* pDC = CANVAS->GetDC();

			// 获取points数组的最后一个point(就是上一个点),并将当前绘图位置移动到该点
			pDC->MoveTo(points[points.size() - 1]);
			// 连接上一个点和当前点
			pDC->LineTo(point);
			points.push_back(point); // 将当前点加入数组
			ReleaseDC(pDC);
		}
	}
}

// 鼠标右键点击事件(多边形绘制完毕)
void CPolygonFillDlg::OnRButtonDown(UINT nFlags, CPoint point)
{
	if(IsCompleted == TRUE)
	{
		return;
	}

	else
	{
		// 如果前面少于3个点,则无法连接成为多边形,弹出错误信息
		if (points.size() < 3) {
			CString message = _T("顶点数量少于3,无法绘制多边形");
			CString caption = _T("多边形绘制错误");
			MessageBox(message, caption, MB_ICONERROR);
		}

		// 若points已存储有2个以上的顶点,则连接上一个点和第一个点
		else
		{
			CStatic* CANVAS = (CStatic*)GetDlgItem(IDC_STATIC_CANVAS);
			CDC* pDC = CANVAS->GetDC();
			// 连接第一个点和当前点
			pDC->MoveTo(points[points.size() - 1]);
			pDC->LineTo(points[0]);
			ReleaseDC(pDC);

			// 成功消息
			CString message = _T("多边形绘制完毕");
			CString caption = _T("多边形绘制完毕");
			MessageBox(message, caption, MB_OK);

			IsCompleted = TRUE;
		}
	}
}
扫描线填充
由于扫描线填充涉及到的代码较长,这里不全部展示,仅列出关键的几个步骤
获取边表
void CPolygonFillDlg::getET()
{
	for (int i = 1; i <= points.size() ; i++)
	{
		float dx;
		float x_lower, y_lower, y_upper;

		// points中最后一个点和第一个点的连线
		if (i == points.size())
		{
			if (points[i - 1].x == points[0].x)
			{
				continue; // 边平行于x轴,不处理
			}
			else if (points[i - 1].y == points[0].y)
			{
				dx = 0.0;
			}
			else
			{
				dx = (points[i - 1].x - points[0].x) * 1.0 / (points[i - 1].y - points[0].y);
			}

			if (points[0].y <= points[i - 1].y)
			{
				y_lower = points[0].y;
				y_upper = points[i - 1].y;
				x_lower = points[0].x;
			}
			else
			{
				y_lower = points[i - 1].y;
				y_upper = points[0].y;
				x_lower = points[i - 1].x;
			}
			// 插入到Edge边信息中
			Edge e(x_lower, dx, y_upper);
			// 插入到ET表中
			ET[y_lower].push_back(e);
		}

		else
		{
			// 斜率
			if (points[i - 1].x == points[i].x)
			{
				continue; // 边平行于x轴,不处理
			}
			else if (points[i - 1].y == points[i].y)
			{
				dx = 0;
			}
			else
			{
				dx = (points[i - 1].x - points[i].x) * 1.0 / (points[i - 1].y - points[i].y);
			}

			// 线段上端点的x,y值
			if (points[i - 1].y <= points[i].y)
			{
				y_lower = points[i - 1].y;
				y_upper = points[i].y;
				x_lower = points[i - 1].x;
			}
			else
			{
				y_lower = points[i].y;
				y_upper = points[i - 1].y;
				x_lower = points[i].x;
			}

			// 计算多边形的最高点y值
			if (y_upper >= YMAX)
			{
				YMAX = y_upper;
			}

			// 插入到Edge边信息中
			Edge e(x_lower, dx, y_upper);
			// 插入到ET表中
			ET[y_lower].push_back(e);
		}
	}
}
AET表更新
// 移除已经超出扫描线的边
std::vector<Edge> newAET;
for (auto it = AET.begin(); it != AET.end(); ++it) {
	if (it->y_upper > y) {
		newAET.push_back(*it);
	}
}
AET = newAET;

//检查是否有新的边加入
if (it_ET != ET.end() && y >= it_ET->first) {
	AET.insert(AET.begin(), it_ET->second.begin(), it_ET->second.end());
	it_ET++;
}
获取当前扫描线的所有交点
auto it = AET.begin();
while (it != AET.end())
{
	float x1 = it->x_lower;
	it->x_lower += it->dx;
	it++;

	if (it != AET.end())
	{
		float x2 = it->x_lower;
		it->x_lower += it->dx;
		it++;

		// 扫描线遇到两条线相交的顶点时,不记录交点
		if (x1 != x2)
		{
			scanPoints.push_back(CPoint(x1, y));
			scanPoints.push_back(CPoint(x2, y));
		}
	}
}
交点排序并填充
// 比较函数,按照CPoint对象的x值升序排列
bool CPolygonFillDlg::compareCPoint(const CPoint& a, const CPoint& b) {
	return a.x < b.x;
}
// 对扫描到的所有交点进行升序排列
std::sort(scanPoints.begin(), scanPoints.end(), compareCPoint);

// 获取画板
CStatic* CANVAS = (CStatic*)GetDlgItem(IDC_STATIC_CANVAS);
CDC* pDC = CANVAS->GetDC();
// 成对绘制,i每次+2
for (int i = 0; i < scanPoints.size(); i += 2)
{
	pDC->MoveTo(scanPoints[i]);
	pDC->LineTo(scanPoints[i + 1]);
}
ReleaseDC(pDC);
实验结果
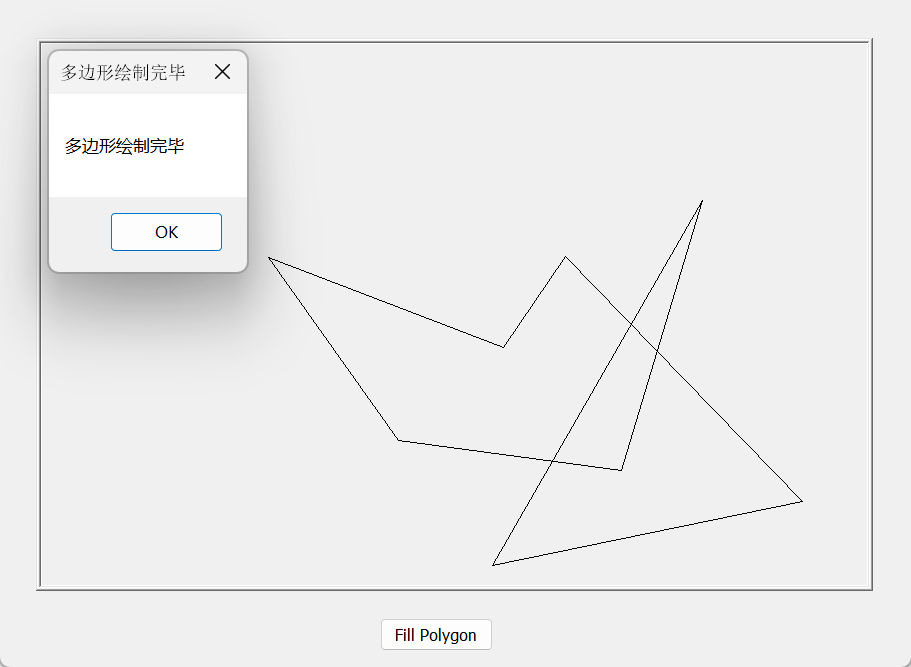
如上图,通过左键点击绘制多边形,右键点击结束绘制
绘制成功后会弹出绘制完毕的提示框
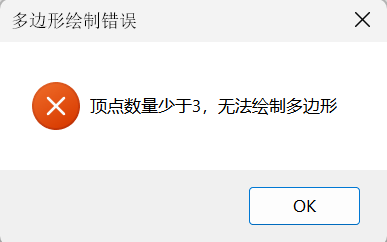
如果多边形顶点少于3个,则弹出错误提示框如下:
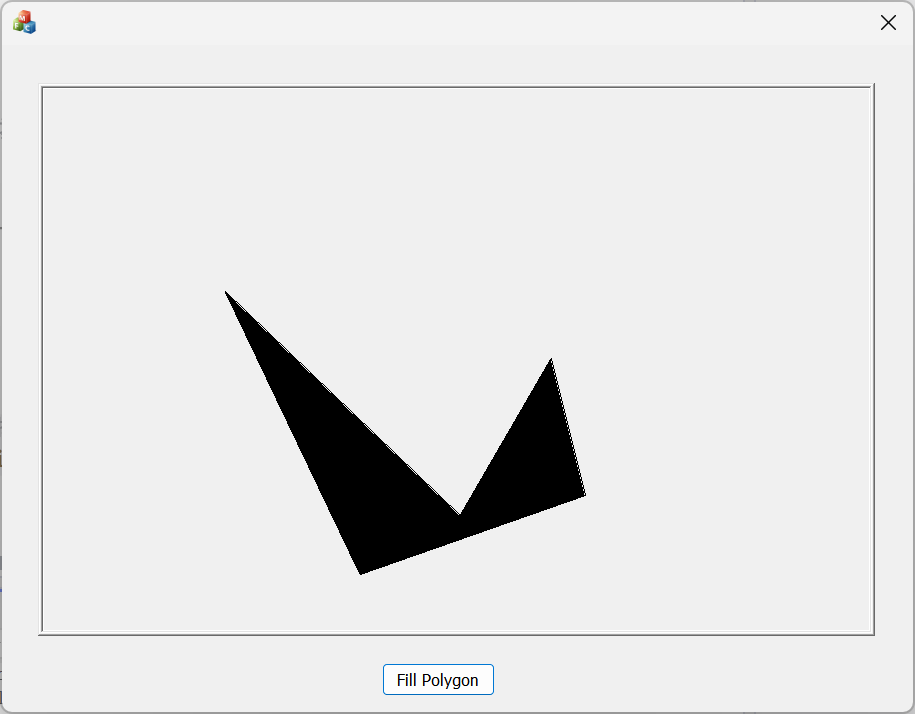
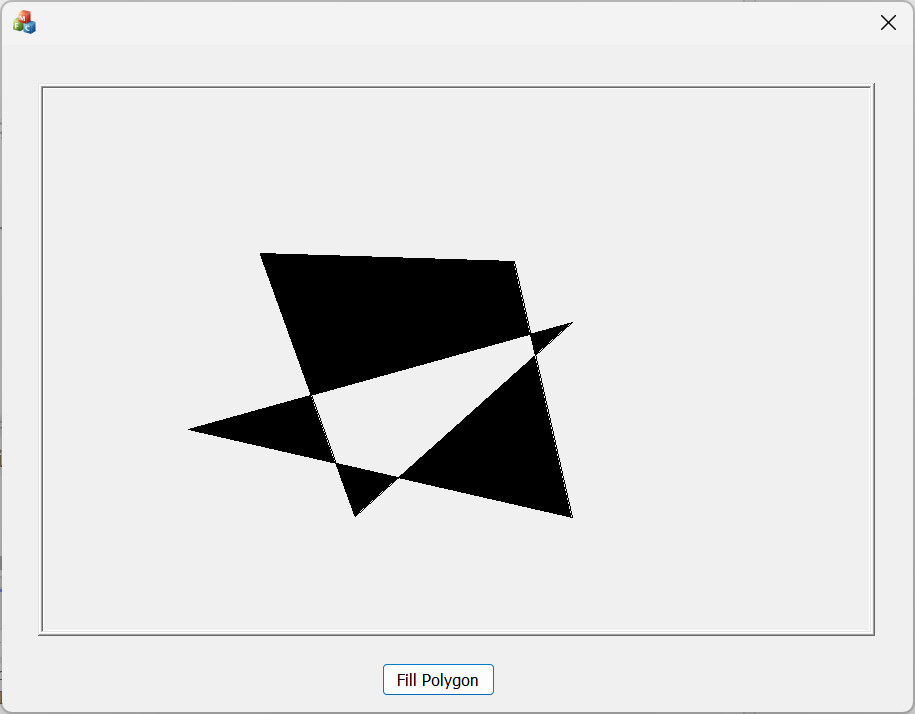
随后点击Fill Polygon按钮,运行扫描线填充,结果如下:
- 凸多边形

- 凹多边形
- 边相交


 976
976


 被折叠的 条评论
为什么被折叠?
被折叠的 条评论
为什么被折叠?
 到【灌水乐园】发言


