


提示:文章写完后,目录可以自动生成,如何生成可参考右边的帮助文档
前言
提示:paypal支付集成的相关心得
最近接到公司一个需求,要将paypal支付集成至跨境电商网站上面。说是因为老外对隐私这些看得比较重,也可能比较懒吧。在满足有paypal账号支付的客户外,还需要满足无账号使用信用卡快捷支付的需求。
`提示:因目前条件有限,所以暂时也就只能是paypal沙盒环境进行调试。不过流程走通了之后,生产也是一样的咯。
一、paypal是什么?
可以直接理解成国外的支付宝,说是支持全球200多个国家。然而在中国,这玩意可能没多少知名度。至少在这之前,我是不知道paypal支付的。
有兴趣的可以看一下paypal的官网:paypal官网,如果浏览器打不开,那你可能得借助特殊工具了。
下面咱们直接进入正题
二、使用步骤
1.准备 :注册一个paypa账号
1、注册地址 :https://www.paypal.com/signin?intent=developer&returnUri=https%3A%2F%2Fdeveloper.paypal.com%2Fdeveloper%2Fapplications。
登录进去之后就长这样了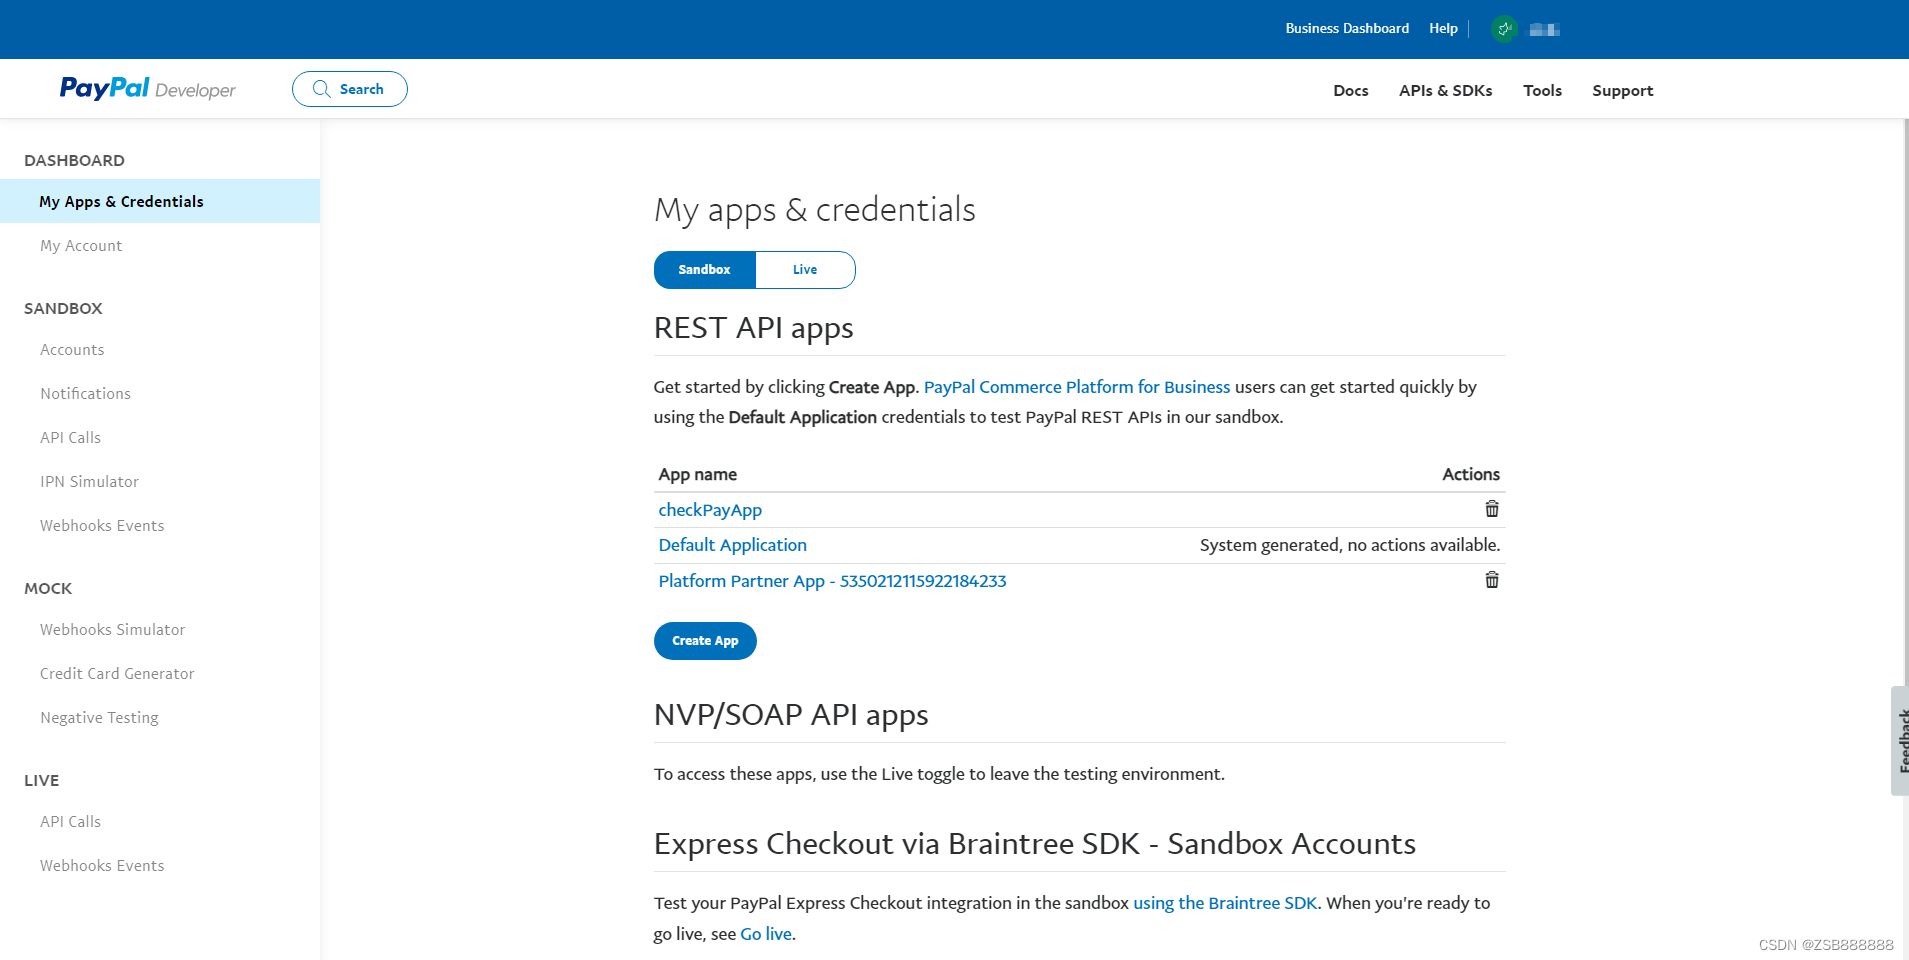
paypal大致上跟微信支付和支付宝支付一样,要先创建一个APP,因为开发时也需要用到appID和那个秘钥的。
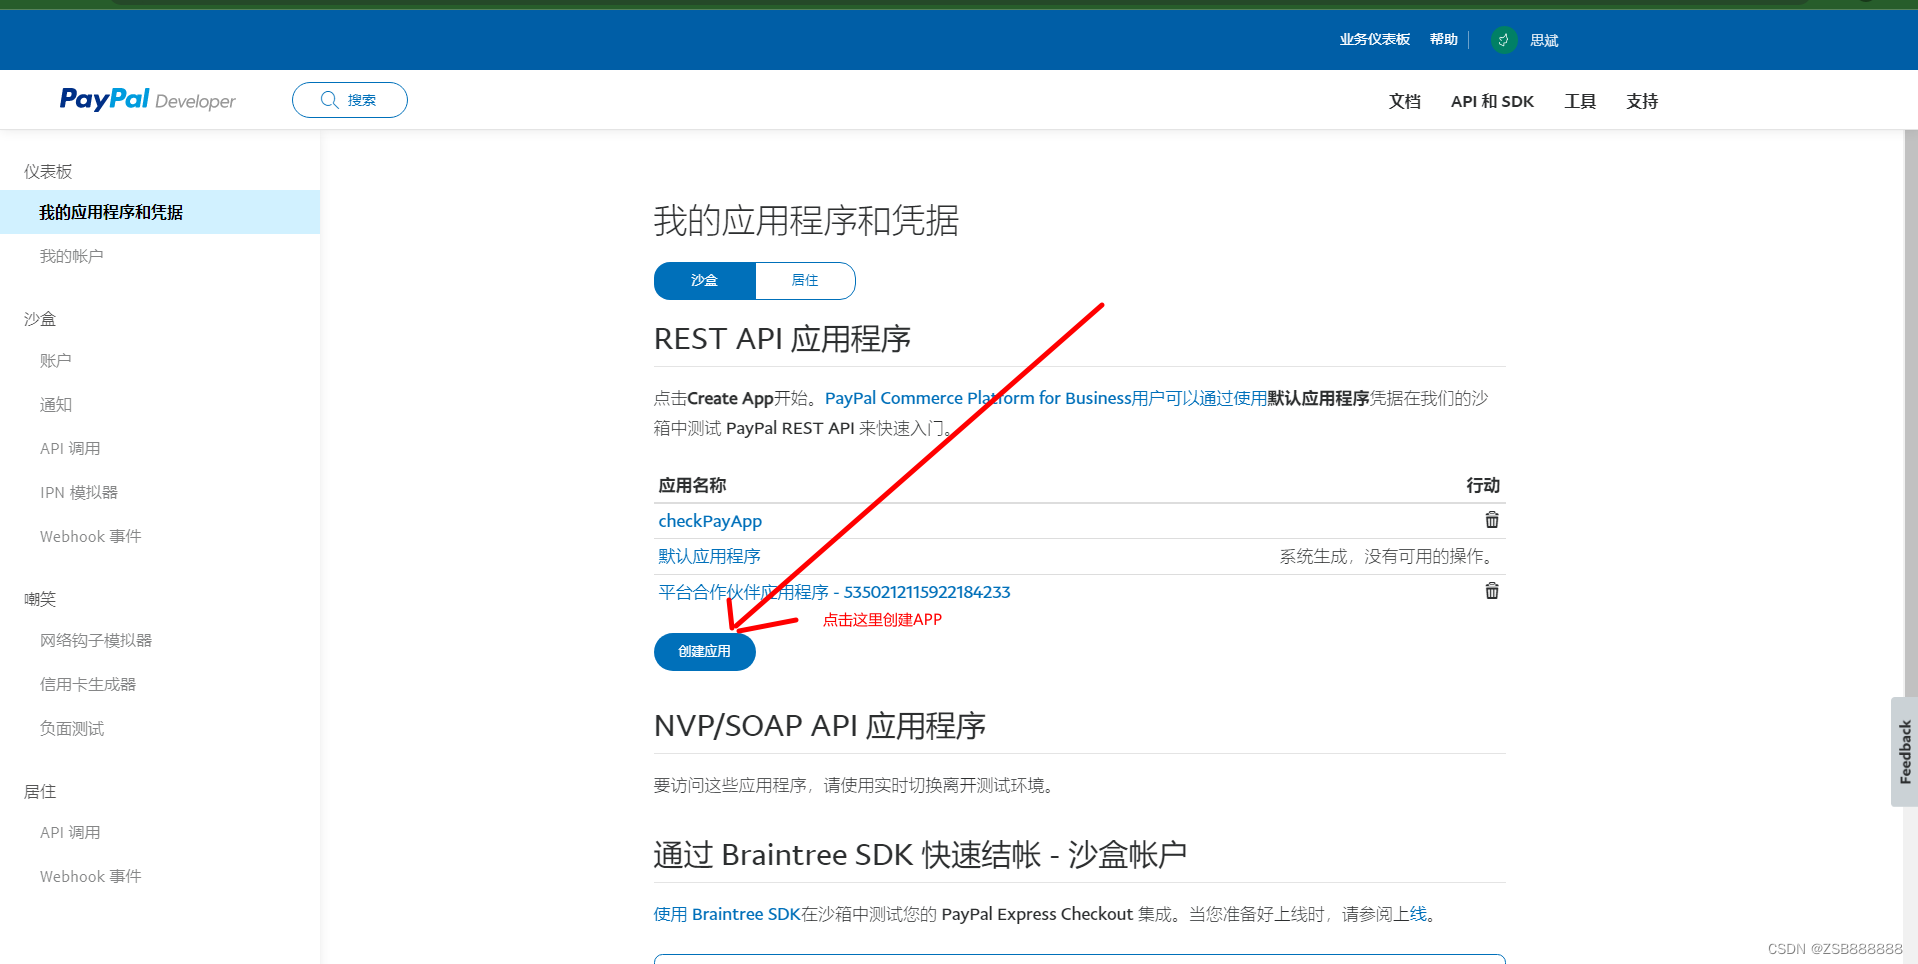
通过上面的截图可以发现,创建应用有两个选项 :商家和平台。这里经过我接口调试后发现,区别也就是官方说的那个标准支付和高级支付。平台也就是商家的升级版,因为想做到无账号实现信用卡快捷支付,那就得是平台才行。所以咱们直接创建平台应用。
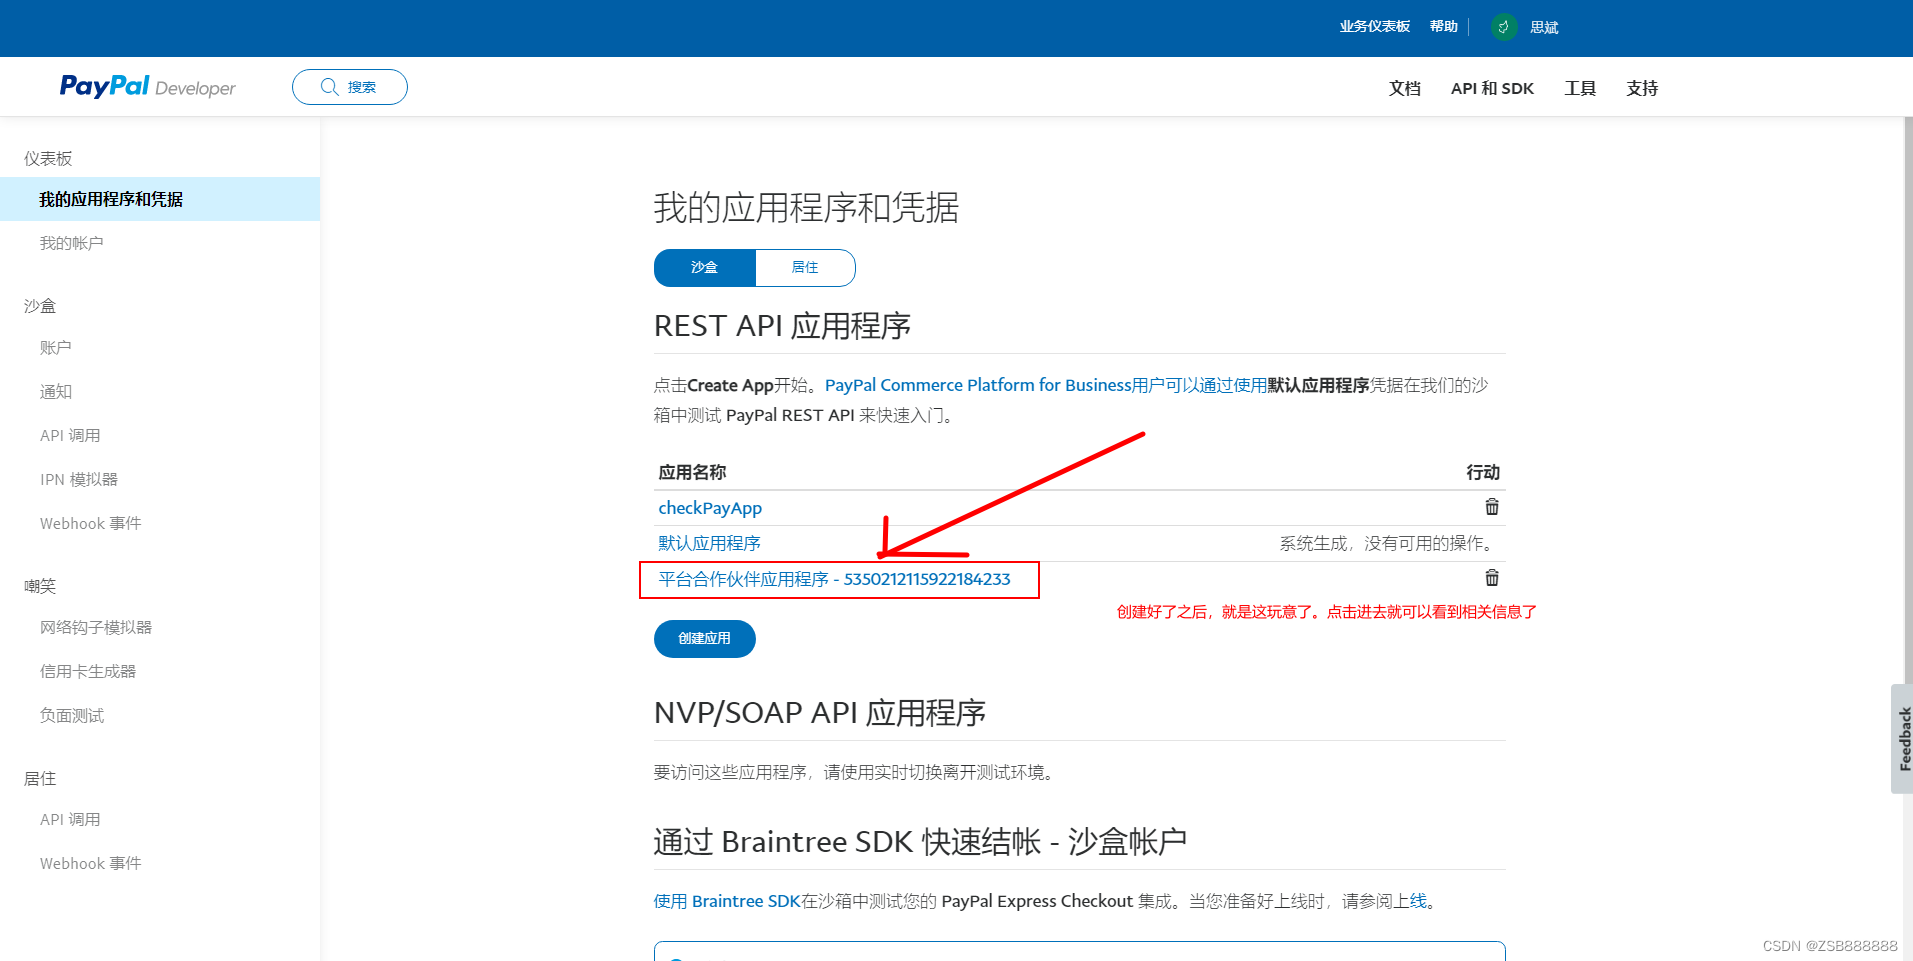
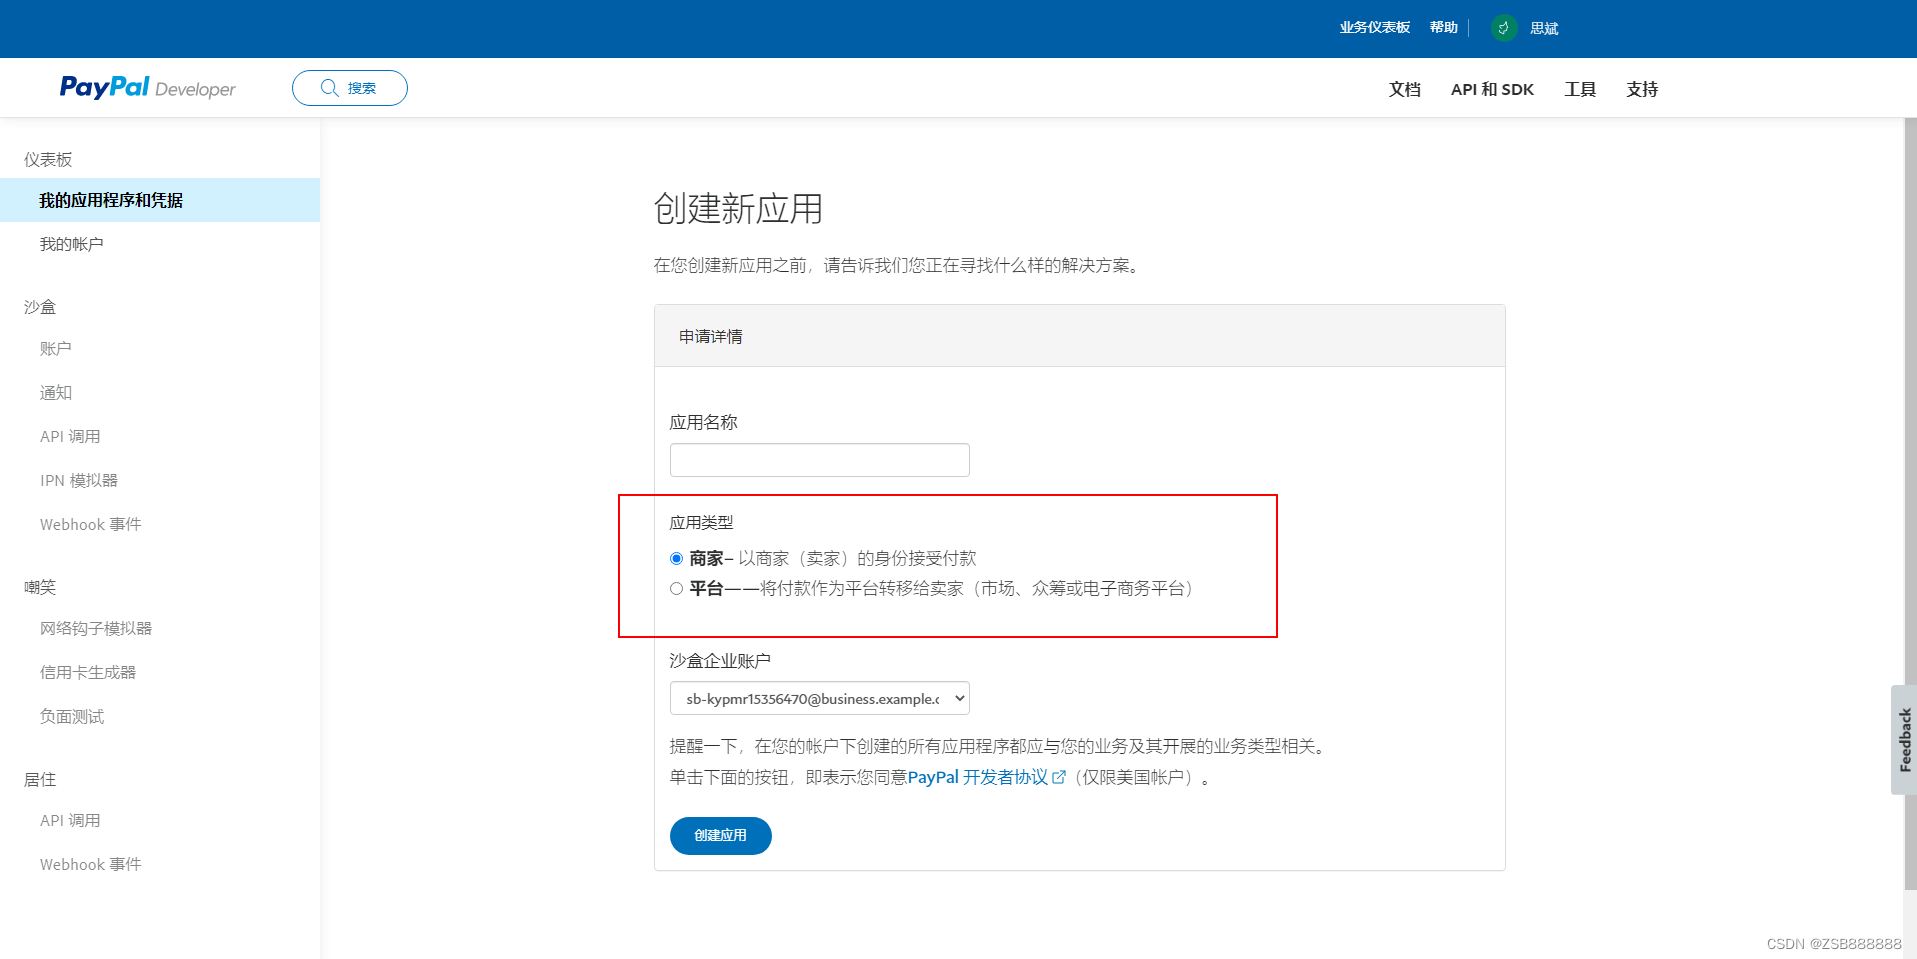
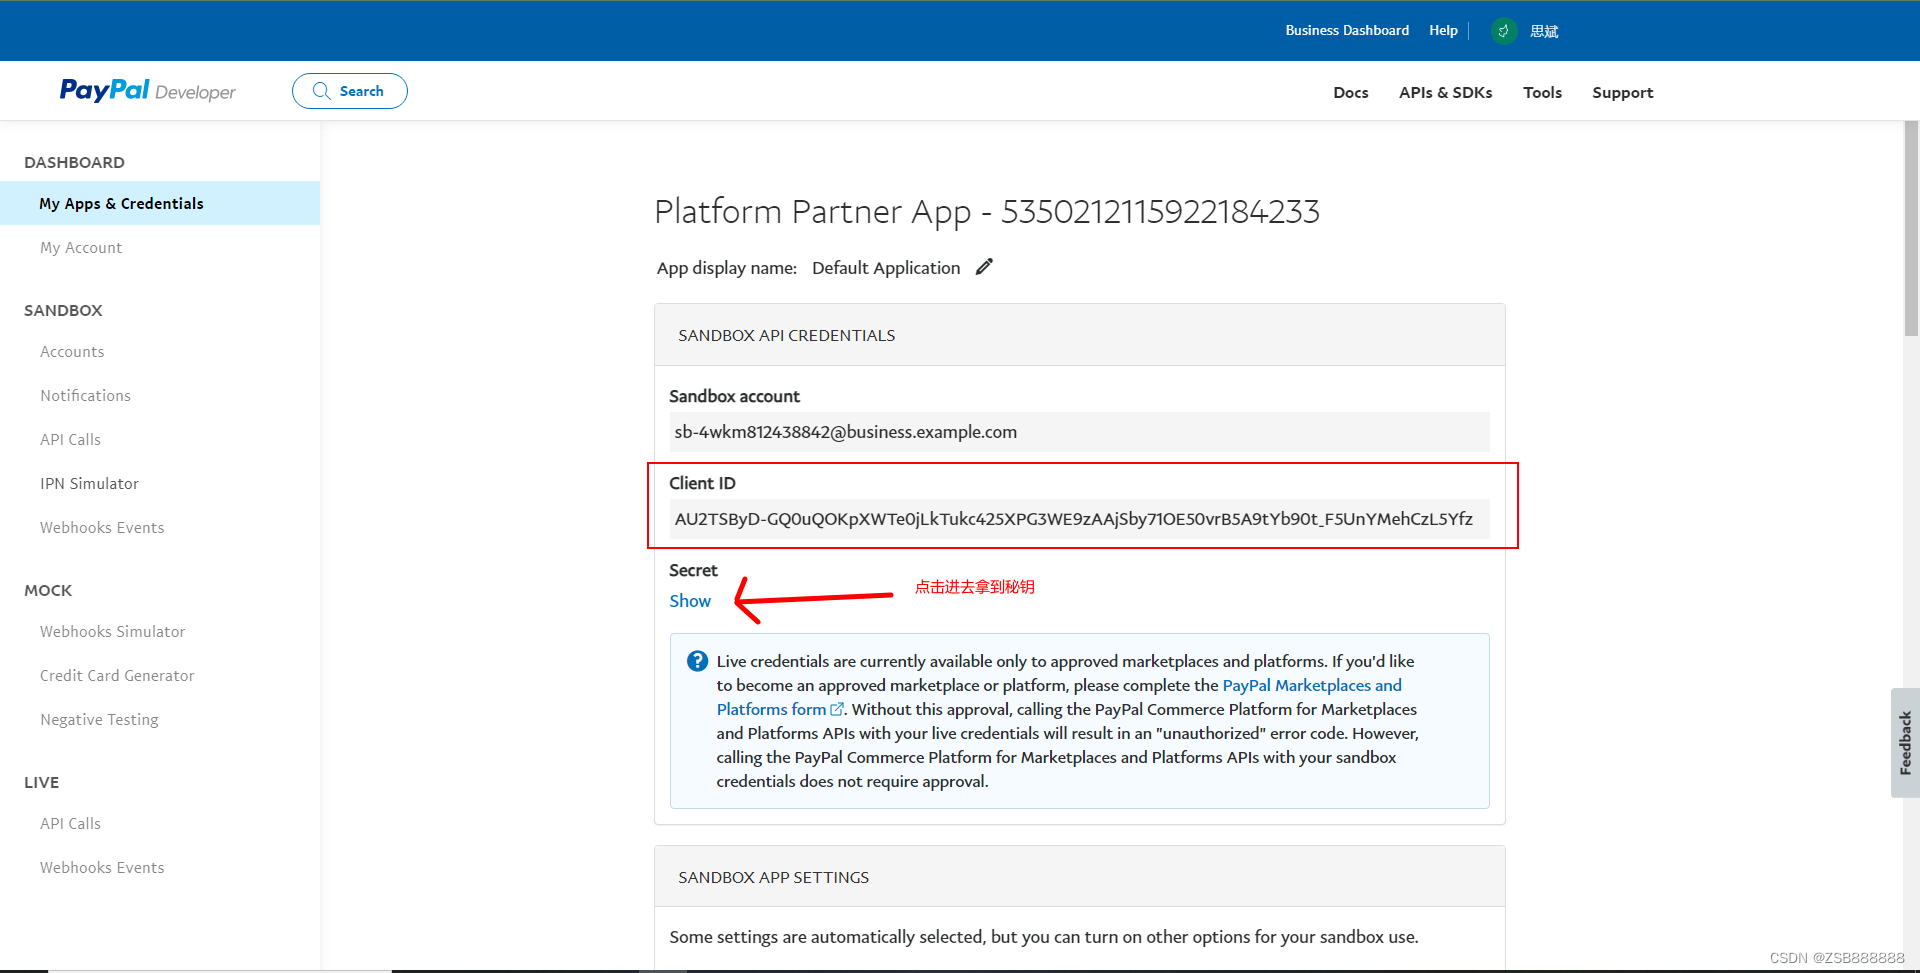
然后点击进去拿到clientId 和 secret
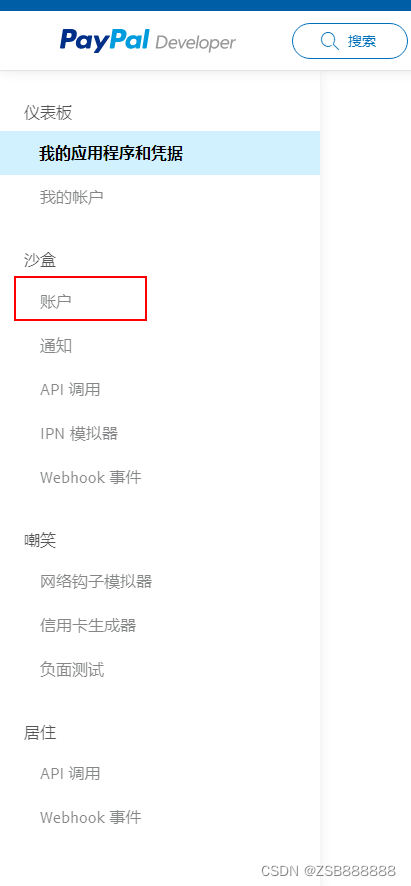
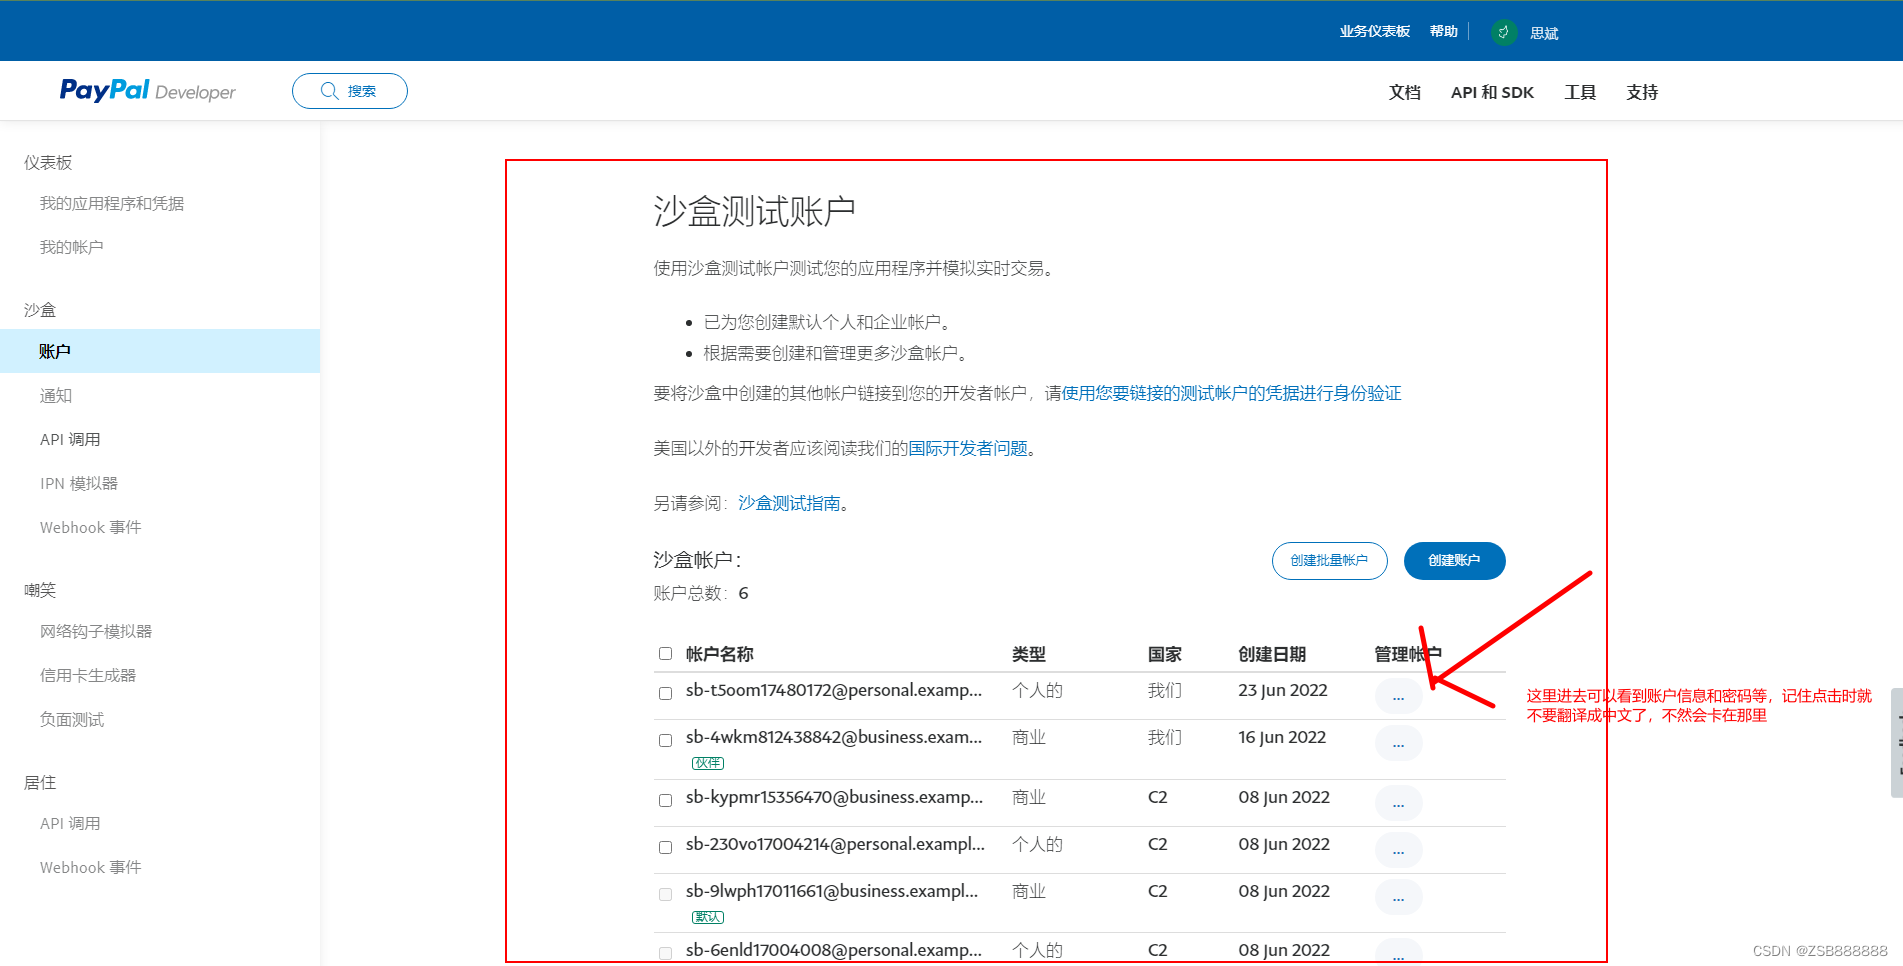
然后咱们开始创建一个个人沙盒账号,后面用来支付。沙盒账号咱们就用默认的吧。
到这里咱们就基本上准备就绪了,在撸代码前,还是建议先看一下标准支付和高级支付文档和流程的。
标准支付 : https://www.paypal.com/apex/product-profile/ordersv2/updateOrder
高级支付 :比较麻烦,因为我是后端,所以后面会以后端的方式讲解。不过你们有兴趣可以自行查看官方文档 :https://developer.paypal.com/docs/checkout/
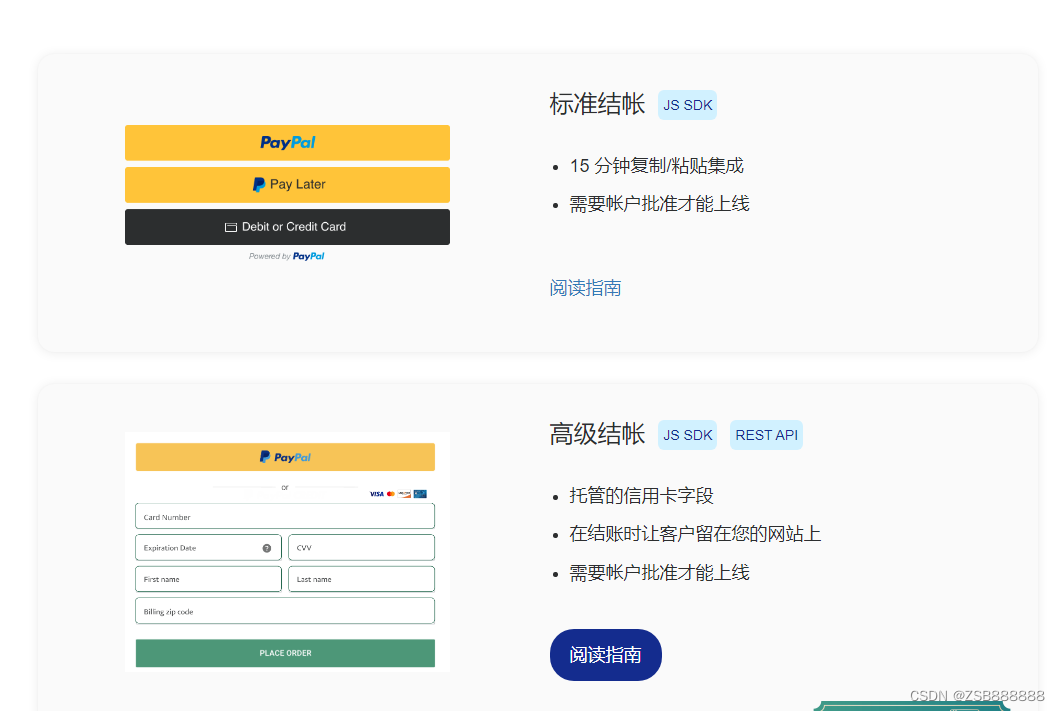
其实除了这两个支付方式,还有一个自定义结账:
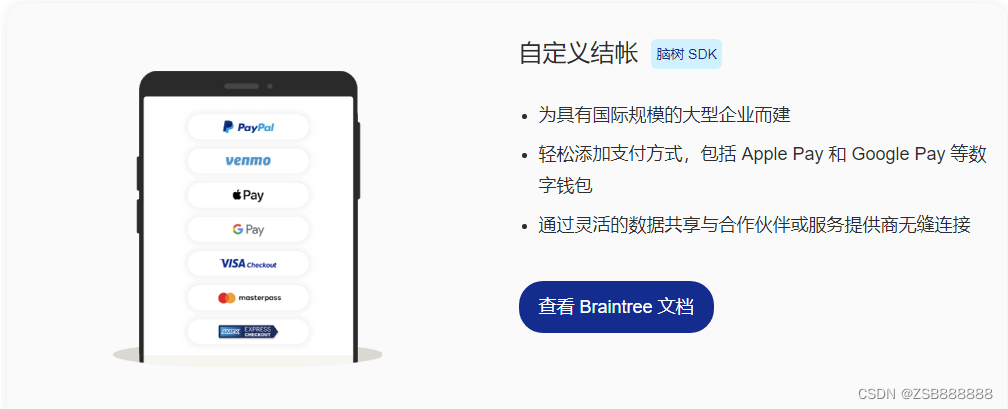
这种方式就更加灵活和厉害些了,不过需要前后端配合。目前我也是一知半解的,如果有大佬研究透,记得分享一下。谢谢
2.编写paypal后端接口demo
其实官网是有相关前后端SDK的,据官网所描述V1 和 V2版本,V1据说不进行维护了。这里我就提供一下maven吧,有兴趣可以自己看一下源码。可能有人会想,官网应该是有SDK的说明吧,那我只能说是你想多了,毕竟源码连个注释都没有。
V1 :
 <dependency>
            <groupId>com.paypal.sdk</groupId>
            <artifactId>rest-api-sdk</artifactId>
            <version>2.0.0-SNAPSHOT</version>
        </dependency>
V2 :
 <!-- https://mvnrepository.com/artifact/com.paypal.sdk/checkout-sdk -->
        <!--<dependency>
            <groupId>com.paypal.sdk</groupId>
            <artifactId>checkout-sdk</artifactId>
            <version>1.0.5</version>
        </dependency>-->
paypal支付分几步 :
1、创建订单
	官网 :
			public static void main(String[] args) {
				try {
					String url = "https://api.sandbox.paypal.com/v2/checkout/orders";
					URL obj = new URL(url);
					HttpsURLConnection con = (HttpsURLConnection) obj.openConnection();
					con.setRequestMethod("POST");
					con.setRequestProperty("accept", "application/json");
					con.setRequestProperty("content-type", "application/json");
					con.setRequestProperty("accept-language", "en_US");
					con.setRequestProperty("authorization", "Bearer A21AALAMZY4usVfQCrfOGNgGl0dWHHqtl6SERLSRuuw10_OK2cZgyr_lMm6axSCOTJYPPKKmC15RN1S9Q2y2LVeofLS-GCcSA");
					String body = "{" +
						"  \"intent\": \"CAPTURE\"," +
						"  \"purchase_units\": [" +
						"    {" +
						"      \"reference_id\": \"PUHF\"," +
						"      \"amount\": {" +
						"        \"currency_code\": \"USD\"," +
						"        \"value\": \"100.00\"" +
						"      }" +
						"    }" +
						"  ]," +
						"  \"application_context\": {" +
						"    \"return_url\": \"\"," +
						"    \"cancel_url\": \"\"" +
						"  }" +
						"}";

					// Send request
					con.setDoOutput(true);
					DataOutputStream wr = new DataOutputStream(con.getOutputStream());
					wr.writeBytes(body);
					wr.flush();
					wr.close();

					BufferedReader in = new BufferedReader(
						new InputStreamReader(con.getInputStream()));
					String inputLine;
					StringBuffer response = new StringBuffer();
					while ((inputLine = in.readLine()) != null) {
						response.append(inputLine);
					}
					in.close();

					// Print the response
					System.out.println(response.toString());
				} catch (Exception e) {
					e.printStackTrace();
				}
		}
	SDK :
		//创建订单
    @Test
    public void createOrder() throws Exception{
        String amount = "100.00";
        PayPalHttpClient client = new PayPalHttpClient(new PayPalEnvironment.Sandbox(clientId, secret));


        // 配置请求参数
        OrderRequest orderRequest = new OrderRequest();
        orderRequest.checkoutPaymentIntent("CAPTURE");
        List<PurchaseUnitRequest> purchaseUnits = new ArrayList<>();
        purchaseUnits.add(new PurchaseUnitRequest().amountWithBreakdown(new AmountWithBreakdown().currencyCode("USD").value(amount)));
        orderRequest.purchaseUnits(purchaseUnits);
        orderRequest.applicationContext(new ApplicationContext().returnUrl(notifyURLSuccess).cancelUrl(notifyURLFail));
        OrdersCreateRequest request = new OrdersCreateRequest().requestBody(orderRequest);

        HttpResponse<Order> response;
        try {
            response = client.execute(request);
            Order order = response.result();
            String token = order.id();
            //log.debug("payPal 支付操作返回结果: " + order);
            System.out.printf("payPal 支付操作返回结果: " + order);
            String payHref = null;
            String status = order.status();
            if (status.equals("CREATED")) {
                List<LinkDescription> links = order.links();
                for (LinkDescription linkDescription : links) {
                    if (linkDescription.rel().equals("approve")) {
                        payHref = linkDescription.href();
                    }
                }
            }
            Map<String, String> resultMap = new HashMap<String, String>();
            resultMap.put("token", token);
            resultMap.put("payHref", payHref);

            System.out.printf(resultMap.toString());
        } catch (IOException ioe) {
            if (ioe instanceof HttpException) {
                HttpException he = (HttpException) ioe;

            }
        }
    }
    创建订单之后。完整的返回报文 :
    	{
			"links": [
				{
					"method": "GET",
					"rel": "self",
					"href": "https://api.sandbox.paypal.com/v2/checkout/orders/1RY52286985553701"
				},
				{
					"method": "GET",
					"rel": "approve",
					"href": "https://www.sandbox.paypal.com/checkoutnow?token=1RY52286985553701"
				},
				{
					"method": "PATCH",
					"rel": "update",
					"href": "https://api.sandbox.paypal.com/v2/checkout/orders/1RY52286985553701"
				},
				{
					"method": "POST",
					"rel": "capture",
					"href": "https://api.sandbox.paypal.com/v2/checkout/orders/1RY52286985553701/capture"
				}
			],
			"id": "1RY52286985553701",
			"status": "CREATED"
		}
2、授权订单(客户授权订单)
	这里其实就是客户登录一下paypal账号对这笔订单进行授权,就是前端做的事情。找到创建订单之后返回的报文,拿到approve下的那里url,用浏览器访问打开一下,再使用上面创建的个人沙盒账号登录授权一下,就可以进行下一步扣款了。

3、更新订单
	官网 :
		public static void main(String[] args) {
			try {
				// APEX examples for PATCH calls use Unirest library as HttpsURLConnection does not support PATCH method without a workaround
				HttpResponse<String> response = Unirest.patch("https://api.sandbox.paypal.com/v2/checkout/orders/83849099T1607350D")
	  			.header("accept", "application/json")
	  			.header("content-type", "application/json")
	  			.header("accept-language", "en_US")
	  			.header("authorization", "Bearer A21AALAMZY4usVfQCrfOGNgGl0dWHHqtl6SERLSRuuw10_OK2cZgyr_lMm6axSCOTJYPPKKmC15RN1S9Q2y2LVeofLS-GCcSA")
	  			.body("[" +
					"  {" +
					"    \"op\": \"replace\"," +
					"    \"path\": \"/purchase_units/@reference_id=='PUHF'/amount\"," +
					"    \"value\": {" +
					"      \"currency_code\": \"USD\"," +
					"      \"value\": \"200.00\"," +
					"      \"breakdown\": {" +
					"        \"item_total\": {" +
					"          \"currency_code\": \"USD\"," +
					"          \"value\": \"180.00\"" +
					"        }," +
					"        \"shipping\": {" +
					"          \"currency_code\": \"USD\"," +
					"          \"value\": \"20.00\"" +
					"        }" +
					"      }" +
					"    }" +
					"  }" +
					"]")
	  			.asString();
	  			System.out.println(response.getBody());
	  			System.out.println(response.getStatus());
	  		} catch (UnirestException e) {
				throw new IllegalStateException(e);
			}
	}
	SDK : 这个我就没去写测试了,感觉有点鸡肋
4、捕获订单(就是商家扣款)
	请求地址需要带一个ID,这个ID就是前面创建订单时返回的那个ID
	官网 :
		public static void main(String[] args) {
			try {
				String url = "https://api.sandbox.paypal.com/v2/checkout/orders/83849099T1607350D/capture";
				URL obj = new URL(url);
				HttpsURLConnection con = (HttpsURLConnection) obj.openConnection();
				con.setRequestMethod("POST");
				con.setRequestProperty("content-type", "application/json");
				con.setRequestProperty("authorization", "Bearer A21AALAMZY4usVfQCrfOGNgGl0dWHHqtl6SERLSRuuw10_OK2cZgyr_lMm6axSCOTJYPPKKmC15RN1S9Q2y2LVeofLS-GCcSA");
				BufferedReader in = new BufferedReader(
					new InputStreamReader(con.getInputStream()));
				String inputLine;
				StringBuffer response = new StringBuffer();
				while ((inputLine = in.readLine()) != null) {
					response.append(inputLine);
				}
				in.close();

				// Print the response
				System.out.println(response.toString());
			} catch (Exception e) {
				e.printStackTrace();
			}
	}
	SDK :
		//捕获订单
    @Test
    public void captureOrder() {
        String token = "21P67705TC475012Y";
        PayPalHttpClient client = new PayPalHttpClient(new PayPalEnvironment.Sandbox(clientId,
        OrdersCaptureRequest request = new OrdersCaptureRequest(token);

        try {
            HttpResponse<Order> response = client.execute(request);
            Order order = response.result();
            System.out.printf(order.status());
            String status = order.status();
            if (status.equals("COMPLETED")) {
                System.out.printf("成功");
            }
            System.out.printf("成功");
        } catch (IOException ioe) {
            if (ioe instanceof HttpException) {
                HttpException he = (HttpException) ioe;

                System.out.printf("PayPal支付捕获失败"+ioe);
            }

            System.out.printf("捕获订单异常" + ioe);
        }
    }
看到这里应该发现了吧,流程就是 :创建订单 》》客户授权 》》商家扣款。简单来说就是这三步了,另外请求头中需要传authorization,paypal那边会效验。其实这个是有个专门的接口的 :
	官网 :
		public static void main(String[] args) {
			try {
				String url = "https://api.sandbox.paypal.com/v1/oauth2/token";
				URL obj = new URL(url);
				HttpsURLConnection con = (HttpsURLConnection) obj.openConnection();
				con.setRequestMethod("POST");
				con.setRequestProperty("accept", "application/json");
				con.setRequestProperty("accept-language", "en_US");
				con.setRequestProperty("content-type", "application/x-www-form-urlencoded");
				con.setRequestProperty("authorization", "basic QVRt**********WXU=");
				String body = "grant_type=client_credentials";

				// Send request
				con.setDoOutput(true);
				DataOutputStream wr = new DataOutputStream(con.getOutputStream());
				wr.writeBytes(body);
				wr.flush();
				wr.close();

				BufferedReader in = new BufferedReader(
					new InputStreamReader(con.getInputStream()));
				String inputLine;
				StringBuffer response = new StringBuffer();
				while ((inputLine = in.readLine()) != null) {
					response.append(inputLine);
				}
				in.close();

				// Print the response
				System.out.println(response.toString());
			} catch (Exception e) {
				e.printStackTrace();
			}
		}
这个接口会返回一个token,其实authorization有两种方式,一个是这个token,还有一个就是用clientId 和 secret。因为每次请求都要传这个,所以哪种方便就看个人了
/*****
     * paypal支付通用请求头
     * ***/
    public static Map<String, String> getBaseHeaders(String accessToken,String clientId,String secret) {
        Map<String, String> headers = new HashMap<>(3);
        headers.put("Content-Type", ContentType.JSON.toString());
        String authorization = "";
        String encodedAuth;
        if (StringUtils.isNotEmpty(accessToken))
        {
            encodedAuth = Base64.encode(accessToken.getBytes(Charset.forName("US-ASCII")));
            authorization = "Bearer " + encodedAuth;
        }else{
            String auth = clientId + ":" + secret;
            encodedAuth = Base64.encode(auth.getBytes(Charset.forName("US-ASCII")));
            authorization = "Basic " +  encodedAuth;
        }
        headers.put("Authorization", authorization);

        return headers;
    }
到这里之后流程就很清楚了吧,回到咱们开始说到的无账号实现信用卡快捷支付,按现有的流程是不是就没办法实现?毕竟创建订单之后,肯定是需要客户进行订单授权的。
要想实现这个,那就得用到paypal的高级支付了。客户只需要在页面输入信用卡卡号等几个属性,就可以代替订单授权这一步骤了。后端接收到信用卡的几个属性后,直接调用创建订单接口后,再调一个属于高级支付的接口将这几个属性传过去,之后就可以直接调接口进行扣款了。
@Test
    public void test08() throws UnsupportedEncodingException {

// 客户端接口请求路径

        String url = "https://cors.api.sandbox.paypal.com/v2/checkout/orders/16E92398U6411971K/validate-payment-method";
        //String body = "";
        String body = "{\"payment_source\":{\"card\":{\"number\":\"4032032482415913\",\"expiry\":\"2024-06\",\"security_code\":\"359\",\"name\":\"Lee Vincen\",\"billing_address\":{\"address_line_1\":\"beijing\",\"address_line_2\":\"CAD\",\"admin_area_1\":\"1\",\"admin_area_2\":\"beijign\",\"postal_code\":\"518000\",\"country_code\":\"CA\"}}},\"application_context\":{\"vault\":false}}";
// 创建请求
        //创建httpclient对象
        CloseableHttpClient httpClient = HttpClients.createDefault();
        //设置连接超时时间(非必要设置)
        RequestConfig requestConfig = RequestConfig.custom().setSocketTimeout(3000)
                .setConnectTimeout(3000).build();
        //创建post方式请求对象
        HttpPost post = new HttpPost(url);
       // post.setConfig(requestConfig);
        //设置对应请求接口要求设置的请求头
        post.setHeader("Content-Type", "application/json");
//        post.setHeader("Accept", "application/json;charset=utf-8");
        post.setHeader("Authorization", getHeader());
        StringEntity stringEntity = new StringEntity(body);
        post.setEntity(stringEntity);
        // 执行请求并拿到结果
        CloseableHttpResponse response = null;
        String result = null;
        try {
            response = httpClient.execute(post);
            //判断返回状态是否正常
            int state = response.getStatusLine().getStatusCode();
            if (state != HttpStatus.SC_OK) {
                System.out.println("connection faild 错误代码:"+state);
            }
            //获取结果实体并返回结果
            HttpEntity entity = response.getEntity();
            result = EntityUtils.toString(entity,"UTF-8");
            //返回json处理见下面testGet方法里对json数据的解析处理
            //打印结果
            System.out.println(result);
            //释放所有由httpEntity所持有的资源
            EntityUtils.consume(entity);
        } catch (Exception e) {
            e.printStackTrace();
        }finally {
            if(response != null){
                try {
                    response.close();
                } catch (IOException e) {
                    e.printStackTrace();
                }
            }
            if(httpClient != null){
                try {
                    httpClient.close();
                } catch (IOException e) {
                    e.printStackTrace();
                }
            }
        }
    }
这里我要着重说明一下 /v2/checkout/orders/16E92398U6411971K/validate-payment-method接口,官网是没有相关文档和说明的。按照官网设定,这一步是要在前端SDK实现的,我也是通过浏览器F12才发现的这个接口,说起来是有点难受的。
再贴一个paypal 的 ipn通知吧
/****
     * IPN实时付款通知
     * ***/
    @PostMapping(value = "/notifyUrl")
    public void notifyUrl(HttpServletRequest request, HttpServletResponse response) throws Exception{

        try{
            //获取paypal请求参数,并拼接验证参数
            Enumeration<String> en = request.getParameterNames();
            String str = "cmd=_notify-validate";
            while (en.hasMoreElements()) {
                String paramName = en.nextElement();
                String paramValue = request.getParameter(paramName);
                //此处的编码一定要和自己的网站编码一致,不然会出现乱码,paypal回复的通知为‘INVALID’
                str = str + "&" + paramName + "=" + URLEncoder.encode(paramValue, "utf-8");
            }
            //建议在此将接受到的信息 str 记录到日志文件中以确认是否收到 IPN 信息
            log.info("=========================================================================================");
            log.info("paypal传递过来的交易信息:"+str);
            PayPalApiConfig config = getConfig();
            IJPayHttpResponse reData = PayPalApi.validationIPN(config,str);
            String verifled = reData.getBody();
            log.info("回调回复之后 :" + verifled);
            /**
             * 将 POST 信息分配给本地变量,可以根据您的需要添加
             */
            // 交易状态 Completed 代表交易成功
            String paymentStatus = request.getParameter("payment_status");
            log.info("交易状态 :" + paymentStatus);//Completed :交易完成已付款
            // 交易时间
            String paymentDate = request.getParameter("payment_date");
            log.info("交易时间 :" + paymentDate);
            // 交易id
            String txnId = request.getParameter("txn_id");
            log.info("交易id :" + txnId);
            // 父交易id
            String parentTxnId = request.getParameter("parent_txn_id");
            log.info("父交易id :" + parentTxnId);
            // 收款人email0
            String receiverEmail = request.getParameter("receiver_email");
            log.info("收款人email :" + receiverEmail);
            // 收款人id
            String receiverId = request.getParameter("receiver_id");
            log.info("收款人id :" + receiverId);
            // 付款人email
            String payerEmail = request.getParameter("payer_email");
            log.info("付款人email :" + payerEmail);
            // 付款人id
            String payerId = request.getParameter("payer_id");
            log.info("付款人id :" + payerId);
            // 交易金额
            String mcGross = request.getParameter("mc_gross");
            log.info("交易金额 :" + mcGross);
            // 自定义字段,我们存放的订单ID
            String custom = request.getParameter("custom");
            log.info("自定义字段,我们存放的订单ID :" + custom);

            /**
             * 获取 PayPal 对回发信息的回复信息,判断刚才的通知是否为 PayPal 发出的
             */
            if("VERIFIED" .equalsIgnoreCase(verifled)){

                log.info("请求是真的 :" + verifled + "可进行一些想过逻辑处理");

            }else if ("INVALID".equalsIgnoreCase(verifled)) {
                //非法信息,可以将此记录到您的日志文件中以备调查
                log.error("paypal完成支付发送IPN通知返回状态非法,请联系管理员,请求参数:" + str);
            } else {
                //处理其他错误
                log.error("paypal完成支付发送IPN通知发生其他异常,请联系管理员,请求参数:" + str);
            }
        }catch (Exception e){

        }

    }
总结
国外的api文档,真的对咱们很不友好。以上都是刚开始对接paypal时,写的测试类。如果有什么不足的,欢迎大家提出来。


 被折叠的 条评论
为什么被折叠?
被折叠的 条评论
为什么被折叠?
 到【灌水乐园】发言


