


目录
概述
App门户页面设计与开发
1、设计一个app的门户框架,实现4个tab切换效果。所需技术为:activity、xml、fragment
2、在任一tab页中实现列表效果;本功能的实现使用recycleview;
一、需求分析及初步设计
需求分析:
设计类微信的门户页面,其中包括4个tab切换效果。其中的一个tab页需要实现列表效果,我们将使用RecyclerView来实现。
初步设计:
1.在layout文件夹中新建六个xml文件,分别设计头部、底部和四个界面的布局;
2.首先在activity_main.xml布局文件中设计三个主要分区:包含四个tab的bottom.xml、顶部top.xml、展示对应tab内容的fragmentlayout.xml;
3.在MainActivity.java同一级文件夹中分别创建四个tab对应的java文件,同时编辑好对应的fragment.xml布局文件,实现导航栏和 Fragment布局切换功能;
4.实现列表效果,准备数据源,设计列表布局格式,重写联系人java文件内容,创建适配器类等;
二、设计过程
1.设计头部布局top.xml
使用LinearLayout作为父容器。它是一个线性布局,用于在垂直或水平方向上排列子视图。
android:layout_width=“match_parent”:设置布局的宽度为与父容器匹配,即填充满父容器。
android:layout_height=“wrap_content”:设置元素的高度,根据文本内容自动调整高度
android:gravity=“center”:设置文本在TextView中的对齐方式为居中对齐。
android:text=“微信”:设置TextView显示的文本内容为"微信"。
android:textColor=“@color/black”:设置文本的颜色为绿色。
android:textSize=“50dp”:设置文本的字体大小为50dp。
android:background=“@color/green”:设置TextView的背景颜色。
<?xml version="1.0" encoding="utf-8"?>
<LinearLayout xmlns:android="http://schemas.android.com/apk/res/android"
    android:layout_width="match_parent"
    android:layout_height="wrap_content">

    <TextView
        android:id="@+id/textView"
        android:layout_width="wrap_content"
        android:layout_height="wrap_content"
        android:layout_weight="1"
        android:background="@color/green"
        android:gravity="center"
        android:text="微信"
        android:textColor="@color/black"
        android:textSize="50dp" />
</LinearLayout>

2.设计底部布局bottom.xml
创建一个水平布局的LinearLayout作为父容器,再创建四个垂直布局的LinearLayout子布局,子布局包含一个图片视图和一个文本视图。
根据需求需要设计四个子布局,这四个布局代码类似,只需修改数据,现列举消息界面的子布局:
<?xml version="1.0" encoding="utf-8"?>
<LinearLayout xmlns:android="http://schemas.android.com/apk/res/android"
    xmlns:app="http://schemas.android.com/apk/res-auto"
    android:layout_width="match_parent"
    android:layout_height="match_parent"
    android:gravity="bottom"
    android:orientation="horizontal">

    <LinearLayout
        android:id="@+id/linearlayout_weixin"
        android:layout_width="0dp"
        android:layout_height="match_parent"
        android:layout_weight="1"
        android:clickable="false"
        android:orientation="vertical">

        <ImageView
            android:id="@+id/imageview_weixin"
            android:layout_width="match_parent"
            android:layout_height="76dp"
            app:srcCompat="@drawable/wechat_top" />

        <TextView
            android:id="@+id/textView"
            android:layout_width="match_parent"
            android:layout_height="30dp"
            android:textSize="20dp"
            android:gravity="center"
            android:text="weixin" />
    </LinearLayout>

3.设计中间部分,即四个tab页面布局
现将这四个tab页面分别命名为fragment_weiixn.xml、fragment_friend.xml、fragment_contact.xml、fragment_config.xml,其中这四个xml文件布局、实现代码类似,仅列举消息fragment_weiixn.xml内容:
<?xml version="1.0" encoding="utf-8"?>
<LinearLayout xmlns:android="http://schemas.android.com/apk/res/android"
xmlns:tools="http://schemas.android.com/tools"
android:layout_width="match_parent"
android:layout_height="match_parent"
android:gravity="center"
android:orientation="vertical"
tools:context=".weixinFragment">
<TextView
android:id="@+id/textView5"
android:layout_width="match_parent"
android:layout_height="150dp"
android:gravity="center"
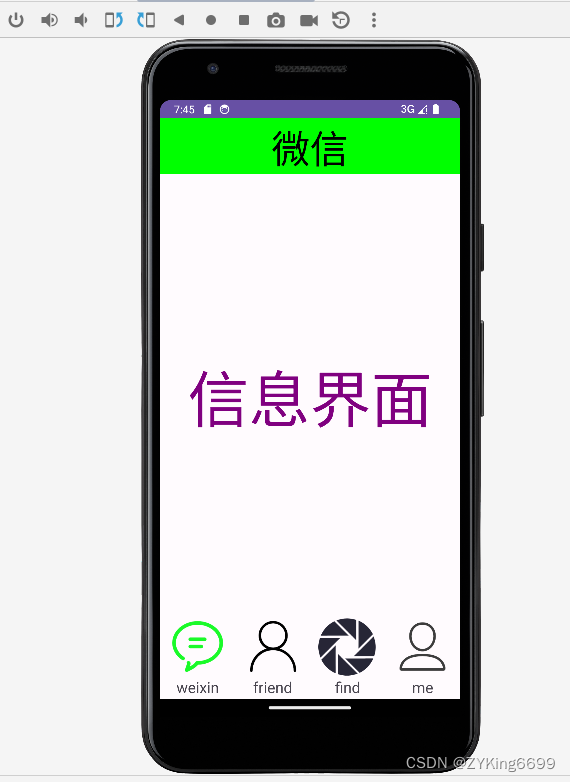
android:text="信息界面"
android:textColor="@color/purple"
android:textSize="80dp" />
</LinearLayout>
4.整合布局
在activity_main.xml文件中将上述实现的各个部分的布局组合在一起。
<?xml version="1.0" encoding="utf-8"?>
<LinearLayout xmlns:android="http://schemas.android.com/apk/res/android"
    xmlns:app="http://schemas.android.com/apk/res-auto"
    xmlns:tools="http://schemas.android.com/tools"
    android:layout_width="match_parent"
    android:layout_height="match_parent"
    android:orientation="vertical"
    android:gravity="bottom|center"
    tools:context=".MainActivity">
    <include
        layout="@layout/top"
        android:layout_width="match_parent"
        android:layout_height="wrap_content" />
    <FrameLayout
        android:id="@+id/id_content"
        android:layout_width="match_parent"
        android:layout_height="0dp"
        android:layout_weight="1">
    </FrameLayout>
    <include
        layout="@layout/bottom"
        android:layout_width="match_parent"
        android:layout_height="wrap_content"
        android:gravity="bottom" />
</LinearLayout>

5.实现对应Java文件的创建和编写
首先创建四个tab页面对应的Java文件,同上,这四个Java文件类似,现列举其中一个:
package com.example.zyk_application;
import android.os.Bundle;
import android.app.Fragment;
import android.view.LayoutInflater;
import android.view.View;
import android.view.ViewGroup;
public class weixinFragment extends Fragment {
    public weixinFragment() {
        // Required empty public constructor
    }
    @Override
    public View onCreateView(LayoutInflater inflater, ViewGroup container,
                             Bundle savedInstanceState) {
        // Inflate the layout for this fragment
        return inflater.inflate(R.layout.fragment_weixin, container, false);
    }
}
然后在MainActivity.java文件中创建相应对象,
    private weixinFragment weixinFragment = new weixinFragment();
    private friendFragment friendFragment = new friendFragment();
    private contactFragment contactFragment = new contactFragment();
    private configFragment configFragment = new configFragment();
    private FragmentManager fragmentManager;
    private LinearLayout linearLayout1;
    private LinearLayout linearLayout2;
    private LinearLayout linearLayout3;
    private LinearLayout linearLayout4;
    private ImageView imageView1;
    private ImageView imageView2;
    private ImageView imageView3;
    private ImageView imageView4;
在oncreate函数中将控件的ID和对象对应起来,同时创建四个点击监听:
    @Override
    protected void onCreate(Bundle savedInstanceState) {
        super.onCreate(savedInstanceState);
        supportRequestWindowFeature(Window.FEATURE_NO_TITLE);
        setContentView(R.layout.activity_main);
        linearLayout1 = findViewById(R.id.linearlayout_weixin);
        linearLayout2 = findViewById(R.id.linearlayout_friend);
        linearLayout3 = findViewById(R.id.linearlayout_contact);
        linearLayout4 = findViewById(R.id.linearlayout_config);
        imageView1 = findViewById(R.id.imageview_weixin);
        imageView2 = findViewById(R.id.imageview_friend);
        imageView3 = findViewById(R.id.imageview_contact);
        imageView4 = findViewById(R.id.imageview_config);
        linearLayout1.setOnClickListener(this);
        linearLayout2.setOnClickListener(this);
        linearLayout3.setOnClickListener(this);
        linearLayout4.setOnClickListener(this);
        initFragment();
    }
初始化fragment函数:将四个fragment装进容器中,隐藏所有fragment:
private void initFragment() {
        fragmentManager = getFragmentManager();
        FragmentTransaction transaction = fragmentManager.beginTransaction();
        transaction.add(R.id.id_content, weixinFragment);
        transaction.add(R.id.id_content, friendFragment);
        transaction.add(R.id.id_content, contactFragment);
        transaction.add(R.id.id_content, configFragment);
        hideFragment(transaction);
        transaction.show(weixinFragment);
        transaction.commit();
    }
    private void hideFragment(FragmentTransaction transaction) {
        transaction.hide(weixinFragment);
        transaction.hide(friendFragment);
        transaction.hide(contactFragment);
        transaction.hide(configFragment);
    }
根据参数展示对应的fragment,同时更换对应的图片,点击监听函数,将四个tab对应的图片全部换成最初始的图片。
private void showfragment(int i) {
        FragmentTransaction transaction = fragmentManager.beginTransaction();
        hideFragment(transaction);
        switch (i) {
            case 0:
                transaction.show(weixinFragment);
                emptyimage();
                imageView1.setImageResource(R.drawable.wechat_top);
                break;
            case 1:
                transaction.show(friendFragment);
                emptyimage();
                imageView2.setImageResource(R.drawable.friend_green);
                break;
            case 2:
                transaction.show(contactFragment);
                emptyimage();
                imageView3.setImageResource(R.drawable.find_green);
                break;
            case 3:
                transaction.show(configFragment);
                emptyimage();
                imageView4.setImageResource(R.drawable.me_green);
                break;
            default:
                break;
        }
        transaction.commit();
    }
    public void onClick(View view) {
        int viewId = view.getId();
        if (viewId == R.id.linearlayout_weixin) {
            showfragment(0);
        } else if (viewId == R.id.linearlayout_friend) {
            showfragment(1);
        } else if (viewId == R.id.linearlayout_contact) {
            showfragment(2);
        } else if (viewId == R.id.linearlayout_config) {
            showfragment(3);
        }
    }
    public void emptyimage() {
        imageView1.setImageResource(R.drawable.message);
        imageView2.setImageResource(R.drawable.wechat_people);
        imageView3.setImageResource(R.drawable.wechat_find);
        imageView4.setImageResource(R.drawable.wechat_me);
    }
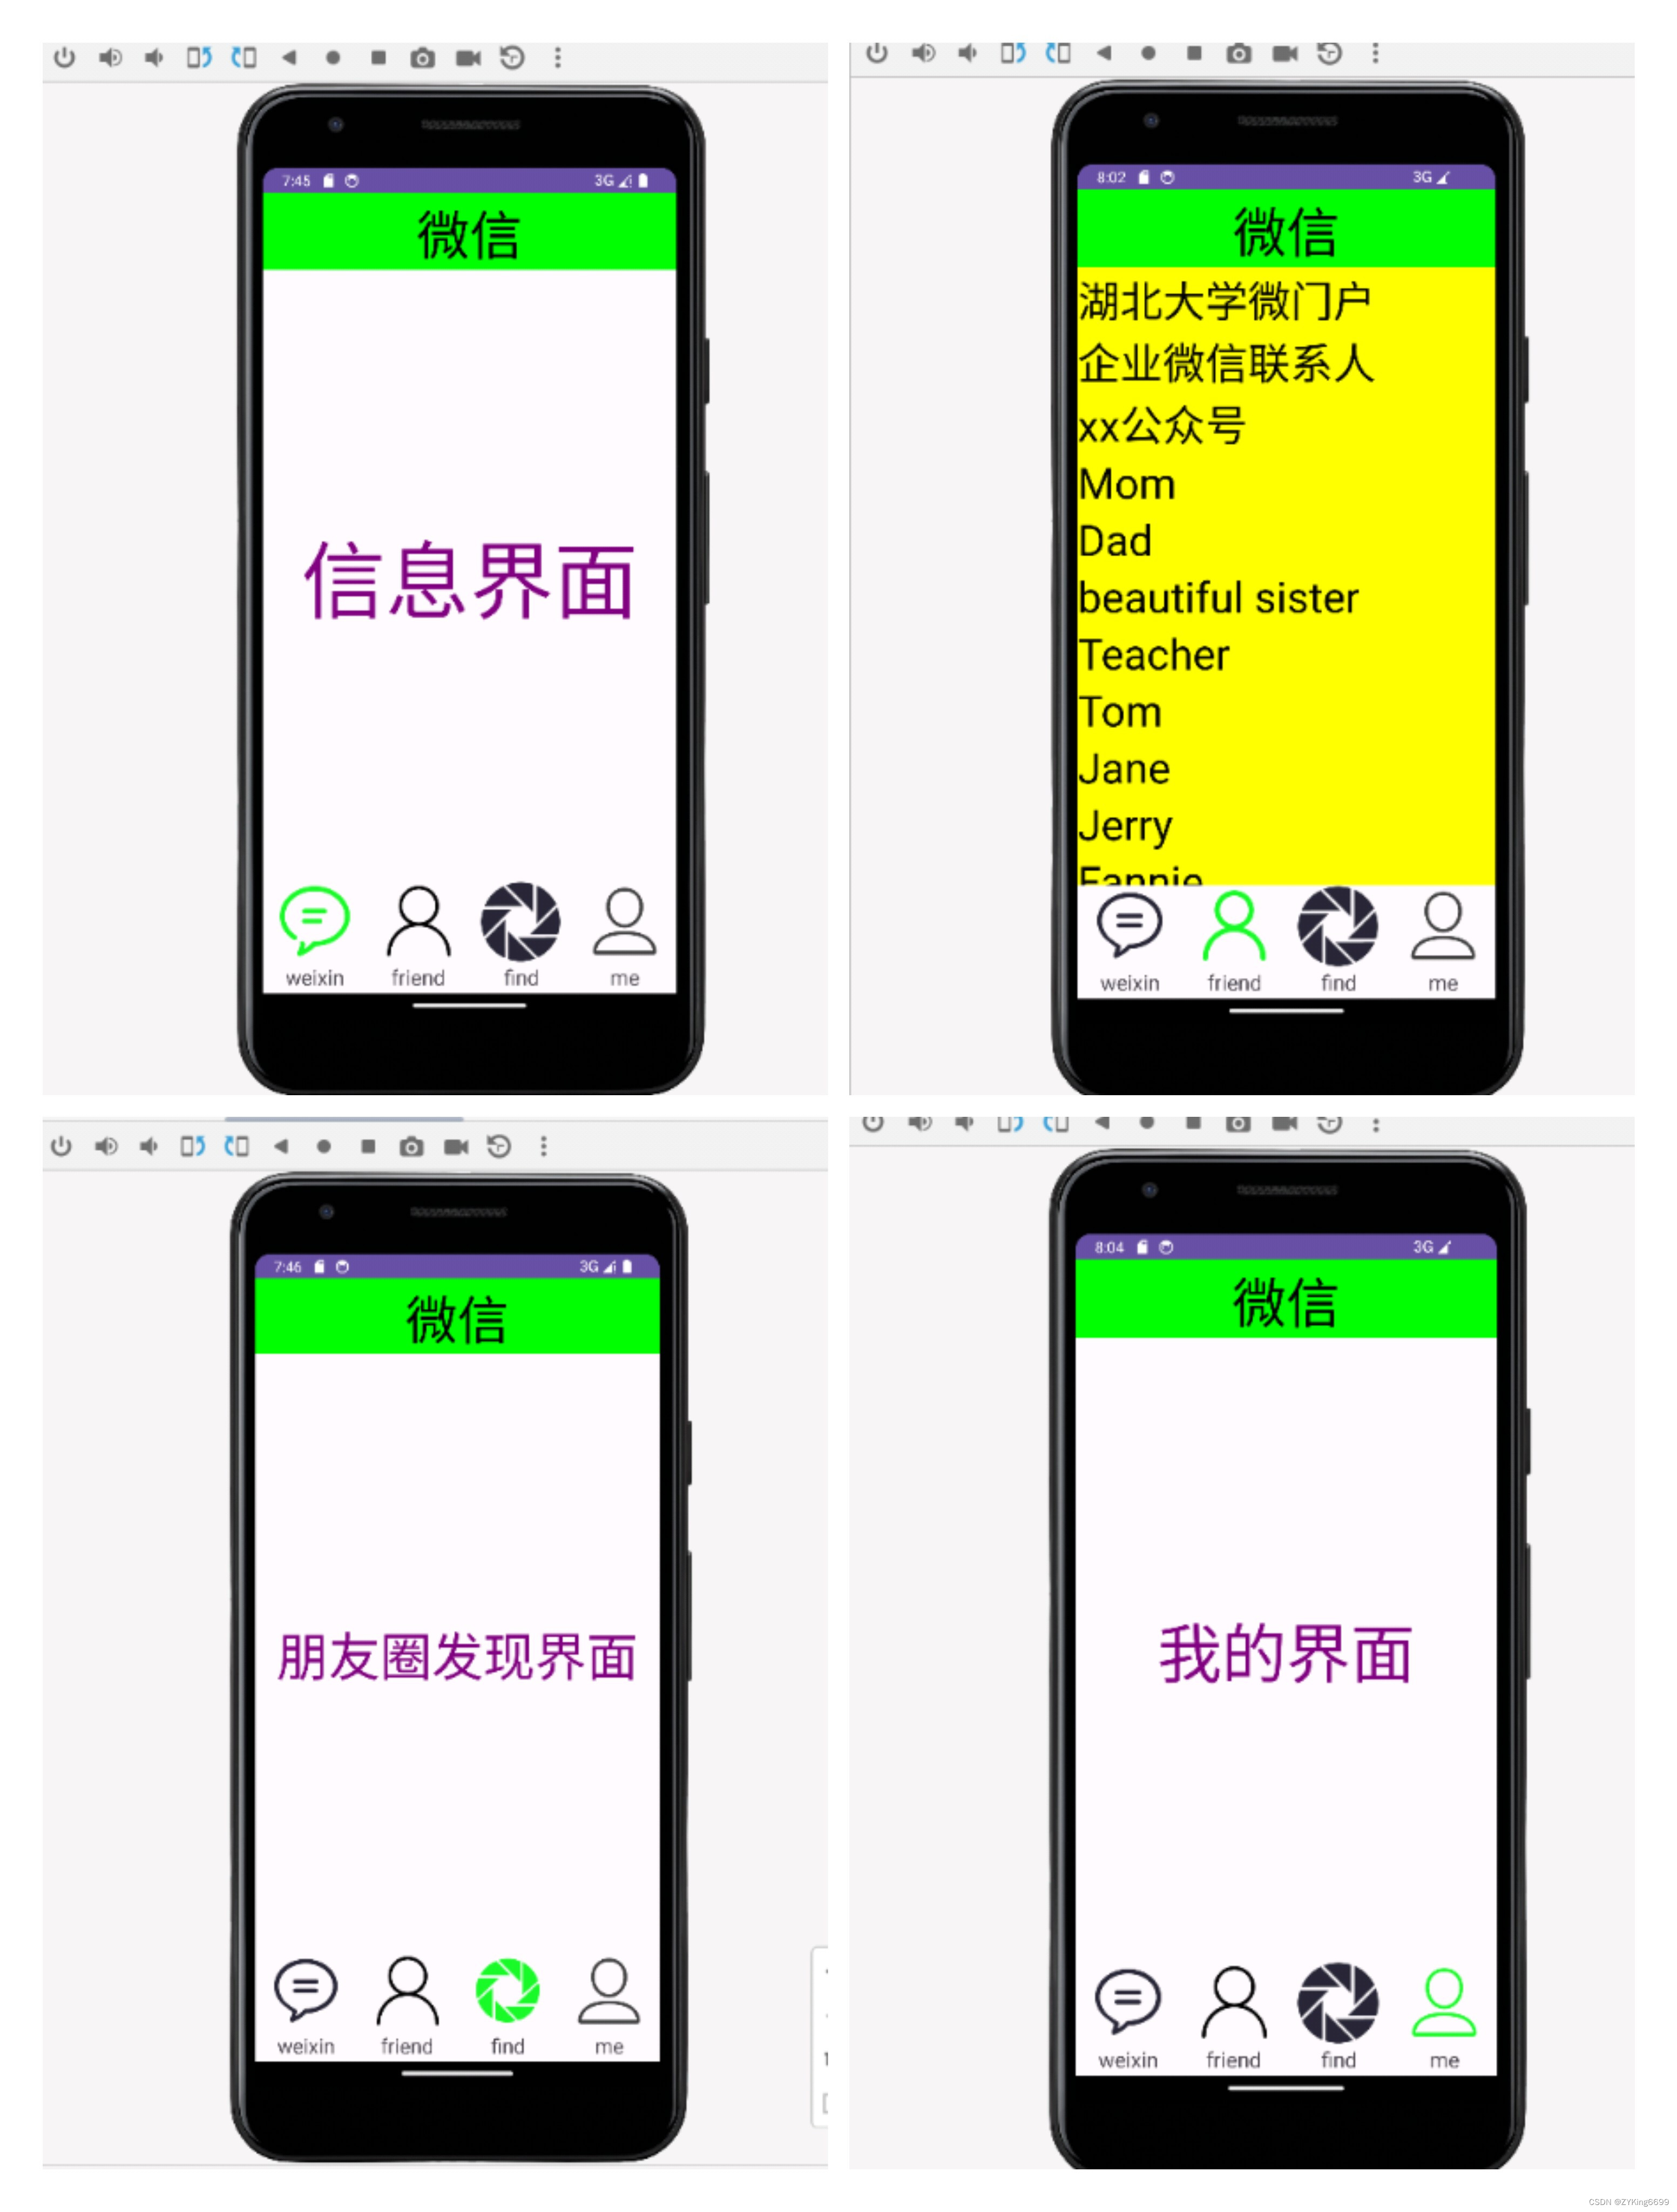
tab切换效果展示

6.联系人界面实现列表效果
在fragment_friend.xml文件中添加recycleview:
<?xml version="1.0" encoding="utf-8"?>
<androidx.constraintlayout.widget.ConstraintLayout xmlns:android="http://schemas.android.com/apk/res/android"
    xmlns:app="http://schemas.android.com/apk/res-auto"
    xmlns:tools="http://schemas.android.com/tools"
    android:layout_width="match_parent"
    android:layout_height="match_parent"
    tools:context=".MainActivity">
    <TextView
        android:id="@+id/textView6"
        android:layout_width="413dp"
        android:layout_height="99dp"
        android:layout_weight="1"
        android:gravity="center"
        android:text="联系人"
        android:textColor="@color/purple"
        android:textSize="50dp"
        app:layout_constraintEnd_toEndOf="parent"
        tools:ignore="MissingConstraints" />
    <androidx.recyclerview.widget.RecyclerView
        android:id="@+id/recycleview"
        android:layout_width="412dp"
        android:layout_height="636dp"
        tools:ignore="MissingConstraints"
        tools:layout_editor_absoluteX="0dp"
        tools:layout_editor_absoluteY="99dp" />

</androidx.constraintlayout.widget.ConstraintLayout>
在friendFragment.java中创建相应对象并准备数据源,重写onCreateView方法:
private void initial() {
        list.add("湖北大学微门户");
        list.add("企业微信联系人");
        list.add("xx公众号");
        list.add("Mom");
        list.add("Dad");
        list.add("beautiful sister");
        list.add("Teacher");
        list.add("Tom");
        list.add("Jane");
        list.add("Jerry");
        list.add("Fannie");
        list.add("Jessie");
        list.add("Wendy");
        list.add("Louie");
        list.add("John");
        list.add("Lewis");
        list.add("Korbin");
        list.add("Aiden");
        list.add("Gene");
        list.add("Connor");
    }
@SuppressLint("MissingInflatedId")
    @Override
    public View onCreateView(LayoutInflater inflater, ViewGroup container,
                             Bundle savedInstanceState) {
        // Inflate the layout for this fragment
        View view=inflater.inflate(R.layout.fragment_friend,container,false);
        context=view.getContext();
        recyclerView=view.findViewById(R.id.recycleview);
        list=new ArrayList();
        initial();
        myadapter = new Myadapter(context,list);
        recyclerView.setAdapter(myadapter);
        LinearLayoutManager manager=new LinearLayoutManager(context);
        manager.setOrientation(LinearLayoutManager.VERTICAL);
        recyclerView.setLayoutManager(manager);
        return view;
    }
新建friend_item.xml,设计列表布局格式:
<?xml version="1.0" encoding="utf-8"?>
<LinearLayout xmlns:android="http://schemas.android.com/apk/res/android"
    android:layout_width="match_parent"
    android:layout_height="wrap_content">
    <TextView
        android:id="@+id/textView1"
        android:layout_width="wrap_content"
        android:layout_height="wrap_content"
        android:layout_weight="1"
        android:text="TextView"
        android:textColor="@color/black"
        android:textSize="40sp"
        android:background="@color/yellow"/>
</LinearLayout>
创建适配器Myadapter类,将数据源中的数据与RecyclerView的列表项进行绑定,完成列表项的显示:
package com.example.zyk_application;
import android.content.Context;
import android.view.LayoutInflater;
import android.view.View;
import android.view.ViewGroup;
import android.widget.TextView;
import androidx.annotation.NonNull;
import androidx.recyclerview.widget.RecyclerView;
import java.util.List;
public class Myadapter extends RecyclerView.Adapter<Myadapter.Myholder> {
    Context context1;
    List<String> list1;
    public Myadapter(Context context,List list) {
        context1=context;
        list1=list;
    }
    @NonNull
    @Override
    public Myholder onCreateViewHolder(@NonNull ViewGroup parent, int viewType) {
        View view = LayoutInflater.from(context1).inflate(R.layout.friend_item,parent,false);
        Myholder holder = new Myholder(view);
        return holder;
    }
    @Override
    public void onBindViewHolder(@NonNull Myholder holder, int position) {
        holder.textView.setText(list1.get(position));
    }
    @Override
    public int getItemCount() {
        return list1.size();
    }
    public class Myholder extends RecyclerView.ViewHolder{
        TextView textView;
        public Myholder(@NonNull View itemView) {
            super(itemView);
            textView=itemView.findViewById(R.id.textView1);
        }
    }
}
7.实现结果
该类微信页面的设计到此结束,实现效果如下。

总结
以上是使用Android Studio设计完成类微信页面的全部内容,通过本次实践,我进一步熟悉了实现一个具体项目的结构、各类文件配置以及各组件的功能。开发App门户页面需要使用Activity、XML、Fragment技术,并结合底部导航栏、ViewPager、RecyclerView等控件来实现界面的切换和列表展示。
在设计实验过程中还要注意常量表达式的情况,比如在MainActivity.java文件中,资源ID不是常量表达式,此时使用swtich-case语句编译时无法确定每个case的匹配情况,从而导致错误。查阅资料后可以使用if-else语句来处理这种情况。if-else语句不要求表达式是常量,可以在运行时动态确定条件。
线上仓库地址
gitee仓库地址:
https://gitee.com/Zyking6699/as_-appwork.git


 1362
1362


 被折叠的 条评论
为什么被折叠?
被折叠的 条评论
为什么被折叠?
 到【灌水乐园】发言


