


本文使用的SpringAI版本为1.0.0-M1
简介
官方文档地址:Spring AI :: Spring AI 参考手册 --- Spring AI :: Spring AI Reference
旨在简化java开发人员将 AI 功能集成到应用程序中。
作为java开发人员,不需要理解AI背后的知识,只需要对他们在AI系统中的角色和功能有基本的了解和认识,正确使用即可。
准备工作
-
JDK版本须在17以上,SpringAI不支持17以下版本
-
IDEA
-
OpenAI的key和api
对于第三项,推荐使用开源项目GPT-API-free,可以申请免费API Key。
地址:https://github.com/chatanywhere/GPT_API_free
初体验
通过IDEA创建项目
1.创建Spring项目
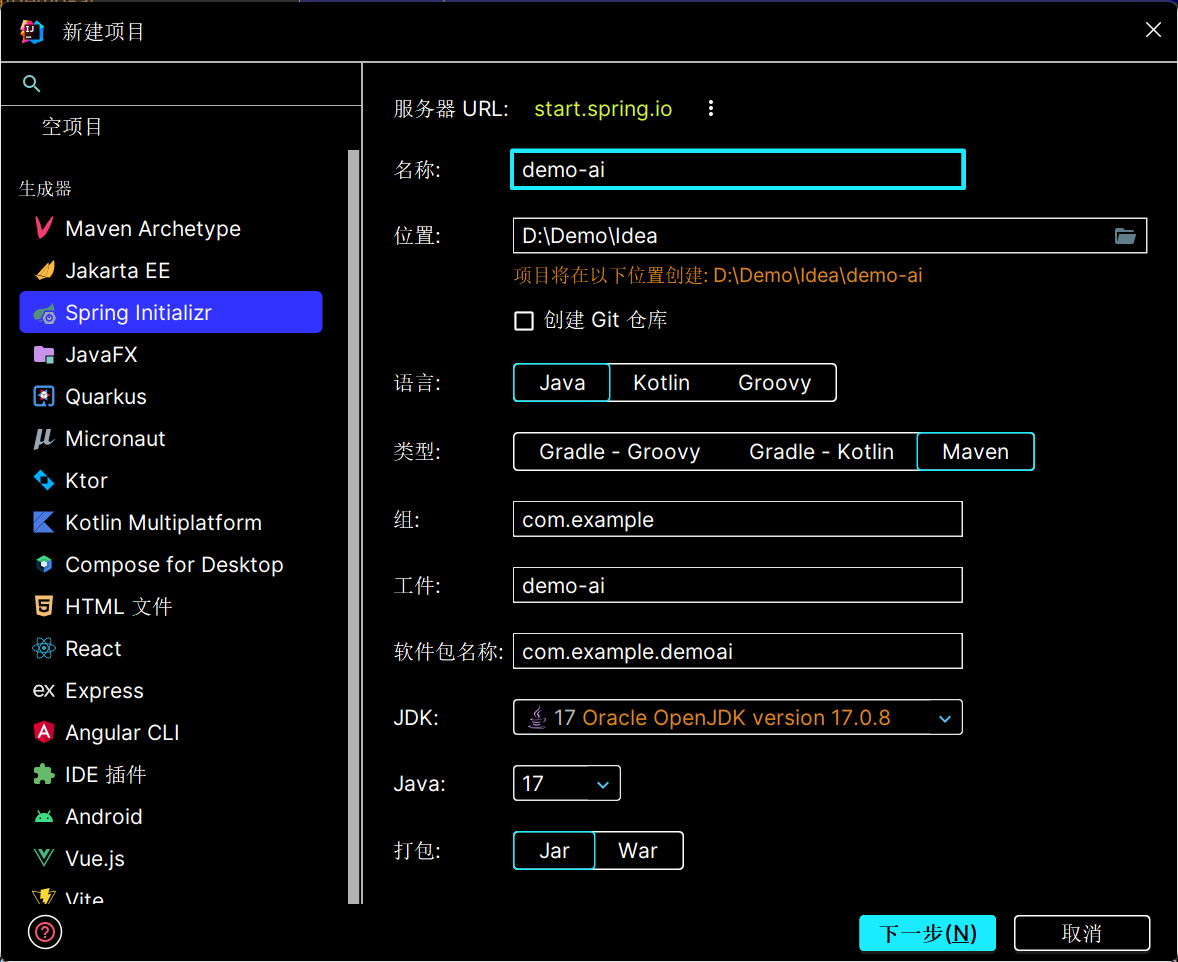
2.添加依赖
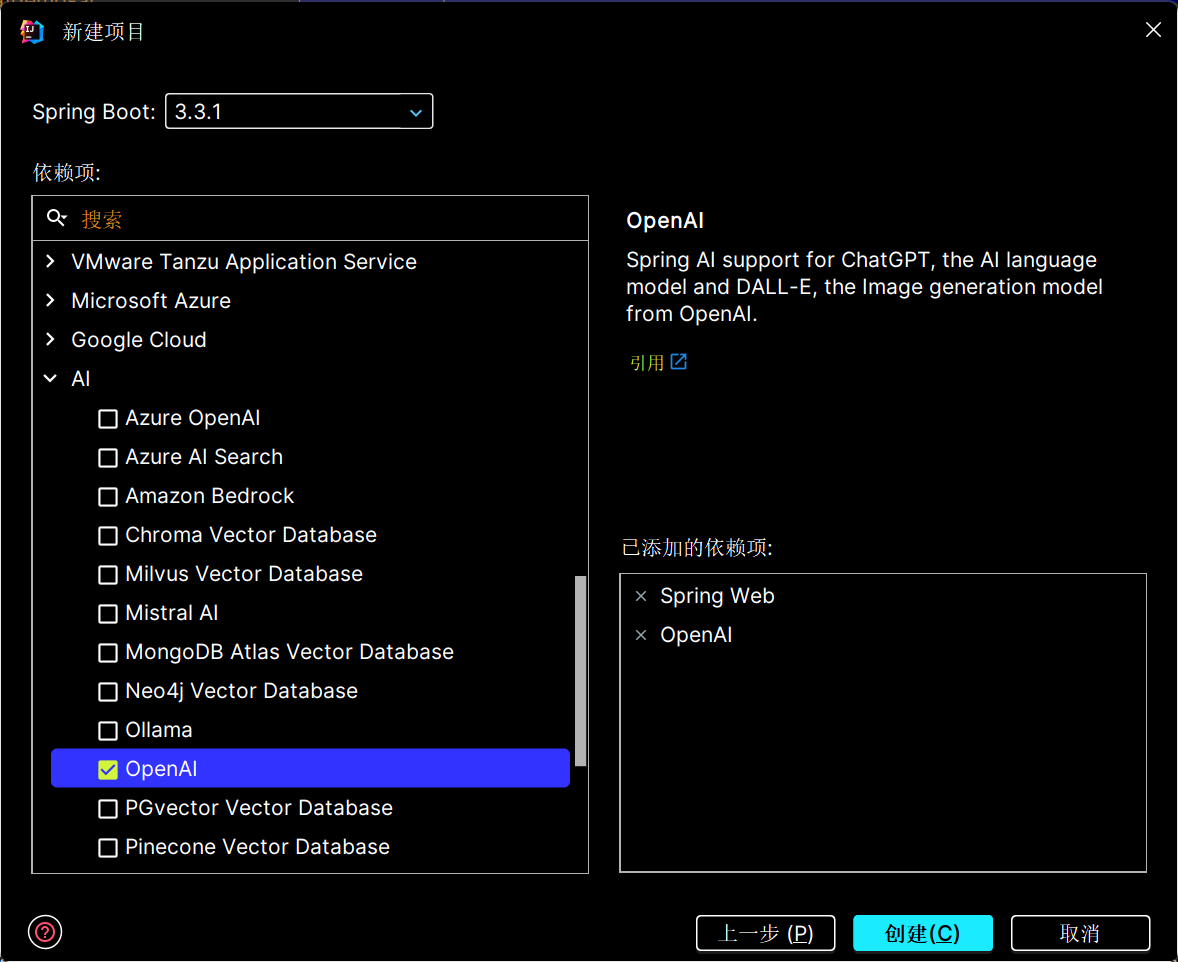
创建完成后,pom文件如下所示
<?xml version="1.0" encoding="UTF-8"?>
<project xmlns="http://maven.apache.org/POM/4.0.0" xmlns:xsi="http://www.w3.org/2001/XMLSchema-instance"
xsi:schemaLocation="http://maven.apache.org/POM/4.0.0 https://maven.apache.org/xsd/maven-4.0.0.xsd">
<modelVersion>4.0.0</modelVersion>
<parent>
<groupId>org.springframework.boot</groupId>
<artifactId>spring-boot-starter-parent</artifactId>
<version>3.3.1</version>
<relativePath/> <!-- lookup parent from repository -->
</parent>
<groupId>com.demoAi</groupId>
<artifactId>demo-ai</artifactId>
<version>0.0.1-SNAPSHOT</version>
<name>demo-ai</name>
<description>demo-ai</description>
<url/>
<licenses>
<license/>
</licenses>
<developers>
<developer/>
</developers>
<scm>
<connection/>
<developerConnection/>
<tag/>
<url/>
</scm>
<properties>
<java.version>17</java.version>
<spring-ai.version>1.0.0.M1</spring-ai.version>
</properties>
<dependencyManagement>
<dependencies>
<dependency>
<groupId>org.springframework.ai</groupId>
<artifactId>spring-ai-bom</artifactId>
<version>1.0.0-M1</version>
<type>pom</type>
<scope>import</scope>
</dependency>
</dependencies>
</dependencyManagement>
<dependencies>
<dependency>
<groupId>org.springframework.boot</groupId>
<artifactId>spring-boot-starter-web</artifactId>
</dependency>
<dependency>
<groupId>org.springframework.ai</groupId>
<artifactId>spring-ai-openai-spring-boot-starter</artifactId>
</dependency>
<dependency>
<groupId>org.springframework.boot</groupId>
<artifactId>spring-boot-starter-test</artifactId>
<scope>test</scope>
</dependency>
</dependencies>
<build>
<plugins>
<plugin>
<groupId>org.springframework.boot</groupId>
<artifactId>spring-boot-maven-plugin</artifactId>
</plugin>
</plugins>
</build>
<repositories>
<repository>
<id>spring-milestones</id>
<name>Spring Milestones</name>
<url>https://repo.spring.io/milestone</url>
<snapshots>
<enabled>false</enabled>
</snapshots>
</repository>
<repository>
<id>spring-snapshots</id>
<name>Spring Snapshots</name>
<url>https://repo.spring.io/snapshot</url>
<releases>
<enabled>false</enabled>
</releases>
</repository>
</repositories>
</project>文件解析:
-
通过<dependencyManagement>引入<version>1.0.0-M1</version>父工程,所有子项目的依赖便无需显式列出版本号。
-
repositories中两个为储存库。
修改文件配置
修改application.yml配置文件
添加OpenAI配置。
spring:
  ai:
    openai:
      api-key: {你的OpenAI key}
      base-url: {转发地址}
添加Controller
package com.demoai.demoai.controller;
import org.springframework.ai.chat.client.ChatClient;
import org.springframework.web.bind.annotation.*;
@RestController
@RequestMapping("/ai")
public class MyAiController {
private final ChatClient chatClient;
public MyAiController(ChatClient.Builder builder){
this.chatClient=builder.build();
}
@GetMapping("/chat")
public String generation(@RequestParam(value = "message",defaultValue = "今天天气怎么样") String message) {
return chatClient.prompt()
.user(message)
.call()
.content();
}
}文件解析如下:
-
private final ChatClient chatClient;:创建会话客户端,不能使用@Autowird注入。
-
ChatClient.Builder:构造器。
-
chatClient内方法解析:
-
prompt():用户设置提示题。
-
user(message):用户问题信息。
-
call():对大模型进行远程请求。
-
content();:返回文本。
-
测试

注意事项
1. 添加依赖时maven未找到依赖
原因:在之前项目中,maven中的源改为了阿里的源,但里面还未添加最新的依赖。
解决办法:改回原文件即可。
(改回以下即可)
<mirror>
    <id>mirrorId</id>
    <mirrorOf>repositoryId</mirrorOf>
    <name>Human Readable Name for this Mirror.</name>
    <url>http://my.repository.com/repo/path</url>
</mirror>


 3224
3224

 被折叠的 条评论
为什么被折叠?
被折叠的 条评论
为什么被折叠?
 到【灌水乐园】发言


