


一些关于vue中路由的学习笔记,希望对你的学习有所帮助!
文章目录
一.路由的基本使用
//main.js
import router from './router'
createApp(App).use(router).mount('#app')
//router/index.js
import { createRouter, createWebHashHistory } from 'vue-router'
import Home from '../components/Home.vue'
import Login from './../components/Login.vue'
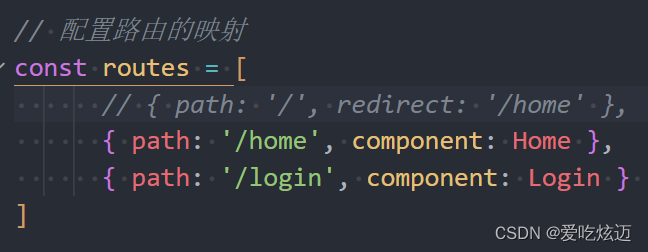
// 配置路由的映射
const routes = [
{ path: '/', redirect: '/home' },
{ path: '/home', component: Home },
{ path: '/login', component: Login }
]
// 创建router对象
const router = createRouter({
routes,
history:createWebHashHistory()
})
export default router
//App.vue
<template>
<div class="app">
<router-view></router-view>
</div>
</template>
//components/Home.vue
<template>
<div class="home">
<h2>home页面</h2>
</div>
</template>
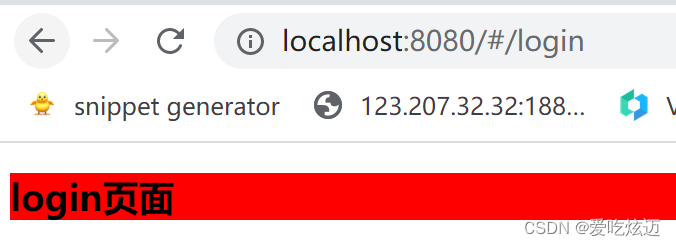
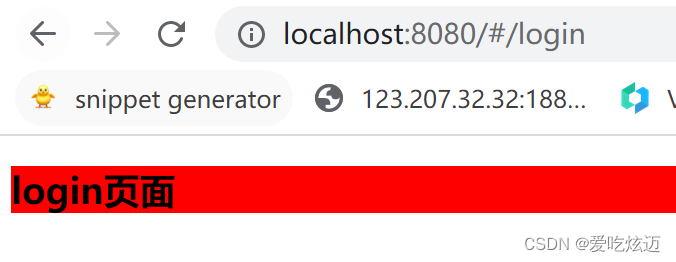
//components/Login.vue
<template>
<div class="login">
<h2>login页面</h2>
</div>
</template>
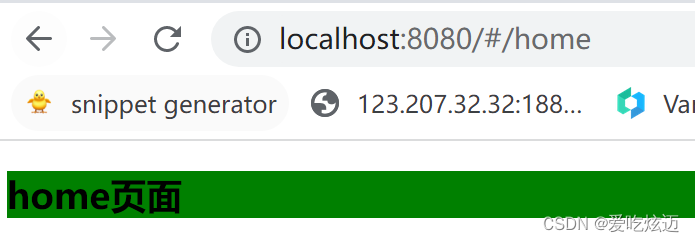
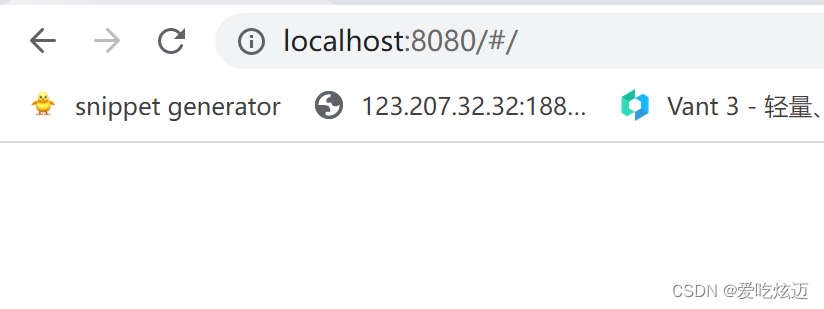
1.路由的默认路径
- 默认情况下, 进入网站的首页, 我们希望渲染首页的内容
- 但是我们的实现中, 默认没有显示首页组件, 必须让用户点击才可以;
- 如何可以让路径默认跳到到首页, 并且渲染首页组件呢?
- 我们可以在routes中再配置一个映射:
- path配置的是根路径: /
- redirect是重定向, 也就是我们将根路径重定向到/home的路径下, 这样就可以得到我们想要的结果了.
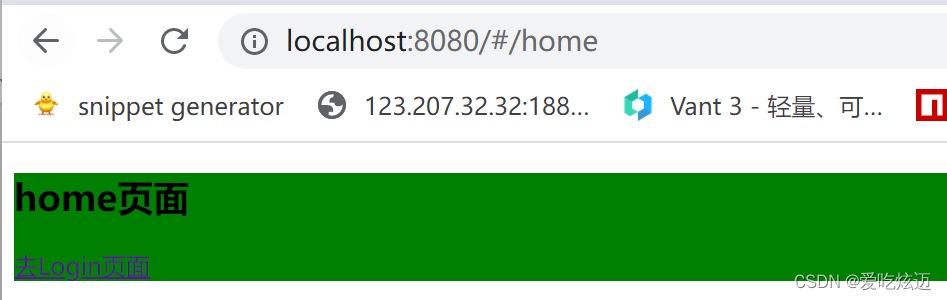
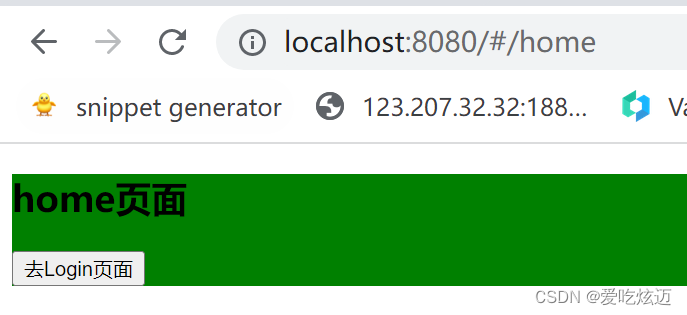
例如!!!:没有配置默认路径:不会跳转

配置了默认路径!!!:直接会跳转到Home页面
2.history模式
- createWebHashHistory
import { createRouter, createWebHashHistory } from 'vue-router'

// 创建router对象
const router = createRouter({
  routes,
  history:createWebHashHistory()
})

- createWebHistory
import { createRouter, createWebHistory } from 'vue-router'

// 创建router对象
const router = createRouter({
  routes,
  history:createWebHistory()
})

二.路由跳转的三种方式
- 举个栗子!!从Home页面跳转到login页面
1. router-link
(1)属性配置
- router-link事实上有很多属性可以配置:
- to属性:
- 是一个字符串,或者是一个对象
- replace属性:
- 设置 replace 属性的话,当点击时,会调用 router.replace(),而不是router.push();
- active-class属性:
- 设置激活a元素后应用的class,默认是router-link-active
- exact-active-class属性:
- 链接精准激活时,应用于渲染的
<a>的 class,默认是router-link-exact-active;
- 链接精准激活时,应用于渲染的
(2)跳转
- 实现点击“去Login页面”完成跳转
-
点击前:
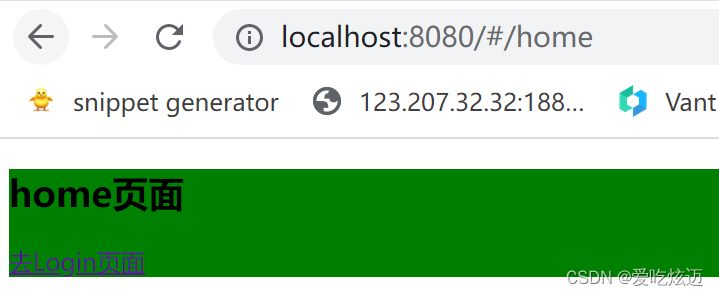
-
点击后:
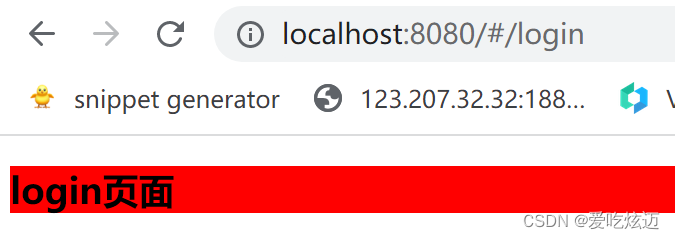
-
<template>
  <div class="home">
      <h2>home页面</h2>
      <router-link to="/login">去Login页面</router-link>
  </div>
</template>
2.OPtion API跳转
- 实现点击“去Login页面”按钮完成跳转
- 点击按钮前:
- 点击按钮后
- 点击按钮前:
<template>
  <div class="home">
      <h2>home页面</h2>
      <button @click="goLogin">去Login页面</button>
  </div>
</template>
(1)实现跳转
//components/Home.vue
<script>
export default {
methods: {
  goLogin() {
    this.$router.push('/login')
  }
 }
}
</script>
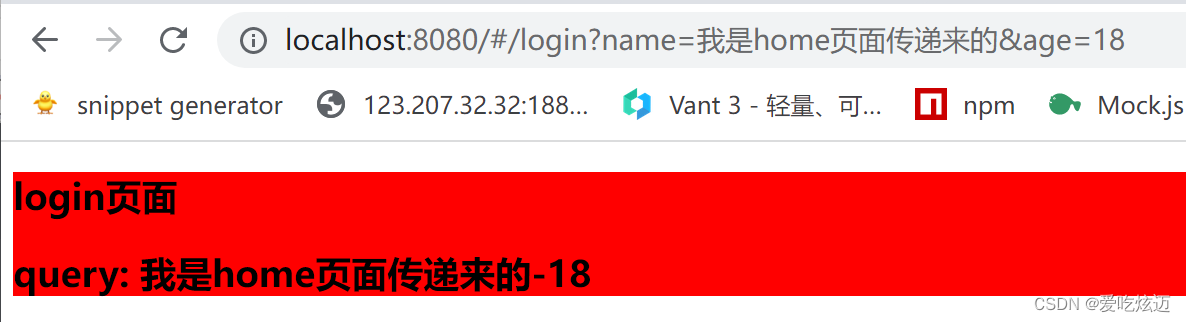
(2)通过query传递参数
//components/Home.vue
<script>
export default {
  methods: {
  goLogin() {
    this.$router.push({
      path: '/login',
      query: { name:'我是home页面传递来的',age:18 }
    })
  }
 }
}
</script>
3.Composition API跳转
<script setup>
	import { useRouter } from 'vue-router'
	const router = useRouter()
	const goLogin = () => {
	router.push('/login')
	}
</script>
三.路由懒加载
- 当打包构建应用时,JavaScript 包会变得非常大,影响页面加载:
- 如果我们能把不同路由对应的组件分割成不同的代码块,然后当路由被访问的时候才加载对应组件,这样就会更加高效;
- 也可以提高首屏的渲染效率;
- 其实这里还是webpack的分包知识,而Vue Router默认就支持动态来导入组件:
- 这是因为component可以传入一个组件,也可以接收一个函数,该函数 需要返回一个Promise;
- 而import函数就是返回一个Promise;
const routes = [
      { path: '/', redirect: '/home' },
       { path: '/home', component: () => import('../components/Home.vue') },
       { path: '/login', component: () => import('../components/Login.vue')}

]
四.路由的其他属性
- name属性:路由记录独一无二的名称;
- meta属性:自定义的数据;
{
    name:"home-router",
    path: '/home',
    component: () => import('../components/Home.vue'),
    meta: {
      name: "abc",
      age:18
    }
 }
五.路由的嵌套
- 什么是路由的嵌套呢?
- 目前我们匹配的Home、Login、User等都属于第一层路由,我们在它们之间可以来回进行切换;
- 但是呢,我们Home页面本身,也可能会有多个组件之间来回切换:
- 比如Home中包括Product、Message,它们可以在Home内部来回切换;
- 这个时候我们就需要使用嵌套路由,在Home中也使用 router-view 来占位之后需要渲染的组件;
1.基本使用
//router/index.js
{
    path: '/home',
    component: () => import('../components/Home.vue'),
    children: [
      {
        path: '',
        redirect: '/home'
      },
      {
        path: '/product',
        component: () => import('../components/Product.vue'),
      },
      {
        path: '/message',
        component: () => import('../components/Message.vue'),
      }
   ]
  },
//components/Home.vue
<template>
  <div class="home">
      <h2>home页面</h2>
      <router-view></router-view>
  </div>
</template>
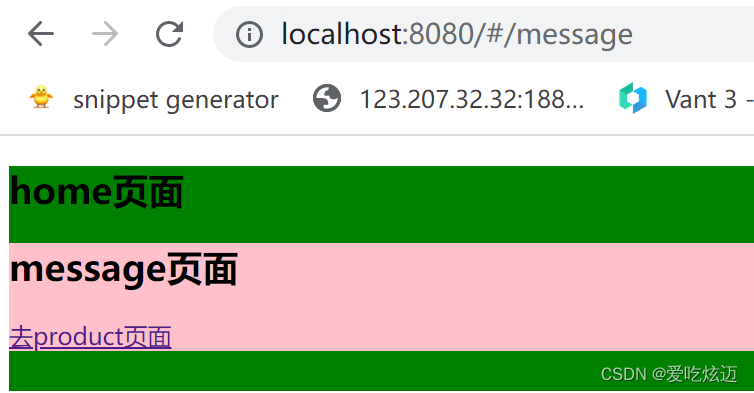
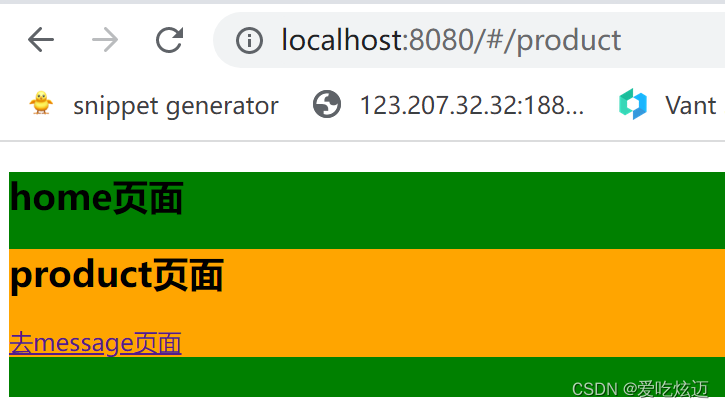
//components/Message.vue
<template>
    <div class="message">
        <h2>message页面</h2>
        <router-link to="/product">去product页面</router-link>
    </div>
</template>
//components/Product.vue
<template>
    <div class="product">
        <h2>product页面</h2>
        <router-link to="/message">去message页面</router-link>
    </div>
</template>
六.动态路由
1.动态路由基本匹配
- 很多时候我们需要将给定匹配模式的路由映射到同一个组件:
- 例如,我们可能有一个 User 组件,它应该对所有用户进行渲染,但是用户的ID是不同的;
- 在Vue Router中,我们可以在路径中使用一个动态字段来实现,我们称之为 路径参数;
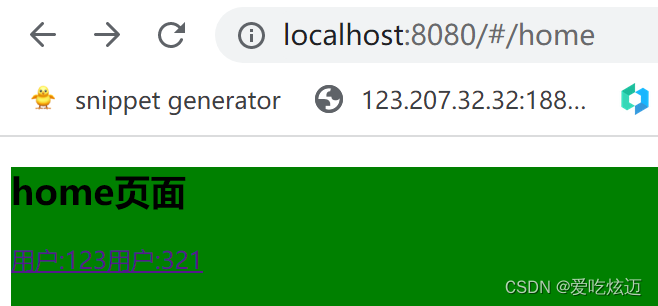
//components/Home.vue
<template>
  <div class="home">
      <h2>home页面</h2>
      <router-link to="/user/123">用户:123</router-link>
      <router-link to="/user/321">用户:321</router-link>
  </div>
</template>
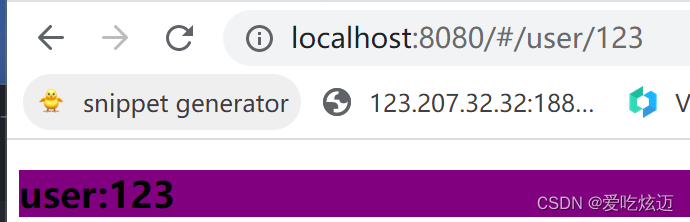
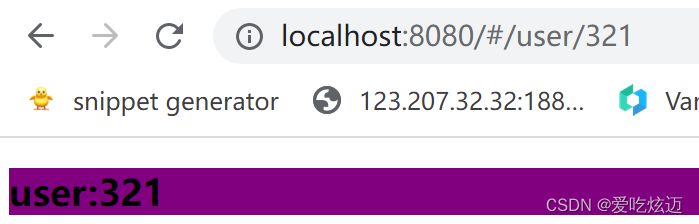
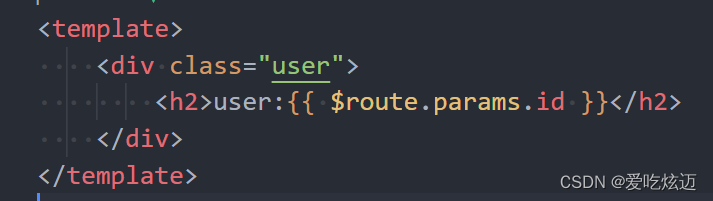
//components/User.vue
<template>
    <div class="user">
        <h2>user:{{ $route.params.id }}</h2>
    </div>
</template>
点击“用户:123”:
点击“用户:321”:
1.获取动态路由的值
- 那么在User中如何获取到对应的值呢?
- 在template中,直接通过 $route.params获取值;
- 在created中,通过 this.$route.params获取值;
- 在setup中,我们要使用 vue-router库给我们提供的一个hook useRoute;
- 该Hook会返回一个Route对象,对象中保存着当前路由相关的值;
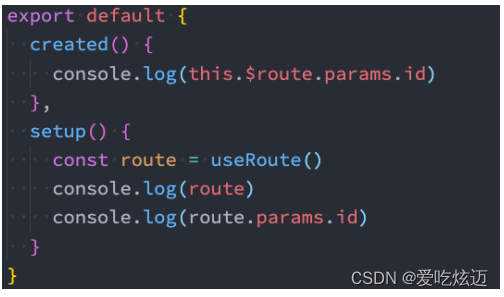
- 该Hook会返回一个Route对象,对象中保存着当前路由相关的值;
七.动态管理路由
1.动态添加路由
- 某些情况下我们可能需要动态的来添加路由:
- 比如根据用户不同的权限,注册不同的路由;
- 这个时候我们可以使用一个方法 addRoute;
router.addRoute({
    path: "/admin",
    component: () => import("../components/Admin.vue")
  })
- 如果我们是为route添加一个children路由,那么可以传入对应的name:
router.addRoute("home", {
    path: "vip",
    component: () => import("../components/HomeVip.vue")
  })
2.动态管理路由的其他方法
- 动态删除路由
- 方式一:添加一个name相同的路由;
- 方式二:通过removeRoute方法,传入路由的名称;
- 方式三:通过addRoute方法的返回值回调;
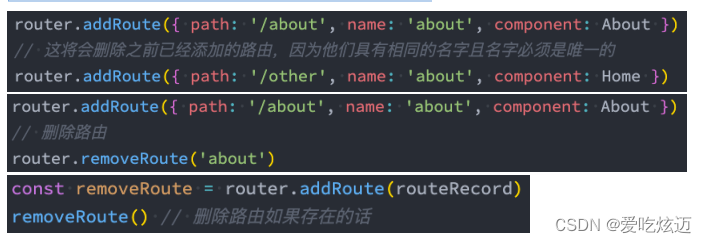
- 其他方法
- router.hasRoute():检查路由是否存在。
- router.getRoutes():获取一个包含所有路由记录的数组。
八.路由导航守卫
- vue-router 提供的导航守卫主要用来通过跳转或取消的方式守卫导航。
- 全局的前置守卫beforeEach是在导航触发时会被回调的:
- 它有两个参数:
- to:即将进入的路由Route对象;
- from:即将离开的路由Route对象;
- 它有返回值:
- false:取消当前导航;
- 不返回或者undefined:进行默认导航;
- 返回一个路由地址:
- 可以是一个string类型的路径;
- 可以是一个对象,对象中包含path、query、params等信息;
- 可选的第三个参数:next(不推荐使用)
- 在Vue2中我们是通过next函数来决定如何进行跳转的;
- 但是在Vue3中我们是通过返回值来控制的,不再推荐使用next函数,这是因为开发中很容易调用多次next;
// 进行任何的路由跳转之前, 传入的beforeEach中的函数都会被回调
// 需求: 进入到订单(order)页面时, 判断用户是否登录(isLogin -> localStorage保存token)
// 情况一: 用户没有登录, 那么跳转到登录页面, 进行登录的操作
// 情况二: 用户已经登录, 那么直接进入到订单页面
router.beforeEach((to, from) => {
   1.进入到任何别的页面时, 都跳转到login页面
   if (to.path !== "/login") {
    return "/login"
   }

  // 2.进入到订单页面时, 判断用户是否登录
  const token = localStorage.getItem("token")
  if (to.path === "/order" && !token) {
    return "/login"
  }
})
<script setup>
import { useRouter } from 'vue-router'

const router = useRouter()

function loginClick() {
  // 向服务器发送请求, 服务器会返回token
  localStorage.setItem("token", "cba")

  // 跳转到order页面
  router.push("/order")
}
</script>


 4553
4553


 被折叠的 条评论
为什么被折叠?
被折叠的 条评论
为什么被折叠?
 到【灌水乐园】发言


