


前言
最近在学习自定义控件方面的知识,光看的话,始终是不会写。于是准备自己动手写一些自定义控件,先看下面一张图
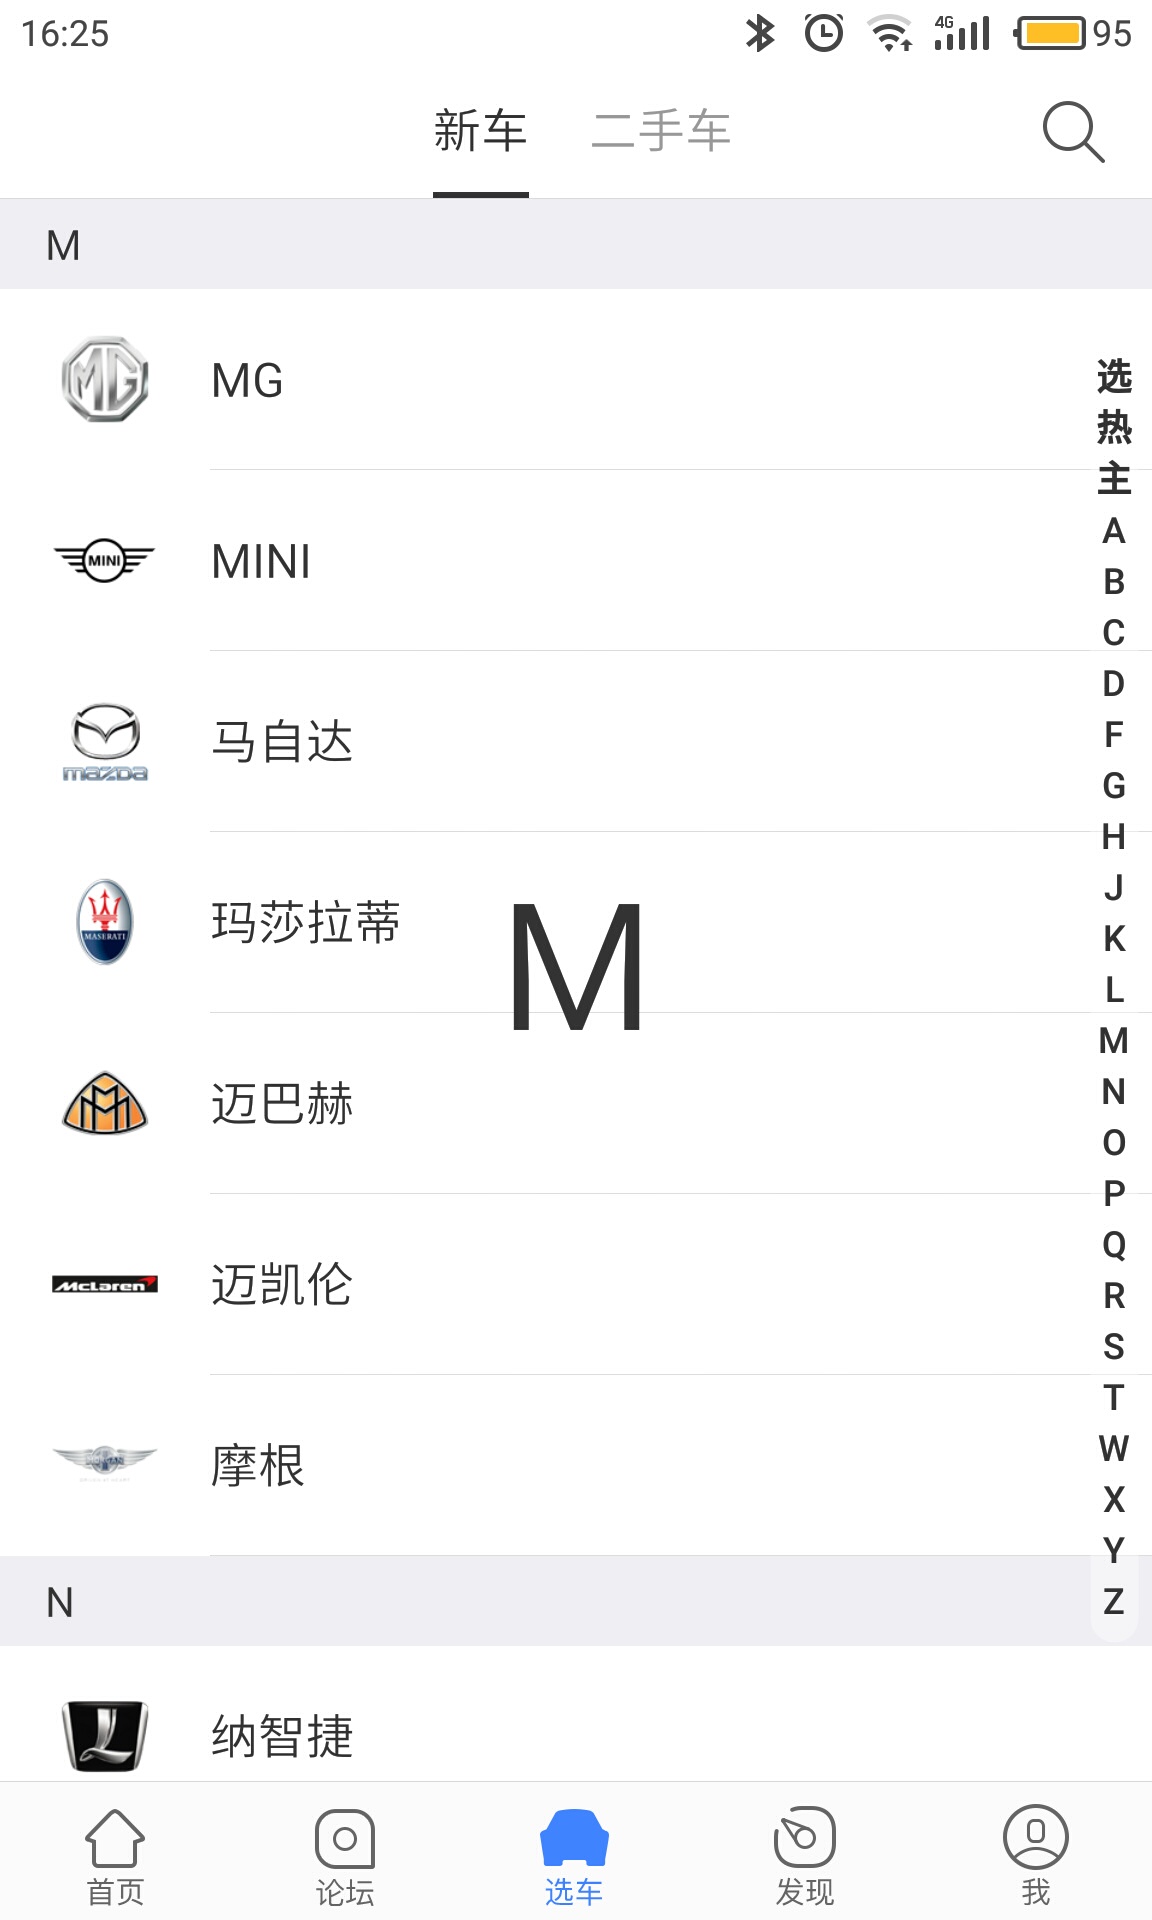
我想不出意外的话,这个按字母或汉字进行索引就是一个自定义控件吧!而至于具体是怎么实现的,这正是我需要去实现的!
刚开始的时候,感觉不知道从什么地方下手,这就是光看而没动手写过所带来的不良反应啊!于是先看了看网上有没有比较与众不同的这方面的索引类控件,于是发现了这个

于是决定了,就试着实现下这个效果看看!
动手之前,先仔细看了下它们的实现效果,发现它们都是以覆盖的方式,仔细看的话,和列表的分割线相交范围附近的表现始终感觉不太友好,于是看了看WaveSideBar的布局应用
<?xml version="1.0" encoding="utf-8"?>
<RelativeLayout xmlns:android="http://schemas.android.com/apk/res/android"
    xmlns:tools="http://schemas.android.com/tools"
    android:layout_width="match_parent"
    android:layout_height="match_parent"
    tools:context="cc.solart.wavesidebar.MainActivity">

    <android.support.v7.widget.RecyclerView
        android:id="@+id/recycler_view"
        android:layout_width="match_parent"
        android:layout_height="match_parent"/>

    <cc.solart.wave.WaveSideBarView
        android:id="@+id/side_view"
        android:layout_width="match_parent"
        android:layout_height="match_parent"/>

</RelativeLayout>
嘿,果然啊,布局方式就是覆盖的方式,那么,我就要重新挑战刺激点的,那就是让这个索引控件作为一个容器控件来使用(即继承ViewGroup),这样也顺便练习下事件的分发流程!话不多说,直接开整!
实战
刚开始动手前,一直不知道该怎么下手,犹犹豫豫,一上午就过去了!于是准备先从画线开始,先画出右侧的那条“竖线”,然后再在里面写上26个字母。
画索引字符的背景
package com.kzax1l.stunt.index;

import android.content.Context;
import android.graphics.Canvas;
import android.util.AttributeSet;
import android.view.ViewGroup;

/**
 * Created by Zsago on 2017/3/30.
 *
 * @since 1.0.0
 */
public class CharacterIndexView extends ViewGroup {
    private final String[] ARRAY_CHARACTER = {"A", "B", "C", "D", "E", "F", "G",
            "H", "I", "J", "K", "L", "M", "N",
            "O", "P", "Q", "R", "S", "T",
            "U", "V", "W", "X", "Y", "Z"};

    public CharacterIndexView(Context context) {
        this(context, null);
    }

    public CharacterIndexView(Context context, AttributeSet attrs) {
        super(context, attrs);
    }

    public CharacterIndexView(Context context, AttributeSet attrs, int defdefStyleAttr) {
        super(context, attrs, defdefStyleAttr);
    }

    @Override
    protected void onFinishInflate() {
        super.onFinishInflate();
    }

    @Override
    protected void onMeasure(int widthMeasureSpec, int heightMeasureSpec) {
        super.onMeasure(widthMeasureSpec, heightMeasureSpec);
    }

    @Override
    protected void onLayout(boolean changed, int l, int t, int r, int b) {
    }

    @Override
    protected void onDraw(Canvas canvas) {
        super.onDraw(canvas);
    }
}按照绘制流程的三个步骤:measure -> layout -> draw,先进行测量(measure)过程,也就是重写onMeasure(int, int)
    protected void onMeasure(int widthMeasureSpec, int heightMeasureSpec) {
        super.onMeasure(widthMeasureSpec, heightMeasureSpec);
        int widthMode = MeasureSpec.getMode(widthMeasureSpec);
        int heightMode = MeasureSpec.getMode(heightMeasureSpec);
        int widthSize = MeasureSpec.getSize(widthMeasureSpec);
        int heightSize = MeasureSpec.getSize(heightMeasureSpec);
        setMeasuredDimension(widthSize, heightSize);
}目前先假设我们的CharacterIndexView控件在XML布局中设置的宽高都是match_parent,所以上面这么实现也很好理解。
至于布局(layout)过程,就是对其内部的所有子控件进行布局,同样,目前的目标是先画那条“竖线”,所以就暂不考虑子控件的情况
    protected void onLayout(boolean changed, int l, int t, int r, int b) {
        int childCount = getChildCount();
        if (childCount == 0) return;
    }
其实上面可以什么代码都不写的,反正目前不考虑有子控件的情况。
好了,终于该到画线的时候了,那么就需要实现绘画(draw)过程,那么就要重写onDraw(Canvas),额绘画又少不了Paint
package com.kzax1l.stunt.index;
...
public class CharacterIndexView extends ViewGroup {
...
private Paint mWritePaint;
private Paint mBackgroudPaint;
...
public CharacterIndexView(Context context, AttributeSet attrs) {
super(context, attrs);
initPaintOfWrite();
initPaintOfBackgroud();
}
private void initPaintOfWrite() {
if (mWrite != null) return;
mWritePaint = new Paint();
mWritePaint.setStyle(Paint.Style.FILL);
mWritePaint.setColor(Color.BLACK);
}
private void initPaintOfBackgroud() {
if (mBackgroudPaint != null) return;
mBackgroudPaint = new Paint();
mBackgroudPaint.setColor(Color.BLUE);
mBackgroudPaint.setStrokeWidth(5);
mBackgroudPaint.setStyle(Paint.Style.FILL);
}
...
@Override
protected void onDraw(Canvas canvas) {
super.onDraw(canvas);
int left = getLeft();
int top = getTop();
int right = getRight();
int bottom = getBottom();
canvas.drawLine(left, top, right, top, mBackgroudPaint);
canvas.drawLine(right, top, right, bottom, mBackgroudPaint);
}
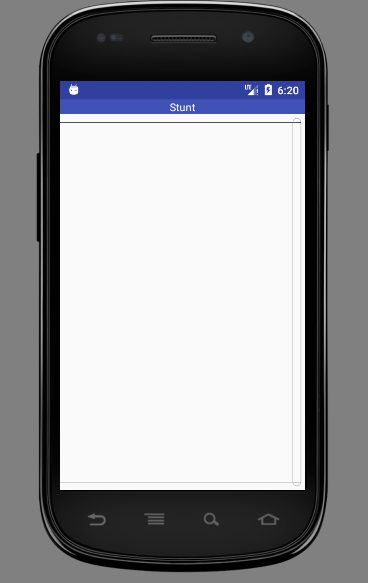
}啊,先应用到XML布局来看看效果
<?xml version="1.0" encoding="utf-8"?>
<LinearLayout xmlns:android="http://schemas.android.com/apk/res/android"
android:layout_width="match_parent"
android:layout_height="match_parent"
android:orientation="vertical">
<TextView
android:layout_width="match_parent"
android:layout_height="wrap_content"
android:background="@color/colorPrimary"
android:gravity="center_horizontal"
android:text="@string/app_name"
android:textColor="@android:color/white"/>
<com.kzax1l.stunt.index.CharacterIndexView
android:layout_width="match_parent"
android:layout_height="match_parent"/>
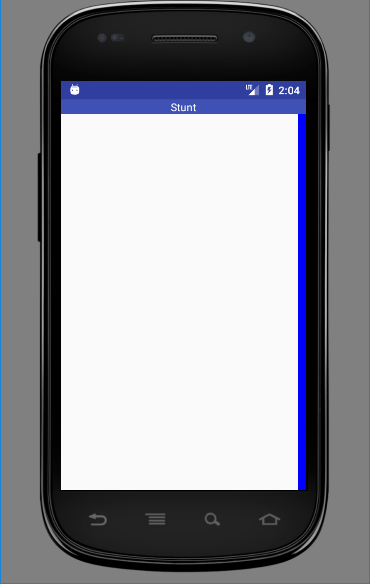
</LinearLayout>运行下效果看看
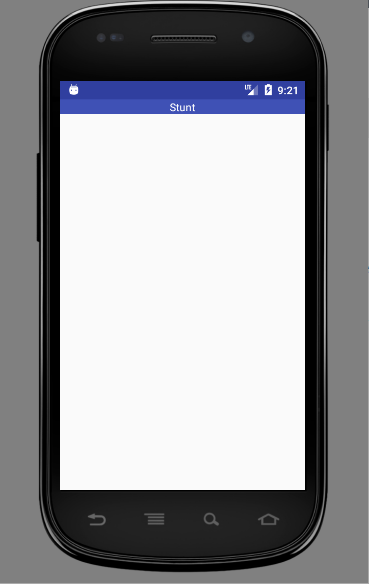
额,什么情况?一阵DEBUG排查,发现onDraw(Canvas)根本就没有被调用!怎么回事呢?
原来啊,ViewGroup默认情况下,会被设置成WILL_NOT_DRAW,这是从性能考虑,这样一来,onDraw(Canvas)就不会被调用了。如果我们要重写一个ViweGroup的onDraw(Canvas)方法,有两种方法
在构造函数里面,给其设置一个背景颜色,如#00000000
在构造函数里面,调用
setWillNotDraw(false),去掉其WILL_NOT_DRAW flag
有了上面的认知,那么就好处理了
public CharacterIndexView(Context context, AttributeSet attrs) {
...
setWillNotDraw(false);
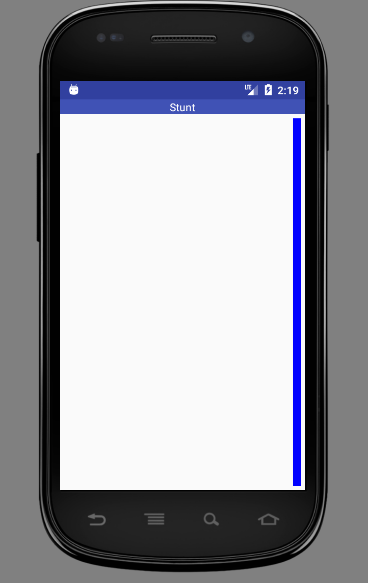
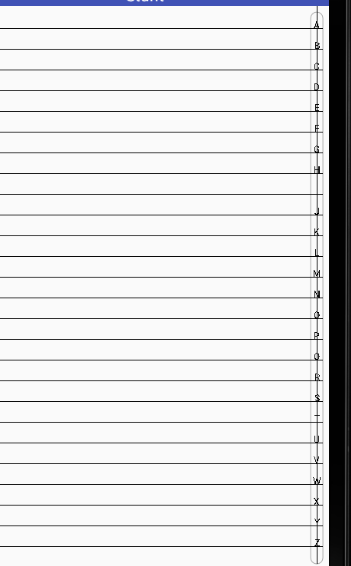
}这下应该就没问题了吧,运行下效果看看
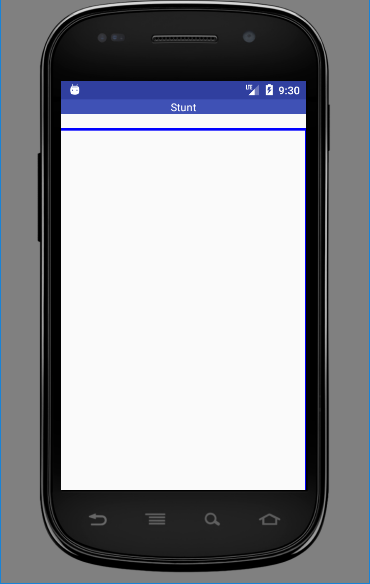
线是画出来了,但是,蓝色横线和TextView之间的空白是什么情况?
经过思考,难道是坐标系方面的知识没应用到位?查了下资料,一张图就明白了

看看我画线的代码
        int left = getLeft();
        int top = getTop();
        int right = getRight();
        int bottom = getBottom();
        canvas.drawLine(left, top, right, top, mBackgroudPaint);
        canvas.drawLine(right, top, right, bottom, mBackgroudPaint);
就拿我横线的起点和终点坐标分别为(getLeft(), getTop())、(getRight(), getTop()),而getTop()的返回值是相对父控件而言!那么就好办了
    protected void onDraw(Canvas canvas) {
        super.onDraw(canvas);
        int left = getLeft();
        int top = getTop();
        int right = getRight();
        int bottom = getBottom();
        canvas.drawLine(0, 0, right - left, 0, mBackgroudPaint);
        canvas.drawLine(right, 0, right, bottom, mBackgroudPaint);
    }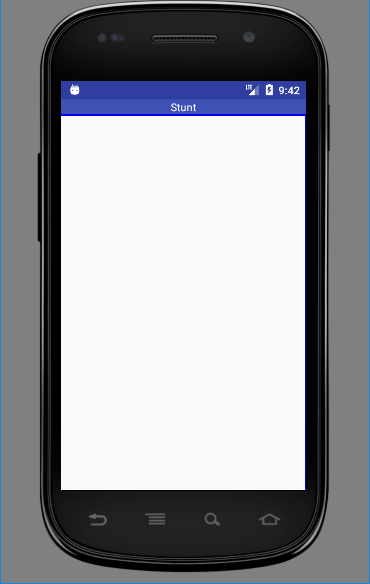
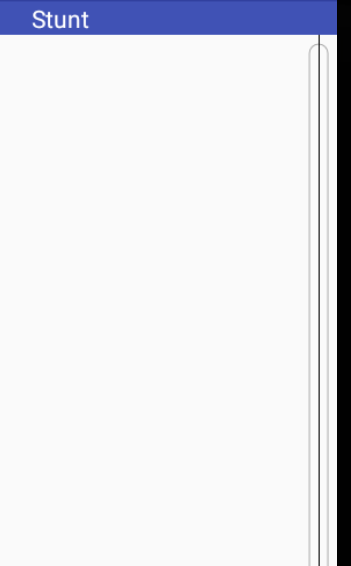
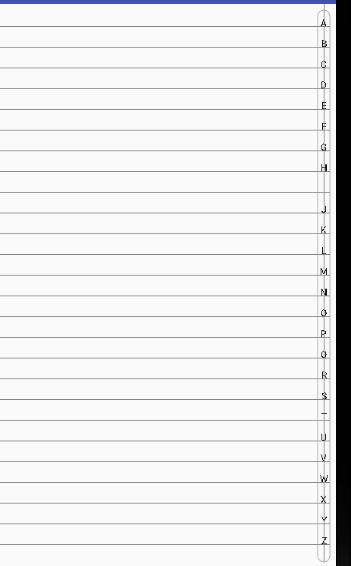
效果有些不太清楚,不过细看,应该会发现,目前已经解决了上面的问题。
好了,下面该是。。。好吧,又不知道该怎么做了,哎,果然纸上谈兵的症状又暴露出来了!没办法,先去研究下WaveSideBar的源码再说(原谅我水平不足吧)!
先根据“竖线”里面的字体大小来画出合适宽度的“竖线”。通过效果图发现,用线画出来不是个好的选择,而且上下两头还是圆角的,所以可以考虑使用drawRoundRect(RectF, float, float, Paint)来实现。
...
public class CharacterIndexView extends ViewGroup {
    ...

    private int mTextSize = 16;

    @Override
    protected void onDraw(Canvas canvas) {
        super.onDraw(canvas);
        int left = getLeft();
        int top = getTop();
        int right = getRight();
        int bottom = getBottom();
        RectF rect = new RectF(right - mTextSize, 0, right, bottom);
        canvas.drawRoundRect(rect, 0, 0, mBackgroudPaint);
    }
}
现在的问题是上下右三个边应该有一定的边距,而且上下两边由于我用了(0, 0)来设置圆角半径,所以还没有生成圆角效果。
现在假设边距为“竖线”内部需要绘制的字体大小的一半
    protected void onDraw(Canvas canvas) {
        ...
        RectF rect = new RectF(right - mTextSize - mTextSize / 2, 0 + mTextSize / 2, right - mTextSize / 2, bottom - top - mTextSize / 2);
        canvas.drawRoundRect(rect, 0, 0, mBackgroudPaint);
    }
注意,确定下边距纵坐标需要用
bottom - top
下面再来设置圆角
protected void onDraw(Canvas canvas) {
...
canvas.drawRoundRect(rect, mTextSize / 2, mTextSize / 2, mBackgroudPaint);
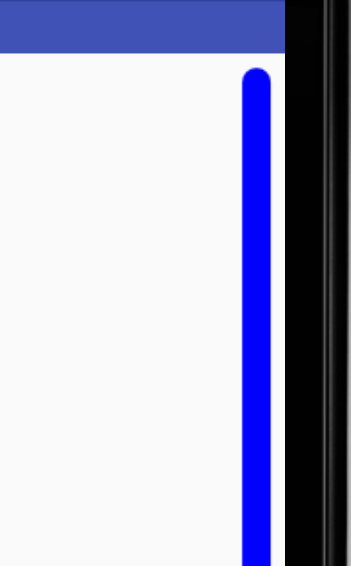
}至于为什么这里要设置圆角的两个半径值分别为宽度值的一半,我也说不清楚,可以查看相关资料

将图片放大,发现这个样子,很容易联想到,需要设置抗锯齿属性
    private void initPaintOfBackgroud() {
        ...
        mBackgroudPaint.setAntiAlias(true);
    }
当然,在绘制流程最好不要创建新的对象,这样可能会严重影响性能!
...
public class CharacterIndexView extends ViewGroup {
    ...
    private RectF mRectF = new RectF();
    ...
    protected void onDraw(Canvas canvas) {
        ...
        mRectF.set(right - mTextSize - mTextSize / 2,
                0 + mTextSize / 2, right - mTextSize / 2,
                bottom - top - mTextSize / 2);
        canvas.drawRoundRect(mRectF, mTextSize / 2, mTextSize / 2, mBackgroudPaint);
    }
}
和效果图比较,发现,效果图的“竖线”最外边是有一个边框的!我们可以用另外一个Paint来绘制这个边框,但是,完全没必要!因为这样不仅麻烦,而且过渡绘制严重!所以,变换下画笔的样式、颜色和宽度就行了!
    private void initPaintOfBackgroud() {
        ...
        mBackgroudPaint.setARGB(255, 169, 169, 169);
        mBackgroudPaint.setStrokeWidth(1);
        mBackgroudPaint.setStyle(Paint.Style.STROKE);
        ...
    }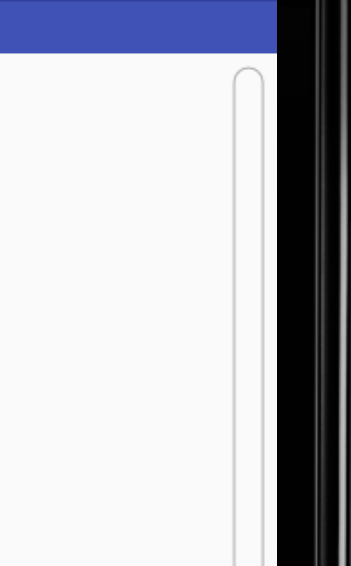
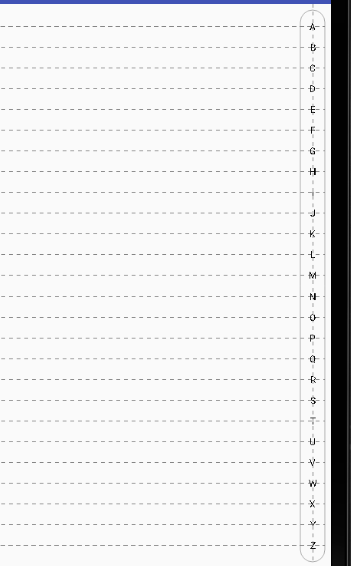
好,这样一来,又离目标进了一步!接下来该是填充索引字符了!
填充索引字符
在绘制索引字符之前,先要确定baseLine!默认baseLine的基准座标为(0, 0),先用线来标记索引字符所绘制的范围
    protected void onDraw(Canvas canvas) {
        super.onDraw(canvas);
        int l = getRight() - mTextSize - mTextSize / 2;
        int t = 0 + mTextSize / 2;
        int r = getRight() - mTextSize / 2;
        int b = getBottom() - getTop() - mTextSize / 2;
        mRectF.set(l, t, r, b);
        canvas.drawRoundRect(mRectF, mTextSize / 2, mTextSize / 2, mBackgroudPaint);

        mBaseLineY = t + mTextSize / 2;
        canvas.drawLine(0, mBaseLineY, r, mBaseLineY, mWritePaint);
        canvas.drawLine(0, b - mTextSize / 2, r, b - mTextSize / 2, mWritePaint);
    }
上下两根线之间就是我们要绘制的索引字符的范围!下面就将每个索引字符的baseLine画出来
    protected void onDraw(Canvas canvas) {
        super.onDraw(canvas);
        int l = getRight() - mTextSize - mTextSize / 2;
        int t = mTextSize / 2;
        int r = getRight() - mTextSize / 2;
        int b = getBottom() - getTop() - mTextSize / 2;
        mRectF.set(l, t, r, b);
        canvas.drawRoundRect(mRectF, mTextSize / 2, mTextSize / 2, mBackgroudPaint);

        mBaseLineY = t + mTextSize / 2;
        int itemHeight = (b - t) / ARRAY_CHARACTER.length;
        mBaseLineY += itemHeight / 2;
        for (int i = 0; i < ARRAY_CHARACTER.length; i++) {
            canvas.drawLine(0, mBaseLineY, r, mBaseLineY, mWritePaint);
            mBaseLineY += itemHeight;
        }
    }
接下来需要确定索引字符的中点纵坐标
protected void onDraw(Canvas canvas) {
        super.onDraw(canvas);
        int l = getRight() - mTextSize - mTextSize / 2;
        int t = mTextSize / 2;
        int r = getRight() - mTextSize / 2;
        int b = getBottom() - getTop() - mTextSize / 2;
        mRectF.set(l, t, r, b);
        canvas.drawRoundRect(mRectF, mTextSize / 2, mTextSize / 2, mBackgroudPaint);

        int baseX = l + (r - l) / 2;
        canvas.drawLine(baseX, 0, baseX, b, mWritePaint);
    }
坐标都已经确定了,终于可以写字符了!
protected void onDraw(Canvas canvas) {
        super.onDraw(canvas);
        int l = getRight() - mTextSize - mTextSize / 2;
        int t = mTextSize / 2;
        int r = getRight() - mTextSize / 2;
        int b = getBottom() - getTop() - mTextSize / 2;
        mRectF.set(l, t, r, b);
        canvas.drawRoundRect(mRectF, mTextSize / 2, mTextSize / 2, mBackgroudPaint);

        mBaseLineY = t + mTextSize / 2;
        int baseX = l + (r - l) / 2;
        int itemHeight = (b - t) / ARRAY_CHARACTER.length;
        mBaseLineY += itemHeight / 2;
        for (String character : ARRAY_CHARACTER) {
            canvas.drawLine(0, mBaseLineY, r, mBaseLineY, mWritePaint);
            canvas.drawText(character, baseX, mBaseLineY, mWritePaint);
            mBaseLineY += itemHeight;
        }
        canvas.drawLine(baseX, 0, baseX, b, mWritePaint);
    }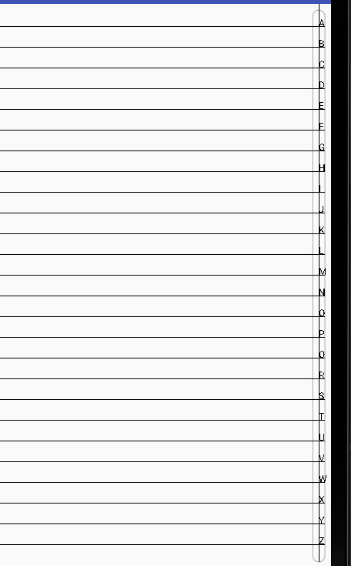
咦,索引字符怎么在我们标记的中间线的右边?回顾下相关知识,便知道问题出在哪了!
    private void initPaintOfWrite() {
        ...
        mWritePaint.setTextAlign(Paint.Align.CENTER);
    }
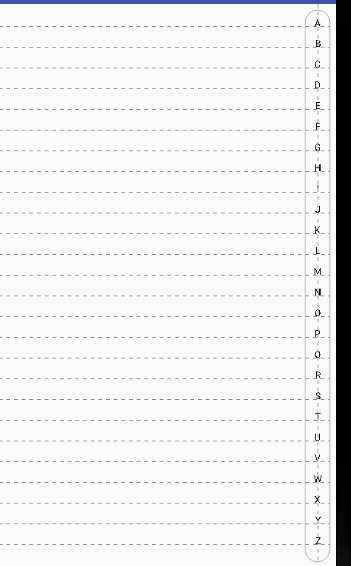
这个时候可以小得意一下了,终于把你绘制出来了!但是,革命尚未完成啊,继续吧。。。
先保留辅助线,并将其弄成虚线吧!
...
public class CharacterIndexView extends ViewGroup {
    ...
    private Paint mAssistPaint;

    public CharacterIndexView(Context context, AttributeSet attrs) {
        ...
        initPaintOfAssist();
        ...
    }

    private void initPaintOfAssist() {
        if (mAssistPaint != null) return;
        mAssistPaint = new Paint();
        mAssistPaint.setStyle(Paint.Style.FILL);
        mAssistPaint.setARGB(255, 128, 128, 128);
        mAssistPaint.setStrokeWidth(1);
        mAssistPaint.setStrokeCap(Paint.Cap.ROUND);
        mAssistPaint.setPathEffect(new DashPathEffect(new float[]{5f, 5f}, 0));
    }

    @Override
    protected void onDraw(Canvas canvas) {
        ...
        for (String character : ARRAY_CHARACTER) {
            canvas.drawLine(0, mBaseLineY, r, mBaseLineY, mAssistPaint);
            ...
        }
        canvas.drawLine(baseX, 0, baseX, b, mAssistPaint);
    }
}
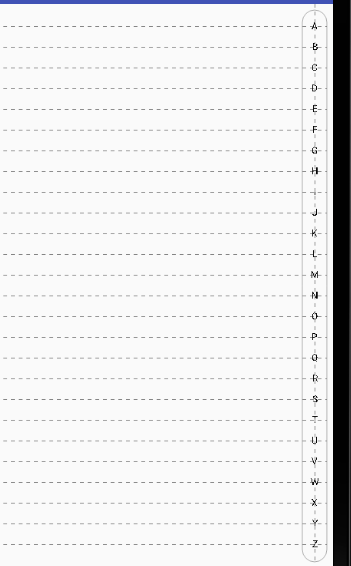
发现根本就不起作用,解决办法就是禁掉硬件加速!
    public CharacterIndexView(Context context, AttributeSet attrs) {
        ...
        setLayerType(View.LAYER_TYPE_SOFTWARE, null);
    }
索引列表的背景的左右边界和索引字符看起来有点拥挤,暂定扩大半个文字大小的边距
    protected void onDraw(Canvas canvas) {
        super.onDraw(canvas);
        int l = getRight() - 2 * mTextSize - mTextSize / 2;
        int t = mTextSize / 2;
        int r = getRight() - mTextSize / 2;
        int b = getBottom() - getTop() - mTextSize / 2;
        mRectF.set(l, t, r, b);
        canvas.drawRoundRect(mRectF, mTextSize, mTextSize, mBackgroudPaint);
        ...
    }
这个时候才发现,第一个和最后一个索引字符距边界是不一样的,原来是绘制文字的时候只做到了水平方向居中,没有做到竖直方向居中!明白问题后就好办了,需要用四格线中的bottom线和top线的差值来算出索引字符的高度,进而绘制索引字符的正确位置
protected void onDraw(Canvas canvas) {
        ...

        int metricTop = mBaseLineY - mWritePaint.getFontMetricsInt().top;
        int metricBottom = mBaseLineY + mWritePaint.getFontMetricsInt().bottom;
        int height = Math.abs(metricBottom - metricTop);

        for (String character : ARRAY_CHARACTER) {
            ...
            canvas.drawText(character, baseX, mBaseLineY + height / 2, mWritePaint);
            ...
        }
        ...
    }
这下才算是真正绘制完成!后面就是判定手势然后绘制被选中的索引字符,这还要用到贝塞尔曲线方面的知识!哎呀,虽然还长路漫漫,但回头一看,也算是有所成了,调整好心态,继续开整!
绘制选中的索引字符
在绘制选中的索引字符前,先做一些优化!显然的,在onDraw(Canvas)中尽量使用已有的变量
    protected void onDraw(Canvas canvas) {
        super.onDraw(canvas);
        mRectF.set(getRight() - 2 * mTextSize - mTextSize / 2,
                mTextSize / 2, getRight() - mTextSize / 2,
                getBottom() - getTop() - mTextSize / 2);
        canvas.drawRoundRect(mRectF, mTextSize, mTextSize, mBackgroudPaint);
        ...
    }
将每个索引字符的占用高度的变量用一个全局变量来存放
public class CharacterIndexView extends ViewGroup {
    ...
    private float mItemHeight;
    ...
    @Override
    protected void onDraw(Canvas canvas) {
        ...
        mItemHeight = (mRectF.bottom - mRectF.top - mTextSize) / ARRAY_CHARACTER.length;
        ...
    }
    ...
}
这里之所以要多减去一个mTextSize,是因为尽量将上下两个圆角的高度值减去掉!由于去掉了几个临时变量,所以之前其它几个变量的计算也需要做些微调
        float baseX = mRectF.left + (mRectF.right - mRectF.left) / 2;
        float baseLineY = mRectF.top + mTextSize / 2 + mItemHeight / 2;

        float metricTop = baseLineY - mWritePaint.getFontMetricsInt().top;
        float metricBottom = baseLineY + mWritePaint.getFontMetricsInt().bottom;
        float height = Math.abs(metricBottom - metricTop);
变量值类型基本从int变为了float,这样也更精确一些!
之前不考虑手势点击的情况下,用了个全局变量mBaseLineY来存放索引字符的基线纵坐标(现在更改为一个局部临时变量baseLineY了),每写入一个索引字符,写入下一个索引字符之前,都要加上mItemHeight。现在考虑手势后,这样就不利于判定手势点击的纵坐标区域属于哪个索引字符的范围!
新的思路就是根据索引字符数组的下标和mItemHeight的组合使用
    protected void onDraw(Canvas canvas) {
        ...
        for (int i = 0; i < ARRAY_CHARACTER.length; i++) {
            float posY = baseLineY + i * mItemHeight;
            canvas.drawLine(0, posY, mRectF.right, posY, mAssistPaint);
            canvas.drawText(ARRAY_CHARACTER[i], baseX, posY + height / 2, mWritePaint);
        }
        canvas.drawLine(baseX, 0, baseX, mRectF.bottom, mAssistPaint);
    }
不难发现,变量值类型从int变为了float后,位置坐标更精确了!
好了,下面就是该处理手势的事件分发流程了!先是要重写dispatchTouchEvent(MotionEvent),并且需要记录点击的位置所对应的索引字符在数组中对应的下标
public class CharacterIndexView extends ViewGroup {
    ...
    private int mPosition = -1;
    ...
    public boolean dispatchTouchEvent(MotionEvent ev) {
        float x = ev.getX();
        float y = ev.getY();
        int oldPos = mPosition;
        switch (ev.getAction()) {
            case MotionEvent.ACTION_DOWN:
                if (x < mRectF.left) return super.dispatchTouchEvent(ev);
                mPosition = (int) Math.floor((y - mRectF.top) / mItemHeight);
                if (mPosition > ARRAY_CHARACTER.length - 1) {
                    mPosition = -1;
                }
                if (oldPos != mPosition && mPosition != -1) invalidate();
                break;
            case MotionEvent.ACTION_MOVE:
                break;
            case MotionEvent.ACTION_UP:
                break;
            case MotionEvent.ACTION_CANCEL:
                break;
        }
        return true;
    }
}
然后是设置点击后的效果
public class CharacterIndexView extends ViewGroup {
    ...
    private Paint mChoosePaint;
    ...
    public CharacterIndexView(Context context, AttributeSet attrs) {
        ...
        initPaintOfChoose();
        ...
    }
    ...
    private void initPaintOfChoose() {
        if (mChoosePaint != null) return;
        mChoosePaint = new Paint();
        mChoosePaint.setStyle(Paint.Style.FILL);
        mChoosePaint.setColor(Color.RED);
        mChoosePaint.setTextAlign(Paint.Align.CENTER);
    }
    ...
    protected void onDraw(Canvas canvas) {
        ...
        for (int i = 0; i < ARRAY_CHARACTER.length; i++) {
            float posY = baseLineY + i * mItemHeight;
            canvas.drawLine(0, posY, mRectF.right, posY, mAssistPaint);
            if (i == mPosition) {
                canvas.drawText(ARRAY_CHARACTER[i], baseX, posY + height / 2, mChoosePaint);
            } else {
                canvas.drawText(ARRAY_CHARACTER[i], baseX, posY + height / 2, mWritePaint);
            }
        }
        canvas.drawLine(baseX, 0, baseX, mRectF.bottom, mAssistPaint);
    }
    ...
}
同时为了方便查看测试效果,先少设置些索引字符
private final String[] ARRAY_CHARACTER = {"A", "B", "C", "D", "E", "F", "G"};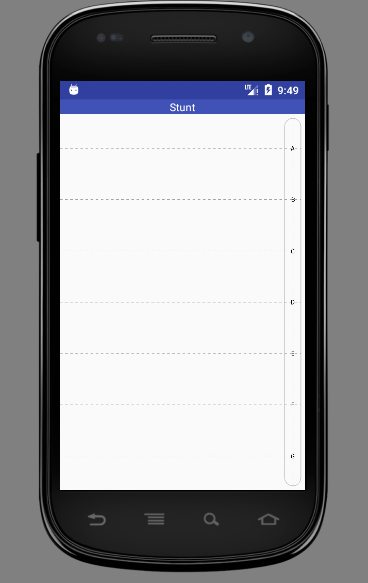
好吧,忘了设置画笔的字体大小
public class CharacterIndexView extends ViewGroup {
    ...
    private int mTextSize = 24;
    ...
    private void initPaintOfWrite() {
        ...
        mWritePaint.setTextSize(mTextSize);
        ...
    }

    private void initPaintOfChoose() {
        ...
        mChoosePaint.setTextSize(mTextSize);
        ...
    }
    ...
}
现在只有ACTION_DOWN有效,还得设置ACTION_MOVE
    public boolean dispatchTouchEvent(MotionEvent ev) {
        float x = ev.getX();
        float y = ev.getY();
        int oldPos = mPosition;
        switch (ev.getAction()) {
            case MotionEvent.ACTION_DOWN:
            case MotionEvent.ACTION_MOVE:
                if (x < mRectF.left) return super.dispatchTouchEvent(ev);
                mPosition = (int) Math.floor((y - mRectF.top) / mItemHeight);
                if (mPosition > ARRAY_CHARACTER.length - 1) {
                    mPosition = -1;
                }
                if (oldPos != mPosition && mPosition != -1) invalidate();
                break;
            case MotionEvent.ACTION_UP:
                break;
            case MotionEvent.ACTION_CANCEL:
                return super.dispatchTouchEvent(ev);
        }
        return true;
    }
万岁!又迈入了一个新的阶段了!接下来就该是画波纹效果了!
绘制波浪效果
为了不让绘制过程的代码过于混乱,先对不同的绘制流程进行整理
public class CharacterIndexView extends ViewGroup {

    ...

    protected void onDraw(Canvas canvas) {
        super.onDraw(canvas);
        drawBackground(canvas);
        drawCharacters(canvas);
    }

    private void drawBackground(Canvas canvas) {
        mRectF.set(getRight() - 2 * mTextSize - mTextSize / 2,
                mTextSize / 2, getRight() - mTextSize / 2,
                getBottom() - getTop() - mTextSize / 2);
        canvas.drawRoundRect(mRectF, mTextSize, mTextSize, mBackgroudPaint);
    }

    private void drawCharacters(Canvas canvas) {
        mItemHeight = (mRectF.bottom - mRectF.top - mTextSize) / ARRAY_CHARACTER.length;

        float baseX = mRectF.left + (mRectF.right - mRectF.left) / 2;
        float baseLineY = mRectF.top + mTextSize / 2 + mItemHeight / 2;

        float metricTop = baseLineY - mWritePaint.getFontMetricsInt().top;
        float metricBottom = baseLineY + mWritePaint.getFontMetricsInt().bottom;
        float height = Math.abs(metricBottom - metricTop);

        for (int i = 0; i < ARRAY_CHARACTER.length; i++) {
            float posY = baseLineY + i * mItemHeight;
            canvas.drawLine(0, posY, mRectF.right, posY, mAssistPaint);
            if (i == mPosition) {
                canvas.drawText(ARRAY_CHARACTER[i], baseX, posY + height / 2, mChoosePaint);
            } else {
                canvas.drawText(ARRAY_CHARACTER[i], baseX, posY + height / 2, mWritePaint);
            }
        }
        canvas.drawLine(baseX, 0, baseX, mRectF.bottom, mAssistPaint);
    }

    ...

}
画波浪之前需要明确几个重要点的坐标!下面结合手稿图来说明(手稿图后续补上)
按照这几个点画出贝塞尔曲线
public class CharacterIndexView extends ViewGroup {
    ...
    private Paint mWavePaint;

    public CharacterIndexView(Context context, AttributeSet attrs) {
        ...
        initPaintOfWave();
        ...
    }

    private void initPaintOfWave() {
        if (mWavePaint != null) return;
        mWavePaint = new Paint();
        mWavePaint.setColor(Color.BLUE);
        mWavePaint.setStyle(Paint.Style.FILL);
        mWavePaint.setAntiAlias(true);
    }

    private void drawCharacters(Canvas canvas) {
        ...
            if (i == mPosition) {
                ...
                drawWave(canvas, mItemHeight, getMeasuredWidth(), posY);
            }
        ...
    }

    private void drawWave(Canvas canvas, float radius, float centerX, float centerY) {
        mPath.reset();
        mPath.moveTo(centerX, centerY - 2 * radius);
        mPath.quadTo(centerX, centerY - radius, centerX - radius / 2, (float) (centerY - radius * Math.cos(Math.PI * 30 / 180)));
        mPath.quadTo(centerX - 1.5f * radius, centerY, centerX - radius / 2, (float) (centerY + radius * Math.cos(Math.PI * 30 / 180)));
        mPath.quadTo(centerX, centerY + radius, centerX, centerY + 2 * radius);
        mPath.close();
        canvas.drawPath(mPath, mWavePaint);
    }
    ...
}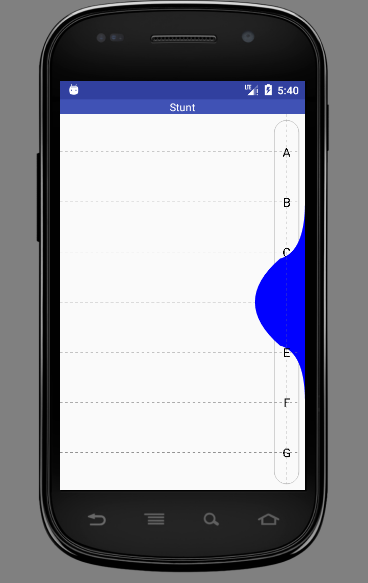
看起来倒是有那么点味道!先变换下波浪颜色和选中的字体颜色
public class CharacterIndexView extends ViewGroup {
    ...
    private void initPaintOfChoose() {
        ...
        mChoosePaint.setColor(Color.WHITE);
        ...
    }

    private void initPaintOfWave() {
        ...
        mWavePaint.setARGB(190, 105, 190, 145);
        ...
    }
    ...
}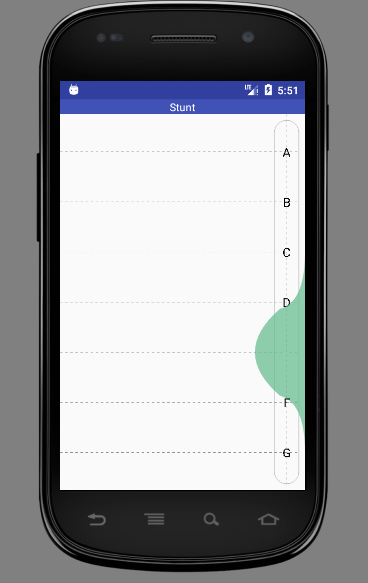
怎么选中的索引字符“没”了呢?第一时间是想到被波浪覆盖了,但是一想不对,因为波浪设置的颜色值是有透明的,所以,是因为背景颜色和字体颜色都是白色,所以才会有这个合成效果!为了不那么麻烦,就干脆先绘制波浪,再绘制选中的字符!
    private void drawCharacters(Canvas canvas) {
        ...
            if (i == mPosition) {
                drawWave(canvas, mItemHeight, getMeasuredWidth(), posY);
                canvas.drawText(ARRAY_CHARACTER[i], baseX, posY + height / 2, mChoosePaint);
            }
        ...
    }
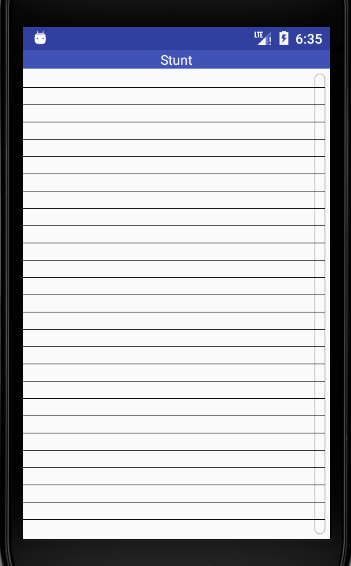
换成26个字母试试效果
private final String[] ARRAY_CHARACTER = {"A", "B", "C", "D", "E", "F", "G",
            "H", "I", "J", "K", "L", "M", "N",
            "O", "P", "Q", "R", "S", "T",
            "U", "V", "W", "X", "Y", "Z"};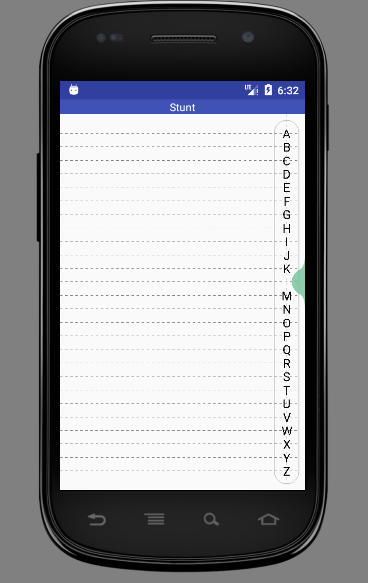
这效果真的是有点让人哭笑不得!看来,选择圆形的半径以每个索引字符所占用的高度为准是不可取的!为了可读性,先对代码做点优化
public class CharacterIndexView extends ViewGroup {
    ...
    private int mPadding = mTextSize / 2;
    ...
    private void drawBackground(Canvas canvas) {
        mRectF.set(getRight() - 2 * mTextSize - mPadding,
                mPadding, getRight() - mPadding,
                getBottom() - getTop() - mPadding);
        canvas.drawRoundRect(mRectF, mTextSize, mTextSize, mBackgroudPaint);
    }
    ...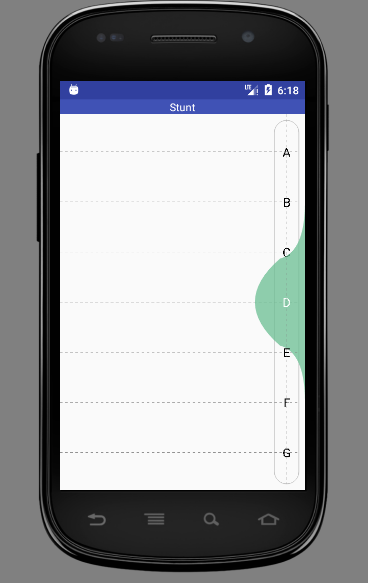
}毕竟只是模仿效果,于是还是借鉴了WaveSideBar中点的算法(手稿图后续补上)
public class CharacterIndexView extends ViewGroup {

    ...

    private void drawCharacters(Canvas canvas) {
        ...
            if (i == mPosition) {
                drawWave(canvas, (mRectF.right - mRectF.left) + mPadding, getMeasuredWidth(), posY);
                ...
            }
        ...
    }

    private void drawWave(Canvas canvas, float radius, float centerX, float centerY) {
        mPath.reset();

        float x1 = centerX;
        float y1 = centerY - 3 * radius;
        float x2 = centerX;
        float y2 = centerY - 2 * radius;
        float x3 = (float) (centerX - radius * Math.sin(Math.PI * 45 / 180));
        float y3 = (float) (centerY - 2 * radius + radius * Math.cos(Math.PI * 45 / 180));
        float x4 = (float) (centerX - 1.8f * radius * Math.sin(Math.PI * 90 / 180));
        float y4 = centerY;
        float x5 = x3;
        float y5 = (float) (centerY + 2 * radius - radius * Math.cos(Math.PI * 45 / 180));
        float x6 = centerX;
        float y6 = centerY + 2 * radius;
        float x7 = centerX;
        float y7 = centerY + 3 * radius;
        mPath.moveTo(x1, y1);
        mPath.quadTo(x2, y2, x3, y3);
        mPath.quadTo(x4, y4, x5, y5);
        mPath.quadTo(x6, y6, x7, y7);

        mPath.close();
        canvas.drawPath(mPath, mWavePaint);
    }

    ...

}
果然还是画曲线容易,确定三个点难啊(起始点、控制点、结束点)!
虽然还有很多优化空间和功能扩展,但最主要的流程总算被我记录完毕了!


 4112
4112


 被折叠的 条评论
为什么被折叠?
被折叠的 条评论
为什么被折叠?
 到【灌水乐园】发言


